background image

Содержание Matador 4 x 4 Medium 0853

Страница 1: ......

Страница 2: ......

Страница 3: ...BOOK No IOOj F W 2A DRIVER S HANDBOOK FOR TRACTOR 4 x 4 MEDIUM A E C M A T ADO R Model 0853 C 1 Engine Air Pressure Assisted Hydraulic Brakes THE ASSOCIATED EQUIPMENT CO LTD October 1943 ...

Страница 4: ...2 Fig 1 Arrangement of Chassis FUEL TANK VENT pIPE ...

Страница 5: ... tasks are completed once per fortnight Apart from necessary adjustments and lubrication a vehicle that is performing satisfactorily should not be tampered with or any part dismantled as this may lead to trouble See to it that you understand the tasks and your vehicle and should you notice anything which may be wrong during your inspection report it Do not overlook anything If your vehicle is equi...

Страница 6: ...upply System 31 Task No S Engine Contr ls 35 Task No 6 f These Tasks do not apply to this vehicle Task No 7 l they are replaced by Winch 36 Task No 8 Steering Task No 9 Charging System Electrical Task No 10 Sta ter Motor and Lights Task No ll Clutch and Gearboxes Task No 12 Transmission Universal Joints and Axles Task No 13 Chassis and Road Springs Task No I4 Body Task No IS Brake System Task No I...

Страница 7: ...g and auxiliaries Electrolyte to be t in above top of plates Lockheed Hydraulic assisted by Air Pressure Separate cylinder to each road wheel 80 90 lb sq inch Westinghouse 95 100 lb sq inch Clayton Dewandre Size 13 50 in x 20 in Single low pressure Bar tread LUBRICANTS AND CAPACITIES FOR MAIN UNITS Unit Service Type Capacity Lubricant Engme Oil 30 H D 6 gallons Fuel injection pump OiI30H D pint Fu...

Страница 8: ...nd Lever 12 Ether Starting Device 13 Ether Starting Butterfly Valve Control 14 Battery Cut out Switch 15 Electrical Control Unit C A V For Simms Electrical Control Unit see Fig 40 16 Starter Button 17 Dynamo Indicator Light 18 Tail Lamp Switch 19 Side Lamp Switch 20 Head Lamp Switch 21 Starting Switch 22 Inspection Lamp Connection 24 Oil Pressure Gauge 25 Air Pressure Gauge 26 Speedometer 27 Instr...

Страница 9: ...rates the brakes on rear wheels only To apply brake pull lever back to release brake grip the trigger lever and return hand lever to forward position S Winch Brake Just behind the hand brake lever the shorter of the two It should always be in the on position back except when winching 6 Gear Lever Main Gearbox The long lever on left of driver and opposite the hand brake lever It is used for changin...

Страница 10: ...e rear Movement of lever is Up for clutch out Down for clutch in Except during winching this lever must be in the up position in the clip provided 10 Engine Speed Control Hand Lever The small lever mounted on the side of the bonnet to the left of the driver Tt is used to regulate the speed of the engine as during winching without the necessity for keeping foot on the the accelerator pedal It must ...

Страница 11: ...d the starting switch 21 are closed and the engine is stationary or idling If the light appears when the engine is running fairly fast the dynamo is not working and it must be reported at once 18 Tail Lamp Switch This also controls the axle flood lamp 19 Side Lamp Switch 20 Head Lamp Switch The movements for operating these switches are indicated on the panel 21 Starting Switch This must be switch...

Страница 12: ...icle and total mileage Note Early vehicles had additional gauges showing the Radiator water and Engine oil temperatures 27 Instrument Panel Light Switch 28 Horn Push This is mounted on top of the bonnet 29 Warner Brake Controller Although ilJustrated in Fig 2 this controlJer is only fitted to the front dash on vehicles having air pressure braking On other vehicles it is mounted in the chassis fram...

Страница 13: ...s the engine starts If the engine does not pick up in a few seconds do not keep the starter running as to do so will exhaust the battery wait for the engine to come to rest then begin again It will sometimes be found necessary to keep the accelerator pedal more or less fully depressed for a few moments after the engine starts but as soon as it has warmed up slightly this will not be necessary vi I...

Страница 14: ...ing butterfly valve by pushing in knob 13 Fig 2 If there is a te ndency for the engine to stop immediately reclose butterfly viii Continue vii until the engine is running with starting butterfly fully open i e knob pressed in Fig 6 Ethalet Tool ix Gradually allow accelerator pedal to rise until engine idles satisfactorily x Remove the used Ethalet capsule by lifting the lever to upper position and...

Страница 15: ...lutch out to coast iv Use top gear as much as possible and do not change down while the engine has the load well in hand When climbing hills do not wait however until the engine is labouring before changing down v Do not race the engine unnecessarily and when going up a hill in low gear change up as soon as the speed will allow vi The engine is governed to a speed of 1 800 r p m under load which l...

Страница 16: ...ehicle has reached the speed shown in the following table for this gear repeat the process and pull main gear lever into 4th gear position top Changing UP with 7 9 1 Axle and 2 31 1 Auxiliary Gearbox ratios High Auxiliary Gear Low Auxiliary Gear From To On Level UphiU On Level Uphill 1st Gear 2nd Gear 7 3 2nd 3rd 8 11 3t 5 3rd 1 4th 14 18 6 8 With 6 25 1 Axle and 2 91 1 Auxiliary Gearbox ratios 1s...

Страница 17: ...ould be changed DOWN when the vehicle is travelling up hill 7 9 1 with 6 25 1 with For both Ratios From To High Auxiliary High Auxiliary with Low Gear Gear Auxiliary Gear 4th Top 3rd 20 26 9 3rd 2nd 12 15 6 2nd 1st 7 8 4 You must stop the vehicle to change auxiliary gear or to engage four wheel drive or rear wheel drive To Stop the Vehicle i Release the accelerator pedal and depress brake pedal ii...

Страница 18: ... remove handles The handles can only be removed when the cocks are closed Fig 7 Air Storage Tank Westinghouse Fig 8 Air Storage Tank Clayton Dewandre FROST PRECAUTIONS A PROTECTION BY USE OF ANTI FREEZE MIXTURE Vehicles with anti freeze mixture in the engine cooling system have an identification mark in the form of a disc painted in a specified colour on the front of the vehicle ...

Страница 19: ... prevent the valves of the air compressor and various other units in the air pressure system from freezing in severe weather the anti freezer fitted to the nearside chassis frame must be filled with I M S wbstitute or Methanol when frost precautions are ordered and the operating cap must be pulled up see Fig 38 B PROTECTION BY DRAINING THE ENGINE COOLING SYSTEM where anti freeze is not used If ant...

Страница 20: ...n descending long hills as although the supply tank is of large capacity the amount of braking under these conditions would reduce the supply the compressor being idle The hand brake is operated by mechanical linkage on the rear wheels only and actuates the same shoes as the foot brake When descending long hills the hand brake should be used and the foot brake lpplied occasionally as required The ...

Страница 21: ...it is fitted by attaching the winch cable to a suitable anchorage in line with the tractor either to the front or the rear It may also be used for unditching a second vehicle in which case the skid pans provided must be placed under the front wheels of the Ull ditched vehicle as shown in Fig 10 to ensure sufficient hold To Payout the Cable i See that the winch engagement lever which is mounted on ...

Страница 22: ...ON 4 OF HAUL SKID PANS PLACED UNDER FRONT WHEELS THE SKID PAN HAWSERS MUST BE ADJUSTED SO THAT THEY ARE TIGHT WHEN THE FRONT WHEELS ARE AT THE TOP OF THE SKID PANS ON HARD GROUND THE FLAT SURFACES OF THE SKID PANS MUST BE TO THE GROUND SO THAT THE WHEEL RESTS IN THE PAN ON SOFT GROUND THE POSITION OF THE SKID PANS MUST BE AS ILLUSTRATED Fig 10 Method of Anchoring Vehicle for Winching ...

Страница 23: ...d over the lop of the protecting bar at the front of the air storage tank iii Remove outer guide roller from its support at the front of the frame by withdrawing the pin Place cable against inner roller then replace outer roller and pin iv Attach end of cable to holdfast in line with the tractor The front guide roller is not designed to carry an excessive side load Note Winching from the front sho...

Страница 24: ... defects DAILY Engine Sump Fuel Injection Pump Fuellnjection Pump Governor SUMP STRAINER COVER PLATE Fig 11 Engine Oil Dipstick Check level of oil in sump and top up if necessary with 30 H D to top mark on dip stick Fig 11 Do not fill above the level indicated a Remove dipstick and check if oil level is up to top mark on dipstick Lubrication Chart Reference No 25 b If necessary unscrew oil filler ...

Страница 25: ...w all moisture to escape then close and remove handles from cocks the handles can only be removed when the cocks are closed Normally to be done every night see page 18 Start the engine and note reading on gauge with the accelerator pedal depressed a quarter of its travel the gauge should reach at least 80 or 95 lb sq inch according to type of air pressure equipment see page 10 after approximately ...

Страница 26: ...ch Withdrawal Race Lubricate with Oil C 600 using gun Lubrication Chart reference No 6 EVERY 1 000 MILES Main Fuel Filter Fig 20 Unscrew the centre nut in the top cover remove the bowl and extract the element Swill the element and felt washer in clean fuel oil remove bottom plug from bowl and wash bowl in clean fuel oil until sludge is removed When assembling guard against dirt entering the filter...

Страница 27: ...crewing the six nuts securing the cover plate to the rear end of the bottom of the sump The sump strainer will be removed with the cover plate do not separate Clean the strainer with paraffin then refit to sump exercising care that the oil suction pipe enters the hole in the strainer Refit the two drain plugs and secure with locking wire Refill with oil to top mark on dipstick Brake Air Compressor...

Страница 28: ...24B NOTES ...

Страница 29: ...e oil filler at offside of box On later vehicles the drain plug is fitted at the rear of the box Fill to level plug in filler neck or on early vehicles to top mark on dipstick provided in the tool kit Servo Motor Clayton Dewandre only Drain and refill Filler plug on nearside of casing See Fig 31 Top up to level of the filler plug Winch Worm Casing If the winch is frequently and regularly used drai...

Страница 30: ...ing care to avoid over tightening ii CYLINDER HEAD JOINTS Leakage will usually be detected by a deposit of oil and jor water around the joint If a leak is detected report at once Fig 13 Nearside View of Engine iii AIR INTAKE PIPE JOINTS Fig 14 Examine each end of pipe from air cleaner to rear cylinder head also the rubber connection between the heads Stop the engine and tighten connections if nece...

Страница 31: ...pring loaded bolts under the front crossmember should not be dead tight but should have allowance for movement of the engine against the springs see Fig 15 ii The six nuts which hold the front support bracket to the crankcase I hould also be inspected these are split pinned see Fig 14 iii The rear of the engine is held by 7 bolts through the bell housing which also secure the main gearbox to the c...

Страница 32: ...Examine silencer and exhaust pipe for serviceability See that the brackets are tight and that the tail pipe has not become choked with mud Fig 15 Engine Frollt Mounting TASK NO 2 ENGINE LUBRICATION A CHECK LEVEL OF OIL IN SUMP and refill if necessary to the top mark on dipstick Lubrication Chart Reference No 1 This is in addition to daily replenishment and periodical oil change see page 22 Use oil...

Страница 33: ...ain case k Fuel injection pump drive shaft cover on front of timing chain I m n case Fuel injection pump drive shaft cover on rear of timing chairu case Camshaft rear bearing cover at rear of cylinder block Fig 14 Dynamo drive cover Do not disturb the oil pressure relief valve adjuster Fig 15 ii OIL PIPE UNIONS a Oil feed pipe to cylinder heads Banjo pin at each end of pipe Fig 14 b Oil pipes to p...

Страница 34: ...GED JOINTS a Radiator top tank water pipe flange b Top water pipe thermostat body Fig 17 c Thermostat body front cylinder head Fig 17 d Between front cylinder head and rear cylinder head e Rear cylinder head elbow f Elbow water inlet pipe g By pass pipe connection on thermostat body h By pass pipe connection on water pump body report if leaking i Radiator bottom connecting pipe the bolt for this g...

Страница 35: ...or broken and check for loose rivets Fig 17 ii FAN CLUTCH 31 With a fair pull on the tip of the blade the fan should just slip Fig 17 Part View Nearside Front of Engine D REPORT DEFECTS TASK NO 4 FUEL SUPPLY SYSTEM A INSPECT FOR LEAKS Do not slack off any nuts or connections on fuel pipes Tighten in a right hand direction i Union nuts at each end of fuel pipe from pump to injectors Tighten union n...

Страница 36: ...a Tank to fuel lift pump b Fuel lift pump to filter c Filter to injection pump iv Joints on fuel lift pump Examine the 6 bolts which hold the halves of the pump together these must be perfectly tight v Taps drain and priming plugs for leaks a 2 drain plugs on the fuel tank b 1 drain plug under main fuel filter on dash c 1 priming plug on top of main fuel filter on dash d 3 way fuel tap on top of f...

Страница 37: ...ion pump H due to loose nuts clips etc tighten if unavailing report D LUBRICATION OF FUEL INJECTION PUMP Check oil level in i INJECTION PUMP By dipstick If replenishment is required refill with oil 30 H D to top mark on dipstick this is also a daily task see page 22 FUEL PUMP DELJY ERY TQJ1 1JECTORS DO NOT REMOVE _ YUJil LEVEL UOll 1HIS pwq INJECTIOI rPUMP _ _ G AND GOvE tlO Fig 19 Fuel Injectioll...

Страница 38: ...ir be removed from the fuel system as even air bubbles will inter fere with the regularity of the fuel injection To drive any air from the fuel pump a open vent cock b operate the hand primer on fuel lift pump until fuel flows from vent cock without bubbles then while still pump ing c close the vent cock see Figs 41 and 42 Should the hand primer not bleed the system remove plug in top of main filt...

Страница 39: ...ing oil 30 H D iii ENGINE CONTROL HAND LEVER Clean and apply a little oil 30 H D iv OIL BATH TYPE AIR CLEANER Fill to oil level line with 30 H D See also page 24 B TEST FOR CORRECT OPERATION i GOVERNOR Depress accelerator slowly and verify that the governor is working As the accelerator pedal is depressed so the speed of the engine will increase until it reaches the maximum allowed by the governor...

Страница 40: ...n wires must be tucked in C LUBRICATION i APPLY GUN USING OIL C 600 TO ALL LUBRICATORS The numbers in brackets refer to location of lubricator on lubrication chart at end of book Part Location Number of Lubricators Winch Clutch Shaft 15 2 Winch Brake Shaft 16 I Winch Cable Rollers 17 4 Winch Cable Guide Pins 18 5 Winch Worm Gear 35 1 Winch Bearings 36 2 ii USE OIL CAN WITH OIL 30 H D ON THE FOLLOW...

Страница 41: ... split pins but report if sign of looseness i SECURITY OF STEERING BOX 3 bolts hold the steering box to the frame 1 nut is covered by the end of the engine crossmember if this is loose report immediately ii EFFECTIVENESS OF STEERING STOPS Steering stops must come into contact with axle cas ing to prevent the grease retainers from fouling the radius in the neck of the swivel ball one on each swivel...

Страница 42: ...nt is incorporated at each end of the track rod and the drag link so that no slackness should be felt To test turn the steering wheel to the right and left and get someone to check the movement of the linkage Do not jack up for this test iii DROP ARM FOR CRACKS Keep metal bright and wipe with an oily rag examine closely for cracks D REPORT DEFECTS TASK NO 9 CHARGING SYSTEM ELECTRICAL A INSPECT DYN...

Страница 43: ...ncy to jam or failure to engage report no special test is necessary as it should be observed in normal use B LIGHTS AND ACCESSORIES i Loose mountings Lamp bracket bolts and security of lamps on brackets ii Mounting of electrical control unit Fig 2 iii All exposed leads for rubbing and shorts If any indication of shorts or rubbing the leads must be repaired as necessary and repositioned iv Windscre...

Страница 44: ...ut Fig 24 Al ove Clutch Pedal Adjustment Fig 25 Right ClulCh Brake AdjustJ11el1t B GEARBOXES Inspect oil tight joints fur leaks i MAIN GEARBOX a Mainshaft cover 1 b Layshaft cover At rear of box c Selector shaft cover J d Selector shaft cover at front of box e Joint between selector box and main casing Offside of f Selector box cover box g Joint between compressor and main casing on nearside of bo...

Страница 45: ...oint between top and bottom b Wormshaft cover v DRAIN PLUGS LEVEL PLUGS AND FILLER PLUGS a Main gearbox b Auxiliary g ear box Fig 27 c Change speed box Fig 26 41 d Winch worm casing Filler plug and level plug F g 26 Access to Change Speed Box and Clutch Pedal Adjuster C INSPECT FOR CRACKS i Main gearbox ii Auxiliary gearbox iii Change speed box iv Winch worm drive box D INSPECT OIL SEALS FOR LEAKS...

Страница 46: ...26 iv Winch worm casing Remove filler plug from top of casing also level plug from nearside of casing then fill to level of level plug hole v Clutch withdrawal race This is a periodical attention see page 24 Use oil can with 30 H D on all gearbox control fork ends F REPORT DEFECTS TASK NO 12 TRANSMISSION UNIVERSAL JOINTS AND AXLES A TRANSMISSION i Clean universal joints and examine for damage Ther...

Страница 47: ...f movement between spring and axles and report Fig 28 iv Examine joints for oil leaks Front Axle Figs 15 and 28 a 3 bearing housing joints behind propeller shaft coupling flange b 2 covers 1 at each end of helical pinion shaft c Joint between axle pot and reduction gear casing d Filler plug elbow joint e Level plug in front of axle pot Drain plug on nearside of reduction gear casing g Signs ofleak...

Страница 48: ...e No 5 Fig 29 Rear Axle Oil Filler and Drain Plug c Vehicles fitted with RZEPPA Universal Joints to the front wheel drive are provided with a lubricator in each front wheel hub cap Lubrication Chart Reference No 38 d REAR AXLE The casing should contain oil C 600 up to the level of the level plug hole see Fig 29 See that the breather on the filler plug is free from obstruction Lubrication Chart Ref...

Страница 49: ... the leaves in service ii Check all spring clip bolts for tightness These nuts are split pinned iii Examine nuts on shackle pins and clamp bolts for signs ofslackness These nuts are split pinned iv Lubrication Use gun and oil C 600 The numbers in brackets refer to location of lubricator on lubrication chart at end of book Item Front Spring Pins Shackles Rear Spring Front Pins Shackles C REPORT DEF...

Страница 50: ...ration a Doors One in each side b Seats For worn cushions c Floor traps d Tail board chains and pins e Lockers n Woodwork and fabric on body g Ammunition stowage h Kit racks i Straps ropes eyelets and lift the dot fasteners on side curtains C LUBRICATION Lubricate all locks catches and hinges including floor traps Use oil can and oil 30 H D D REPORT DEFECTS TASK NO 15 BRAKE SYSTEM A INSPECT MOUNTI...

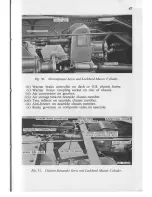
Страница 51: ...er brake coupling socket on rear of chassis vi Air compressor on gearbox vii Air storage tank on nearside chassis member viii Tyre inflator on nearside chassis member ix Anti freezer on nearside chassis member x Brake governor or composite valve on nearside Fig 31 Clayton Dewandre Servo and Lockheed Master Cylinder 47 ...

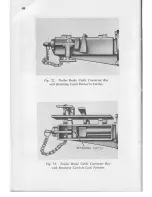
Страница 52: ...48 Fig 32 Trailer Brake Cable Connector Box with Retaining Catch Parked in Carrier Fig 33 Trailer Brake Cable Connector Box with Retaining Catch in Lock Position ...

Страница 53: ...AIR STRAINER GOVFRN OR SERVO MOTOR ANTI fREEZER l Y lil INFLATOR ilk TRAILER BRAKE CYLINDER J1 r L Fig 34 Brake air pressure system Westillghouse ...

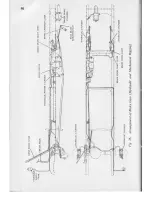
Страница 54: ...YLINDER f 11 I I 47 _ _ _ _ 77 HYDRAU Ll C CY LI ND ER REAR BRAKE ADJUSTING NUT C YLINDER HYDRAULIC CYLINDER c t J 1 0 li I 1 11 I I I i j I b 1 r _ f_ r J HYDRAULIC CYLINDER BRAKE CROSS SHAfT H YDRA U LIC CYLIND ER Fig 35 Arrangement of Brake Gear Hydraulic and Mechanical Rigging ...

Страница 55: ... FRUZER PIPE ANTI FREEZER TO COMPRESSOR TO PRES URE PIPEjRESERVOIR TO TYRE PUMP SERVO MOTOR TRAILER BRAKE CYliNDER PIPE SERVO TO ADAPTOR le PIPE ADAPTOR TO TRAILER BR AKE CYL C i I I E tY t j r _ r l _c_ Ii _ Fig 36 Brake Air Pressure System Clayton Dewandre Ul ...

Страница 56: ...y for the pressure to be kept on the pedal while the pipe line and cylinders are examined for leakage Report at once iii Examine flexible hose connections to the brake cylinders C CHECK FOR CORRECT OPERATION i HAND BRAKE Examine pawl for engagement in ratchet and check that the lever is not at the end of its travel when fully applied ii FOOT BRAKE Apply and release brake pedal and listen for air r...

Страница 57: ...level plug with oil 30 H D see Fig 31 Lubrication Chart Reference No 26 The Trailer Brake Cylinder must be topped up with oil 30 H D to height of the filler plug Lubrication Chart Reference No 33 Fig 37 Air Compressor Fig 38 Anti freezer In addition to the above all brake lever fork ends the hand brake ratchet and pawl and pawl release trigger also hinged lid of Warner brake coupling socket on rea...

Страница 58: ... and 8 This is a daily task see page 23 b Tyre Inflator Remove drain plug at base refit and tighten securely Do not drain the trailer brake cylinder as this is charged with oil H HYDRAULIC SUPPLY TANK ON FRONT DASH see Fig 35 Top up with W D Hydraulic Brake Fluid No 3 to within t in of the top Lubrication Chart Reference No 27 TASK NO 16 TYRES AND TOOLS A CHECK TYRE PRESSURES This is dealt with un...

Страница 59: ...USE Place thumb over the outlet turn handle to the left and operate the plunger just enough to feel that pressure is being applied Lock handle by turning to the right then shake extinguisher backwards and forwards to expel the small amount of charge released during the test Check bracket and tighten fixing if necessary F REPORT DEFECTS SPECIAL TOOLS WAR OFFICE SCHEDULE A Description Brace for Whee...

Страница 60: ...Funnel Oil Can Hammer and Shaft Pliers Screw Driver 11 Screw Driver 7 Spanner Box i and iir Spanner Box iir and i Spanner Box r r and Spanner Box fs and i Tommy Bar Spanner Double Ended i and fs Spanner Double Ended i and iir Spanner Double Ended i and r r Spanner Double Ended r and fs Spanner Double Ended i and i Spanner Double Ended tV and Spanner Adjustable 4 Spanner Adjustable 11 Lifting Jack ...

Страница 61: ... the fuel in the reserve tank is liable to splash into the main tank Faulty Injection Any troubles experienced with injection will probably be accom panied by one or more of the following report immediately i Heavy blue white smoke in the exhaust when the engine is hot and pulling on load ii Misfiring listen at the exhaust tail pipe iii Pronounced knocking in the affected cylinder iv Loss of power...

Страница 62: ... NUMBERS 1 Battery Cut out Switch 5 Side Lamp Switch 2 Starter Button 6 Head Lamp Switch 3 Dynamo Indicator Light 7 Starting Switch 4 Tail Lamp Switch 8 Inspection Lamp Connection Fig 40 Electrical Control Unit Simms ...

Страница 63: ...E WHEN fUEL PUMP IS REMOVE D FROM ENGINE ALL UNIONS MUST BE COVERED TO PREVENT INGRESS OF DIRT GOVERNOR O IL lEVEL PLUG Fig 41 Fuel Injection Pump and Governor C I LV seCONDARY MAXIMUM DELIVERY ADJUSTMENT ...

Страница 64: ...NOTE When fuel pump is f all unions must be Fig 42 Fuel Injection Pump and Governor Simms ...

Страница 65: ...6 NOTES ...

Страница 66: ...62 NOTES ...

Страница 67: ...63 NOTES ...

Страница 68: ...64 NOTES 372 53_ 10_43 LR llOO ...

Отзывы: