background image

16

17

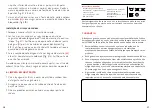
InSTRUCCIOneS De LAVADO:


· la funda es desmontable y 

lavable a 30°, sólo se debe 
secar al aire libre.

· lavar en máquina, en frio.
· No usar lejía.

· limpieza en seco, cualquier 

disolvente excepto 
tricloroetileno.

· No usar secadora.
· No planchar.

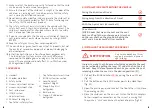
30 °C

Si tiene alguna duda sobre el uso o colocación de este producto o necesita 
cualquier pieza de repuesto, por favor póngase en contacto con nuestro 
servicio de atención al cliente.

7. gArANTÍA

Babyauto garantiza sus productos contra todo defecto de fabricación 
durante un período de 2 años a partir de la fecha de compra según la Ley 
23/2003, de 10 de Julio, de Garantías de venta de bienes de consumo.
1.  Quedan excluidos los defectos o averías producidas por uso 

inadecuado, o el incumplimiento de las normas de seguridad de 
instalación y mantenimiento descritas en las hojas de instrucciones 
que acompañan los productos.

2.  Garantizada la reparación totalmente gratuita de defectos originarios.
3.  en los supuestos en que la reparación efectuada no fuera satisfactoria 

y el producto no revistiese las condiciones óptimas para cumplir el uso 
a que estuviese destinado, el titular de la garantía tendrá derecho a la 
sustitución del artículo adquirido por otro de similares características o 
a la devolución del precio pagado,en los 2 años siguientes a la fecha.

4.  La garantía se considerará automáticamente cancelada si el artículo 

adquirido hubiera sido reparado o hubiera intentado repararlo una 
persona no autorizada por nuestra empresa.

nOTICe

1.  this child seat must be used with the harness system for children 

weighing between 9 kg and 18 kg. (from 9 months to 4 years of age 

approximately).  

2.  this child seat may be used without the harness system for 

children weighing between 15 kg and 36 kg (from 4 to 12 years of 

age approximately)

3.  please read the instructions carefully, as incorrect installation could 

result in serious injury. If any injuries should occur as a result of 

incorrect installation, the manufacturer will accept no liability.

4.


this is an IsoFIX ChIlD rEstraInt sYstEM. It has been certified 

under European regulation ECE r44/04 for general use in vehicles 

fitted with IsoFIX anchorage systems.

5.  It may only be fitted in vehicles with certified IsoFIX anchorage 

systems (as indicated in the owner manual for the vehicle), 

depending on the category of the child seat and the device.

6.   the IsoFIX weight group and size class for which the device has 

been designed are: Group 1, for children between 9 and 18 kg. 

IsoFIX class B1 restraint system.

5.  under no circumstances should the safety seat be installed in the 

front seat of the car opposite the direction of travel if the car is 

equipped with an active airbag.

6.  please never use the safety seat without its cover or without 

the harness protectors.

7.  Fastening a child dressed in outerwear could reduce the 

efficiency of the restraint system.

8.  Make sure to protect the child safety seat from direct sunlight 

as it could heat up and hurt the child. 

9.  Child seats or harness accessories that are damaged or have 

been used incorrectly must be replaced.

10. Do not leave heavy objects inside the car, as these may injure 

the child in the event of an accident.

IMPorTANT

Please read carefully BefORe 

installing the child seat in the vehicle.

Содержание Penta Fix

Страница 1: ...PENTA FIX Manual de uso Instructions for use Notice d instruction Instruções de utilização Manuale d istruzioni 9 36 kg Grupo Group Groupe Grupo Gruppo 1 2 3 ...

Страница 2: ... kgs from 9 months to 12 Years approx Français Mode d emploi Siège de sécurité pour enfants Groupe 1 2 3 de 9 à 36 kg environ 9 mois à 12 ans Portugues Instruções de utilização Dispositivo de retenção para crianças Grupo 1 2 3 entre 9 e 36 kg 9 meses aos 12 anos aprox Italiano Istruzioni d uso Seggiolino di sicurezza per bimbi Gruppo 1 2 3 da 9 a 36 kg da 9 a 12 anni circa 4 17 24 31 38 ...

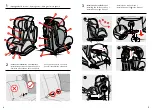
Страница 3: ... instalación en el vehículo Installation positions whitin the vehicle Positions d installation dans le véhicule Postos de instalação no veículo Posti di installazione nel veicolo Instalación de la silla Grupo 1 Installing the child seat Group 1 Installation du siège Groupe 1 Instalação da cadeira Grupo 1 Installazione del seggiolino Gruppo 1 3 ...

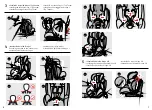
Страница 4: ...op Tether Installazione del seggiolino Gruppo 1 Top Thether 3 Instalación del niño Grupo 1 Fastening the chlid to the seat Group 1 Installation de l enfant Groupe 1 Instalação da criança Grupo 1 Sistemazione del bambino Gruppo 1 4 Instalación del niño Grupo 2 3 Fastening the child into the seat Group 2 3 Installation de l enfant Groupe 2 3 Instalação da criança Grupo 2 3 Sistemazione del bambino G...

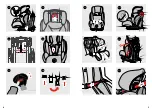
Страница 5: ...8 9 5 3 5 9 5 11 5 5 5 7 5 8 5 6 O M 5 12 5 14 5 13 5 10 5 4 ...

Страница 6: ... hebilla está correctamente cerrada porque en caso de emergencia el niño podrá ser liberado rápidamente 12 Verifique que ninguna parte de la silla infantil está atrapada en la puerta del vehículo o en un asiento reclinable Además revise que la silla de seguridad está asegurada e instalada correctamente 13 No intente desmontar modificar o agregar alguna pieza a la silla infantil o al arnés porque a...

Страница 7: ...asta que el indicador de seguridad se vuelva verde fig 3 7 Desinstalación del sistema Isofix 8 Para soltar los anclajes IsoFix tire del botón de los anclajes para desbloquearlos La silla quedará libre fig 3 3 4 INSTALACIÓN DEl niño en la silla GRUPO 1 Ajustar la altura del reposacabezas El ajuste correcto del reposacabezas garantiza la correcta instalación del niño en la silla Debe de ajustarse de...

Страница 8: ... reposacabezas la tuerca plástica que sujeta el soporte de los arneses 5 Desenrósquela haciéndola girar Retire el soporte de los arneses y guárdelo junto a la tuerca y el tornillo para futuros usos fig 5 4 y 5 5 6 Tome las placas de retención de las cintas de los arneses situadas en la parte inferior del asiento y gírelas para pasarlas por las ranuras correspondientes retirando las cintas de los a...

Страница 9: ... the harness system for children weighing between 9 kg and 18 kg from 9 months to 4 years of age approximately 2 This child seat may be used without the harness system for children weighing between 15 kg and 36 kg from 4 to 12 years of age approximately 3 Please read the instructions carefully as incorrect installation could result in serious injury If any injuries should occur as a result of inco...

Страница 10: ...EW 2 INSTALLATION POINTS WITHIN THE VEHICLE Facing the direction of travel Facing away from the direction of travel With the 2 point belt car seatbelt On seats with ISOFIX hooks between the seat and the seat back and Top Tether anchorage points such as on the rear shelf on the ground or behind the seat and a 3 point seatbelt car seatbelt A Headrest B Shoulder protectors C Safety buckle D Harness a...

Страница 11: ...t easier to fasten the child into the seat put the buckle s metal connectors into the covers N on both sides 5 Sit the child on the seat and fit the safety harness around the child 6 Connect the 2 parts of the fastener inserting them into the buckle until you hear a click fig 4 6 which indicates that it is securely locked 7 Pull the harness adjustment strap E until the harness is fully tightened f...

Страница 12: ...ap does not enter inside the buckle or metal pieces 3 Do not use chemical products or bleach on any part of the child seat WASHING INSTRUCTIONS The cover can be removed and washed at 30 C It should only be air dried Machine wash cold Do not use bleach Dry clean any solvent except trichlorethylene Do not use a dryer Do not iron 30 C If you have any doubts about using or installing this product or y...

Страница 13: ...dent IMPORTANT Lisez attentivement avant d installer le siège enfant dans le véhicule 11 Vérifiez que la boucle est correctement fermée car en cas d urgence l enfant pourra être libéré rapidement 12 Vérifiez qu aucune partie du siège pour enfant n est prise dans la porte du véhicule ou dans un siège inclinable Vérifiez également que le siège de sécurité est fixé et installé correctement 13 N essay...

Страница 14: ...g 3 5 5 Poussez le siège pour enfant contre le siège du véhicule pour replier le système ISOFIX et que le siège pour enfant soit le plus collé au siège du véhicule fig 3 5 6 Recherchez l attache pour Top Tether de votre voiture qui peut se trouver à l arrière du siège dans le coffre ou sur le toit de la voiture et accrochez la fig 3 6 Recherchez ce symbole sur votre véhicule 7 Tirez sur la sangle ...

Страница 15: ... tête l écrou en plastique qui maintient le support des harnais 5 Dévissez le en tournant Retirez le support des harnais et conservez le avec l écrou et la vis pour une utilisation future fig 5 4 et 5 5 6 Prenez les plaques de retenue des sangles des harnais situées dans la partie inférieure du siège et faites les tourner pour les faire passer par les rainures correspondantes en retirant les sangl...

Страница 16: ... com o sistema de arnês para crianças entre 9 e 18 kg de 9 meses a 4 anos aprox 2 Esta cadeira infantil pode ser utilizada sem o sistema de arnês para crianças de 15 a 36 Kg de 4 anos a 12 anos aproximadamente 3 Leia cuidadosamente as instruções porque uma instalação incorreta poderá provocar sérios danos Nesse caso o fabricante não assumirá qualquer tipo de responsabilidade 4 Este é um SISTEMA DE...

Страница 17: ... Em contramarcha Com o cinto de 2 pontos cinto do veículo Em assentos com Ganchos ISOFIX entre o assento e o encosto e pontos de fixação Top Tether por exemplo na bandeja no chão ou por trás do encosto e cinto de 3 pontos do veículo cinto do veículo A Apoios de cabeça B Protetores de ombro C Fivela de segurança D Botão de ajuste do arnês E Correia de ajuste do arnês F Alavanca de ajustamento da in...

Страница 18: ...a 6 Junte as 2 partes do abrochador e introduza as na fivela até ouvir um Clique fig 4 6 que indicará o fechamento correto 7 Puxe a correia reguladora do arnês E até este ficar completamente esticado fig 4 7 Lembre se de que para garantir a segurança da criança os arneses devem estar bem presos 5 INSTALAÇÃO DA criança na cadeira GRUPO 2 e 3 Só para uso do Grupo 2 3 a partir de aprox os 4 anos aos ...

Страница 19: ... produtos químicos ou lixívia em qualquer parte da cadeira INSTRUÇÕES DE LAVAGEM A cobertura é desmontável e lavável a 30 e apenas deve ser seca ao ar livre Lavar na máquina a frio Não usar lixívia Limpeza a seco qualquer dissolvente exceto tricloroetileno Não usar máquina de secar Não engomar 30 C Se tiver alguma dúvida sobre o uso ou a colocação deste produto ou precisa de alguma peça de reposiç...

Страница 20: ... in caso di emergenza il bambino possa essere liberato rapidamente 12 Verificare che nessuna parte del seggiolino per bambini sia rimasta incastrata nella porta del veicolo o in un sedile reclinabile Inoltre ricontrollare che il seggiolino di sicurezza sia stato fissato e installato correttamente 13 Non tentare di smontare modificare o aggiungere nessun pezzo al seggiolino per bambini o alla cintu...

Страница 21: ...ile del veicolo per ripiegare il sistema ISOFIX e accostare il più possibile il seggiolino al sedile fig 3 5 6 Cercare l attacco per il Top Tether della propria vettura che può trovarsi nella parte posteriore del sedile nel portabagagli o sul soffitto del veicolo e agganciarlo fig 3 6 Cercare questo simbolo sul proprio veicolo 7 Tirare la cintura del Top Tether finché l indicatore di sicurezza non...

Страница 22: ... Togliere la federa del poggiatesta individuando nella parte posteriore dello stesso il dado di plastica che regge il sostegno delle cinture 5 Svitarlo facendolo girare Togliere il sostegno delle cinture conservandolo accanto al dado e alla vite per usi futuri fig 5 4 e 5 5 6 Prendere le piastre di ritenuta delle cinghie delle cinture situate nella parte inferiore del sedile e girarle per farle pa...

Страница 23: ... beni di consumo 1 Restano esclusi i difetti o i danni provocati dall uso improprio o dall inosservanza delle norme di sicurezza di installazione e manutenzione descritte nelle pagine delle istruzioni fornite insieme ai prodotti 2 Viene garantita la riparazione totalmente gratuita dei difetti di fabbrica 3 Nel caso in cui la riparazione effettuata non fosse soddisfacente e il prodotto non presenta...

Страница 24: ...46 47 ...
Страница 25: ...ks02 Parque Empresarial Zuatzu Edificio Donosti 2ª planta Oficina 3 20018 San Sebastián Gipuzkoa Spain t 34 943 833 013 f 34 943 833 004 ...

Отзывы: