2
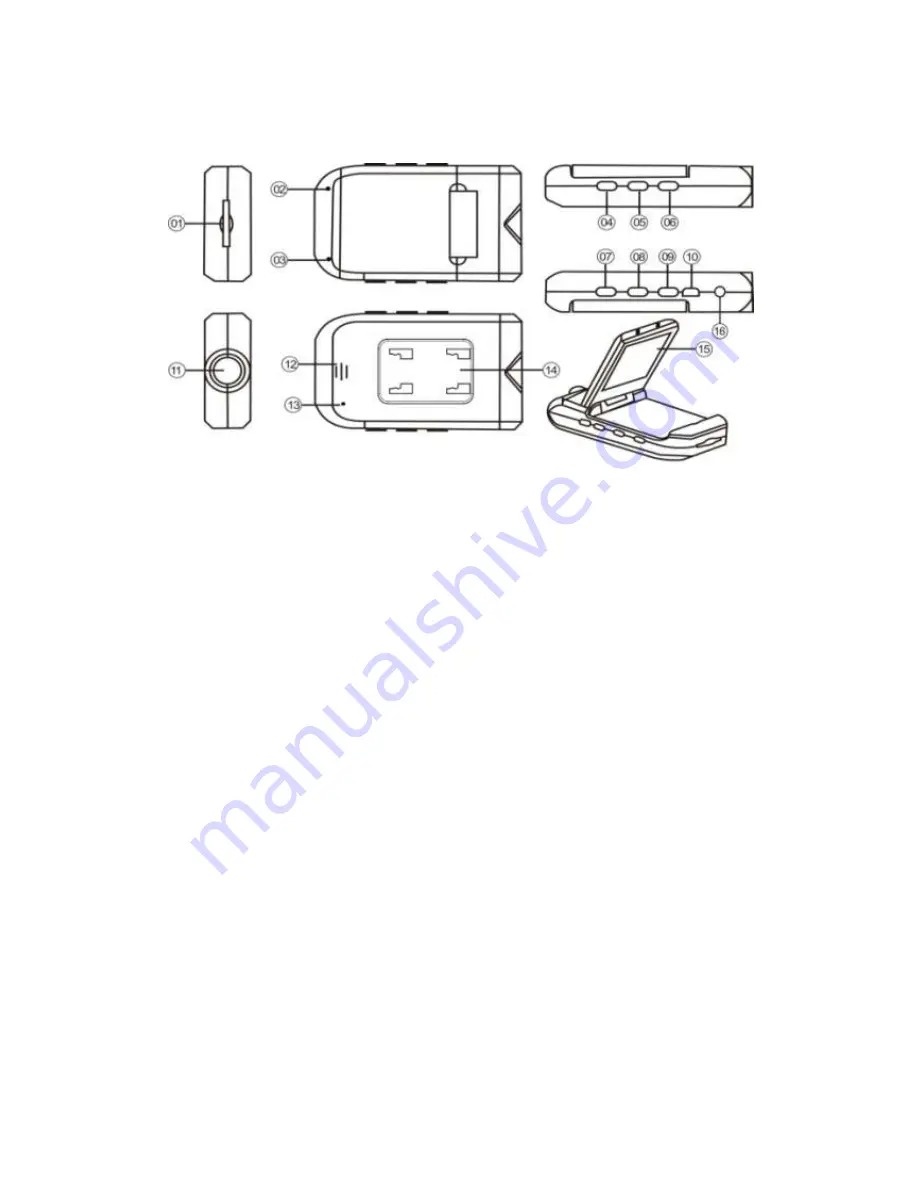
Function introduction:
1. Memory Card slot 9. MODE switch modes button (recording/photo/preview)
2. Indicator light
10.USB Interface
3. Microphone 11. Lens
4. REC/SNAP: Confirm/Select button 12. Speaker
5. MENU 13. RESET
6. POWER: Day/Night Mode 14. Bracket slides
7. DOWN: Flip Screen (must use firm pressure)
8. UP: Flip Screen 15. 2.5 inch LCD screen
16. AV OUT: AV output interface
Note: The POWER button doubles as the day/night mode button. One quick press of the
POWER button changes the camera from day to night mode and activates the device’s
LEDs. To power off the device, long press (for 3 seconds) the power button.
Note: The UP and DOWN buttons double as the device’s “Flip Screen” function. When
mounting the camera on your dashboard as opposed to the windshield, press the UP
button to flip the screen and keep your recording right side up. When you want to
switch back to recording mounted from your windshield, use the DOWN button to flip
the screen back to normal.
Note: Pressing the MENU button while recording will shut off the Dash Cam’s display
screen, while continuing to record. This will allow you to save battery power. Press
the menu button again to turn the display screen back on.


