


S-Series Camera Quick Start Guide |
VX-2S-D4-RIA
12000 Pecos St., Suite 290, Westminster, CO 80234 | www.3xlogic.com | (877) 3XLOGIC
15
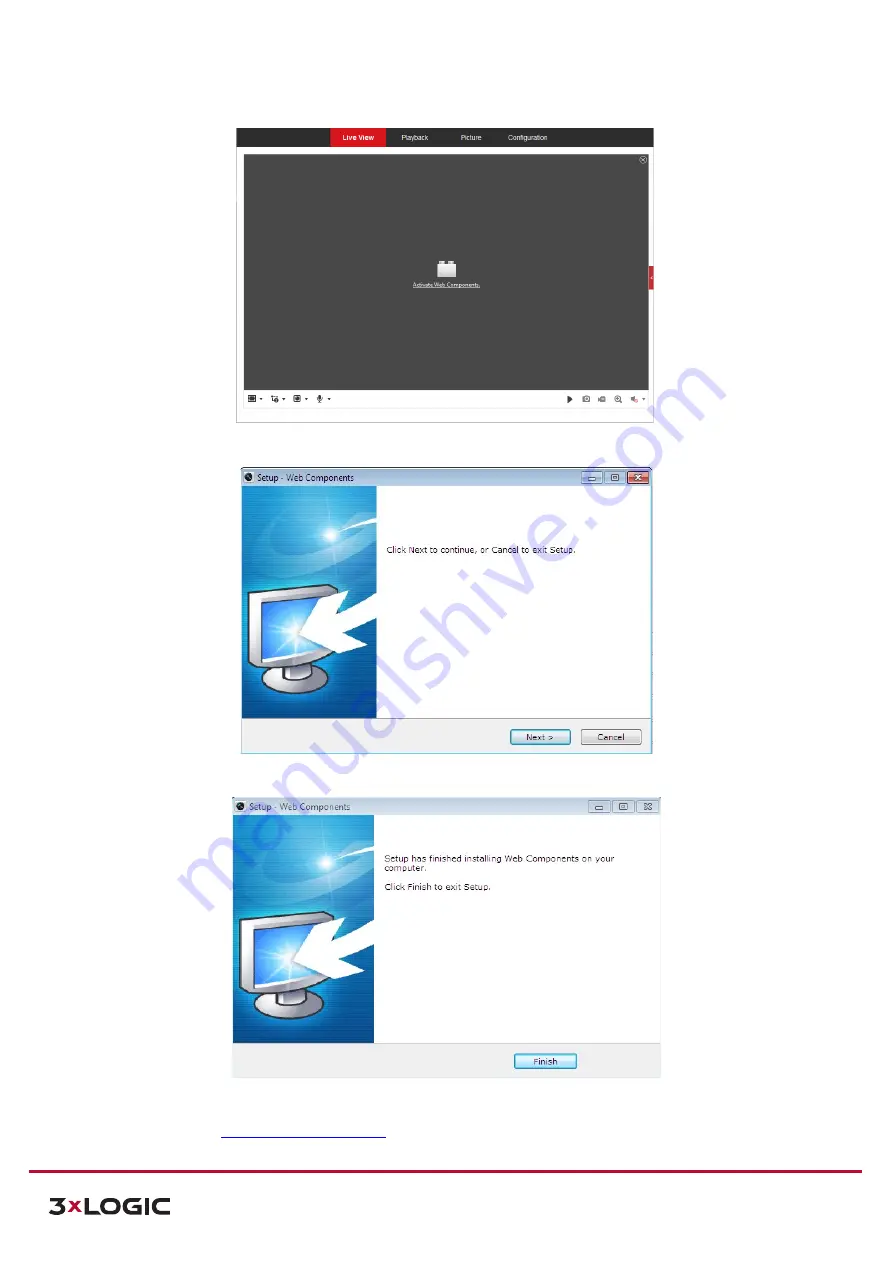
Figure 2-4
Download and Install Plug-in
Figure 2-5
Install Plug-in (1)
Figure 2-6
Install Plug-in (2)
After the Web Components plugin successfully install, you can access and operate the camera’s browser
interface. Visit the
for the latest available support documentation.