Network DVR
D4091
4ch
/
D8091
8ch
/
DG091
16ch
- 16 -
Software Installation
After the hardware has been installed, insert the installation CD into the CD-ROM driver and
run the
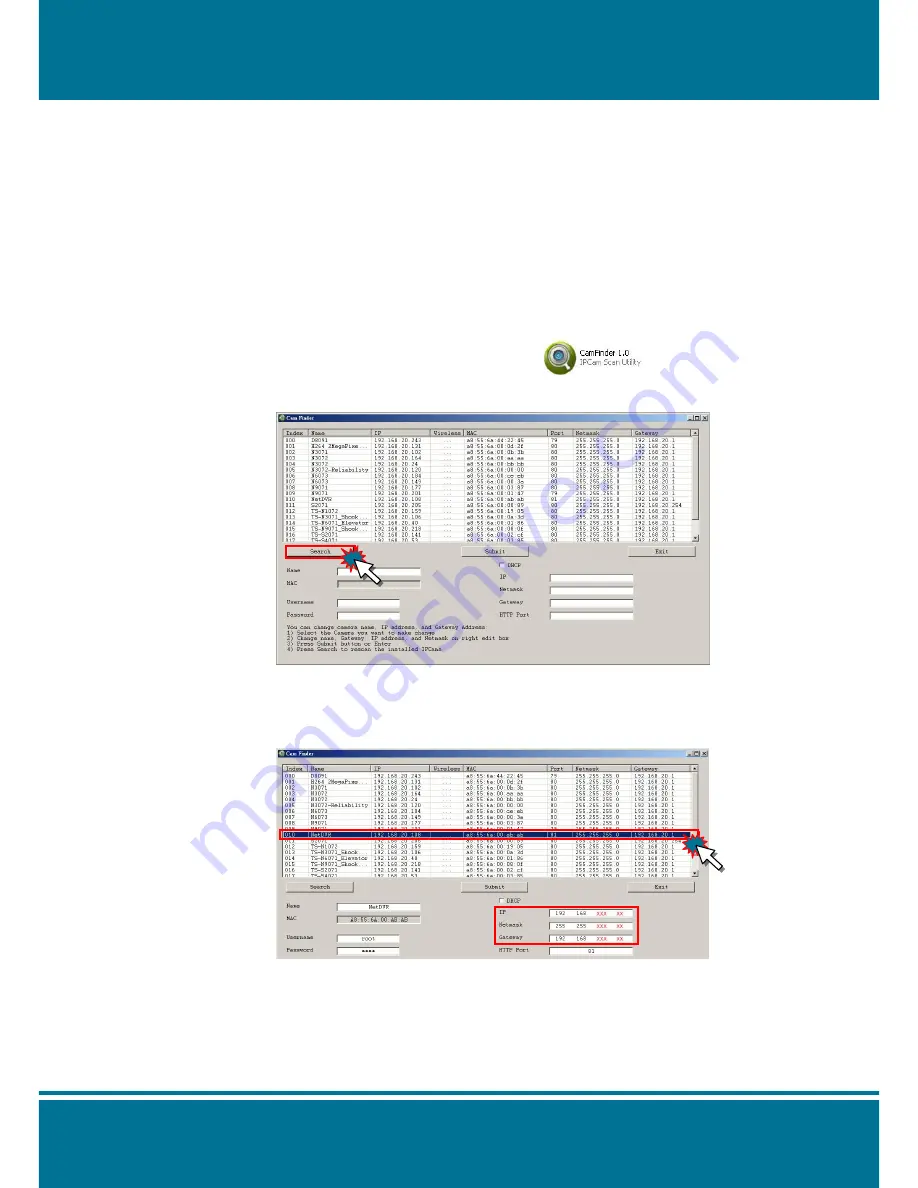
“Cam Finder.exe” following the steps below to search and change the IP address of
D4091
(4ch)
/
D8091
(8ch)
/
DG091
(16ch)
Digital Video Recorder.
NOTE
:
If the network environment has the router, please refer to
Appendix: Set up the Router
Setting with IP Camera
for different environment description.
1. Start the Camera Setting.
Run the
Cam Finder.exe
from the installation CD.
2. Set the IP address of the Network Camera.
Click
Search
to find the IP Camera on the LAN, the factory IP setting
192.168.0.20
appears on the screen.
3. Change the IP address and related settings for the network environment
When you find the camera, click it and the settings will appear on the right side. You can
change the settings for the new network environment as you need.
NOTE:
Enter new settings in the field of the
IP
, Netmask and Gateway fields and keep the
settings in other fields unchanged.
Содержание D4091
Страница 1: ......
Страница 4: ...Network DVR D40914ch D80918ch DG09116ch 4 TROUBLESHOOTING AND FAQS 93...
Страница 15: ...Network DVR D40914ch D80918ch DG09116ch 15 Rear Panel Product Application Diagram...
Страница 20: ...Network DVR D40914ch D80918ch DG09116ch 20 Figure 2 D8091 8ch Figure 3 DG091 16ch...
Страница 32: ...Network DVR D40914ch D80918ch DG09116ch 32 Information The current firmware version of DVR will show here...
Страница 52: ...Network DVR D40914ch D80918ch DG09116ch 52 Reboot NOTE Press the power button to turn the DVR on or off Power...
Страница 59: ...Network DVR D40914ch D80918ch DG09116ch 59 Preview Mode Select the preview mode from Full Screen 1 4 9 and 16...
Страница 60: ...Network DVR D40914ch D80918ch DG09116ch 60...
Страница 64: ...Network DVR D40914ch D80918ch DG09116ch 64...


