


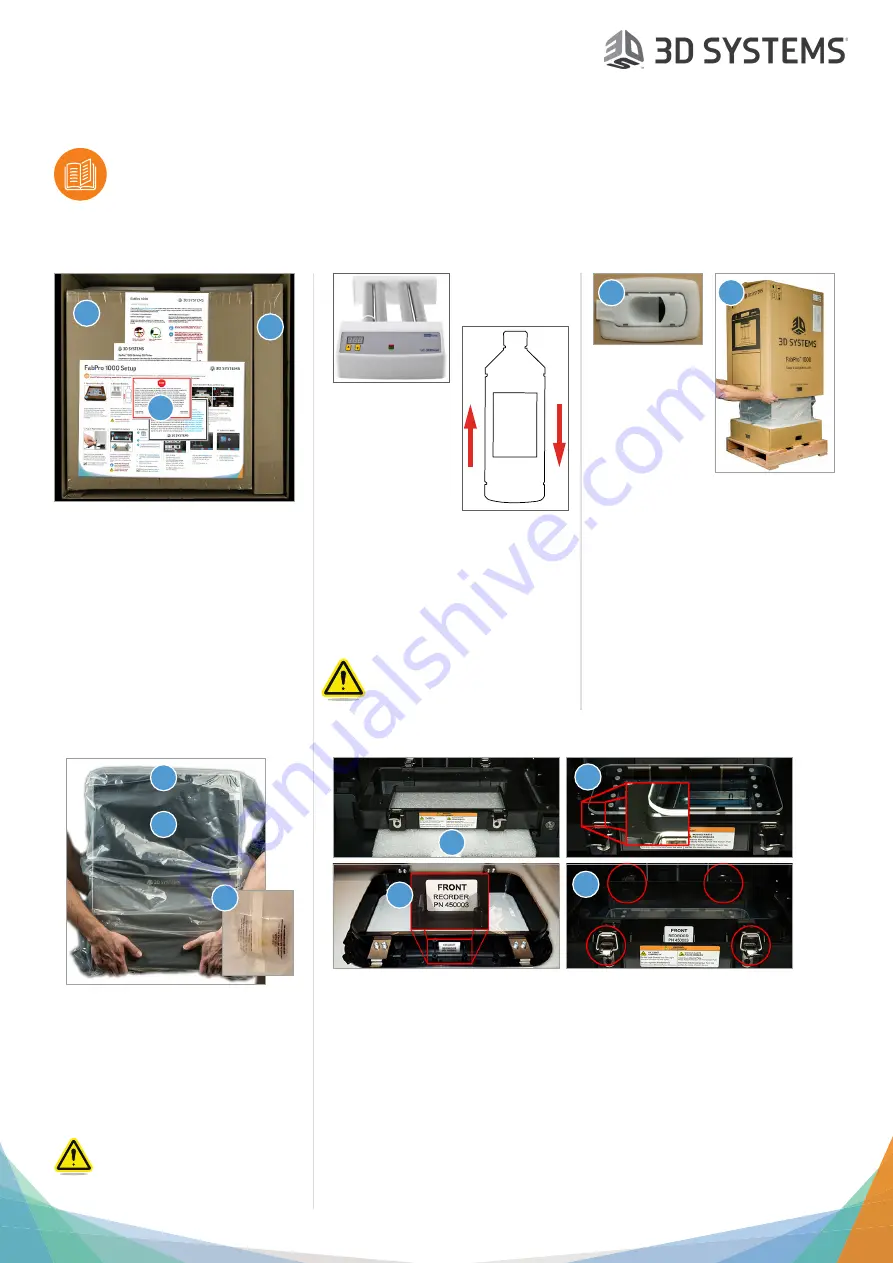
FabPro 1000 Setup
Please see the FabPro 1000 User Guide, found on support.3dsystems.com/fabpro, for safety information and com-
prehensive operating instructions.
Save all foam and packing material for future use. Shipping without the original packing material may
cause damage to the printer.
Mixer sold separately
1. Remove Finishing Kit
Insufficiently mixed material
may result in build failure.
2. Mix Material Bottle(s)
3. Remove Packing Material
Remove packed-in documents (1),
finishing kit (2), and power cord
box (3). Compare the contents of
the printer package to the list in
the
Welcome Letter
to ensure
everything is included.
Place bottle(s) on LC-3DMixer for time
specified on material’s package
or
shake bottle vigorously up and down.
Stir material in print tray
before each
build
(see
User Guide
).
Open all four box clips (1) along the
bottom of the package. Lift outer box
up and off (2). Remove foam pieces
from top of printer.
4. Stage Printer
Team-lift printer off pallet and onto
table/counter. Remove protective
covers from LCD screen (1) and printer
door (2). Remove plastic packaging
and silica-gel packet (3).
Ensure staging area is on a level
surface.
5. Install Glass Print Base and Print Tray
1.
Open printer door. Remove foam piece from under the tilt tray.
2. Install glass print base in tilt tray, lining up its flat corners
with corresponding flat corners in tilt tray.
3.
The print tray is wrapped inside the plastic storage container in the
finishing kit. Unwrap it. Install it, concave side facing upward. Be sure the
“
FRONT”
label is facing you.
4.
Fasten four toggle case locks.
1
2
1
2
3
1
2
3
4
1
2
3