2
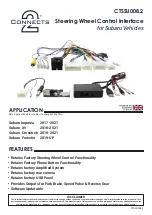
CTSSU008.2
PRIOR TO INSTALLATION
Read the manual prior to installation. Technical knowledge is necessary for installation. The place of installation must be free of moisture
and away from heat sources. Please ensure that the correct tools are using during the installation to avoid damage to the vehicle or prod-
uct.
Connects2 can not be held responsible for the installation of this product.
WIRING KEY
STEERING WHEEL CONTROL FUNCTIONALITY
The following diagram, though based on careful research, is an example only. Individual steering wheel control configurations may differ.
Button Function
-
1. Info
2. Arrow Up
3. Select / Set
4. Arrow Down
Purple
Right Rear S
Purple/Black
Right Rear Speaker -
Green
Left Rear S
Green/Black
Left Rear Speaker -
Grey
Right Front S
Grey/Black
Right Front Speaker -
White
Left Front S
White/Black
Left Front Speaker -
Yellow
Permanent 12V
Black
Ground
Red
Ignition 12V
Orange
Illumination
Green
Park Brake
Pink
Speed Pulse
Purple/White
Reverse Gear
Blue
Amp Remote
Blue/White
Remote Output
INSTALLATION GUIDE
Take the 14-way connector on the vehicle interface harness and plug this into the relevant connection on the side of
the interface.
Attach the antenna adapter to the vehicles pre-existing connection.
Remove the vehicles exisiting USB interface and replace the circuit board within the origianl hosuing using the re
-
placement provided. This will provide support with your new aftermarket radio (See page 4 for more information).
Connect the male yellow RCA to the ‘reverse camera input’ on the back of the new stereo.
Attach the additional wiring on the harness to the back of the stereo:
Pink
- Speed Pulse
Green
- Park Brake
Purple
- Reverse


