10/24/17 1:37 PM
Digital Heart – Analog Soul
Copyright 1010music LLC 2017
Use the Note Sequencer
The Note Sequencer is a piano roll style sequencer that generates gate and pitch signals in both CV
and MIDI outputs. The CV gate signals for each note sequencer are output through Gate Outputs 5 –
8, labeled Note Sequencer Gate Outputs in the diagram. The CV Pitch signals are output through CV
Outputs 1 - 4, labeled Note Sequencer Pitch Outputs in the diagram. The MIDI signals are output
through the MIDI Output Jacks.
Follow these steps to configure each of the four Note Sequencers:
1.
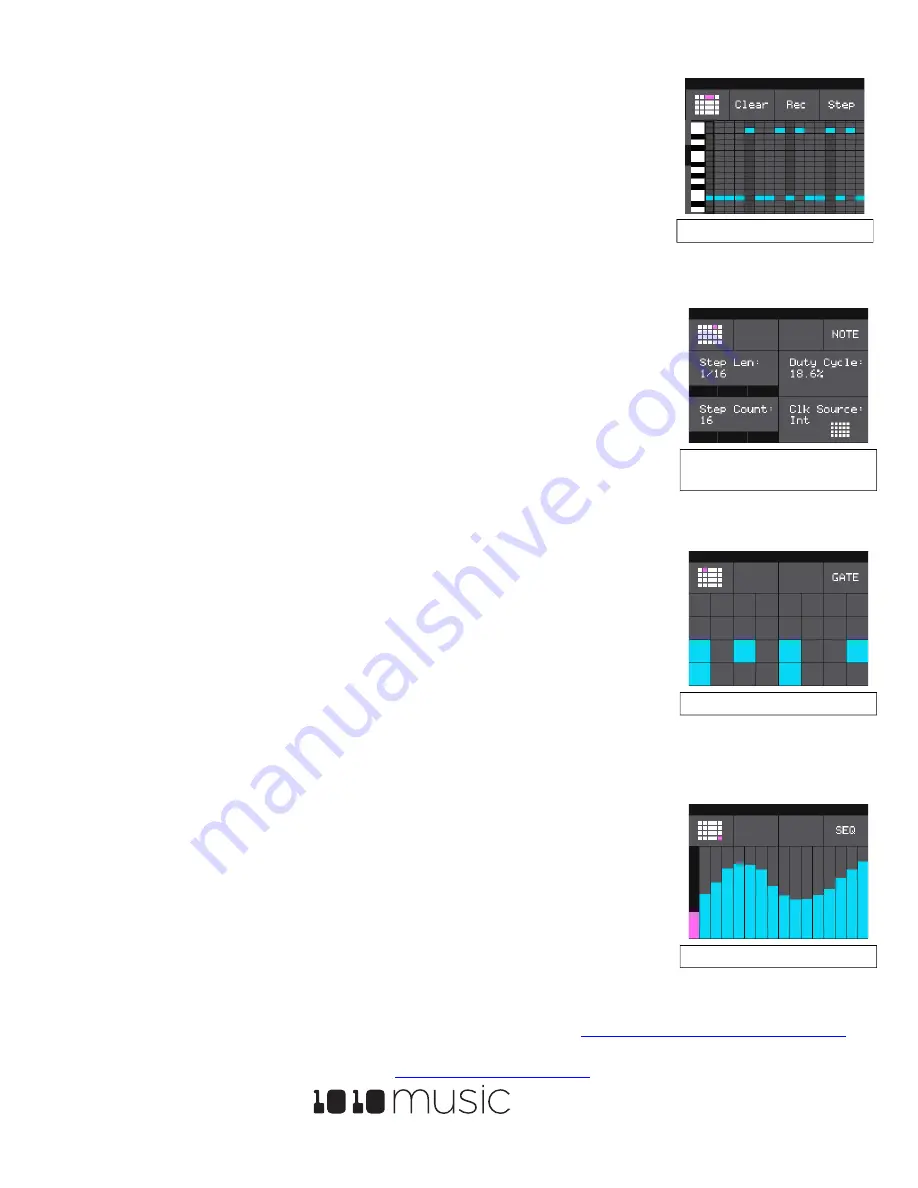
From the Main screen, touch one of the Note Sequencers in column 3 to display the Note
Sequencer screen. The black and white display along the left side of the screen represents
notes on a keyboard. The vertical gray bars represent steps in the sequence. Blue rectangles
represent notes in the sequence. MIDI output can support multiple notes per step, but CV
output only supports one note per step.
2.
There are three ways to add notes to the sequence:
a.
Touch the screen at the step and note position desired.
b.
Touch
Rec
to record inputs coming in through the MIDI Input Jack in real time.
Touch
Rec
again to stop recording.
c.
Touch
Step
to record inputs coming in through the MIDI Input Jack with each
successive MIDI input note adding a note to the next step in the sequence. Touch
Step
again to stop recording.
3.
Use the Control Knobs and touch gestures to zoom and scroll through the sequencer.
4.
Press the
INFO
button to toggle the display between the Note Sequencer Screen and the
Note Sequencer Parameters screen pages 1 and 2 for this Note Sequencer.
5.
Use the Control Knobs to adjust the values of the parameters.
Use the Gate Sequencer
Each of the four Gate Sequencers allows you to generate a sequence of gate signals through the Gate
Sequencer Output Jacks 1 through 4. The sequence starts with step 1 in the lower left corner and scrolls
right then up. To edit a Gate Sequence:
1.
Press the
HOME
button if needed to return the Main Screen.
2.
Touch one of the Gate Sequencers in column 2 to display the Gate Sequencer screen. The
gate sequencer displays a series of boxes that control whether the gate signal is on (light blue)
or off (gray) at each step in the sequence.
3.
Touch a box in the sequence to change its state.
4.
Press the
INFO
button to toggle the display between the Gate Sequencer screen and the
Gate Parameters screen for this gate sequencer.
5.
Use the Control Knobs to adjust the values of the parameters.
Use the Function Generators LFO and SEQ
Toolbox can generate three low frequency oscillation (LFO) signals and one control voltage sequencer
(SEQ) signal. These outputs play out the Function Generator Output Jacks 5 through 8. The output
range is -5V to +5V. To configure an LFO or SEQ:
1.
From the Main screen, touch one of the
LFO
or
SEQ
boxes to display the LFO Parameters
screen or CV Sequencer screen. From the CV Sequencer screen, press the
INFO
button to
display the CV Sequencer Parameters screen.
2.
Use the Control Knobs to adjust the values of the parameters.
3.
On the CV Sequencer screen, use touch gestures and Control Knobs to configure the values of
the sequencer steps.
Learn More
Download the Toolbox User Manual or watch toolbox videos on our website at
https://1010music.com/toolbox-support
.
Join the conversation with other toolbox owners at
https://forum.1010music.com
.
Note Sequencer Screen
Note Sequencer
Parameters Page 1
Gate Sequencer Screen
CV Sequencer Screen


