


CREATE A NEW PRESET AND CONFIGURE
PADS
Let’s get you working with bitbox mk2 by creating a new preset and configuring the
different pad modes. This section will also cover managing and recording WAV files.
Starting a New Preset
First, create a new preset that will be used to store the
configuration parameters you select.
To Create a New Preset:
1.
Push the HOME button repeatedly until you
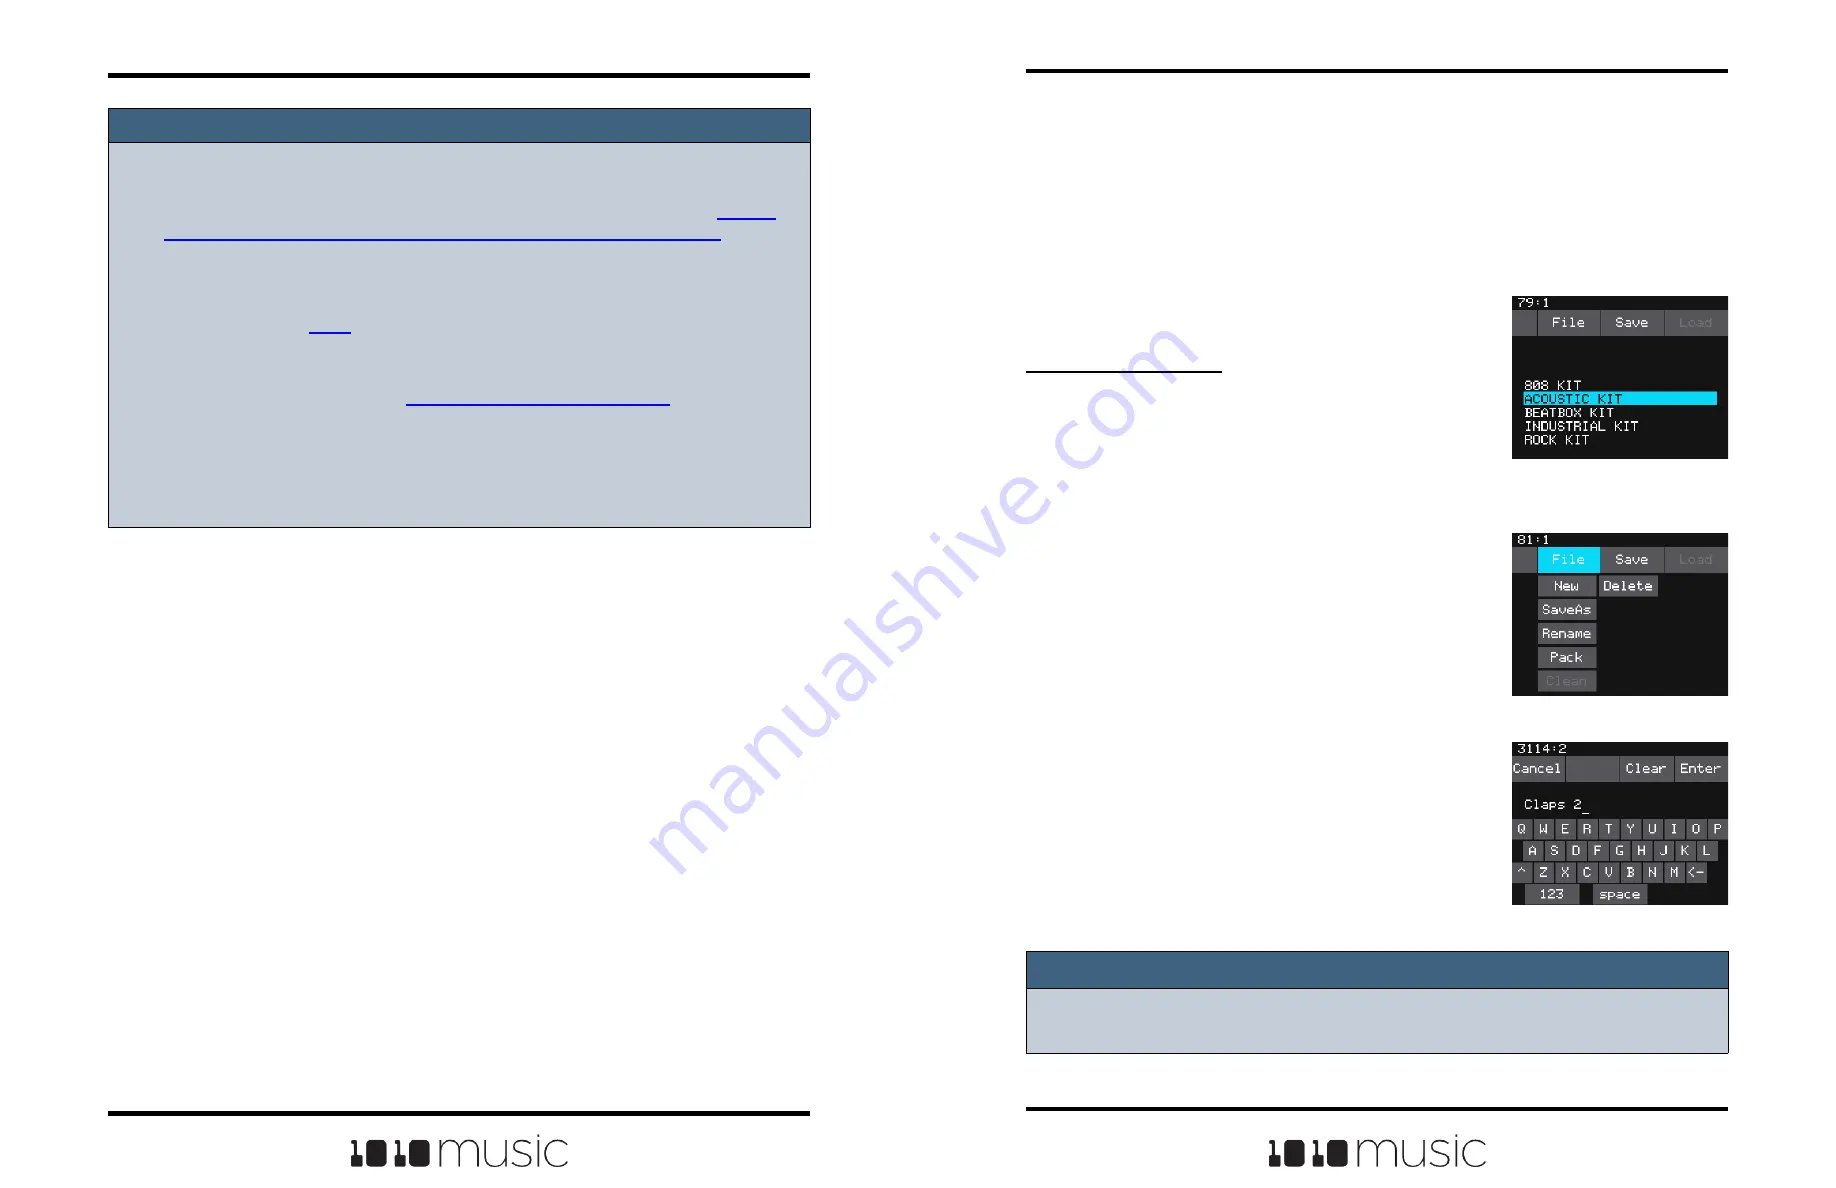
see the Menu screen. Touch the Presets option
to display the Preset Management screen. The
Preset Management screen shows a list of the
presets stored on the microSD card with a
menu across the top. The currently selected
preset is highlighted in blue.
2.
Touch File then New in the top menu. A new
preset is added to the list with the name New
Preset. You can use the on-screen keyboard to
change the name.
3.
Touch Clear to erase the preset name. Then
use the on-screen keyboard to type in a new
name. Turn the knob to change where you are
typing. Use the carat button ^ to toggle
between upper- and lower-case letters. Touch
the 123 button to display the numeric keyboard
if needed.
4.
When the name is complete, touch Enter to
save the name and go to the Presets screen
with the new preset selected. The new preset
is loaded. Push HOME to go back to the Pads
screen.
Preset Management
Screen
Preset File Menu
Keyboard Screen
Note:
► If you attempt to save the file using a name that is already in use on the microSD
card, bitbox mk2 will append “ 2” to the end of the name to make it unique.
Copyright 1010music LLC 2023
Page 20 of 97
Page 21 of 97
Copyright 1010music LLC 2023
Bitbox MK2 2.1 User Manual
Mar 1, 2023
Bitbox MK2 2.1 User Manual
Mar 1, 2023
Note:
► The MIDI input is compatible with both Type A and Type B mini TRS connections.
Be sure to use a TRS cable and not a TS cable. Read the blog post Mini
TRS
Jacks for MIDI Connections Compatibility Guide
on our website at
1010music.com/stereo-minijacks-midi-connections-compatibility-guide
for more
details about Type A and Type B TRS connections.
► Bitbox mk2 by default responds to MIDI inputs on all MIDI Channels. You can
change this in the
screens as described above.
► Bitbox mk2 can also use MIDI inputs on a specific channel to trigger playback of
slices within a Slicer pad. See
To Use MIDI Notes to Play Slices
below for more
information.
► The MIDI parameter for a pad can be used to configure a pad to be triggered by
a MIDI channel other than the one specified for MIDI Pads. We’ll talk about this
some more we when cover Cell Parameters later.


