background image

PERFIS

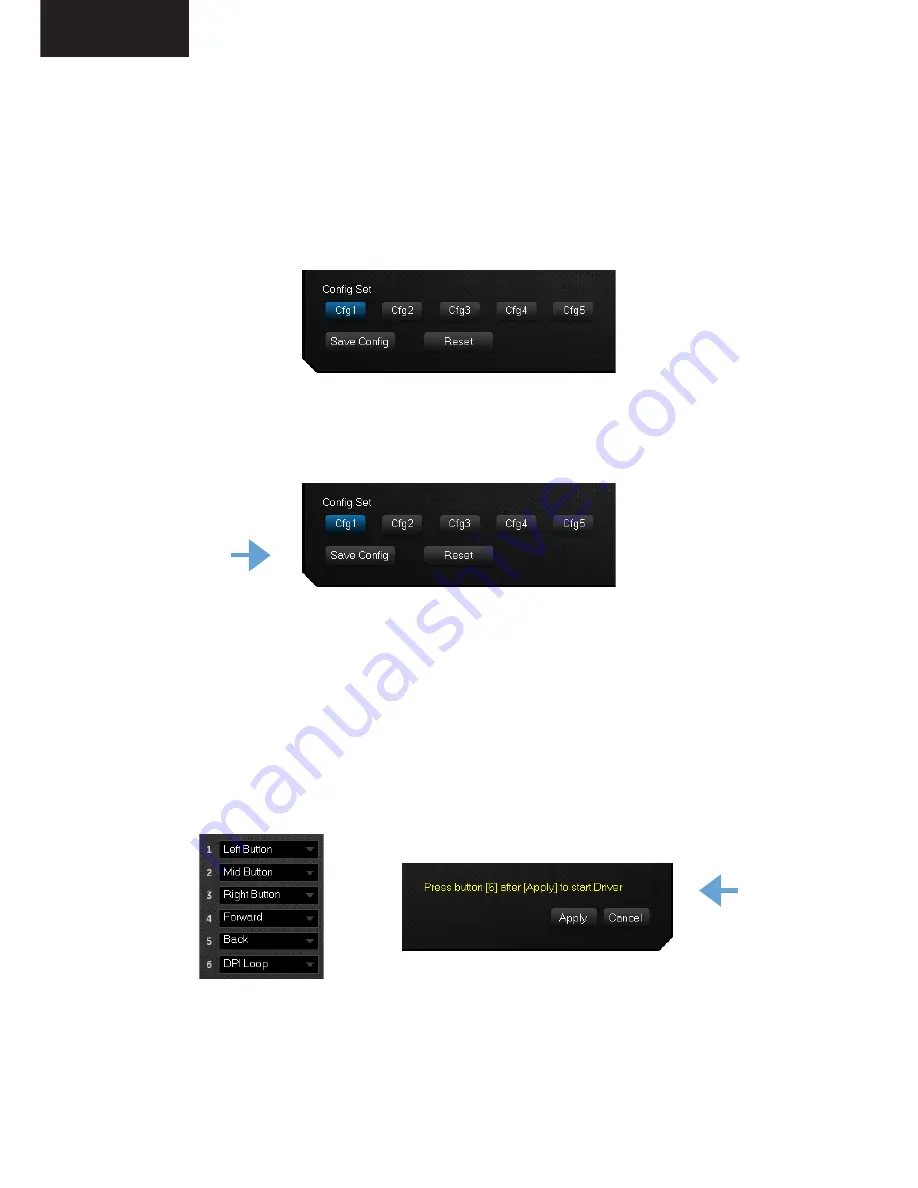
Existem 5 perfis disponíveis, do “Cfg1” ao “Cfg5” e nos quais poderá 
gravar todas as suas preferências.

Após definir as suas preferências é necessário premir o botão “Save 
Config” de forma a gravar as suas definições no perfil pretendido.

FUNÇÕES DOS BOTÕES

O rato possui 6 botões cujas funções podem ser personalizadas. 
Utilize o menu para atribuir uma determinada função a um botão 
específico.

Posteriormente deverá premir o botão “Apply” e seguir as instruções 
da mensagem de confirmação exibida a amarelo.

PT

Содержание Vyper

Страница 1: ...OPTICAL GAMING MOUSE RATO ÓTICO GAMING User Guide Guia de utilizador ...

Страница 2: ...BUTTONS 1 Left button 2 Scroll wheel 3 Right Button 4 Forward button 5 Backward Button 6 DPI button EN 1 3 2 6 4 5 ...

Страница 3: ...are download Download the mouse customization software from the product s page at www 1 Life eu 2 Software installation Connect the gaming mouse to the PC and install the software After installation launch the software EN ...

Страница 4: ...e button Save Config in order to record the customized settings on the profile BUTTON FUNCTIONS There are 6 buttons in which you can customize the functions Navigate the menu to set the desired function on a specific button After that you will need to press the Apply button and follow the instructions on the confirmation message displayed in yellow EN ...

Страница 5: ...ow the instructions on the confirmation message displayed in yellow DPI PROFILES There are four DPI profiles You can choose from five different settings to apply in each profile The available settings are 1200 1600 2000 2500 and 3400 DPI Select your options and after that you will need to press the Apply button and follow the instructions on the confirmation message displayed in yellow EN ...

Страница 6: ... the Name field enter the intended macro designation 2 Press the New button 3 Press the Record button 4 Enter the intended macro combination 5 Press the Stop button to finish the recording 6 Press the Save button to store the recorded macro If your macro combination turned out too slow or too fast you can adjust its delay time In order to do so right click over the macro EN ...

Страница 7: ...ust be as follows 1 Go to the Base Setting menu 2 Navigate to the macro option on the menu for the button that you want to assign the function to 3 Select the macro from the available list Press the Apply button and follow the instructions on the confirmation message displayed in yellow ILLUMINATION SETTINGS Navigate to the LED Setting menu This is where you can customize the illumination effects ...

Страница 8: ...llumination can be set to 1 6 seconds pulse effect 2 4 seconds pulse effect 3 Fixed 4 Off Set your preference press the Apply button and follow the instructions on the confirmation message displayed in yellow EN ...

Страница 9: ...BOTÕES 1 Botão esquerdo 2 Roda scroll 3 Botão direito 4 Botão avançar 5 Botão retroceder 6 Botão alternador de DPI PT 1 3 2 6 4 5 ...

Страница 10: ...r o software Descarregue o software para configuração do rato na página do produto em www 1 Life eu 2 Instalar o software Ligue o rato gaming ao computador e instale o software Após concluir a instalação execute o software PT ...

Страница 11: ...premir o botão Save Config de forma a gravar as suas definições no perfil pretendido FUNÇÕES DOS BOTÕES O rato possui 6 botões cujas funções podem ser personalizadas Utilize o menu para atribuir uma determinada função a um botão específico Posteriormente deverá premir o botão Apply e seguir as instruções da mensagem de confirmação exibida a amarelo PT ...

Страница 12: ... premir o botão Apply e seguir as instruções da mensagem de confirmação exibida a amarelo PERFIS DE DPI Existem 4 perfis de DPI à disposição Poderá optar por entre 5 opções diferentes para cada perfil As opções são 1200 1600 2000 2500 e 3400 DPI Seleccione a suas opções Posteriormente deverá premir o botão Apply e seguir as instruções da mensagem de confirmação exibida a amarelo PT ...

Страница 13: ...forma 1 No campo Name deverá introduzir a designação pretendida 2 Prima o botão New 3 Prima o botão Record 4 Introduza a combinação macro desejada 5 Prima o botão Stop para terminar a gravação 6 Prima o botão Save para guardar a macro gravada Caso a combinação macro tenha ficado demasiado lenta ou rápida ao ser reproduzida poderá também afinar os seus tempos de PT ...

Страница 14: ...ir o botão Save de forma a gravar as modificações efectuadas Para atribuir uma função macro a um determinado botão deverá proceder da seguinte forma 1 Navegue até ao menu Base Setting 2 Encontre no menu do botão que pretende configurar a opção macro 3 Seleccione a macro desejada na listagem disponível Prima o botão Apply e siga as instruções da mensagem de confirmação exibida a amarelo CONFIGURAÇÕ...

Страница 15: ...LED poderá ser configurada para a Efeito pulsar de 6 segundos b Efeito pulsar de 4 segundos c Fixa d Desligada Seleccione a sua opção Posteriormente deverá premir o botão Apply e seguir as instruções da mensagem de confirmação exibida a amarelo PT ...

Страница 16: ...ies and electrical or electronic equipment For additional informations regarding batteries electrical or electronic recycling pick up points please contact your local municipal services DECLARAÇÃO DE CONFORMIDADE COM DIRECTIVAS DA UNIÃO EUROPEIA A 1Life declara que este produto está em conformidade com os requisitos essenciais e outras disposições relevantes da Directiva 2004 108 CE conforme aplic...

Страница 17: ...www 1 Life eu One Life Play it hard ...

Отзывы: