ZKTeco ZL500, Installation Manual
The ZKTeco ZL500 embodies simplicity and efficiency. Get up and running instantly with the Quick Start Manual, available for free download on our website. This comprehensive manual ensures smooth installation and seamless operation, empowering you to make the most of your ZL500 experience.
Share
Download


Reviews:
No comments
Related manuals for ZL500
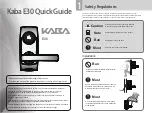
E30
Brand: Kaba Pages: 4

TOUCHLOCK BT BL0509
Brand: BIO-key Pages: 9

DL610LC
Brand: C.R. Laurence Pages: 2

LA GARD BASIC 3802
Brand: Kaba Mas Pages: 2

E8850FL MortiseSeries
Brand: Yale Pages: 10

Armadillo HASPLOCK
Brand: Carbine Pages: 2

Von Duprin 98/99
Brand: Allegion Pages: 12

OTS ADVANCE E-30
Brand: Ojmar Pages: 3

SECUREMME
Brand: D-SMART Pages: 22

Matrix 3
Brand: INSAFE Pages: 4

PMR30S31
Brand: Ezset Pages: 9

TAIL PIECES Samples
Brand: Alarm Lock Pages: 1

T3e Series Addendum
Brand: Alarm Lock Pages: 1

SCHLAGE CYLINDER ASSEMBLY Addendum
Brand: Alarm Lock Pages: 1

PDL6100
Brand: Alarm Lock Pages: 36

Stock Locks C1975
Brand: COMPX Pages: 1

Stock Locks C1802
Brand: COMPX Pages: 1

Stock Locks C1702
Brand: COMPX Pages: 1


