Zanussi ZGG649, Instruction Booklet
The Zanussi ZGG649 gas cooker comes with an Instruction Booklet, providing users with a comprehensive manual for effective usage. This essential resource can be easily downloaded for free from manualshive.com, enabling customers to access detailed instructions and make the most of their cooking experience.
Share
Download


Reviews:
No comments
Related manuals for ZGG649
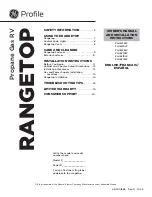
Profile PLU612RW
Brand: GE Pages: 60

SIM562FX
Brand: Smeg Pages: 15

T1 B22 Series
Brand: NEFF Pages: 48

IH 4 TB1FZS 007C
Brand: VALBERG Pages: 75

V5 HQ4 0 Series
Brand: NEFF Pages: 28

CPG 64 SGX
Brand: Candy Pages: 48

GK58CN
Brand: Electrolux Pages: 8

ZGX65424XA
Brand: Zanussi Pages: 20

ZGS 646X
Brand: Zanussi Pages: 16

ZGX65424
Brand: Zanussi Pages: 20

ZGX65414
Brand: Zanussi Pages: 20

ZGP 982
Brand: Zanussi Pages: 16

ZGRN 2504-7
Brand: Zanussi Pages: 17

ZGO96524
Brand: Zanussi Pages: 16

ZGO75524BA
Brand: Zanussi Pages: 16

ZGS 645
Brand: Zanussi Pages: 21

ZGO62414BA
Brand: Zanussi Pages: 16

ZGO65414BA
Brand: Zanussi Pages: 16


