background image

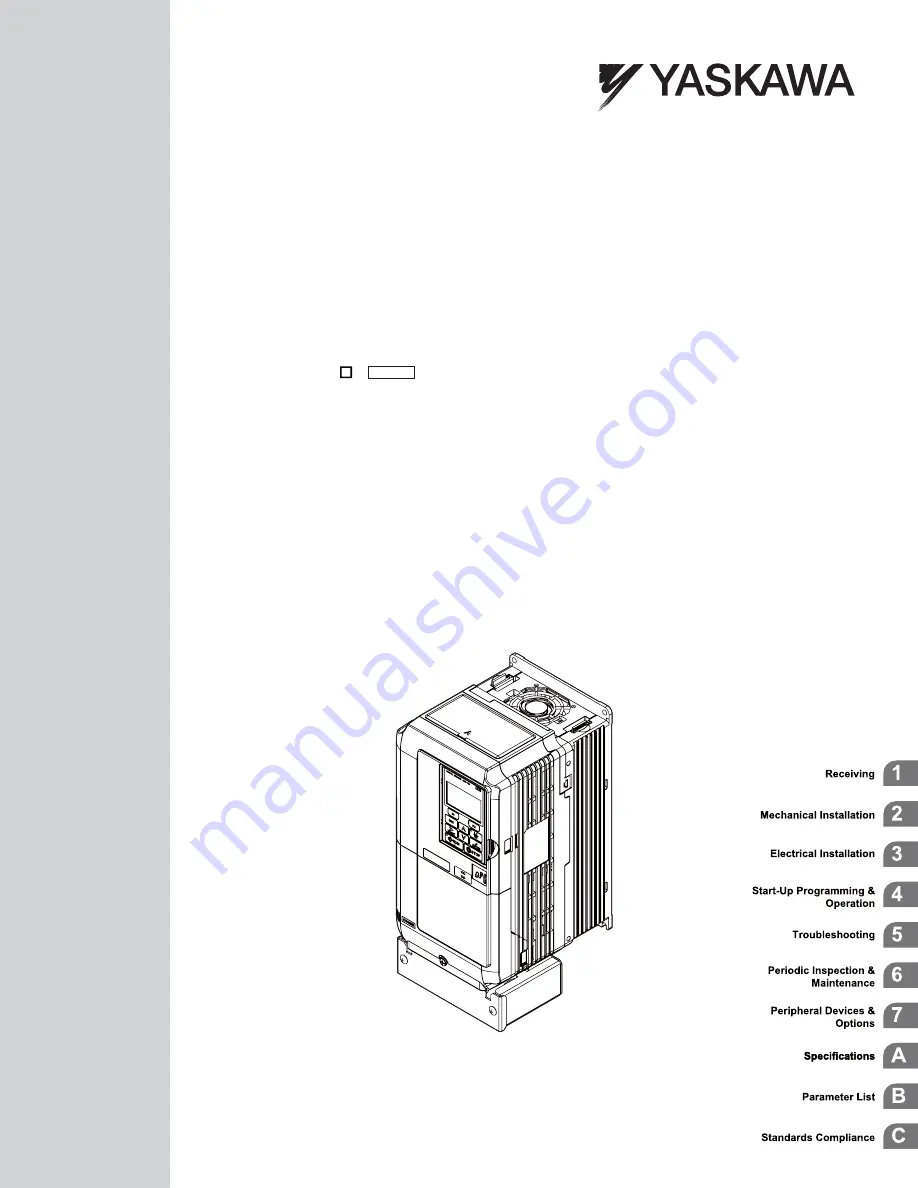
YASKAWA AC Drive P1000

Industrial Fan and Pump Drive

Quick Start Guide

MANUAL NO.   TOEP YAIP1U 01B

To properly use the product, read this manual thoroughly and retain 

for easy reference, inspection, and maintenance. Ensure the end user 

receives this manual.

Type: CIMR-PU A          

Models: 200 V Class: 3/4 to 175 HP ND

400 V Class: 3/4 to 1000 HP ND

600 V Class: 2 to 250 HP ND

Summary of Contents for P1000

Page 1: ...O TOEP YAIP1U 01B To properly use the product read this manual thoroughly and retain for easy reference inspection and maintenance Ensure the end user receives this manual Type CIMR PU A Models 200 V...

Page 2: ...nt liability is assumed with respect to the use of the information contained herein Moreover because Yaskawa is constantly striving to improve its high quality products the information contained in th...

Page 3: ...Monitors Use drive monitors to check if fans capacitors or other components require maintenance Refer to Performance Life Monitors Maintenance Monitors on page 159 Fault Display and Troubleshooting Re...

Page 4: ...This Page Intentionally Blank 4 YASKAWA ELECTRIC TOEP YAIP1U 01B YASKAWA AC Drive P1000 Quick Start Guide...

Page 5: ...ELECTRICAL INSTALLATION 41 3 1 Standard Connection Diagram 42 3 2 Main Circuit Connection Diagram 45 Three Phase 200 V Class Models 2A0004 to 2A0081 Three Phase 400 V Class Models 4A0002 to 4A0044 Thr...

Page 6: ...Configuration 68 Wiring the Control Circuit Terminal 69 3 8 Control I O Connections 71 Sinking Sourcing Mode for Digital Inputs 71 Using the Pulse Train Output 72 Terminals A1 A2 and A3 Input Signal S...

Page 7: ...ssible Solutions 135 5 3 Alarm Detection 146 Alarm Codes Causes and Possible Solutions 146 5 4 Operator Programming Errors 149 Operator Programming Error Codes Causes and Possible Solutions 149 5 5 Au...

Page 8: ...Braking 185 b3 Speed Search 186 b4 Timer Function 187 b5 PID Control 187 b6 Dwell Function 190 b8 Energy Saving 190 B 3 C Tuning 191 C1 Acceleration and Deceleration Times 191 C2 S Curve Characterist...

Page 9: ...1 S2 Programmable Run Timers 221 S3 Secondary PI PI2 Control 223 S6 P1000 Protection 225 B 11 T Motor Tuning 226 T1 Induction Motor Auto Tuning 226 B 12 U Monitors 227 U1 Operation Status Monitors 227...

Page 10: ...Table of Contents This Page Intentionally Blank 10 YASKAWA ELECTRIC TOEP YAIP1U 01B YASKAWA AC Drive P1000 Quick Start Guide...

Page 11: ...roduct that if not heeded may result in fatality personal injury or equipment damage Yaskawa is not responsible for the consequences of ignoring these instructions i 1 PREFACE 12 i 2 GENERAL SAFETY 13...

Page 12: ...ms arising from misapplication of its products This manual is designed to ensure correct and suitable application of drives Read this manual before attempting to install operate maintain or inspect a...

Page 13: ...WARNING Read and understand this manual before installing operating or servicing this drive The drive must be installed according to this manual and local codes The following conventions are used to...

Page 14: ...could result in death or serious injury Maintenance inspection and replacement of parts must be performed only by authorized personnel familiar with installation adjustment and maintenance of AC drive...

Page 15: ...voltage test on any part of the drive Failure to comply could result in damage to the sensitive devices within the drive Do not operate damaged equipment Failure to comply could result in further dam...

Page 16: ...e span of the IGBTs Yaskawa recommends lowering the carrier frequency particularly when audible noise is not a concern It is beneficial to reduce the load increase the acceleration and deceleration ti...

Page 17: ...ery 30 minutes Frequent use can damage the drive Use the drive to stop and start the motor Inspection and Maintenance WARNING Electrical Shock Hazard Capacitors in the drive do not immediately dischar...

Page 18: ...n running from line power n Synchronous Motors Contact Yaskawa or a Yaskawa agent when planning to use a synchronous motor not endorsed by Yaskawa Use a standard induction motor when running multiple...

Page 19: ...he motor causes excessive current to flow and can damage drive components A split phase start or a repulsion start can burn out the starter coils because the internal centrifugal switch is not activat...

Page 20: ...esigned or manufactured for use in devices or systems that may directly affect or threaten human lives or health Customers who intend to use the product described in this manual for devices or systems...

Page 21: ...ns how to inspect the drive upon receipt and gives an overview of the different enclosure types and components 1 1 MODEL NUMBER AND NAMEPLATE CHECK 22 1 YASKAWA ELECTRIC TOEP YAIP1U 01B YASKAWA AC Dri...

Page 22: ...PH 200 240V 50 60Hz 3 9A AC3PH 0 240V 0 400Hz 3 5A 3 3 kg E131457 IP20 200 400 V Class 600 V Class PRG 8500 IND CONT EQ 7J48 B YASKAWAELECTRIC CORPORATION Assembled in USA CIMR PU5A0003FAA AC3PH 500 6...

Page 23: ...tion types and component descriptions 2 Drives with these specifications do not guarantee complete protection for the environmental conditions indicated n Three Phase 200 V Class Drive Model Max Motor...

Page 24: ...296 4A0362 185 300 362 4A0414 220 350 414 4A0515 250 400 450 515 4A0675 355 500 550 675 4A0930 500 750 930 4A1200 630 1000 1200 n Three Phase 600 V Class Drive Model Max Motor Capacity kW HP Rated Out...

Page 25: ...Mechanical Installation This chapter explains how to properly mount and install the drive 2 1 MECHANICAL INSTALLATION 26 2 YASKAWA ELECTRIC TOEP YAIP1U 01B YASKAWA AC Drive P1000 Quick Start Guide 25...

Page 26: ...Vibration 10 to 20 Hz at 9 8 m s2 32 15 ft s2 1 20 to 55 Hz at 5 9 m s2 19 36 ft s2 Models 2A0004 to 2A0211 4A0002 to 4A0165 and 5A0003 to 5A0099 or 2 0 m s2 6 56 ft s2 Models 2A0250 to 2A0415 4A0208...

Page 27: ...ation When installing multiple drives into the same enclosure panel mount the drives according to Figure 2 2 and set L8 35 Installation Method Selection to 1 Side by Side Mounting When mounting drives...

Page 28: ...during installation to an enclosure panel Do not use vertical suspension to transport the drive Use screws to securely affix the drive front cover terminal blocks and other drive components prior to...

Page 29: ...e to ensure a 50 or wider suspension angle as illustrated in Figure 2 8 The maximum allowable load of the eye bolts cannot be guaranteed when the drive is suspended with the wires at angles less than...

Page 30: ...Lower the drive when ready to install in the enclosure panel Stop lowering the drive when it is near the floor then begin lowering the drive again very slowly until the drive is placed correctly 2 1...

Page 31: ...300 11 81 164 6 46 122 4 80 260 10 24 248 9 76 6 0 24 40 1 57 1 5 0 06 55 2 17 5 0 20 M5 3 8 8 2 2A0030F 140 5 51 300 11 81 167 6 57 122 4 80 260 10 24 248 9 76 6 0 24 40 1 57 1 5 0 06 55 2 17 5 0 20...

Page 32: ...39 167 6 57 160 6 30 300 11 81 284 11 18 7 9 0 31 40 1 57 1 5 0 06 55 2 17 5 0 20 M5 5 8 12 6 4A0038F 180 7 09 340 13 39 187 7 36 160 6 30 300 11 81 284 11 18 7 9 0 31 40 1 57 1 5 0 06 75 2 95 5 0 20...

Page 33: ...9 M6 27 59 5 5A0052F 279 10 98 515 20 28 258 10 16 220 8 66 7 9 0 31 450 17 72 435 17 13 7 7 0 30 65 2 56 100 3 94 2 2 0 09 2 2 0 09 M6 27 59 5 5A0062F 329 12 95 730 28 74 283 11 14 260 10 24 7 9 0 31...

Page 34: ...4 W4 W3 d5 d6 d7 D D1 D2 D3 W2 W2 Figure 9 Table 2 5 Conduit Bracket Dimensions for IP20 NEMA Type 1 Drive Model Figure Dimensions mm in Diameter mm in W D W1 W2 W3 W4 D1 D2 D3 D4 d5 d6 d7 200 V Class...

Page 35: ...6 51 2 0 61 2 4 36 1 4 2A0360A 9 191 7 5 130 5 1 104 4 1 30 1 2 28 1 1 71 2 8 157 6 2 71 2 8 51 2 0 51 2 0 61 2 4 43 1 7 400 V Class 4A0002F 1 43 1 7 38 1 5 38 1 5 41 1 6 71 2 8 79 3 1 23 0 9 36 1 4 4...

Page 36: ...56 2 2 48 1 9 84 3 3 53 2 1 36 1 4 23 0 9 43 1 7 5A0027F 28 1 1 79 3 1 64 2 5 51 2 0 86 3 4 56 2 2 36 1 4 23 0 9 43 1 7 5A0032F 28 1 1 79 3 1 64 2 5 51 2 0 86 3 4 56 2 2 36 1 4 23 0 9 43 1 7 5A0041F 3...

Page 37: ...10 0 39 680 26 77 12 0 49 130 5 12 3 3 0 13 3 3 0 13 M10 76 167 6 2A0312A 1 450 17 72 705 27 76 330 12 99 325 12 80 10 0 39 680 26 77 12 0 49 130 5 12 3 3 0 13 3 3 0 13 M10 80 176 4 2A0360A 1 500 19 6...

Page 38: ...4 1250 49 21 1380 54 33 370 14 57 1110 43 70 6 0 24 330 13 00 440 17 32 1345 52 95 15 0 59 150 5 91 4 6 0 18 4 6 0 18 M12 545 1201 5 4A1200A 4 1250 49 21 1380 54 33 370 14 57 1110 43 70 6 0 24 330 13...

Page 39: ...s not listed Table 2 9 IP20 NEMA Type 1 Kit Selection IP00 Open Type Drive Model IP20 NEMA Type 1 Kit Code Comments 2A0250A 100 054 503 Refer to IP20 NEMA Type 1 Enclosure Drives on page 31 for drive...

Page 40: ...2 1 Mechanical Installation This Page Intentionally Blank 40 YASKAWA ELECTRIC TOEP YAIP1U 01B YASKAWA AC Drive P1000 Quick Start Guide...

Page 41: ...IAGRAM 42 3 2 MAIN CIRCUIT CONNECTION DIAGRAM 45 3 3 TERMINAL COVER 49 3 4 DIGITAL OPERATOR AND FRONT COVER 51 3 5 TOP PROTECTIVE COVER 54 3 6 MAIN CIRCUIT WIRING 55 3 7 CONTROL CIRCUIT WIRING 66 3 8...

Page 42: ...able of delivering not more than 100 000 RMS symmetrical amperes 240 Vac maximum 200 V class 480 Vac maximum 400 V class 600 Vac maximum 600 V class NOTICE When the input voltage is 440 V or higher or...

Page 43: ...pair shielded line main circuit terminal control circuit terminal R L1 S L2 T L3 R S T Main Switch Fuse EMC Filter M3 M4 Multi function relay output Zero Speed H2 02 250 Vac max 1 A 30 Vdc max 1 A min...

Page 44: ...s at terminals AM and FM Set parameters H4 07 and H4 08 accordingly 12 Self cooling motors do not require the same wiring necessary for motors with cooling fans WARNING Sudden Movement Hazard Do not c...

Page 45: ...e Phase 400 V Class Models 4A0002 to 4A0044 Three Phase 600 V Class Models 5A0003 to 5A0032 1 2 R L1 S L2 T L3 Relay Gate board Control board Operator Current sensor U T1 V T2 W T3 B1 B2 Figure 3 2 Co...

Page 46: ...Connecting Main Circuit Terminals u Three Phase 200 V Class Models 2A0250 to 2A0415 Three Phase 400 V Class Models 4A0165 to 4A0675 Three Phase 600 V Class Models 5A0125 to 5A0242 1 R L1 S L2 T L3 U...

Page 47: ...pare a 3 winding transformer for the power supply Contact Yaskawa or your nearest sales representative for transformer specifications WARNING Fire Hazard Failure to remove jumpers shorting the power s...

Page 48: ...3 R1 L11 S1 L21 T1 L31 U1 V1 W1 W2 V2 U2 Braking Unit option Braking Resistor Unit option Motor Figure 3 8 Connecting Main Circuit Terminals 3 2 Main Circuit Connection Diagram 48 YASKAWA ELECTRIC TOE...

Page 49: ...remove the terminal cover Figure 3 10 Removing the Terminal Cover on an IP20 NEMA Type 1 Enclosure Drive n Reattaching the Terminal Cover Power lines and signal wiring should pass through the opening...

Page 50: ...ype Enclosure Drive 2 Pull forward on the terminal cover to free it from the drive Figure 3 13 Removing the Terminal Cover on an IP00 Open Type Enclosure Drive n Reattaching the Terminal Cover After w...

Page 51: ...otches on the left side of the opening Next press gently on the right side of the operator until it clicks into place Figure 3 16 Reattaching the Digital Operator u Removing Reattaching the Front Cove...

Page 52: ...4A0058 to 4A1200 4 Unhook the left side of the front cover then swing the left side towards you as shown in Figure 3 19 until the cover comes off Figure 3 19 Remove the Front Cover 2A0010 to 2A0415 a...

Page 53: ...cover while guiding it back into the drive Make sure it clicks firmly into place Models 2A0110 to 2A0415 and 4A0058 to 4A1200 1 Slide the front cover so the hooks on the top connect to the drive Figu...

Page 54: ...hown in the figure below to free the cover from the drive Note Removing the top protective cover or the bottom conduit bracket from an IP20 NEMA Type 1 enclosure drive voids the NEMA Type 1 protection...

Page 55: ...S1 L21 T L3 T1 L31 when using 12 phase rectification S1 L21 T1 L31 U T1 Drive output Connects to the motor 43 V T2 W T3 B1 Braking resistor Not available Available for connecting a braking resistor o...

Page 56: ...ls n Insulation Caps or Sleeves Use insulation caps or sleeves when wiring the drive with crimp terminals Take particular care to ensure that the wiring does not touch nearby terminals or the surround...

Page 57: ...072 and 5A0003 to 5A0052 Refer to UL Standards Compliance on page 244 for information on UL compliance Yaskawa recommends using closed loop crimp terminals on all drive models To maintain UL cUL appro...

Page 58: ...1 B2 8 to 6 M5 2 7 to 3 0 23 9 to 26 6 6 6 to 4 M6 5 4 to 6 0 47 8 to 53 1 2A0081 R L1 S L2 T L3 2 3 to 2 M8 9 9 to 11 0 87 6 to 97 4 U T1 V T2 W T3 2 3 to 2 1 2 3 to 2 B1 B2 6 M5 2 7 to 3 0 23 9 to 2...

Page 59: ...ordance with IEC EN 61800 5 1 2 Install a GFCI or use 10 mm2 AWG 8 copper wire when using this wire gauge in accordance with IEC EN 61800 5 1 Note When connecting peripheral devices or options to term...

Page 60: ...8 to 35 4 U T1 V T2 W T3 8 8 to 6 1 2 6 B1 B2 10 to 8 2 7 to 3 0 23 9 to 26 6 6 10 to 6 M6 5 4 to 6 0 47 8 to 53 1 4A0044 R L1 S L2 T L3 6 6 to 4 M6 5 4 to 6 0 47 8 to 53 1 U T1 V T2 W T3 6 6 to 4 1...

Page 61: ...83 to 354 U T1 V T2 W T3 500 2 0 to 600 1 3 0 to 600 3 1 to 325 M10 18 to 23 159 to 204 2 2 to 350 M12 32 to 40 283 to 354 4A0362 R L1 S L2 T L3 4 0 2P 3 0 to 600 M12 32 to 40 283 to 354 U T1 V T2 W T...

Page 62: ...ass Table 3 5 Wire Gauge and Torque Specifications Three Phase 600 V Class Drive Model Terminal Recomm Gauge AWG kcmil Wire Range AWG kcmil Screw Size Tightening Torque N m lb in 5A0003 5A0004 5A0006...

Page 63: ...0 3 6 to 4 0 4 4 5A0077 R L1 S L2 T L3 3 10 to 4 0 M10 18 to 23 159 to 204 U T1 V T2 W T3 3 10 to 4 0 1 3 to 4 0 3 6 to 4 0 4 4 5A0099 R L1 S L2 T L3 1 0 10 to 4 0 M10 18 to 23 159 to 204 U T1 V T2 W...

Page 64: ...frequency according to Table 3 6 If the motor wiring distance exceeds 100 m because of the system configuration reduce the ground currents Refer to C6 02 Carrier Frequency Selection on page 100 Table...

Page 65: ...S L2 T L3 _ 1 2 U T1 V T2 W T3 B1 B2 A B A Braking circuit protective cover B DC bus protective cover Figure 3 25 Protecting Cover to Prevent Miswiring Model 5A0011 n Main Circuit Connection Diagram...

Page 66: ...ed reference 1 S6 Multi function input 6 Multi step speed reference 2 S7 Multi function input 7 Jog reference S8 Multi function input 8 Baseblock command N O SC Multi function input common Multi funct...

Page 67: ...doing so may shorten relay performance life Switching life is estimated at 200 000 times assumes 1 A resistive load Connect a suppression diode as shown in Figure 3 26 when driving a reactive load su...

Page 68: ...more reliable wiring use crimp ferrules on the wire ends Refer to Table 3 11 for ferrule terminal types and sizes Table 3 10 Wire Gauges Terminal Screw Size Tightening Torque N m lb in Bare Wire Termi...

Page 69: ...ontrol terminals Improper application of peripheral devices could result in drive performance degradation due to improper power supply Refer to NEC Article 725 Class 1 Class 2 and Class 3 Remote Contr...

Page 70: ...pair wires preparing wire ends as shown in Figure 3 31 and connect the shield to the ground terminal of the drive A E B C D A Drive side B Insulation C Control device side D Shield sheath insulate wit...

Page 71: ...t short terminals SP and SN Failure to comply will damage the drive Table 3 12 Digital Input Sink Source External Power Supply Selection Mode Drive Internal Power Supply Terminals SN and SP External 2...

Page 72: ...ower Supply Sink Mode The high voltage level of the pulse output signal depends on the external voltage applied The voltage must be between 12 and 15 Vdc The load resistance must be adjusted so that t...

Page 73: ...gnal level for terminal A2 0 0 to 10 Vdc 1 0 to 10 Vdc Bipolar 2 4 to 20 mA 3 0 to 20 mA 0 to 3 2 u Terminal AM FM Signal Selection The signal type for terminals AM and FM can be set to either voltage...

Page 74: ...ecting the drive to a PC Yaskawa DriveWizard Industrial software can be used to monitor drive performance and manage parameter settings Contact Yaskawa for more information on DriveWizard Industrial P...

Page 75: ...the amount of voltage drop when selecting wire gauges Increase the wire gauge when the voltage drop is greater than 2 of motor rated voltage Ensure the wire gauge is suitable for the terminal block U...

Page 76: ...hing other terminals or connections 26 Properly separate control circuit wiring and main circuit wiring 27 Analog signal line wiring should not exceed 50 m 28 Safe Disable input wiring should not exce...

Page 77: ...T MODES 82 4 3 START UP FLOWCHART 88 4 4 POWERING UP THE DRIVE 89 4 5 APPLICATION SELECTION 90 4 6 BASIC DRIVE SETUP ADJUSTMENTS 91 4 7 AUTO TUNING 118 4 8 NO LOAD OPERATION TEST RUN 121 4 9 TEST RUN...

Page 78: ...rolls down to display the previous item selects parameter numbers and decrements setting values 7 STOP STOP Key 1 Stops drive operation 8 ENTER Key Enters parameter values and settings Selects a menu...

Page 79: ...ence is assigned to the MEMOBUS Modbus Communication Inputs of the drive OP Displayed when the frequency reference is assigned to an Option Unit of the drive RP Displayed when the frequency reference...

Page 80: ...N LED Indications LED Lit Flashing Flashing Quickly Off When the operator is selected for Run command and frequency reference control LOCAL When a device other than the operator is selected for Run co...

Page 81: ...RV Fault Trace JOG FWD FWD REV Rdy JOG FWD FWD REV JOG FWD FWD FWD FWD FWD FWD REV Modified X Parameters LSEQ LREF LSEQ LREF LSEQ LREF LSEQ LREF LSEQ LREF LSEQ LREF YASKAWA P1000 P1000 XXXV X X X XkW...

Page 82: ...Real Time Clock Adjustment Display in Figure 4 4 when the drive is powered up for the first time Refer to Manual Clock Adjustment Procedure by Setting o4 17 to 1 on page 83 for the Real Time Clock se...

Page 83: ...he right arrow key to select the desired digit then set the correct date and time using the up and down arrow keys ALM 20 10 01 01 00 00 Second per month 0 sec YYYY MM DD HH MM ALM 2 After entering th...

Page 84: ...ALM 8 After entering the correct time press the ENTER key to save the changes The display will return to the display shown in step 5 and the alarm LED will be OFF ALM Entry accepted n o4 17 Real Time...

Page 85: ...to select parameter C1 02 PRMSET C1 02 10 0Sec 0 0 6000 0 10 0 sec PRG Decel Time 1 FWD 7 Press to view the current setting value 10 0 s The leftmost digit flashes PRMSET C1 02 0010 0Sec 0 0 6000 0 1...

Page 86: ...1 02 Deceleration Time 1 d1 01 Frequency Reference 1 d2 01 Frequency Reference Upper Limit d2 02 Frequency Reference Lower Limit Parameter Name E2 01 Motor Rated Current L2 01 Momentary Power Loss Ope...

Page 87: ...E U1 01 0 00Hz U1 02 0 00Hz U1 03 0 00 A DRV FREF OPR Rdy JOG FWD FWD REV LSEQ LREF n Using Input Terminals S1 through S8 to Switch between LOCAL and REMOTE It is possible to switch between LOCAL and...

Page 88: ...e drive work as desired Couple the load or machine to the motor Run the machine and check for desired operation Fine tune parameters Adjust application settings if necessary Check the machine operatio...

Page 89: ...and 4A1200 Remove the jumpers on R1 L11 S1 L21 and T1 L31 when using 12 phase rectification Refer to 12 Phase Rectification on page 47 for details When operating without 12 phase rectification proper...

Page 90: ...eter The value cannot be changed without first setting A1 03 to 2220 or 3330 to initialize the drive WARNING Sudden Movement Hazard Confirm the drive I O signals and external sequence before performin...

Page 91: ...for more information on digital input functions Notes on Parameter Initialization The parameters shown in Table 4 7 will not be reset when the drive is initialized by setting A1 03 2220 or 3330 Table...

Page 92: ...Selection Function Selection Gain Bias A1 0 to 10 Vdc H3 01 0 H3 02 0 Frequency Reference Bias H3 03 H3 04 10 to 10 Vdc H3 01 1 A2 0 to 10 Vdc H3 09 0 H3 10 0 Frequency Reference Bias H3 11 H3 12 Set...

Page 93: ...RP to provide the frequency reference Follow the directions below to verify that the pulse signal is working properly Verifying the Pulse Train is Working Properly Set b1 01 to 4 and set H6 01 to 0 Se...

Page 94: ...drive will start DC injection Zero Speed Control or Short Circuit Braking Refer to b2 01 DC Injection Braking Start Frequency on page 96 for details Setting 1 Coast to Stop When the Run command is rem...

Page 95: ...C fault occurs during DC Injection Braking to Stop lengthen the minimum baseblock time L2 03 until the fault no longer occurs Setting 3 Coast to Stop with Timer When the Run command is removed the dri...

Page 96: ...tting Range Default b3 01 Speed Search Selection at Start 0 1 0 Setting 0 Disabled This setting starts operating the drive at the minimum output frequency when the Run command is entered If external S...

Page 97: ...back must drop below the wake up level for the time set in b5 96 in order for the drive to wake up For Reverse Acting PID the wake up level is determined by the PID Setpoint plus the b5 94 level The P...

Page 98: ...tors U5 01 U5 04 and U5 99 0 WC Inch of water 1 PSI Pounds per square inch 2 GPM Gallons per minute 3 F Degrees Fahrenheit 4 CFM Cubic feet per minute 5 CMH Cubic meters per hour 6 LPH Liters per hour...

Page 99: ...range and resolution is determined by b5 90 Changing b5 90 will not automatically update the value of this parameter n C1 01 to C1 04 Accel Decel Times 1 and 2 Two different sets of acceleration and d...

Page 100: ...peripheral devices Excessive leakage current from the drive Wiring between the drive and motor is too long 1 Audible motor noise is too loud Increase the carrier frequency or use Swing PWM 2 1 The car...

Page 101: ...rminal board to V voltage for A2 when inputting 0 to 10 V to terminal A2 analog input Select the different speed references as shown in Table 4 13 Figure 4 17 illustrates the multi step speed selectio...

Page 102: ...specific to 200 V class drives Double the value for 400 V class drives Multiply the value by 2 875 for 600 V class drives E1 01 Related Values The input voltage setting determines the overvoltage and...

Page 103: ...ariable torque For fans pumps and other applications where the required torque changes as a function of the speed 5 50 Hz Variable torque 2 6 60 Hz Variable torque 1 7 60 Hz Variable torque 2 8 50 Hz...

Page 104: ...ge V Frequency Hz 0 10 2 17 3 230 1 5 3 60 Voltage V Frequency Hz Predefined V f Patterns for Models 2A0030 to 2A0211 4A0018 to 4A0103 and 5A0011 to 5A0077 The values in the following graphs are speci...

Page 105: ...ves Table 4 23 Rated Torque Characteristics Settings 0 to 3 Setting 0 50 Hz Setting 1 60 Hz Setting 2 60 Hz Setting 3 72 Hz 0 6 200 1 3 2 5 50 12 Voltage V Frequency Hz 0 6 200 1 5 3 60 12 Voltage V F...

Page 106: ...2 0 0 to E1 04 0 0 Hz 6 E1 12 Middle Output Frequency Voltage 2 0 0 to 255 0 V 4 0 0 V 5 6 E1 13 Base Voltage 0 0 to 255 0 V 4 0 0 V 5 7 4 Values shown are specific to 200 V class drives Double the va...

Page 107: ...Terminal S8 Function Selection 0 to 9F 8 6 1 External Baseblock Command 1 Number appearing in parenthesis is the default value after performing a 3 Wire initialization A1 03 3330 Table 4 27 Multi Fun...

Page 108: ...mmand Stop command Figure 4 20 3 Wire Sequence Note 1 The Run command must be closed for more than 2 ms 2 If the Run command is active at power up and b1 17 0 Run command at power up not accepted the...

Page 109: ...D Feedback High 4A During KEB Operation 4C During Fast Stop 4D oH Pre Alarm Time Limit 4E 2 Braking Transistor Fault rr 4F 2 Braking Resistor Overheat rH 50 Waiting to Run 51 Sequence timer 1 52 Seque...

Page 110: ...Selection 0 to 3 0 Setting 0 0 to 10 Vdc The input level is 0 to 10 Vdc The minimum input level is limited to 0 so that a negative input signal due to gain and bias settings will be read as 0 Setting...

Page 111: ...Analog Input Voltage Figure 4 24 Frequency Reference Setting by Analog Input with Negative Bias n H3 05 Terminal A3 Signal Level Selection Determines the function assigned to analog input terminal A3...

Page 112: ...the level of the input value selected that is equal to 10 Vdc input or 20 mA input to terminal A2 Parameter H3 12 sets the level of the input value selected that is equal to 0 V 4 mA or 0 mA input at...

Page 113: ...o H4 02 Terminal FM Monitor Gain on the digital operator A voltage equal to 100 of the parameter being set in H4 01 will be output from terminal FM 2 Adjust H4 02 viewing the monitor connected to the...

Page 114: ...ad oL1 or drive overload oL2 faults common when accelerating with heavy loads L3 01 determines the type of Stall prevention the drive should use during acceleration No Name Setting Range Default L3 01...

Page 115: ...he upper limit and default value is determined by parameter L8 38 Carrier Frequency Reduction Lower L3 02 if stalling occurs when using a motor that is relatively small compared to the drive Also set...

Page 116: ...ion time compared to the set value If this is not appropriate for the application consider using a dynamic braking option Figure 4 29 illustrates the function of Stall Prevention during deceleration O...

Page 117: ...e motor to stall and trip the drive with an oC or oL fault Setting 1 Decelerate using C1 02 If the current exceeds the Stall Prevention level set in parameter L3 06 the drive will decelerate at decel...

Page 118: ...ain functions like torque compensation slip compensation Energy Saving and Speed Search Table 4 30 lists the data that must be entered for Auto Tuning Make sure this data is available before starting...

Page 119: ...y returns to the display shown in Step 3 A TUNE T1 01 2 2 Term Resistance PRG Tuning Mode Sel Rdy ESC FWD DATA n Enter Data from the Motor Nameplate After selecting the type of Auto Tuning enter the d...

Page 120: ...th the motor stopped which could result in death or serious injury Do not touch the motor until Auto Tuning has been completed NOTICE Rotational Auto Tuning will not function properly if a holding bra...

Page 121: ...1 03 0 00 A DRV FREF OPR Rdy JOG FWD FWD REV LSEQ LREF 2 Press to select LOCAL The LO RE light will turn on LO RE F2 F1 ESC RUN STOP ENTER RESET ALARM DIGITAL OPERATOR JVOP 180 Off On MODE U1 01 0 00H...

Page 122: ...hes until the motor comes to a complete stop LO RE F2 F1 ESC RUN STOP ENTER RESET RUN RUN Off On MODE U1 01 60 00Hz U1 02 0 00Hz U1 03 0 00A DRV FREF OPR Rdy JOG FWD FWD REV LSEQ LREF 4 8 No Load Oper...

Page 123: ...r should come to a complete stop without problems Connect the load and machinery to the motor Fasten all installation screws properly and check that the motor and connected machinery are held in place...

Page 124: ...10 If the motor rotates in the opposite direction during test run switch two of U T1 V T2 W T3 or change b1 14 89 11 Set motor rated current E2 01 and motor protection L1 01 values for motor thermal...

Page 125: ...e Monitor Selection 132 u A1 03 8009 Pump w PI Table 4 32 Pump w PI Application Parameters Parameter Name Page A1 06 Application Preset Selection monitor only 90 b1 02 Run Command Selection 93 b1 03 S...

Page 126: ...4 34 Fan Application Parameters Parameter Name Page A1 06 Application Preset Selection monitor only 90 b1 02 Run Command Selection 93 b1 03 Stopping Method Selection 94 b1 04 Reverse Operation Select...

Page 127: ...ake Up 1 EZ Sleep Wake Up C1 01 90 0 s 60 0 s C1 02 90 0 s 60 0 s C2 01 5 00 s 5 00 s C2 02 5 00 s 5 00 s C2 03 5 00 s 5 00 s C2 04 5 00 s 5 00 s H3 10 B PID Feedback B PID Feedback L2 01 2 CPU Active...

Page 128: ...set to b5 14 a FBL Feedback Low alarm will be displayed and a digital output set for PID feedback low H2 oo 3E will be triggered If the PID feedback value exceeds the level set to b5 36 for longer th...

Page 129: ...15 25 0 Setting 0 WC Inch of Water Setting 1 PSI Pounds per Square Inch Setting 2 GPM Gallons per Minute Setting 3 F Degrees Fahrenheit Setting 4 CFM Cubic Feet per Minute Setting 5 CMH Cubic Meters p...

Page 130: ...ernally limited to b5 38 Changing b5 20 b5 38 and b5 39 will not automatically update the value of this parameter n d2 01 Frequency Reference Upper Limit Sets the maximum frequency reference as a perc...

Page 131: ...2 29 setting If an input terminal set for KEB 1 H1 oo 65 66 is triggered while the drive is decelerating it will accelerate back up to speed when the input is released Notes on Settings 1 through 5 Uv...

Page 132: ...by o1 07 and o1 08 n o1 07 Second Line User Monitor Selection Selects the monitor that is shown in the second line Effective only when o1 06 is set to 1 Enter the last three digits of the monitor para...

Page 133: ...also serve as a reference guide for tuning the drive during a trial run 5 1 DRIVE ALARMS FAULTS AND ERRORS 134 5 2 FAULT DETECTION 135 5 3 ALARM DETECTION 146 5 4 OPERATOR PROGRAMMING ERRORS 149 5 5...

Page 134: ...the alarm occurs A multi function contact output set to be tripped by a minor fault H2 oo 10 closes If the output is set to be tripped by an alarm the contact will not close The digital operator displ...

Page 135: ...d the shield on the controller side or the drive input power side Separate all communication wiring from drive power lines Install an EMC noise filter to the drive power supply input The option card i...

Page 136: ...r Cause Possible Solution Hardware is damaged If the problem continues replace the control board or the entire drive Contact Yaskawa or a Yaskawa representative for instructions on replacing the contr...

Page 137: ...or insulation is damaged Check the insulation resistance of the motor Replace the motor A damaged motor cable is creating a short circuit Check the motor cable Remove the short circuit and reapply pow...

Page 138: ...the motor insulation is damaged Check the insulation resistance Replace the motor One of the motor cables has shorted out or there is a grounding problem Check the motor cables Remove the short circui...

Page 139: ...Option Card Fault at Option Port CN5 B Option compatibility error oFb01 Option Card Fault at Option Port CN5 B Option not properly connected oFb02 Option Card Fault at Option Port CN5 B Same type of o...

Page 140: ...s driven below the rated speed with a high load Reduce the load Increase the speed If the motor is supposed to operate at low speeds either increase the motor capacity or use a motor specifically desi...

Page 141: ...n time b3 02 After Auto Tuning set b3 24 to 1 to enable Speed Estimation Speed Search Output current fluctuation due to input phase loss Check the power supply for phase loss Digital Operator Display...

Page 142: ...uit lines and ground wiring Load inertia is set incorrectly Check the load inertia settings when using KEB overvoltage suppression or Stall Prevention during deceleration Adjust the load inertia ratio...

Page 143: ...tal Operator Display Fault Name TdE TdE Time Data Error Cause Possible Solution An error has occurred in the Real Clock Time function of the digital operator Replace the digital operator For instructi...

Page 144: ...s wired incorrectly Correct the wiring One of the drive input power wiring terminals is loose Ensure there are no loose terminals Apply the tightening torque specified in this manual to fasten the ter...

Page 145: ...presentative Digital Operator Display Fault Name Uv3 Undervoltage 3 Soft Charge Bypass Relay Fault The soft charge bypass relay failed 1 Uv4 Gate Drive Board Undervoltage Voltage drop in the gate driv...

Page 146: ...bUS Option Communication Error The connection was lost after initial communication was established Assign a Run command frequency reference to the option CALL Serial Communication Transmission Error C...

Page 147: ...e The main circuit and control circuit capacitors are nearing the end of their expected performance life Note An alarm output H2 oo 10 will only be triggered if H2 oo 2F LT 3 Soft Charge Bypass Relay...

Page 148: ...Test Mode Complete rUn Motor Switch during Run A command to switch motors was entered during run SE MEMOBUS Modbus Communication Test Mode Error Note This alarm will not trigger a multi function outp...

Page 149: ...ing Error Use U1 18 to find parameters set outside the range oPE03 Multi Function Input Selection Error A contradictory setting is assigned to multi function contact inputs H1 01 to H1 08 oPE04 Initia...

Page 150: ...ient detected only during Rotational Auto Tuning and displayed after Auto Tuning is complete Cause Possible Solutions Motor data entered during Auto Tuning was incorrect Make sure the data entered to...

Page 151: ...ns Auto Tuning canceled by pressing STOP button Auto Tuning did not complete properly Restart Auto Tuning Digital Operator Display Error Name Er 04 Line to Line Resistance Error Cause Possible Solutio...

Page 152: ...ssible Digital Operator Display Error Name Er 12 Current Detection Error Cause Possible Solutions One of the motor phases is missing U T1 V T2 W T3 Check motor wiring and correct any problems The curr...

Page 153: ...sk CoPy Writing Parameter Settings flashing CPyE Error Writing Data CSEr Copy Unit Error dFPS Drive Model Mismatch End Task Complete iFEr Communication Error ndAT Model Voltage Class Capacity Mismatch...

Page 154: ...the digital operator display has turned off ON OFF 2 1 Note If the Run command is present the drive will disregard any attempts to reset the fault Remove the Run command before attempting to clear a f...

Page 155: ...inspection and maintenance of the drive to ensure that it receives the proper care to maintain overall performance 6 1 INSPECTION 156 6 2 PERIODIC MAINTENANCE 159 6 3 DRIVE REPLACEMENT 161 6 YASKAWA E...

Page 156: ...ration in performance or product failure Copy this checklist and mark the Checked column after each inspection Table 6 1 General Recommended Daily Inspection Checklist Inspection Category Inspection P...

Page 157: ...ed or loose connections Tighten loose screws and replace damaged screws or terminals Relays and Contactors Inspect contactors and relays for excessive noise during operation Inspect coils for signs of...

Page 158: ...clean air duct as required Display Periodic Inspection Digital Operator Make sure data appears on the display properly Inspect for dust or other foreign material that may have collected on surrounding...

Page 159: ...perature Yearly average of 40 C IP00 Open Type enclosure Load factor 80 maximum Operation time 24 hours a day n Performance Life Monitors Maintenance Monitors The drive calculates the maintenance peri...

Page 160: ...f their designated life time Check the load carrier frequency and output frequency 2 TrPC The IGBTs have reached 90 of their designated life time Contact a Yaskawa representative or the nearest Yaskaw...

Page 161: ...he drive circuitry The following procedure explains how to replace a drive This section provides instructions for drive replacement only To install option boards or other types of options refer to the...

Page 162: ...r the new drive the same way the options were connected in the old drive Connect option boards to the same option ports in the new drive that were used in the old drive 3 Replace the terminal cover 4...

Page 163: ...ipheral Devices Options This chapter explains option installation procedures for the drive 7 1 OPTION CARD INSTALLATION 164 7 YASKAWA ELECTRIC TOEP YAIP1U 01B YASKAWA AC Drive P1000 Quick Start Guide...

Page 164: ...of Options Possible SI B3 SI EN3 SI EM3 SI N3 SI P3 SI T3 SI C3 SI S3 CN5 A 1 AO A3 CN5 A B C 1 Figure 7 1 shows an exploded view of the drive with the option and related components for reference I J...

Page 165: ...r LED will extinguish when the DC bus voltage is below 50 Vdc To prevent electric shock wait at least five minutes after all indicators are off and measure the DC bus voltage level to confirm safe lev...

Page 166: ...cut out the perforated openings on the left side of the drive front cover Sharp edges along the cut out should be smoothed down with a file or sand paper to prevent any damage to the wires When insta...

Page 167: ...iring the option so that the front covers will easily fit back onto the drive Make sure no cables are pinched between the front covers and the drive when replacing the covers 7 1 Option Card Installat...

Page 168: ...7 1 Option Card Installation This Page Intentionally Blank 168 YASKAWA ELECTRIC TOEP YAIP1U 01B YASKAWA AC Drive P1000 Quick Start Guide...

Page 169: ...Specifications A 1 POWER RATINGS 170 A 2 DRIVE SPECIFICATIONS 179 A 3 DRIVE WATT LOSS DATA 181 Appendix A YASKAWA ELECTRIC TOEP YAIP1U 01B YASKAWA AC Drive P1000 Quick Start Guide 169...

Page 170: ...Carrier Frequency User adjustable between 1 and 15 kHz 5 Maximum Output Voltage V Three phase 200 to 240 V proportional to input voltage Maximum Output Frequency Hz 400 Hz user set 1 The motor capaci...

Page 171: ...tween 1 and 15 kHz 5 User adjustable between 1 and 10 kHz 5 Maximum Output Voltage V Three phase 200 to 240 V proportional to input voltage Maximum Output Frequency Hz 400 Hz user set 1 The motor capa...

Page 172: ...10 kHz 5 Maximum Output Voltage V Three phase 200 to 240 V proportional to input voltage Maximum Output Frequency Hz 400 Hz user set 1 The motor capacity HP refers to a NEC rated 4 pole motor The rat...

Page 173: ...Carrier Frequency User adjustable between 1 and 15 kHz 5 Maximum Output Voltage V Three phase 380 to 480 V proportional to input voltage Maximum Output Frequency Hz 400 Hz user adjustable 1 The motor...

Page 174: ...adjustable between 1 and 15 kHz 5 User adjustable between 1 and 10 kHz 5 Maximum Output Voltage V Three phase 380 to 480 V proportional to input voltage Maximum Output Frequency Hz 400 Hz user adjusta...

Page 175: ...ay be required for applications that start and stop frequently Carrier Frequency User adjustable between 1 and 10 kHz User adjustable between 1 and 5 kHz Maximum Output Voltage V Three phase 380 to 48...

Page 176: ...Frequency User adjustable between 1 and 15 kHz 4 User adjustable between 1 and 10 kHz 4 Maximum Output Voltage V Three phase 500 to 600 V proportional to input voltage Maximum Output Frequency Hz 400...

Page 177: ...User adjustable between 1 and 8 kHz 4 Maximum Output Voltage V Three phase 500 to 600 V proportional to input voltage Maximum Output Frequency Hz 400 Hz user set 1 The motor capacity HP refers to a NE...

Page 178: ...e between 1 and 3 kHz 4 Maximum Output Voltage V Three phase 500 to 600 V proportional to input voltage Maximum Output Frequency Hz 400 Hz user set 1 The motor capacity HP refers to a NEC rated 4 pole...

Page 179: ...o 4A0072 and 5A0003 to 5A0052 have a built in braking transistor V f Characteristics User selected programs and V f preset patterns possible Main Control Functions Droop Control Feed Forward Control M...

Page 180: ...ings Specifications may vary with different motors and with changing motor temperature Contact Yaskawa for consultation 2 Disable Stall Prevention during deceleration L3 04 0 when using a regenerative...

Page 181: ...954 3626 1 Value assumes the carrier frequency is 2 kHz C6 02 1 7 8 9 or A Table A 11 Watt Loss 400 V Class Three Phase Models Drive Model Normal Duty Rated Amps A 1 Heatsink Loss W Interior Unit Los...

Page 182: ...2 7 21 5 23 3 44 8 5A0004 3 9 27 5 33 6 61 1 5A0006 6 1 28 1 43 7 71 8 5A0009 9 0 43 4 68 9 112 3 5A0011 11 56 1 88 0 144 0 5A0017 17 96 6 146 7 243 2 5A0022 22 99 4 178 3 277 7 5A0027 27 132 1 227 2...

Page 183: ...3 C TUNING 191 B 4 D REFERENCES 193 B 5 E MOTOR PARAMETERS 196 B 6 H PARAMETERS MULTI FUNCTION TERMINALS 202 B 7 L PROTECTION FUNCTION 211 B 8 N SPECIAL ADJUSTMENT 217 B 9 O OPERATOR RELATED SETTINGS...

Page 184: ...01 through A1 03 and A2 01 through A2 33 cannot be changed Default 0000 Min 0000 Max 9999 A1 05 105 Password Setting When the value set into A1 04 does not match the value set into A1 05 parameters A...

Page 185: ...the drive output waits until this delay time has passed before starting Default 0 s Min 0 Max 600 b1 14 1C3 Phase Order Selection 0 Standard 1 Switch phase order reverses the direction of the motor De...

Page 186: ...ch Detection Compensation Gain Sets the gain which is applied to the speed detected by Speed Estimation Speed Search before the motor is reaccelerated Increase this setting if ov occurs when performin...

Page 187: ...ontroller output Set as a percentage of the maximum output frequency Default 0 0 Min 100 0 Max 100 0 b5 08 1AC PID Primary Delay Time Constant Sets a low pass filter time constant on the output of the...

Page 188: ...mits the PID control input deviation signal as a percentage of the maximum output frequency Acts as a bipolar limit Default 1000 0 Min 0 0 Max 1000 0 b5 36 1A1 PID Feedback High Detection Level Sets t...

Page 189: ...r second 8 Bar Bar 9 Pa Pascal 10 C Degrees Celsius 11 Mtr Meters 12 Ft Feet 13 LPM Liters per minute 14 CMM Cubic meters per minute 15 Hg Inches of Mercury 25 None Default 0 Range 0 to 15 25 b5 47 17...

Page 190: ...te the value of this parameter u b6 Dwell Function No Addr Hex Name Description Values Page b6 01 1B6 Dwell Reference at Start Parameters b6 01 and b6 02 set the frequency to hold and the time to main...

Page 191: ...1 s 0 00 to 600 00 s 1 0 1 s 0 0 to 6000 0 s Default 1 Range 0 1 C1 11 20A Accel Decel Time Switching Frequency Sets the frequency to switch between accel decel time settings Default 0 0 Hz Min 0 0 Ma...

Page 192: ...x 2 50 C4 02 216 Torque Compensation Primary Delay Time 1 Sets the torque compensation filter time Default 200 ms Min 0 ms Max 60000 ms u C6 Carrier Frequency No Addr Hex Name Description Values Page...

Page 193: ...requency reference for the drive Setting units are determined by parameter o1 03 Default 0 00 Hz Min 0 00 Max 400 00 1 100 d1 09 288 Frequency Reference 9 Sets the frequency reference for the drive Se...

Page 194: ...y avoiding continuous operation in predefined frequency ranges The drive accelerates and decelerates the motor through the prohibited frequency ranges Setting 0 0 disables this function Parameters mus...

Page 195: ...s the upper limit for the bias and the value that can be saved in d4 06 Set as a percentage of the maximum output frequency Default 1 0 Min 0 0 Max 100 0 d4 09 2B0 Frequency Reference Bias Lower Limit...

Page 196: ...hat the four frequencies are set according to these rules E1 09 E1 07 E1 06 E1 11 E1 04 Output Voltage V Frequency Hz E1 05 E1 12 E1 13 E1 08 E1 10 E1 09 E1 07 E1 06 E1 11 E1 04 Default 60 0 Hz Min 40...

Page 197: ...the parameter value depends on the drive model 1 This value has two decimal places 0 01 A if the drive is set for a maximum applicable motor capacity up to and including 11 kW and one decimal place 0...

Page 198: ...F7 1 Multi step reference enabled same as V7 Default 0 Range 0 1 F6 08 36A 1 Reset Communication Parameters 0 Communication related parameters F6 oo are not reset when the drive is initialized using...

Page 199: ...5 F6 54 3C5 DeviceNet Idle Mode Fault Detection 0 Enabled 1 Disabled no fault detection Default 0 Range 0 1 F6 55 3C6 DeviceNet Baud Rate Monitor Verifies the baud rate running on the network 0 125 kb...

Page 200: ...ateway Address 4 Sets the fourth most significant octet of network Gateway address Default 1 Range 0 to 255 F7 13 3F1 Address Mode at Startup Select the option address setting method 0 Static 3 1 BOOT...

Page 201: ...ster Default 0 F7 33 to F7 42 375 to 37E Dynamic Input Assembly Parameters Parameters used in Input Assembly 166 Each parameter contains a MEMOBUS Modbus address The value sent for Input Assembly 166...

Page 202: ...ion Digital Input Terminal S8 Function Selection Assigns a function to the multi function digital inputs Refer to pages 202 to 204 for descriptions of setting values Note Set unused terminals to F Def...

Page 203: ...output H2 oo 12 19 PID disable Open PID control enabled Closed PID control disabled 1A Accel decel time selection 2 Used in conjunction with an input terminal set for Accel decel time selection 1 H1 o...

Page 204: ...the drive will stop as specified by b1 03 Closed Ready for operation 75 Up 2 command Used to control the bias added to the frequency reference by the Up Down 2 function The Up 2 and Down 2 commands mu...

Page 205: ...eference 1 or 2 supplies the frequency reference set in b1 01 or b1 15 Closed Digital operator supplies the frequency reference A Run command source Open External Reference 1 or 2 supplies the Run com...

Page 206: ...lt rr Closed The built in dynamic braking transistor failed 4F Braking resistor overheat oH Closed The dynamic braking resistor has overheated 50 Waiting to Run Closed b1 11 Timer is active 51 Sequenc...

Page 207: ...9 112 H3 13 41B Analog Input Filter Time Constant Sets a primary delay filter time constant for terminals A1 A2 and A3 Used for noise filtering Default 0 03 s Min 0 00 Max 2 00 H3 14 41C Analog Input...

Page 208: ...in Uo oo For example enter 103 for U1 03 Default 102 Range 000 to 999 112 H4 02 41E Multi Function Analog Output Terminal FM Gain Sets the signal level at terminal FM that is equal to 100 of the sele...

Page 209: ...s error Adjustment may be needed when networking several drives Default 2 0 s Min 0 0 Max 10 0 H5 10 436 Unit Selection for MEMOBUS Modbus Register 0025H 0 0 1 V units 1 1 V units Default 0 Range 0 1...

Page 210: ...Default 0 10 s Min 0 00 Max 2 00 H6 08 43F Pulse Train Input Minimum Frequency Sets the minimum frequency for the pulse train input to be detected Enabled when H6 01 0 1 or 2 Default 0 5 Hz Min 0 1 Ma...

Page 211: ...ing the deceleration time in C1 09 Default 1 Range 0 to 2 L1 05 484 Motor Temperature Input Filter Time PTC input Adjusts the filter for the motor temperature analog input H3 02 H3 10 or H3 06 E Defau...

Page 212: ...cel Decel Time Setting Units When C1 10 0 units of 0 01 seconds the setting range becomes 0 00 to 600 00 seconds 5 Values shown are specific to 200 V class drives Double the value for 400 V class driv...

Page 213: ...3 06 Default 0 Range 0 1 L3 24 46E Motor Acceleration Time for Inertia Calculations Sets the time needed to accelerate the uncoupled motor at rated torque from stop to the maximum frequency Default 4...

Page 214: ...ously attempt to restart while incrementing restart counter only at a successful restart same as F7 and G7 1 Attempt to restart with the interval time set in L5 04 and increment the restart counter wi...

Page 215: ...m Level An overheat alarm occurs when heatsink temperature exceeds the L8 02 level Default 1 Min 50 C Max 150 C L8 03 4AF Overheat Pre Alarm Operation Selection 0 Ramp to stop A fault is triggered 1 C...

Page 216: ...00 s disables the carrier frequency reduction time Default 0 5 s Min 0 00 Max 2 00 L8 41 4F2 High Current Alarm Selection 0 Disabled 1 Enabled An alarm is triggered at output currents above 150 of dri...

Page 217: ...mit Sets the current limit during HSB as a percentage of the motor rated current Default 1 Min 100 Max 200 n3 03 58A High Slip Braking Dwell Time at Stop Sets the time the drive will run with minimum...

Page 218: ...Monitor Selection Selects the monitor that is shown in the third line Enter the last three digits of the monitor parameter number to be displayed Uo oo For example set 403 to display monitor paramete...

Page 219: ...perating if the digital operator is disconnected 1 An oPr fault is triggered and the motor coasts to stop Default 1 Range 0 1 o2 07 527 Motor Direction at Power Up when Using Operator This parameter r...

Page 220: ...n 0 U2 oo and U3 oo monitor data is not reset when the drive is initialized A1 03 1 U2 oo and U3 oo monitor data is reset when the drive is initialized A1 03 Default 0 Range 0 1 o4 12 512 kWh Monitor...

Page 221: ...impact load is added Default 0 050 s Min 0 000 Max 1 000 S1 07 323C Output Phase Loss Level for Dynamic Noise Control Reduces the output phase loss level when Dynamic Noise Control is active Default...

Page 222: ...Sequence Timer 3 Start Time Sets the start time for timer 3 The value must be set less than or equal to S2 12 Default 00 00 Min 00 00 Max 24 00 1 S2 12 3211 Sequence Timer 3 Stop Time Sets the stop t...

Page 223: ...Operator d1 02 2 Operator d1 03 3 Operator d1 04 4 Terminals 5 Serial communication 6 Option card 7 Pulse input Default 0 Range 0 to 7 1 Setting the sequence timer start time to a higher value than th...

Page 224: ...0 S3 10 3223 Secondary PI Output Lower Limit Sets the minimum output possible from the secondary PI controller Default 0 00 Min 100 00 Max 100 00 S3 11 3224 Secondary PI Output Level Selection Sets th...

Page 225: ...rride Reference Selection Selects the emergency override speed source 0 Use S6 01 Reference 1 Use Frequency Reference Default 0 Range 0 1 S6 07 323C Output Phase Loss Level for Dynamic Noise Control R...

Page 226: ...current T1 05 705 Motor Base Frequency Sets the rated frequency of the motor as specified on the motor nameplate Default 60 0 Hz Min 0 0 Max 400 0 T1 06 706 Number of Motor Poles Sets the number of mo...

Page 227: ...Vdc U1 08 47 Output Power Displays the output power this value is calculated internally 10 V Drive capacity motor capacity kW 4 U1 10 49 Input Terminal Status Displays the input terminal status U1 10...

Page 228: ...1 1 1 1 0 No signal output available U1 24 7D Input Pulse Monitor Displays the frequency to pulse train input terminal RP Determined by H6 02 1 Hz U1 25 4D Software Number Flash FLASH ID No signal out...

Page 229: ...the previous fault Displays the same status displayed in U1 11 No signal output available U2 13 8C Drive Operation Status at Previous Fault Displays the operation status of the drive at the previous f...

Page 230: ...Recent Fault Displays the year when the most third recent fault occurred No signal output available U3 28 3012 Date Month and Day at 3rd Most Recent Fault Displays the date and day when the third most...

Page 231: ...le 1 h U4 02 75 Number of Run Commands Displays the number of times the Run command is entered Reset the number of Run commands using parameter o4 13 This value will reset to 0 and start counting agai...

Page 232: ...limit status data 00 No limit status 01 Run command was left on when stopped in the PRG mode 02 Run command was left on when switching from LOCAL to REMOTE operation 03 Waiting for soft charge bypass...

Page 233: ...I2 Feedback Displays the secondary PI feedback value Dependent upon S3 02 3 U5 19 870 PI2 Input Displays the secondary PI input deviation between PI target and feedback Dependent upon S3 02 3 U5 20 87...

Page 234: ...B 12 U Monitors This Page Intentionally Blank 234 YASKAWA ELECTRIC TOEP YAIP1U 01B YASKAWA AC Drive P1000 Quick Start Guide...

Page 235: ...appendix explains the guidelines and criteria for maintaining CE and UL standards C 1 EUROPEAN STANDARDS 236 C 2 UL AND CSA STANDARDS 244 Appendix C YASKAWA ELECTRIC TOEP YAIP1U 01B YASKAWA AC Drive P...

Page 236: ...h the Low Voltage Directive be sure to meet the following conditions when combining this drive with other devices n Area of Use Do not use drives in areas with pollution higher than severity 2 and ove...

Page 237: ...0072 FWH 250A 250 4A0088 FWH 250A 250 4A0103 FWH 250A 250 4A0139 FWH 350A 350 4A0165 FWH 400A 400 4A0208 FWH 500A 500 4A0250 FWH 600A 600 4A0296 FWH 700A 700 4A0362 FWH 800A 800 4A0414 FWH 800A 800 4A...

Page 238: ...continued compliance with guidelines Refer to EMC Filters on page 241 for EMC filter selection Installation Method Verify the following installation conditions to ensure that other devices and machin...

Page 239: ...conductor with a cross section of at least 10 mm2 Cu or 16 mm2 Al must be used Failure to comply may result in death or serious injury C B A A Braided shield cable B Metal panel C Cable clamp conduct...

Page 240: ...sure panel E Drive F Motor cable braided shield cable max 10 m G Motor H Cable shield ground I Cable clamp J Ground plate scrape off any visible paint K EMC noise filter Figure C 4 EMC Filter and Driv...

Page 241: ...9 6 2A0211 2A0250 FS5972 410 99 410 23 1 10 2 4 5 15 2 9 3 4 7 3 2A0312 2A0360 FS5972 600 99 600 24 3 10 2 5 3 15 2 9 3 4 7 2A0415 Three Phase 400 V Class 4A0002 FS5972 10 07 10 2 7 5 6 1 8 13 0 4 5 1...

Page 242: ...Connect two of the same filters in parallel H X H D W Y Figure 1 Figure 3 Figure 2 W Y X X X H W D Y D Figure C 5 EMC Filter Dimensions n DC Link Chokes for IEC EN 61000 3 2 Compliance Table C 3 DC Li...

Page 243: ...hree Phase Units 4A0002 UZDA B 3 2 A 28 mH 4A0004 Note DC link chokes are not required for other models to comply with EMC C 1 European Standards YASKAWA ELECTRIC TOEP YAIP1U 01B YASKAWA AC Drive P100...

Page 244: ...als are specifically required when wiring the drive main circuit terminals on models 2A0110 to 2A0415 4A0058 to 4A1200 and 5A0041 to 5A0242 Use only the tools recommended by the terminal manufacturer...

Page 245: ...060 100 051 266 2 0 2P 70 10 TD 323 TD 312 TP 080 100 054 036 2A0250 3 0 2P M12 80 L12 YF 1 YET 300 1 TD 323 TD 312 TP 080 100 051 558 4 0 2P 100 L12 TD 324 TD 312 TP 100 100 051 560 250 2P 150 L12 TD...

Page 246: ...AD 952 TP 014 100 051 261 4 R22 6 AD 953 TP 022 100 051 262 4A0058 6 M8 R14 8 YA 5 AD 952 TP 014 100 054 035 4 R22 8 AD 953 TP 022 100 051 263 4A0072 4 M8 R22 8 YA 5 AD 953 TP 022 100 051 263 3 R38 8...

Page 247: ...4A0362 3 0 2P M12 80 L12 YF 1 YET 300 1 TD 323 TD 312 TP 080 100 051 558 4 0 2P 100 L12 TD 324 TD 312 TP 100 100 051 560 250 2P 150 L12 TD 325 TD 313 TP 150 100 051 562 300 2P 350 2P 180 L12 TD 327 T...

Page 248: ...ed in Table C 5 Table C 5 Factory Recommended AC Drive Branch Circuit Protection Normal Duty Drive Model Nominal Output Power HP AC Drive Input Amps MCCB Rating Amps 1 Time Delay Fuse Rating Amps 2 No...

Page 249: ...009 7 5 12 20 20 35 FWP 60B 60 5A0011 10 16 30 25 45 FWP 70B 70 5A0017 15 23 40 40 60 FWP 100B 100 5A0022 20 31 60 50 90 FWP 100B 100 5A0027 25 38 75 60 110 FWP 125A 125 5A0032 30 45 75 75 125 FWP 125...

Page 250: ...ry Recommended Branch Circuit Protection on page 236 u CSA Standards Compliance Figure C 7 CSA Mark n CSA for Industrial Control Equipment The drive is CSA certified as Industrial Control Equipment Cl...

Page 251: ...for a standard self cooled motor with limited cooling capabilities when running below the rated speed The motor overload detection level oL1 is automatically reduced when running below the motor rated...

Page 252: ...gure 2A0110 100 061 273 Figure C 9 2A0138 100 061 274 2A0169 100 061 275 2A0211 2A0250 100 061 277 2A0312 2A0360 100 061 278 2A0415 4A0058 100 061 273 4A0072 100 061 274 4A0088 100 061 276 4A0103 4A01...

Page 253: ...igure C 9 Capacitor Cover A B C D E A Drive outside panel B Opening to capacitors C Drive inside panel D Installation screws E Capacitor cover Figure C 10 Capacitor Cover Models 4A0930 4A1200 C 2 UL a...

Page 254: ...f Publication Revision Number Section Revised Content January 2014 2 All Addition Larger drive capacities added along with corresponding data Three Phase 400V 4A0930 and 4A1200 August 2012 1 Appendix...

Page 255: ......

Page 256: ...3 http www yaskawa com sg YASKAWA ELECTRIC SHANGHAI CO LTD 12F Carlton Bld No 21 HuangHe Road HuangPu District Shanghai 200003 China Phone 86 21 5385 2200 Fax 86 21 5385 3299 http www yaskawa com cn Y...

Reviews: