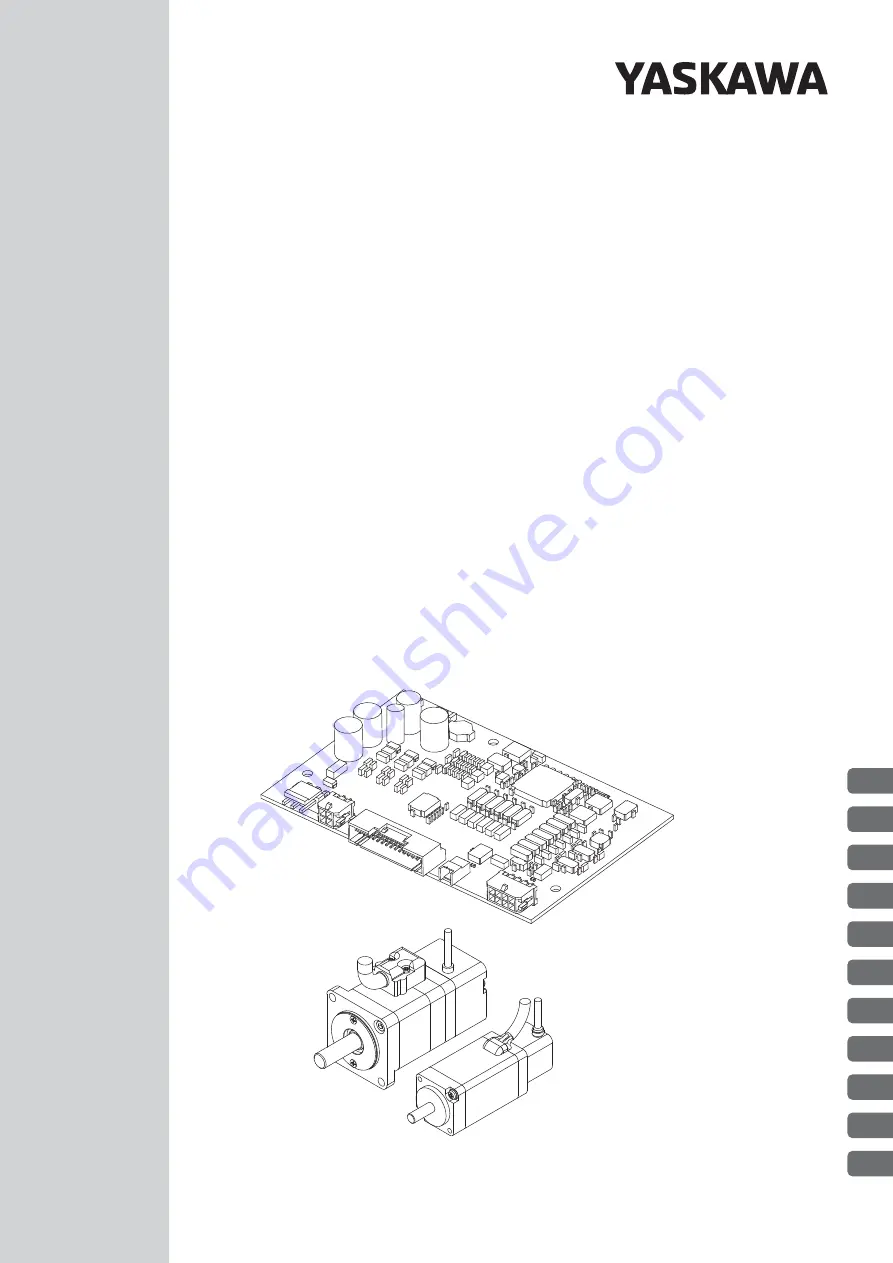
background image

SGPSS SERVOPACK
SGMSL Servomotor

DC Power Supply Input and Contact Commands

-S Series

AC Servo Drives

PRODUCT MANUAL

MANUAL NO.   SIEP S800001 13C

1

2

3

4

5

6

7

8

9

10

11

Basic Information

Selection

Installation

Wiring and Connections

Setup

Trial Operation

Operation and Functions

Tuning

Monitoring

Maintenance

Parameter List

Summary of Contents for E-S Series

Page 1: ...ontact Commands S Series AC Servo Drives PRODUCT MANUAL MANUAL NO SIEP S800001 13C 1 2 3 4 5 6 7 8 9 10 11 Basic Information Selection Installation Wiring and Connections Setup Trial Operation Operation and Functions Tuning Monitoring Maintenance Parameter List ...

Page 2: ... liability is assumed with respect to the use of the informa tion contained herein Moreover because Yaskawa is constantly striving to improve its high quality products the information contained in this manual is sub ject to change without notice Every precaution has been taken in the preparation of this manual Nevertheless Yaskawa assumes no responsibility for errors or omissions Neither is any li...

Page 3: ...imensional draw ings and connection examples 3 Installation Provides information on installing SERVOPACKs and Servomotors in the required locations 4 Wiring and Connections Provides information on wiring and connecting SERVOPACKs to power supplies and peripheral devices 5 Setup Describes the functions that must be set before you start operation It also describes the setting methods 6 Trial Operati...

Page 4: ...owing pages Refer to these documents as required SERVOPACKs and Servomotors Servo Drives Σ S Servo Drive DC Power Supply Input and Pulse Train References Product Manual Σ S SERVOPACK Safety Precautions Σ S Servomotor Safety Precautions Σ S Servo Drive DC Power Supply Input and Contact Commands Product Manual this manual Engineering Tool SigmaWin Online Manual Σ S Series Catalog Servo Drives Manual...

Page 5: ...o Drive Pulse Train Refer ences Product Manual AC Servo Drive Σ S Series Product Manual DC Power Supply Input and Pulse Train References SIEP S800001 49 Engineering Tool Operating Manual AC Servo Drives Engineering Tool SigmaWin Online Manual Σ S Component SIEP S800001 06 Provides detailed operating proce dures for the SigmaWin Engineer ing Tool for a Σ S Series Servo System Σ S SERVOPACK Safety P...

Page 6: ...rvo Drive The combination of a Servomotor and SERVOPACK Servo System A servo control system that includes the combination of a Servo Drive with a host con troller and peripheral devices SERVO ON Supplying power to the motor SERVO OFF Not supplying power to the motor SigmaWin The Engineering Tool for setting up and tuning Servo Drives or a computer in which the Engineering Tool is installed ...

Page 7: ...ipment This is when any change made to the parameter will become effective This is the parameter classification This is the minimum unit setting increment that you can set for the parameter This column explains the selections for the function The notation n indicates a parameter for selecting functions Each indicates the setting for one digit The notation shown here means that the third digit from...

Page 8: ...l Aids The following aids are used to indicate certain types of information for easier reference Indicates precautions or restrictions that must be observed Also indicates alarm displays and other precautions that will not result in machine damage Indicates definitions of difficult terms or terms that have not been previously explained in this manual Indicates operating or setting examples Indicat...

Page 9: ...ation marked as shown below is important for safety Always read this information and heed the precau tions that are provided DANGER Indicates precautions that if not heeded are likely to result in loss of life serious injury or fire WARNING Indicates precautions that if not heeded could result in loss of life serious injury or fire CAUTION Indicates precautions that if not heeded could result in r...

Page 10: ...n after the power is turned OFF Implement safety measures such as installing covers so that hands and parts such as cables do not come into contact with hot components There is a risk of burn injury For a 24 VDC power supply use a power supply device with double insulation or reinforced insulation Do not damage pull on apply excessive force to place heavy objects on or pinch cables There is a risk...

Page 11: ...from the package take adequate measures against static electricity There is a risk of electric shock or failure When you handle a SERVOPACK or Servomotor be careful of sharp parts such as the corners There is a risk of injury Do not place an excessive load on the product during transportation Follow all instructions on the packages There is a risk of injury or damage NOTICE Discharge any static el...

Page 12: ...VOPACK There is a risk of equipment damage Do not install the product in any of the following locations Locations that are subject to direct sunlight Locations that are subject to ambient temperatures that exceed product specifications Locations that are subject to relative humidities that exceed product specifications Locations that are subject to condensation as the result of extreme changes in ...

Page 13: ...re is a risk of failure or malfunction Use the tools recommended by the connector manufacturer if you make any cables yourself Insufficient crimping may cause wires and connectors to generate heat due to faulty contact possi bly resulting in fire Turn ON the power supply to the SERVOPACK only after all wiring has been completed Install molded case circuit breakers and other safety measures to prov...

Page 14: ...r example the E STP signal is set in the default settings to operate on the safe side if a signal line breaks Do not change the polarity of this type of signal Always change to the SERVO OFF state before you turn OFF the power supply If you turn OFF the power supply without changing to the SERVO OFF state during operation the Servomotor will coast to a stop NOTICE When you adjust the gain during s...

Page 15: ... that the power supply can be shut OFF If a magnetic contactor or other shutoff device is not connected when the SERVOPACK fails a large current may flow possibly resulting in fire If an alarm occurs shut OFF the power supply If a magnetic contactor or other shutoff device is not connected when the SERVOPACK fails a large current may flow possibly resulting in fire Install a ground fault detector ...

Page 16: ...g the appropriate product for the intended application The use thereof does not guarantee that there are no infringements of intellectual property rights or other proprietary rights of Yaskawa or third parties nor does it construe a license Yaskawa shall not be responsible for any damage arising from infringements of intellectual prop erty rights or other proprietary rights of third parties as a r...

Page 17: ...ons and operate the Yaskawa product correctly to prevent accidental harm to third parties Specifications Change The names specifications appearance and accessories of products in product catalogs and manuals may be changed at any time based on improvements and other reasons The next edi tions of the revised catalogs or manuals will be published with updated code numbers Consult with your Yaskawa r...

Page 18: ...table Product Model European Directive Harmonized Standards SERVOPACKs SGPSS 3R1C EMC Directive 2014 30 EC EN 55011 group 1 class A EN 61000 6 2 EN 61000 6 4 EN 61800 3 Category C2 Second Environment Low Voltage Directive 2014 35 EC EN 61800 5 1 RoHS Directive 2011 65 EC EN 50581 Rotary Servomotors SGMSL EMC Directive 2004 108 EC EN 55011 group 1 class A EN 61000 6 2 EN 61000 6 4 EN 61800 3 Catego...

Page 19: ...OPACKs and Servomotors 1 6 Selection 2 2 1 System Configuration Example 2 3 2 2 Ratings and Specifications 2 4 2 2 1 Servomotor Specifications 2 4 2 2 2 Servomotor Ratings 2 5 2 2 3 Torque Motor Speed Characteristics 2 5 2 2 4 Servomotor Overload Protection Characteristics 2 6 2 2 5 Servomotor Heat Dissipation Conditions 2 6 2 2 6 SERVOPACK Ratings 2 7 2 2 7 SERVOPACK Specifications 2 7 2 3 Extern...

Page 20: ...ing a Coupling 3 4 3 2 2 Using a Belt 3 5 3 3 Oil and Water Countermeasures 3 6 3 4 Servomotor Temperature Increase 3 7 3 5 SERVOPACK Installation 3 8 3 5 1 Installation Precautions 3 8 3 5 2 Mounting and Securing SERVOPACKs 3 10 3 5 3 Installation Orientation 3 10 Wiring and Connections 4 4 1 Wiring Precautions 4 2 4 1 1 General Precautions 4 2 4 1 2 Countermeasures against Noise 4 4 4 1 3 Ground...

Page 21: ...als to Pins and Parameter Settings 5 20 5 3 5 Setting I O Signal Status with Parameters 5 22 5 4 Settings That Must Be Adjusted to the System 5 23 5 4 1 Motor Direction Setting 5 23 5 4 2 Electronic Gear Settings 5 23 5 4 3 Torque Limit Selection 5 25 5 4 4 Movement Method and Coordinate Settings 5 27 5 4 5 Motor Overload Detection Level 5 28 5 4 6 Software Reset 5 30 5 4 7 Adjusting the Motor Cur...

Page 22: ...3 Setting the Jog Speeds 7 43 7 5 ZONE Outputs 7 45 7 5 1 ZONE Table and ZONE Signals 7 45 7 5 2 SigmaWin Procedures 7 47 7 5 3 ZONE Output Application Example 7 48 Tuning 8 8 1 Overview and Flow of Tuning 8 3 8 1 1 Tuning Function 8 3 8 2 Monitoring Methods 8 4 8 3 Precautions to Ensure Safe Tuning 8 5 8 3 1 Torque Limit Settings 8 5 8 3 2 Setting the Position Deviation Overflow Alarm Level 8 5 8...

Page 23: ...stem Monitor 9 3 9 2 2 Monitoring Status and Operations 9 3 9 2 3 I O Signal Monitor 9 5 9 3 Monitoring Machine Operation Status and Signal Waveforms 9 6 9 3 1 Items That You Can Monitor 9 6 9 3 2 Using the SigmaWin 9 6 Maintenance 10 10 1 Alarm and Warning Displays 10 2 10 1 1 Confirming Alarms and Warnings 10 2 10 1 2 List of Alarms 10 3 10 1 3 Troubleshooting Alarms 10 5 10 1 4 List of Warnings...

Page 24: ...xxiv Parameter List 11 11 1 List of Parameters 11 2 11 1 1 Interpreting the Parameter Lists 11 2 11 1 2 List of Parameters 11 2 11 2 Parameter Recording Table 11 28 Index Revision History ...

Page 25: ...e 1 3 1 2 1 Servomotor Nameplate 1 3 1 2 2 SERVOPACK Nameplate 1 3 1 3 Part Names 1 4 1 3 1 Servomotor Part Names 1 4 1 3 2 SERVOPACK Part Names 1 4 1 3 3 Status Indicators 1 5 1 4 Model Designations 1 6 1 4 1 Interpreting Servomotor Model Numbers 1 6 1 4 2 Interpreting SERVOPACK Model Numbers 1 6 1 4 3 Combinations of SERVOPACKs and Servomotors 1 6 Basic Information 1 ...

Page 26: ...tions to match workpiece size This allows you to easily handle different types of workpieces Zone Outputs Workpieces are detected in realtime when they reach a specified zone and a digital signal is output With pneumatic equipment there is no way to tell when the workpiece has reached the target zone Waiting time becomes necessary to allow for operating time differences that result from changes in...

Page 27: ...AC SERVO MOTOR S e r i e s Ph 3 24 V 30 W 2 9 A 3000 6000 m i n 1 S N O N S G M S L A 3 C K A 2 1 MADE IN JAPAN Servomotor model Power supply voltage rated output and rated current Rated motor speed maximum motor speed Number of phases Order number Serial number SERVOPACK SGPSS 3R1CH1A MADE IN JAPAN D O N S N IN DC 24V 3 3A OUT 3PH 0 24Vdc 3 1Aac 0 300Hz 0 05kW 㸨㸨㸨㸨㸨㸨㸨㸨㸨㸨㸨㸨 㸨㸨㸨㸨㸨㸨㸨㸨㸨㸨㸨㸨㸨㸨㸨 Serial ...

Page 28: ...or the power supply input page 4 8 Servomotor Power Connec tor CN4 This is the connector for the Servomotor Power Cable page 4 12 I O Signal Connector CN1 This is the connector for the I O signals page 4 14 Computer Connector CN5 This is the connector for the computer Connect it to a computer to use the SigmaWin Engineering Tool page 4 20 Encoder Connector CN2 This is the connector for the encoder...

Page 29: ...m and warning numbers and ALM indicator flashing patterns Chapter 10 Maintenance Indicator Name Color Description Status Operating Status PWR Orange Power supply status Not lit The power supply is OFF Lit The power supply is ON ALM Red Servo error sta tus Not lit Normal status Flashing An alarm or warning occurred Lit A system error A b occurred or the initial ization is in progress RUN Green Serv...

Page 30: ...ts 3rd digit 5th digit 6th digit Σ S Series Servomotors 1st 2nd digits 3rd digit Code Specification Code Specification Code Specification Code Specification Design Revision Order 5th digit Shaft End 6th digit Options 7th digit C 24 VDC 3R1 50 W Contact commands rotary Pulse train references rotary H1 P1 SGPSS 3R1 C H1 A A Maximum Applicable Motor Capacity Voltage Interface Code Specification Desig...

Page 31: ...ction Characteristics 2 6 2 2 5 Servomotor Heat Dissipation Conditions 2 6 2 2 6 SERVOPACK Ratings 2 7 2 2 7 SERVOPACK Specifications 2 7 2 3 External Dimensions 2 10 2 3 1 Servomotor External Dimensions 2 10 2 3 2 SERVOPACK External Dimensions 2 11 2 4 Selecting the Servomotor Capacity 2 12 2 4 1 Example of Capacity Selection for Servomotors 2 12 2 5 Selecting Cables 2 14 2 5 1 Cable Selection Ta...

Page 32: ... Devices 2 20 2 6 1 Recommended Power Supply 2 20 2 6 2 Molded case Circuit Breakers and Fuse Capacity 2 20 2 6 3 SERVOPACK Power Supply and Servomotor Power Cable Wires 2 20 2 6 4 Magnetic Contactors 2 21 2 6 5 Noise Filters 2 22 2 7 SigmaWin AC Servo Drive Engineering Tool 2 23 ...

Page 33: ...gmaJunmaSize and Σ S Component Computer for SigmaWin Engineering Tool FG FG I O Signal Cable Computer Cable Host controller Noise Filter Molded case circuit breaker Power supply Single phase 100 VAC or 200 VAC R T Magnetic Contactor Servomotor CN1 CN2 CN3 CN4 CN5 Protects the power line Shuts OFF the circuit when an overcurrent is detected Eliminates external noise from the power line Changes betw...

Page 34: ...ion Permanent magnet Installation Method Flange mounted Drive Method Direct drive Rotation Direction Counterclockwise CCW for forward reference when viewed from the load side Vibration Class 1 V30 Environ mental Condi tions Surrounding Air Temperature 0 C to 40 C Surrounding Air Humidity 20 to 80 relative humidity with no condensation Installation Site Must be indoors and free of corrosive and exp...

Page 35: ...s within the allowable range for the rated torque the Servomotor can be used within the intermittent duty zone 4 The Servomotor Power Supply Cable may cause a voltage drop which may reduce the intermittent duty zone of the torque motor speed characteristics Voltage 24 VDC Model SGMSL A3C A5C Rated Output 1 W 30 50 Rated Torque 1 2 N m 0 0955 0 159 Instantaneous Maximum Torque 1 N m 0 286 0 477 Rat...

Page 36: ...Servomotor temperature may rise considerably because the surface for heat dissipation becomes smaller Refer to the following graphs for the relation between the heat sink size and derating rate Note The derating rates are applicable only when the average motor speed is less than or equal to the rated motor speed If the average motor speed exceeds the rated motor speed consult with your Yaskawa rep...

Page 37: ...tem Specification Drive Method PWM control sine wave current drive Feedback Magnetic encoder 10 bit incremental encoder Operating Conditions Surrounding Air Temperature 0 C to 40 C Storage Temperature 20 C to 85 C Surrounding Air Humidity 90 relative humidity max with no freezing or condensation Storage Humidity 90 relative humidity max with no freezing or condensation Vibration Resistance 4 9 m s...

Page 38: ... 24 VDC 10 Number of output points 13 Output method Photocoupler isolated sink outputs are used Output Signals INPOSITION Positioning Completion signal POUT0 to POUT5 Program Step Number signals WARN Warning signal BK Brake Control signal S RDY Servo Ready signal CLT Torque Limit Detection signal TGON Rotation Detection signal NEAR Near signal V CMP Speed Coincidence signal POSRDY Homing Completed...

Page 39: ...d Compensation 0 to 100 Positioning Completed Width Setting 0 to 99 999 reference units Encoder Divided Pulse Output None Program Table Method Program table positioning in which steps are executed in sequence with commands from contact inputs Maximum Number of Steps 64 Homing 5 methods Jog Operation Constant speed feeding with contact inputs Continued from previous page Item Specification ...

Page 40: ...ng Connector Plug 43020 0801 Terminals 43031 0002 85 300 30 69 26 43 16 2 5 Fr Fs 0 08 0 03 A A A 20 25 3 6 11 3 4 5 2 M3 7 Servomotor Connector Specifications Connector 43025 0400 Terminals 43030 0001 Manufacturer Molex Japan LLC Mating Connector Plug 43020 0401 Terminals 43031 0001 Encoder Cable 3 3 dia AWG30 UL20379 Unit mm Approx mass 180 g 10 0 5 4 5 Shaft End Specifications Shaft End with a ...

Page 41: ...3025 0400 Terminals 43030 0001 Manufacturer Molex Japan LLC Mating Connector Plug 43020 0401 Terminals 43031 0001 Servomotor Power Cable 7 dia AWG20 UL2517 Encoder Cable 3 3 dia AWG30 UL20379 10 2 92 67 28 39 25 1 3 11 7 20 5 2 5 1 5 5 Fr 24 Fs 19 12 46 dia 4 R3 7 2 4 3 dia holes 300 30 300 30 0 08 A A 0 06 dia 40 0 03 A 13 dia 29 4 dia 8 6 dia 30 7 dia Unit mm Approx mass 350 g Shaft End Specific...

Page 42: ...topping Precision δ 0 02 mm Ball Screw Material Density ρ 7 87 103 kg m3 Friction Coefficient μ 0 2 External Force on Linear Motion Section F 0 N Mechanical Efficiency η 0 9 90 Coupling Mass mC 0 3 kg Load Shaft Speed Motor shaft speed Direct coupling gear ratio 1 R 1 R 1 1 Therefore nM nL R 3 000 1 3 000 min 1 Linear motion section Ball screw Coupling Load moment of inertia at motor shaft JL JL1 ...

Page 43: ...s than the encoder resolution pulses rev so the provi sionally selected Servomotor can be used It has been verified that the provisionally selected Servomotor is applicable for position control Item Value Rated Output 30 W Rated Motor Speed 3 000 min 1 Rated Torque 0 0955 N m Instantaneous Maximum Torque 0 286 N m Motor Moment of Inertia 0 00629 10 4 kg m2 Allowable Load Moment of Inertia 0 00629 ...

Page 44: ... JZSP CSSM00 03 E 5 m JZSP CSSM00 05 E 10 m JZSP CSSM00 10 E Encoder Cables relay cables 1 5 m JZSP CSSP00 01P5 E page 2 17 3 m JZSP CSSP00 03 E 5 m JZSP CSSP00 05 E 10 m JZSP CSSP00 10 E I O Signal Cables 1 5 m JZSP CSSI203 01P5 E page 2 18 3 m JZSP CSSI203 03 E Computer Cable 2 m JZSP CPS00 02 E page 2 19 Order Number Length L JZSP CSSG03 01P5 E 1 5 m JZSP CSSG03 03 E 3 m Pin Signal Name Voltage...

Page 45: ...d Wiring Materials Selection Table Note Refer to the following section for wire specifications 2 6 3 SERVOPACK Power Supply and Servomotor Power Cable Wires on page 2 20 Dimensional Drawings Housing Contacts Name Order Number Manufacturer Applicable Wire Sizes Housing VHR 3N J S T Mfg Co Ltd AWG20 0 52 mm2 min Contacts SVH 21T P1 1 11 82 7 92 5 7 10 5 Unit mm 10 6 4 4 2 3 3 8 Unit mm ...

Page 46: ... from Molex Japan LLC Contacts 43030 0001 reeled from Molex Japan LLC 43030 0007 loose from Molex Japan LLC Connector 43020 0401 from Molex Japan LLC Contacts 43031 0001 reeled from Molex Japan LLC 43031 0007 loose from Molex Japan LLC Cable UL2464 AWG20 4C Insulating tube L SERVOPACK end Servomotor end 30 30 6 6 dia Unit mm Pin Signal Signal Wire Color Pin 1 2 3 4 Servomotor connector FG Phase W ...

Page 47: ...from Molex Japan LLC Contacts 43030 0002 reeled from Molex Japan LLC 43030 0008 loose from Molex Japan LLC SERVOPACK end 8 4 5 1 5 1 8 4 Servomotor end Connector 43020 0800 from Molex Japan LLC Contacts 43031 0002 reeled from Molex Japan LLC 43031 0008 loose from Molex Japan LLC Cable UL20276 AWG22 4P Insulating tube 30 30 7 2 dia Unit mm Pin 1 Wire Color 6 5 2 1 3 7 Encoder motor end Pin 1 Signal...

Page 48: ...T Yellow Black 9 SI6 JOGP SEL0 Pink Red 10 SI7 JOGN SEL1 Pink Black 11 SI8 SEL2 Orange Red 12 SI9 SEL3 Orange Black 13 SI10 SEL4 Gray Red 14 SI11 SEL5 Gray Black 15 SI12 S ON White Red 16 SI13 E STP White Black 17 COM_SG Yellow Red 18 SO1 INPOSITION Yellow Black 19 ALM Pink Red 20 SO2 POUT0 Pink Black 21 SO3 POUT1 Orange Red 22 SO4 POUT2 Orange Black 23 SO5 POUT3 Gray Red 24 SO6 POUT4 Gray Black 2...

Page 49: ...l Default Signals Wire Color Markings Color Number Use the Yaskawa specified cable for the Computer Cable Operation may not be dependable with any other cable Order Number Length L JZSP CPS00 02 E 2 m Important SERVOPACK end D sub 9 pin connector L Computer end SERVOPACK end Computer end D sub 9 pin Signal Pin Pin Signal TXD 1 2 RXD RXD 2 3 TXD GND 3 5 GND GND 4 7 RTS 8 CTS Case FG Shield ...

Page 50: ... value of the power supply Note Connect the molded case circuit breakers and fuses before the isolated 24 VDC power supply 1 This is the value for the maximum instantaneous load 2 This is the value when the recommended power supply is used 2 6 3 SERVOPACK Power Supply and Servomotor Power Cable Wires This section provides specifications and precautions for making your own cables for use between th...

Page 51: ... use any of the following three mount ing methods 34 48 to 52 30 48 35 60 Mounting screws 2 M4 Use two mounting holes in diagonally opposing corners to mount the Magnetic Contactor Unit mm Approx mass 320 g Mounting Hole Dimensional Diagram Auxiliary terminal M3 5 14 5 20 5 18 5 52 35 60 30 34 Coil terminal M3 5 Main terminals M3 5 23 81 43 43 10 7 7 28 80 61 8 5 90 for a rail height of 15 With au...

Page 52: ... appropriate leakage detector or leakage breaker taking into account the grounding conditions and the leakage current from the Noise Filter Consult Yaskawa Controls Co Ltd for details AC Power Supply Voltage Order Number Specification Leakage Current Manufacturer 100 VAC 200 VAC FN2070 6 07 Single phase 250 V 6 A 0 734 mA 230 VAC at 50 Hz Schaffner EMC Inc Line Color Terminals Line Load Brown BN P...

Page 53: ...ust like on a oscilloscope Estimates moments of inertia and measure vibration frequencies Displays alarms and provides alarm diagnostics System Requirements Easy to understand GUI to Set Parameters Displaying SERVOPACK Data on a Computer Just Like on an Oscilloscope Estimating Moments of Inertia and Measuring Vibration Frequencies Displaying Alarms and Alarm Diagnostics Item System Requirement Sup...

Page 54: ...allation Environment 3 3 3 1 3 Installation Orientation 3 3 3 2 Coupling to the Machine 3 4 3 2 1 Using a Coupling 3 4 3 2 2 Using a Belt 3 5 3 3 Oil and Water Countermeasures 3 6 3 4 Servomotor Temperature Increase 3 7 3 5 SERVOPACK Installation 3 8 3 5 1 Installation Precautions 3 8 3 5 2 Mounting and Securing SERVOPACKs 3 10 3 5 3 Installation Orientation 3 10 Installation 3 ...

Page 55: ...hing a cover if the Servomotor is used in an application where it is subject to excessive water or oil drops We recommend that you keep the connectors facing downward Mount the Servomotor securely to the machine If the Servomotor is not mounted securely the machine may be damaged or injury may occur Do not allow any foreign matter to enter the Servomotor To prevent electric shock ground the Servom...

Page 56: ...the mechanical specifications protective structure and envi ronmental conditions related to Servomotor installation 2 2 1 Servomotor Specifications on page 2 4 3 1 3 Installation Orientation You can install the Servomotor either horizontally or vertically Installation Orientation Figure Horizontal Vertical Shaft end up Shaft end down Cable trap ...

Page 57: ...he operating conditions An inappropriate coupling may cause damage When you couple the shafts make sure that the required centering accuracy is achieved Vibration will damage the bearings and encoders if the shafts are not properly centered When you attach the coupling do not subject the shaft to direct shock Also do not sub ject the area around the encoder to shock Shock may damage the encoder If...

Page 58: ...ufacturer Select a coupling belt that is suitable for the allowable radial load of the Servomotor and the Ser vomotor output When the Servomotor accelerates or decelerates the counterforce from the acceleration deceleration torque adds tension to the initial belt tension Take this additional ten sion into consideration when you select the coupling belt Adjust the belt tension to adjust the radial ...

Page 59: ... would come into contact with the Servomotor If contact with oil or water is unavoidable implement countermeasures in the machine so that oil from the gear box does not enter the Servomotor Do not use the Servomotor where it would come into contact with cutting fluids Depending on the type of cutting fluid sealing materials packing cables or other parts may be adversely affected Do not use the Ser...

Page 60: ...f the operating environment makes it difficult to use a large heat sink or if the surrounding air temperature given in the specifications is exceeded implement the following measures Derate the Servomotor Refer to the Servomotor specifications for information on derating Consider derating when you select the capacity of the Servomotor Use external forced air cooling for the Servomotor with a cooli...

Page 61: ...es caused by radiant or convection heat from heat sources so that the temperature around the SERVOPACK meets the environmental conditions Installation Near Sources of Vibration Install a vibration absorber on the installation surface of the SERVOPACK so that the SERVO PACK will not be subjected to vibration Other Conditions Do not install the SERVOPACK in a location subject to high temperatures hi...

Page 62: ...ow direction Note If you install more than one PCB install them so that the SERVOPACKs are not subjected to vibration greater than 4 9 m s2 Design the control panel so that the airflow at the airflow measurement point is 0 5 m s or higher Airflow direction Airflow direction Fan Airflow direction Airflow direction 15 mm min 20 mm min 20 mm min 10 mm min Device mounting surface Studs SERVOPACK 10 mm...

Page 63: ...CK 2 Place the SERVOPACK on the prepared studs and secure it to the studs with screws Tightening torque 0 49 N cm This concludes the SERVOPACK installation procedure 3 5 3 Installation Orientation You can install the SERVOPACK either horizontally or vertically Note Secure the cables on the equipment so that they do not place a load on the SERVOPACK NOTICE Remove all static electricity from your bo...

Page 64: ...CN3 Details 4 8 4 3 2 Power ON Sequence 4 8 4 3 3 Power Supply Wiring Diagrams 4 9 4 4 Wiring Servomotors 4 11 4 4 1 Wiring Precautions 4 11 4 4 2 Pin Arrangement of Servomotor Connector CN4 4 12 4 4 3 Pin Arrangement of Encoder Connector CN2 4 13 4 4 4 Wiring the SERVOPACK to the Encoder 4 13 4 5 I O Signal Connections 4 14 4 5 1 I O Signal Connector CN1 Signal Names and Functions 4 14 4 5 2 Pin ...

Page 65: ...ipment or result in personal injury Check the wiring to be sure it has been performed correctly There is a risk of failure or malfunction Use the tools recommended by the connector manufacturer if you make any cables yourself Insufficient crimping may cause wires and connectors to generate heat due to faulty contact possi bly resulting in fire Turn ON the power supply to the SERVOPACK only after a...

Page 66: ...ded case circuit breaker 1QF or fuse to protect the servo system from acci dents involving different power system voltages or other accidents Install an earth leakage breaker The SERVOPACK does not have a built in ground fault protective circuit To configure a safer system install a ground fault detector against overloads and short circuiting or install a ground fault detector combined with a mold...

Page 67: ...information on connecting Noise Filters Noise Filters on page 4 4 Implement suitable grounding measures Refer to the following section for information on grounding measures 4 1 3 Grounding on page 4 6 Noise Filters You must attach Noise Filters in appropriate places to protect the SERVOPACK from the adverse effects of noise The following is an example of wiring for countermeasures against noise 1 ...

Page 68: ...e Filters Separate input lines from output lines Do not place input lines and output lines in the same duct or bundle them together Separate the Noise Filter ground wire from the output lines Do not place the Noise Filter ground wire output lines and other signal lines in the same duct or bundle them together Noise Filter Noise Filter Noise Filter Noise Filter Separate the circuits Grounding plate...

Page 69: ...y noise Observe the following precautions when wiring the ground cable Ground the SERVOPACK to a resistance of 100 Ω or less Be sure to ground at one point only Ground the Servomotor directly if the Servomotor is insulated from the machine Motor Frame Ground or Motor Ground If you ground the Servomotor through the machine switching noise current can flow from the main circuit of the SERVOPACK thro...

Page 70: ...S ALM RST SI13 E STP 7 4 6 5 8 9 SI6 JOGP SEL0 16 3 General purpose sequence input 1 Mode Switch Input Sequence input signal power supply input General purpose sequence input 4 Homing Input General purpose sequence input 3 Program Table Operation Stop Input General purpose sequence input 5 Program Table Operation Reset Input and Alarm Reset Input General purpose sequence input 13 Emergency Stop In...

Page 71: ... the power supply input to the SERVOPACK is turned OFF when an ALM Servo Alarm signal is output CAUTION Wire all connections correctly according to the following table There is a risk of SERVOPACK failure or fire if incorrect wiring is performed Terminal No Name Voltage Specification 1 Power supply input termi nals 24 VDC 15 2 0 VDC 3 Frame ground terminal This is the ground terminal WARNING Even ...

Page 72: ...her device do so before the insulated AC DC converter for the power supply 1 ENC SERVOPACK U V W M 0 V 1Ry 1D 1KM Insulated AC DC converter for main circuit power supply 2 P N FG 1QF R T 24 V For servo alarm display 1Ry 1PL 1KM 1SA Power supply ON Power supply OFF 1QF Molded case circuit breaker 1FLT Noise Filter 1KM Magnetic Contactor 1Ry Relay 1PL Indicator lamp 1SA Surge Absorber 1D Flywheel di...

Page 73: ...he power supply with a magnetic contactor or other device do so before the insulated AC DC converter for the power supply 1QF Molded case circuit breaker 1FLT Noise Filter 1KM Magnetic Contactor 1Ry Relay 2Ry Relay 3Ry Relay 1PL Indicator lamp 1SA Surge Absorber 1D Flywheel diode 2D Flywheel diode 3D Flywheel diode R T 1QF 1FLT 1KM Insulated AC DC converter for main circuit power supply For servo ...

Page 74: ...tress or tension Perform all wiring so that stress is not applied to the Encoder Cable or Servomotor Power Cable If you secure the cables with cable ties protect the cables with cushioning material Before you connect the wires make sure that there are no mistakes in the wiring Always use the connectors specified by Yaskawa and insert them correctly When you connect a connector check it to make sur...

Page 75: ...bles themselves must move Observe the recommended bending radius given in the following table and perform wiring so that stress is not applied to the cables Use the cables so that they are not repeatedly bent 4 4 2 Pin Arrangement of Servomotor Connector CN4 The connector pin layout that is required to connect the SERVOPACK to a Servomotor is given below Cable Diameter Recommended Bending Radius R...

Page 76: ...e encoder Servo motor is given below 4 4 4 Wiring the SERVOPACK to the Encoder represents a shielded twisted pair cable Pin Signal Function 1 Phase A Encoder phase A 2 Phase B Encoder phase B 3 PG5V Encoder power supply 5 VDC 4 5 Phase A Encoder phase A 6 Phase B Encoder phase B 7 PG0V Signal ground 8 FG Frame ground ENC 3 7 8 3 7 CN2 Encoder SERVOPACK 1 5 1 5 2 6 2 6 U V W M PG5V PG0V Phase A Pha...

Page 77: ...he signal turns ON the motor deceler ates to a stop according to the deceleration rate for the current program step page 5 10 SI4 HOME 6 General purpose Sequence Input 4 Homing Input You can allocate the input signal to use with a parameter When the signal turns ON homing is started page 5 11 24VIN 7 Sequence Input Sig nal Power Supply Input Connected to the 24 V side of the sequence input signal ...

Page 78: ...trols turning the Servomotor ON and OFF supplying not supplying power page 5 12 SI13 E STP 16 General purpose Sequence Input 13 Emergency Stop Input You can allocate the input signal to use with a parameter ON Resets an emergency stop OFF Performs an emergency stop page 5 13 Signal Pin Name Function Reference COM_SG 17 Signal Ground Signal ground for sequence output signals SO1 INPOSITION 18 Gener...

Page 79: ...rameter Turns ON when the Servomotor is operating e g during positioning operations page 5 17 SO10 POSRDY 28 General purpose Sequence Output 10 Homing Completed Output You can allocate the output signal to use with a parameter Turns ON when the position information is valid after homing page 5 16 SO11 PAREA 29 General purpose Sequence Output 11 Program Specified Area Output You can allocate the ou...

Page 80: ...9 General purpose Sequence Input 9 11 SI8 General purpose Sequence Input 8 14 SI11 General purpose Sequence Input 11 13 SI10 General purpose Sequence Input 10 16 SI13 General purpose Sequence Input 13 15 SI12 General purpose Sequence Input 12 18 SO1 General purpose Sequence Output 1 17 COM_S G Signal Ground for Sequence Output Signals 20 SO2 General purpose Sequence Output 2 19 ALM Servo Alarm out...

Page 81: ...ng to the specifications required by the machine Example for Relay Circuit Item Characteristics Remarks External power supply 24 VDC 10 A power supply capacity of at least 75 mA is required for all 13 points Sink Circuits Source Circuits Input Signal Polarity Input Signal Polarity Photocoupler Internal signal level Photocoupler Internal signal level ON Low level ON Low level OFF High level OFF Hig...

Page 82: ...hey are connected to relay circuits Electrical Specifications Incorrect wiring or incorrect voltage application to the output circuits may cause short circuit fail ures Short circuit failures can result in equipment damage or personal injury Example for Relay Circuit Item Characteristics Remarks External power supply 24 VDC 10 Allowable Current Range 1 mA to 10 mA DC This is the current range per ...

Page 83: ...CN5 To use the SigmaWin Engineering Tool connect the computer on which the SigmaWin is installed to CN5 on the SERVOPACK Refer to the following manual for the operating procedures for the SigmaWin AC Servo Drives Engineering Tool SigmaWin Online Manual Σ S Component Manual No SIEP S800001 06 ...

Page 84: ...ignals 5 10 5 3 2 Output Signals 5 13 5 3 3 Allocating Input Signals to Pins and Parameter Settings 5 18 5 3 4 Allocating Output Signals to Pins and Parameter Settings 5 20 5 3 5 Setting I O Signal Status with Parameters 5 22 5 4 Settings That Must Be Adjusted to the System 5 23 5 4 1 Motor Direction Setting 5 23 5 4 2 Electronic Gear Settings 5 23 5 4 3 Torque Limit Selection 5 25 5 4 4 Movement ...

Page 85: ...5 5 Settings for References 5 33 5 5 1 Smoothing 5 33 ...

Page 86: ...dually Tuning Parameters Normally the user does not need to set the tuning parameters individually Use the various SigmaWin tuning functions to set the related tuning parameters to increase the response even further for the conditions of your machine Refer to the following sections for details 8 5 Custom Tuning on page 8 15 You can also set the tuning parameters individually to make adjustments Re...

Page 87: ...erved setting Do not use This column explains the functions selected with the settings The notation n indicates a parameter for selecting functions Each indicates the setting for one digit The notation shown here means that the third digit from the right is set to 2 Pn100 Speed Loop Gain Setting Range 10 to 20 000 0 1 Hz 400 Immediately Setting Unit Default Setting When Enabled Classification Tuni...

Page 88: ...Window of the Sig maWin 2 Select the cell of the parameter to edit If the parameter to edit is not displayed in the Parameter Editing Dialog Box click the or Button to display the parameter to edit 3 Click the Edit Button 4 Change the setting of the parameter 5 Click the OK Button 1 For a parameter for a numeric setting input the numeric setting 2 For a parameter for a function selection select th...

Page 89: ...and ON again 5 1 4 Initializing Parameter Settings You can return the parameters to their default settings Preparations Check the following settings before you initialize the parameter settings The parameters must not be write prohibited The system must be in the SERVO OFF state Operating Procedure Use the following procedure 1 Select Parameters Edit Parameters from the menu bar of the Main Window...

Page 90: ...ick the Initialize Button 3 Click the OK Button Click the Cancel Button to cancel initialization The Parameter Editing Dialog Box will return 4 Click the Initialize Button Click the Cancel Button to cancel initialization The Parameter Editing Dialog Box will return 5 Click the OK Button ...

Page 91: ...ters Pn 5 1 4 Initializing Parameter Settings 5 8 6 Turn the power supply to the SERVOPACK OFF and ON again after the parameter set tings have been initialized This concludes the procedure to initialize the parameter settings ...

Page 92: ... Codes 7001h 30 W Servomotor model SGMSL A3 7002h 50 W Servomotor model SGMSL A5 DANGER Set the motor code correctly If the motor code that you set does not agree with the connected motor unexpected opera tion may occur or the Servomotor may be burnt Pn08A Motor Selection Switch Setting Range Setting Unit Default Setting When Enabled Classification 7000h to FFFFh 7001h After restart Setup ...

Page 93: ...ction for details 5 3 3 Allocating Input Signals to Pins and Parameter Settings on page 5 18 STOP Program Table Operation Stop Input Signal If this signal is turned ON during program table operation program table operation is inter rupted If the Servomotor is operating it is decelerated to a stop at the deceleration speed DEC for the current program step If this signal is turned ON during homing h...

Page 94: ... to another connector pin Refer to the following section for details 5 3 3 Allocating Input Signals to Pins and Parameter Settings on page 5 18 SEL0 to SEL5 Program Step Selection Input Signals These signals specify the program step Note Use PnBA7 n X to PnBAC n X SEL0 to SEL5 Program Step Selection Inputs Signal Allo cations to allocate the SEL0 to SEL5 signals to other connector pins Refer to th...

Page 95: ...signal turns the forward external torque limit ON and OFF Note You must allocate the P CL signal to use it Use PnBB5 n X P CL Forward External Torque Limit Input Signal Allocation to allocate the signal to a connector pin Refer to the following section for details 5 3 3 Allocating Input Signals to Pins and Parameter Settings on page 5 18 N CL Reverse External Torque Limit Signal This signal turns ...

Page 96: ...nal Allocation to allocate the INPOSITION signal to another connector pin Refer to the following section for details 5 3 4 Allocating Output Signals to Pins and Parameter Settings on page 5 20 Setting the Positioning Completed Width The INPOSITION signal is output when the difference between the target position and the cur rent position is equal to or less than the setting of PnB2D Positioning Com...

Page 97: ...e system in the equipment driven by the motor The Servomotor does not have its own brake Prepare a brake system in your equipment as required using this signal Note You must allocate the BK signal to use it Use PnBCA n X BK Brake Output Signal Allocation to allocate the signal to a connector pin Refer to the following section for details 5 3 4 Allocating Output Signals to Pins and Parameter Settin...

Page 98: ...ion Output Signal Allocation to allocate the signal to a connector pin Refer to the following section for details 5 3 4 Allocating Output Signals to Pins and Parameter Settings on page 5 20 Setting the Rotation Detection Level Use the following parameter to set the speed detection level at which to output the TGON sig nal NEAR Near Output Signal This signal indicates when the motor position is clo...

Page 99: ...ing section for details 5 3 4 Allocating Output Signals to Pins and Parameter Settings on page 5 20 POSRDY Homing Completed Output Signal This signal is output when the position information becomes valid after homing is completed Note Use PnBD2 n X POSRDY Homing Completed Output Signal Allocation to allocate the POSRDY signal to another connector pin Refer to the following section for details 5 3 ...

Page 100: ...tput Signal The signal indicates when an emergency stop is in effect Note Use PnBD5 n X E STPS Emergency Stop Status Output Signal Allocation to allocate the E STPS signal to another connector pin Refer to the following section for details 5 3 4 Allocating Output Signals to Pins and Parameter Settings on page 5 20 PCO Encoder Origin Signal This signal is output when the encoder origin is passed On...

Page 101: ... following parameters n X of PnBA0 to PnBAC PnBAF PnBB2 PnBB4 to PnBB6 and PnBB8 Input signals are allocated as shown in the following table Refer to Interpreting an Input Signal Allocation Table and change the allocations accordingly Interpreting an Input Signal Allocation Table Type Signal Pin Signal Status Meaning Output ZONE0 to ZONE3 Must be allocated ON closed ON 1 OFF 0 The ZONE0 to ZONE3 s...

Page 102: ...A B C SEL1 PnBA8 n X 0 1 2 3 4 5 6 7 8 9 A B C SEL2 PnBA9 n X 0 1 2 3 4 5 6 7 8 9 A B C SEL3 PnBAA n X 0 1 2 3 4 5 6 7 8 9 A B C SEL4 PnBAB n X 0 1 2 3 4 5 6 7 8 9 A B C SEL5 PnBAC n X 0 1 2 3 4 5 6 7 8 9 A B C S ON PnBAF n X 0 1 2 3 4 5 6 7 8 9 A B C DEC PnBB2 n X 0 1 2 3 4 5 6 7 8 9 A B C ALM RST PnBB4 n X 0 1 2 3 4 5 6 7 8 9 A B C P CL PnBB5 n X 0 1 2 3 4 5 6 7 8 9 A B C N CL PnBB6 n X 0 1 2 3 ...

Page 103: ... tions in the following parameters n X of PnBC0 to PnBC6 PnBC9 to PnBCF and PnBD0 to PnBD9 Output signals are allocated as shown in the following table Refer to Interpreting an Output Signal Allocation Table and change the allocations accordingly Interpreting an Output Signal Allocation Table PnBA0 n 00 PnBA1 n 10 Before change PnBA0 n 10 PnBA1 n 00 After change The signals that are not detected a...

Page 104: ...nBCD n X 0 1 2 3 4 5 6 7 8 9 A B C NEAR PnBCE n X 0 1 2 3 4 5 6 7 8 9 A B C V CMP PnBCF n X 0 1 2 3 4 5 6 7 8 9 A B C PCO PnBD0 n X 0 1 2 3 4 5 6 7 8 9 A B C BUSY PnBD1 n X 0 1 2 3 4 5 6 7 8 9 A B C POSRDY PnBD2 n X 0 1 2 3 4 5 6 7 8 9 A B C PAREA PnBD3 n X 0 1 2 3 4 5 6 7 8 9 A B C S ONS PnBD4 n X 0 1 2 3 4 5 6 7 8 9 A B C E STPS PnBD5 n X 0 1 2 3 4 5 6 7 8 9 A B C ZONE0 PnBD6 n X 0 1 2 3 4 5 6 7...

Page 105: ...on the I O signal monitor 9 2 3 I O Signal Monitor on page 9 5 5 3 5 Setting I O Signal Status with Parameters You can use the n X digit in the parameters to change the signal polarities make the sig nals always active or always inactive or to make other settings Refer to the following section for details 11 1 2 List of Parameters on page 11 2 PnBC1 n 10 PnBC2 n 20 Before change PnBC1 n 20 PnBC2 n...

Page 106: ...r to understand The electronic gear is used to convert the travel distances that are specified in reference units to pulses which are required for actual movements With the electronic gear one reference unit is equal to the workpiece travel distance per refer ence pulse input to the SERVOPACK In other words if you use the SERVOPACK s electronic gear pulses can be read as reference units Note If yo...

Page 107: ...tion 1 to 65 535 1 1 After restart Setup Pn210 Electronic Gear Ratio Denominator Setting Range Setting Unit Default Setting When Enabled Classification 1 to 65 535 1 1 After restart Setup Ball screw lead 6 mm Workpiece Resolution 1 024 10 bits If you do not use the electronic gear you must calculate the number of reference pulses for each reference If you use the electronic gear it is not necessar...

Page 108: ...Reference Unit 0 002 mm 20 μm 0 01 0 05 mm 50 μm 4 Travel Distance per Load Shaft Revolution Reference Units 6 mm 0 02 mm 300 360 0 01 36 000 314 mm 0 05 mm 6 280 5 Electronic Gear Ratio 6 Parameters Pn20E 1 024 Pn20E 10 240 Pn20E 51 200 Pn210 300 Pn210 3 600 Pn210 6 280 Ball screw lead 6 mm Encoder 10 bits Load shaft Reference unit 0 02 mm Encoder 10 bits Load shaft Reference unit 0 01 Gear ratio...

Page 109: ...s are given below If the setting of Pn404 Forward External Torque Limit or Pn405 Reverse External Torque Limit is too low the torque may be insufficient for acceleration or deceleration of the Servomotor Set a percentage of the rated motor torque Pn402 Forward Torque Limit Setting Range Setting Unit Default Setting When Enabled Classification 0 to 800 1 800 Immediately Setup Pn403 Reverse Torque L...

Page 110: ... Use linear coordinates After restart 1 Use rotational coordinates Use the shortest path automati cally set the shortest direction 2 Use rotational coordinates Always move forward 3 Use rotational coordinates Always move in reverse PnB21 Linear coordinates PnB20 0 Forward Software Limit P LS Rotational coordinates PnB20 0 Last Rotational Coordinate Setting Range Setting Unit Default Setting When E...

Page 111: ... specified for the positioning position either forward or reverse rotation will be used whichever is shorter If PnB20 is set to 2 always forward and an absolute position is specified for the positioning position forward rotation will always be used If PnB20 is set to 3 always reverse and an absolute position is specified for the positioning position reverse rotation will always be used If a relati...

Page 112: ...2C Base Current Der ating at Motor Overload Detection An A 720 alarm Continuous Overload can be detected earlier to protect the Servomotor from overloading Note The gray areas in the above graph show where A 710 and A 720 alarms occur Refer to the relevant manual given below for a diagram that shows the relationships between the motor heat dissipation conditions heat sink size surrounding air temp...

Page 113: ...a software reset 1 Select Setup Software Reset from the menu bar of the Main Window of the Sig maWin 2 Click the Execute Button Click the Cancel Button to cancel the software reset The Main Window will return 3 Click the Execute Button 1 Always confirm that the system is in the SERVO OFF state and that the motor is stopped before you start a software reset 2 This function resets the SERVOPACK inde...

Page 114: ...4 6 Software Reset 5 31 5 Setup 4 Click the OK Button to end the software reset operation All settings including parameters will have been re calculated When you finish this operation discon nect the SigmaWin from the SERVOPACK and then connect it again ...

Page 115: ...t detection signal offset The parameters must not be write prohibited The servo must be in ready status The system must be in the SERVO OFF state Operating Procedure Use the following procedure 1 Select Setup Adjust Offset Adjust the Motor Current Detection Offset from the menu bar of the Main Window of the SigmaWin 2 Click the Continue Button 3 Click the Adjust Button Execute the automatic offset...

Page 116: ...not affect the travel distance The following parameters are related to smoothing The filter is disabled if you set the parameter to 0 Note Change the setting only when the motor is stopped Pn217 Average Position Reference Movement Time Setting Range Setting Unit Default Setting When Enabled Classification 0 to 10 000 0 1 ms 0 Immediately after the motor stops Setup Pn217 Before filter After filter...

Page 117: ... 6 1 Flow of Trial Operation 6 2 6 2 Inspections and Confirmations before Trial Operation 6 3 6 3 Trial Operation for the Servomotor without a Load 6 4 6 3 1 Preparations 6 4 6 3 2 Operating Procedure 6 4 6 4 Convenient Function to Use during Trial Operation 6 6 6 4 1 Program Jog Operation 6 6 6 4 2 Origin Search 6 10 Trial Operation 6 ...

Page 118: ...allation 2 Wiring and Connections Wire and connect the SERVOPACK First Servomo tor operation is checked without a load Do not con nect the CN1 connector on the SERVOPACK Chapter 4 Wiring and Connections 3 Confirmations before Trial Operation 6 2 Inspections and Confirmations before Trial Operation on page 6 3 4 Power ON Trial Operation 5 Trial Operation for the Servomotor without a Load 6 3 Trial ...

Page 119: ...er ation Make sure that the SERVOPACK and Servomotor are installed wired and connected cor rectly Make sure that the correct power supply voltage is supplied to the SERVOPACK Make sure that there are no loose parts in the Servomotor mounting If you are performing trial operation on a Servomotor that has been stored for a long period of time make sure that all Servomotor inspection and maintenance ...

Page 120: ...VO OFF state Emergency stop status must not exist The motor code of the Servomotor to use must be set in Pn08A Motor Selection Switch The jog speed must be set considering the operating range of the machine The jog speed is set with the following parameters 6 3 2 Operating Procedure Use the following procedure 1 Select Test Run Jog from the menu bar of the Main Window of the SigmaWin The Jog Opera...

Page 121: ...the Operation Area will change to Servo ON 4 Click the Forward Button or the Reverse Button Jog operation will be performed only while you hold down the mouse button 5 After you finish jog operation turn the power supply to the SERVOPACK OFF and ON again This concludes the jog operation procedure To change the speed click the Edit Button and enter the new speed Information ...

Page 122: ...ration The parameters must not be write prohibited The power supply must be ON There must be no alarms The system must be in the SERVO OFF state Emergency stop status must not exist The motor code of the Servomotor to use must be set in Pn08A Motor Selection Switch The range of machine motion and the safe movement speed of your machine must be con sidered when you set the travel distance and movem...

Page 123: ...Pn536 Movement speed Pn533 Number of movements Pn536 Number of movements Pn536 Waiting time Pn535 Acceleration deceleration time Pn534 Waiting time Pn535 Travel distance Pn531 Travel distance Pn531 Waiting time Pn535 Acceleration deceleration time Pn534 Waiting time Pn535 Travel distance Pn531 Speed 0 Movement speed Pn533 Movement speed Pn533 Travel distance Pn531 Number of movements Pn536 Waiting...

Page 124: ...ation Related Selections Setting Range Setting Unit Default Setting When Enabled Classification 0000 to 0005 0000 Immediately Setup Pn531 Program Jog Travel Distance Setting Range Setting Unit Default Setting When Enabled Classification 1 to 1 073 741 824 1 reference unit 1 024 Immediately Setup Pn533 Program Jog Movement Speed Setting Range Setting Unit Default Setting When Enabled Classification...

Page 125: ... Operation 3 Set the operating conditions click the Apply Button and then click the Run Button A graph of the operation pattern will be displayed 4 Click the Servo ON Button and then the Execute Button The program jog operation will be executed This concludes the program jog operation procedure ...

Page 126: ...te prohibited The power supply must be ON There must be no alarms The system must be in the SERVO OFF state Emergency stop status must not exist The motor code of the Servomotor to use must be set in Pn08A Motor Selection Switch Operating Procedure Use the following procedure 1 Select Setup Origin Search from the menu bar of the Main Window of the SigmaWin The Origin Search Dialog Box will be disp...

Page 127: ...1 6 Trial Operation 3 Click the Servo ON Button 4 Click the Forward Button or the Reverse Button An origin search will be performed only while you hold down the mouse button The motor will stop when the origin search has been completed This concludes the origin search procedure ...

Page 128: ...elated to Program Table Operation 7 17 7 3 3 I O Signals Related to Program Table Operation 7 18 7 3 4 Program Table Configuration 7 18 7 3 5 Settings in the Program Table 7 19 7 3 6 SigmaWin Procedures 7 21 7 3 7 Program Table Operation Examples 7 34 7 4 Jog Operation 7 43 7 4 1 Jog Speeds 7 43 7 4 2 I O Signals Related to Jog Operation 7 43 7 4 3 Setting the Jog Speeds 7 43 7 5 ZONE Outputs 7 45...

Page 129: ...urned ON Program Table Operation You can register program positioning operation patterns in a table in advance and then use specifications from the host controller to specify the operation pattern to perform operation Jog Operation This function supports constant speed operation at preset jog speeds ZONE Outputs This function outputs a zone number to indicate when the motor is within a preset zone...

Page 130: ...before you start program table operation If you perform program table operation without performing homing positions cannot be managed so correct posi tioning may not be possible Unexpected machine operation failure or personal injury may occur Parameter Meaning When Enabled Classifica tion PnB31 n 0 default set ting The position when power is turned ON is the origin If the HOME signal turns ON an ...

Page 131: ...Enabled Classifica tion PnB91 n 0 default set ting The INPOSITION signal turns ON at startup When homing starts the INPOSITION signal turns OFF It turns ON again when homing is completed After restart Setup n 1 The INPOSITION signal turns OFF at startup The INPOSITION signal turns ON when homing is completed PnB25 Home Position Setting Range Setting Unit Default Setting When Enabled Classifica tio...

Page 132: ... direction will be reversed after the motor changes to the creep speed For example for pressing homing a movement is made in the reverse direc tion after the pressing time elapses so a negative value is set Parameter That Specifies the Pressing Torque for Pressing Homing This parameter specifies the torque to apply to the object at the end of travel for pressing oper ation in pressing homing Set t...

Page 133: ...hat is too low the motor may stop before reaching the pressed object in systems where a torque limit is applied during acceleration or other move ment Parameter That Specifies the Pressing Time for Pressing Homing This parameter specifies the pressing time against the pressed object during homing When the set time elapses the pressing operation is ended PnBE2 Pressing Detection Time for Pressing H...

Page 134: ...the homing method PnB31 n X STOP If the STOP signal turns ON during homing homing is stopped and the motor decelerates to a stop When the STOP signal turns OFF homing is continued Output Signal Description INPOSI TION The INPOSITION signal turns ON when the target position final travel distance is within the positioning completed width The positioning completed width set in PnB2D INPOSITION width ...

Page 135: ...l The SERVO ON state is entered Turn ON the HOME signal Homing starts Turn OFF the HOME signal after the BUSY signal turns ON When the DEC signal turns ON the motor changes to the approach speed When the encoder s origin signal phase C is detected the motor decelerates to the creep speed After the motor moves the final travel distance homing has been completed and the POS RDY signal turns ON Opera...

Page 136: ...tered Turn ON the HOME signal Homing starts Turn OFF the HOME signal after the BUSY signal turns ON When the DEC signal turns ON the motor changes to the creep speed After the motor moves the final travel distance homing has been completed and the POS RDY signal turns ON Operation Pattern HOME BUSY INPOSITION Speed Time Approach speed Creep speed DEC POSRDY ALM S ON Power supply 3 s max Final trav...

Page 137: ...gnal Homing starts Turn OFF the HOME signal after the BUSY signal turns ON When the encoder s origin signal phase C is detected the motor decelerates to the creep speed After the motor moves the final travel distance homing has been completed and the POSRDY signal turns ON Operation Pattern HOME BUSY INPOSITION Speed Time Approach speed Creep speed Encoder origin POSRDY ALM S ON Power supply 3 s m...

Page 138: ...e is entered Turn ON the HOME signal Homing starts Turn OFF the HOME signal after the BUSY signal turns ON The motor moves to the end of travel and then performs pressing operation at the torque specified in PnBE1 After pressing for the time set in PnBE3 the motor moves in the opposite direction After the motor moves the final travel distance homing has been completed and the POS RDY signal turns ...

Page 139: ...he encoder s origin signal phase C is detected the motor decelerates to the creep speed After the motor moves the final travel distance homing has been completed and the POS RDY signal turns ON Stopping and Canceling Homing If the STOP signal turns ON during homing the motor decelerates to a stop and homing is stopped When the STOP signal turns OFF homing is restarted If operation is performed wit...

Page 140: ...rm when you edit the program table from the SigmaWin If you select the Positioning Option on the Pressing Torque Limit Dialog Box positioning oper ation will be performed If you select the Pressing Option pressing operation will be per formed The default setting is for positioning operation Refer to the following section for the SigmaWin procedures 7 3 6 SigmaWin Procedures on page 7 21 Both types...

Page 141: ...7 3 Program Table Operation 7 3 1 Types of Operation 7 14 Operation Pattern Speed SPD Time Position Movement at SPD Travel distance POS Positioning completed width Target position ...

Page 142: ...vel distance INPOS The INPOSITION signal turns ON when pressing operation has been performed at the torque threshold CLLV or higher for the pressing operation pressing time PnBE4 Set the pressing travel distance in INPOS Pressing operation is illustrated conceptually in the following figure Pressing operation may not always work well depending on mechanical factors such as the relation between the...

Page 143: ...ssing travel distance INPOS from the pressing starting position so pressing operation is not completed There is no pressing operation so the torque does not exceed the torque threshold CCLV and the INPOSITION signal remains OFF Pressing starting position Operation Pattern Speed SPD Time Position Movement at SPD Travel distance POS Pressing travel distance INPOS Actual travel distance Movement at P...

Page 144: ...t is too small the pressed object will be moved in the pressing direction Even if the pressing operation pressing time PnBE4 elapses the INPOSI TION signal will remain OFF if the pressing torque is lower than the torque threshold CCLV 7 3 2 Parameter Related to Program Table Operation Parameter That Specifies the Pressing Completion Wait Time for Pressing Operation This parameter specifies the pre...

Page 145: ...gram table operation and decelerate the motor to a stop Program table operation will be continued when you turn the STOP signal OFF again PGMRES Turns ON this signal during program table operation to reset program table operation and decelerate the motor to a stop SEL0 to SEL5 Use these signals to specify the program step number Input Signal Description BUSY The BUSY signal is ON while the Servomo...

Page 146: ...ioning speed Refer to the fol lowing section ACC and DEC on page 7 24 TLIMT Position ing torque limit Specifies the torque limit for posi tioning Refer to the fol lowing section TLIMT on page 7 25 The TLIMT and PTLIMT limits will be released if any of the fol lowing conditions occurs after the TLIMT and PTLIMT limits are specified The MODE signal is turned OFF to change to mode 1 The S ON signal i...

Page 147: ...efer to the fol lowing section AREA1 and AREA2 on page 7 28 EVENT End con dition Specifies the condition to use to determine when the program step is completed When the condition is met execution jumps to the program step specified by NEXT Refer to the fol lowing section EVENT on page 7 28 ITn Execution waits for n milli seconds after the INPOSITION Positioning Completion Output signal turns ON cl...

Page 148: ...ed below Editing the Program Table Displaying the Program Table Editing Dialog Box Select Edit Program Table from the menu bar of the Main Window of the SigmaWin Editing the Program Table Writing the Program Table Saving the Program Table Checking Operation with the Program Table Editing the Program Table on page 7 21 Writing the Program Table on page 7 30 Saving the Program Table on page 7 31 ...

Page 149: ...ton Splits the valid coordinate range i e the range defined by PnB21 to PnB23 into equal intervals and sets the resulting positions in the program table Import Button Imports a file on the computer to a program table in SigmaWin Comment Button Lets you enter a comment for the program table The comment is also saved when you click the Save Button Initialize Button Initializes the flash memory for t...

Page 150: ...og Box will be displayed 2 Set the target position and the position distance Target position The Position Distance setting is enabled when you set the target position to an absolute position or relative distance Item Description Display in Program Table Absolute posi tion Use this setting to specify the target position directly A Position Relative distance Use this setting to specify the relative ...

Page 151: ...nder ACC or DEC The Acceleration Deceleration Dialog Box will be displayed 2 Set the acceleration and deceleration rates The Same as previous step Check Boxes are selected by default To use different values from the previous step clear the selections of the Same as previous step Check Boxes and enter the values directly Unit Setting Range Default Setting Reference units 99 999 999 to 99 999 999 ST...

Page 152: ...vious step Check Box is selected by default To use different values from the previous step clear the selection of the Same as previous step Check Box and enter the value directly 3 Click the OK Button This concludes the setting procedure If you select the Same as previous step Check Boxes for the starting program step the settings of the acceleration deceleration parameters PnB29 acceleration rate...

Page 153: ...e displayed The default setting is for positioning Steps for Positioning Operation 2 Select the Positioning Option 3 Click the OK Button This concludes the setting procedure Steps for Pressing Operation 2 Select the Pressing Option 3 Set the torque limit Percentage of rated torque 4 Click the OK Button This concludes the setting procedure The torque limit is used for both forward and reverse movem...

Page 154: ...Double click the cell to edit The Positioning Completed Width Pressing Travel Distance Dialog Box will be displayed 2 Set the positioning completed width for positioning operation or the pressing travel dis tance for pressing operation Using the Setting of PnB2D Using the Same Value as the Previous Step Clear the selection of the PnB2D is used Check Box and select the Same as previous step Check B...

Page 155: ...A2 and the specified area are shown below If AREA1 is less than or equal to AREA2 the shaded area shown below is used If AREA1 is greater than AREA2 the shaded areas shown below are used EVENT Specify the conditions to complete execution of the program steps 1 Double click the cell to edit The Event Dialog Box will be displayed 2 Set the condition and the wait time Unit Setting Range Default Setti...

Page 156: ...a value between 0 and 63 in the Next step number Box Item Description Display in Program Table Positioning complete default setting The step is ended when positioning is completed The step is ended when the INPOSITION signal turns ON closes ITn NEAR The step is ended when the NEAR signal turns ON NTn BUSY The step is ended when the BUSY signal turns OFF opens BTn Wait time There is no condition an...

Page 157: ...AM to operate the SERVOPACK according to the program table 1 Click the Write Button in the Program Table Editing Dialog Box The Write Dialog Box will be displayed 2 Click the OK Button 1 Make sure that the system is in SERVO OFF state when you write the program table 2 The program table that is written will be deleted when the power supply to the SERVOPACK is turned OFF Before you turn OFF the pow...

Page 158: ...VOPACK is turned OFF you must save it to flash memory in the SERVOPACK The program table that is saved in the flash memory is automatically loaded each time the power supply is turned ON We recommend that you save the program table that is normally used for operation in this flash memory 1 Click the Save Button in the Program Table Editing Dialog Box The Save Table Dialog Box will be displayed 2 C...

Page 159: ...aWin Procedures 7 32 1 Click the Save Button The Open Dialog Box will be displayed 2 Specify the save location and file name You can set any file name However you cannot change the file name extension You can also set a comment Information ...

Page 160: ...m Table Operation 7 3 6 SigmaWin Procedures 7 33 7 Operation and Functions This concludes the saving procedure You can use the Import Button to load the program table saved in a file to the SERVO PACK Information ...

Page 161: ...ning operations is shown below Operating Procedure Turn ON the MODE signal to change to mode 0 Set the SEL0 to SEL5 signals to 3 to specify program step 3 Turn ON the START signal to start program table operation The POUT0 to POUT5 signals output 3 Keep the START signal ON for at least 2 ms and then confirm that the BUSY signal is ON If the BUSY signal is ON turn OFF the START signal When position...

Page 162: ... 7 Operation and Functions Operation Pattern and Related Signal Timing 2 ms min Latched Operation Pattern MODE START SEL0 to SEL5 BUSY INPOSITION Mode 0 program table operation 2 ms min 2 ms min Speed Time STOP Latched POUT0 to POUT5 3 5 2 ms min 2 ms min 5 3 Step 3 Step 5 ...

Page 163: ... least 2 ms and then confirm that the BUSY signal is ON If the BUSY signal is ON turn OFF the START signal When positioning is completed to the target position the INPOSITION signal turns ON After the wait time set for the program step elapses execution of the program step specified with the NEXT setting is executed The POUT0 to POUT5 signals output 1 When positioning is completed to the target po...

Page 164: ... and Related Signal Timing The wait times depend on the settings for EVENT in the program table 2 ms min Operation Pattern START SEL0 to SEL5 BUSY INPOSITION 0 2 ms min Speed Time MODE Mode 0 program table operation Latched Wait time 1 000 ms Wait time 2 000 ms STOP 2 ms min Step 0 Step 1 Step 0 POUT0 to POUT5 0 0 1 ...

Page 165: ...at least 2 ms and then confirm that the BUSY signal is ON If the BUSY signal is ON turn OFF the START signal Set the SEL0 to SEL5 signals to 2 to specify program step 2 Turn ON the START signal to change program table operation to program step 2 The POUT0 to POUT5 signals output 2 Keep the START signal ON for at least 2 ms and then confirm that the BUSY signal is ON If the BUSY signal is ON turn O...

Page 166: ...rm that the BUSY signal is ON If the BUSY signal is ON turn OFF the START signal Turn ON the STOP signal to stop program table operation The Servomotor decelerates to a stop and the BUSY signal turns OFF Turn OFF the STOP signal to restart program table operation When positioning is completed to the target position the INPOSITION signal turns ON Operation Pattern and Related Signal Timing PGM STEP...

Page 167: ... output 4 Keep the START signal ON for at least 2 ms and then confirm that the BUSY signal is ON If the BUSY signal is ON turn OFF the START signal Turn ON the STOP signal to stop program table operation Turn OFF the STOP signal while the Servomotor is decelerating Program table operation is restarted When positioning is completed to the target position the INPOSITION signal turns ON Operation Pat...

Page 168: ...erating Procedure Turn ON the MODE signal to change to mode 0 Set the SEL0 to SEL5 signals to 1 to specify program step 1 Turn ON the START signal to start program table operation The POUT0 to POUT5 signals output 1 Keep the START signal ON for at least 2 ms and then confirm that the BUSY signal is ON If the BUSY signal is ON turn OFF the START signal The motor moves to the pressing starting posit...

Page 169: ... Time Position SPD Travel distance Pressing travel distance Actual travel distance Pressing operation at PTLIMT Movement at PSPD 100000 10000 Pressing starting position Home position Step 1 2 ms min MODE START SEL0 to SEL5 BUSY INPOSITION Mode 0 program table operation 2 ms min 2 ms min Latched STOP 1 Pressing time PnBE4 POUT0 to POUT5 1 ...

Page 170: ...edit jog speeds in the jog speed table save the table to flash memory Refer to the following section for the procedure Saving the Program Table to Flash Memory in the SERVOPACK on page 7 31 If you turn OFF the power supply before you save changes to flash memory the changes to the jog speed table will be lost Jog Speed Setting Range Setting Unit Default Setting When Enabled 1 to 99 999 999 Referen...

Page 171: ...n Prints the currently displayed settings Comment Button Lets you add a comment Import Button Imports a jog speed table from a file saved on the computer to the SigmaWin Initialize Button Initializes the flash memory in the SERVOPACK Save Button Saves the settings in the SERVOPACK to flash memory Read Button Reads the settings in the SERVOPACK to the SigmaWin Write Button Writes the currently disp...

Page 172: ...NE number is output on the ZONE signals You can use the ZONE numbers as required e g to trigger operations related to positioning operations Note 1 Signal is ON active 0 Signal is OFF inactive Setting Range Setting Unit Default Setting 99 999 999 to 99 999 999 Reference units 0 ZONE Table ZONE Signals ZONE Number ID ZONE N Reference Units ZONE P Reference Units ZONE3 ZONE2 ZONE1 ZONE0 0 nnnnnnnn p...

Page 173: ...ive the shaded part in the following figure ZONE P ZONE N The ZONE signals for the corresponding ZONE number is output if the current value is less than or equal to ZONE P or greater than or equal to ZONE N the shaded parts in the follow ing figure Duplicated Settings in the ZONE Table The smaller ZONE number is output ZONE N and ZONE P 0 The ZONE number is disabled and all ZONE signals will be OF...

Page 174: ...ngs to a computer file Print Button Prints the currently displayed settings Comment Button Lets you add a comment Import Button Imports a ZONE table from a file saved on the computer to the SigmaWin Initialize Button Initializes the flash memory in the SERVOPACK Save Button Saves the settings in the SERVOPACK to flash memory Read Button Reads the settings in the SERVOPACK to the SigmaWin Write But...

Page 175: ...ble is shown below The relationship between the operation pattern and the ZONE numbers for this example is shown in the following figure PGM STEP POS SPD ACC DEC TLIMT PTLIMT CLLV PSPD INPOS AREA1 AREA2 EVENT NEXT 0 A 0 30000 0 20 0 0 IT0 END 1 A 100000 30000 0 20 0 0 IT0 END 2 A 200000 30000 0 20 0 0 IT0 END 3 A 300000 30000 0 20 0 0 IT0 END 4 A 400000 30000 0 20 0 0 IT0 END ZONE Number ID ZONE N...

Page 176: ...of the following two steps The ZONE table is shown below The relationship between the operation pattern and the ZONE numbers for this example is shown in the following figure PGM STEP POS SPD ACC DEC TLIMT PTLIMT CLLV PSPD INPOS AREA1 AREA2 EVENT NEXT 0 A 500000 30000 0 20 0 0 IT0 1 1 A 0 30000 0 20 0 0 IT0 0 ZONE Num ber ID ZONE N ZONE P 0 0 0 1 99 995 100 004 2 199 995 200 004 3 0 0 4 299 995 30...

Page 177: ... 3 2 Setting the Position Deviation Overflow Alarm Level 8 5 8 3 3 Setting the Position Deviation Overflow Alarm Level at SERVO ON 8 7 8 4 Estimating the Moment of Inertia 8 8 8 4 1 Outline 8 8 8 4 2 Restrictions 8 8 8 4 3 Operating Procedure 8 9 8 5 Custom Tuning 8 15 8 5 1 Outline 8 15 8 5 2 Preparations 8 15 8 5 3 Operating Procedure 8 16 8 5 4 Automatically Adjusted Function Settings 8 21 8 5 ...

Page 178: ...5 8 6 4 Related Parameters 8 27 8 7 Vibration Suppression 8 28 8 7 1 Outline 8 28 8 7 2 Preparations 8 29 8 7 3 Operating Procedure 8 29 8 7 4 Related Parameters 8 31 8 8 Manual Tuning 8 32 8 8 1 Tuning the Servo Gains 8 32 8 8 2 Feedforward 8 41 8 8 3 Mode Switching Changing between Proportional and PI Control 8 41 ...

Page 179: ...No End Yes Perform custom tuning Continuous Vibration Adjust anti resonance control Residual Vibration When Positioning Perform vibration suppression Estimating the Moment of Inertia Initial Confirmations to Ensure Safe Tuning 8 3 Precautions to Ensure Safe Tuning Manual Tuning Tuning Functions Description Reference Moment of Inertia Estimation The moment of inertia ratio is calculated by operatin...

Page 180: ... tom tuning or manual tuning always use the above functions to monitor the machine operating status and SERVOPACK signal waveform while you adjust the servo gains Check the adjustment results with the following response waveforms Item Unit Torque reference Feedback speed min 1 Position reference speed min 1 Position deviation Reference Unit ...

Page 181: ...ion deviation is the difference between the position reference value and the actual position You can calculate the position deviation from the position loop gain Pn102 and the motor speed with the following formula Position Deviation Overflow Alarm Level Pn520 setting unit reference units 1 Refer to the following section for details 5 4 2 Electronic Gear Settings on page 5 23 2 When model followin...

Page 182: ...eration deceleration rate required for the position reference exceeds the tracking capacity of the Servomotor the tracking delay will increase and the position deviation will no longer satisfy the above formulas If this occurs lower the acceleration deceleration rate so that the Servomotor can follow the position reference or increase the position deviation over flow alarm level Related Parameters...

Page 183: ...en Enabled Classification 1 to 1 073 741 823 1 reference unit 25 600 Immediately Setup Pn528 Position Deviation Overflow Warning Level at SERVO ON Setting Range Setting Unit Default Setting When Enabled Classification 10 to 100 1 100 Immediately Setup Pn529 Speed Limit Level at SERVO ON Setting Range Setting Unit Default Setting When Enabled Classification 0 to 10 000 1 min 1 10 000 Immediately Se...

Page 184: ...ated with the following specifications Maximum speed 1 000 min 1 can be changed Acceleration rate 20 000 min 1 s can be changed Travel distance 2 5 rotations max can be changed 8 4 2 Restrictions The following restrictions apply to estimating the moment of inertia Systems for which Execution Cannot Be Performed When the machine system can move only in one direction When the range of motion is 0 5 ...

Page 185: ...ing from the menu bar of the Main Window of the SigmaWin The Tuning Dialog Box will be displayed Click the Cancel Button to cancel tuning 2 Click the Execute Button WARNING Estimating the moment of inertia requires operating the motor and therefore presents haz ards Observe the following precaution Confirm safety around moving parts This function involves automatic operation with vibration Make su...

Page 186: ...culation starting level If the load is large or the machine has low rigidity the torque limit may be applied caus ing moment of inertia estimation to fail If that occurs estimation may be possible if you double the setting of the start level Edit Buttons Click the button to display a dialog box to change the settings related to the speed loop or estimation start level Help Button Click this button...

Page 187: ...to display the Reference Transmission Dialog Box Cancel Button Click this button to return to the Tuning Dialog Box 5 Click the Next Button The Reference Transmission Dialog Box will be displayed CAUTION The travel distance is the distance for one operation in the forward or reverse direction During multiple operations the operation starting position may move in one direction or the other Confirm ...

Page 188: ...ta is being transferred Next Button This button is enabled only when the data has been transferred correctly You cannot use it if an error occurs or if you cancel the transfer before it is completed Click the Next Button to display the Operation Measurement Dialog Box Cancel Button This button cancels processing and returns you to the Tuning Dialog Box 7 Click the Next Button The Operation Measure...

Page 189: ...rmed from 2 to 7 times and then verified The number of measurements is displayed in upper left corner of the dialog box A progress bar at the bottom of the dialog box will show the progress of the transfer each time 12 When the measurements have been completed click the Servo On Button to change to the SERVO OFF state 13 Click the Next Button The Write Results Dialog Box will be displayed If you c...

Page 190: ...at is set for the parameter is displayed here After you click the Writing Results Button the value that was found with operation and measurements will be displayed as the new setting Back Button This button is disabled Cancel Button This button will return you to the Tuning Dialog Box 15 Confirm that the Identified Moment of Inertia Ratio Box and the Pn103 Moment of Inertia Ratio Box show the same...

Page 191: ... one tuning level Automatic setting of notch filters and anti resonance control is provided if vibration is detected Manual anti resonance control adjustment is also possible during custom tuning Tuning Mode 2 Setting Servo Gains Giving Priority to Position Control Applications or 3 Setting Servo Gains Giving Priority to Preventing Overshooting in Position Con trol Applications Two tuning levels a...

Page 192: ... an emergency stop at any time When custom tuning is started several parameters will be overwritten with the recommended settings which may greatly affect the response before and after execution Make sure that you can perform an emergency stop at any time Set the moment of inertia correctly before you execute custom tuning If the setting greatly differs from the actual moment of inertia vibration ...

Page 193: ...vershooting may occur because pri ority is given to response In addition to gain adjustment notch filters and anti resonance control are adjusted 2 Set servo gains for positioning application Tuning is performed for positioning applications In addition to gain adjust ment notch filters anti resonance control and vibration suppression are adjusted 3 Set servo gains especially to pre vent overshooti...

Page 194: ...If the moment of inertia ratio is not set correctly correct the setting and then click the Next Button 8 Change to the SERVO ON state enter a reference from the host controller and then click the Start tuning Button Tuning Mode 0 or 1 Tuning Mode 2 to 3 ...

Page 195: ...ing section for details Vibration Suppression Functions on page 8 20 11 When tuning has been completed click the Completed Button The values that were changed will be saved in the SERVOPACK and you will return to the Tuning Dia log Box This concludes the procedure Tuning Mode 0 or 1 Increase the tuning level until overshooting occurs Tuning Mode 2 to 3 Increase the feedforward level until overshoo...

Page 196: ... resonance control frequencies to the values from just before these frequencies were set automatically When they are reset vibration detection will start again Vib Detect Button While the notch filter or anti resonance control adjustment automatic setting function is enabled you can click the Vib Detect Button to manually detect vibration When you click the Vib Detect Button the SERVOPACK will det...

Page 197: ... automatically default setting Vibration will be detected during custom tuning and anti resonance control will be automati cally adjusted Parameter Function When Enabled Classification Pn460 n 0 Do not adjust the first stage notch filter auto matically during execution of custom tuning Immediately Tuning n 1 default setting Adjust the first stage notch filter automatically during execution of cust...

Page 198: ...ons are met pro ceed to step 3 3 Overshooting will be reduced if the feedback level is increased If the overshooting is eliminated proceed to step 4 4 The graph shows overshooting that occurred when the feed forward level was increased even more after step 3 In this state overshooting occurs but the positioning settling time is shorter Tuning is completed if the specifications are met The tuning r...

Page 199: ...Torque Reference Filter Time Constant Yes Pn408 Torque Related Function Selections Yes Pn409 First Stage Notch Filter Frequency Yes Pn40A First Stage Notch Filter Q Value Yes Pn40C Second Stage Notch Filter Frequency Yes Pn40D Second Stage Notch Filter Q Value Yes Pn140 Model Following Control Related Selections Yes Pn141 Model Following Control Gain Yes Pn143 Model Following Control Bias in the F...

Page 200: ... adjustment The parameters must not be write prohibited CAUTION Related parameters will be set automatically when anti resonance control adjustment is executed This may greatly affect the response before and after execution To ensure safety make sure that you can perform an emergency stop at any time Before you execute anti resonance control adjustment set the correct moment of inertia ratio Pn103...

Page 201: ...n anti resonance control adjustment is executed This may greatly affect the response before and after execution Make sure that you can perform an emergency stop to turn OFF the power supply at any time Set the moment of inertia correctly before you execute anti resonance control adjustment If the setting greatly differs from the actual moment of inertia effective vibration reduction may not be pos...

Page 202: ...l value The tuning level will return to the value from before when custom tuning was started 6 When the adjustment has been completed click the Finish Button The values that were changed will be saved in the SERVOPACK and you will return to the Tuning Dia log Box This concludes the procedure To Automatically Detect the Vibration Frequency The frequency will be set To Manually Set the Vibration Fre...

Page 203: ... or used as reference when you execute anti resonance control adjustment Do not change the settings while anti resonance control adjustment is being executed Yes The parameter is automatically set Parameter Name Automatic Changes Pn160 Anti Resonance Control Related Selections Yes Pn161 Anti Resonance Frequency Yes Pn163 Anti Resonance Damping Gain Yes ...

Page 204: ...ange the setting 10 at a time If the setting of this parameter is lowered the detection sensitivity will be increased Vibration may not be detected accurately if the setting is too small CAUTION Related parameters will be set automatically when vibration suppression is executed This may greatly affect the response before and after execution To ensure safety make sure that you can perform an emerge...

Page 205: ...ing Procedure on page 8 16 2 Click the Vib Suppress Button 3 Click the Import Button or click and Button to manually adjust the set frequency When you click the Import Button the residual vibration frequency in the motor is read as the set fre quency The frequency can be read only when the residual vibration frequency is between 1 0 and 100 0 Frequency detection will not be performed if there is n...

Page 206: ... When the vibration has been eliminated click the Finish Button The updated value will be saved in the SERVOPACK This concludes the procedure No settings related to vibration suppression are changed during operation If the Servomotor does not stop within approximately 10 seconds after changing the setting an update timeout will occur The setting will be automatically returned to the previous value...

Page 207: ...atically set No The parameter is not automatically set but the setting is read during execution Parameter Name Automatic Changes Pn140 Model Following Control Related Selections Yes Pn141 Model Following Control Gain Yes Pn143 Model Following Control Bias in the Forward Direction No Pn144 Model Following Control Bias in the Reverse Direction No Pn145 Vibration Suppression 1 Frequency A Yes Pn146 V...

Page 208: ... in the SERVOPACK to increase the response characteristic of the SERVOPACK Use manual tuning in the following cases When custom tuning does not work well When you want to increase the servo gains higher than the results of custom tuning When you want to determine the servo gains and moment of inertia ratio yourself The operation is started with the default settings for the servo gain parameters Ap...

Page 209: ... does not occur 2 Increase the position loop gain Pn100 and reduce the speed loop integral time constant Pn101 as far as possible within the range that does not cause machine vibration 3 Repeat steps 1 and 2 and return the settings about 10 to 20 from the values that you set 4 Increase the position loop gain Pn102 within the range that does not cause vibration If you greatly change any one servo g...

Page 210: ...r which a high position loop gain Pn102 cannot be set overflow alarms can occur during high speed operation If that is the case you can increase the setting of the fol lowing parameter to increase the level for alarm detection Use the following condition as a guideline for determining the setting If you use a position reference filter transient deviation will increase due to the filter time con st...

Page 211: ...hree parameters for the notch filter frequency notch filter Q value and notch filter depth This section describes the notch filter Q value and notch filter depth Notch filter Q Value The setting of the notch filter Q value determines the width of the frequencies that are filtered for the notch filter frequency The width of the notch changes with the notch filter Q value The larger the notch filter...

Page 212: ... notch filter Immediately Setup n 1 Enable first stage notch filter n 0 default setting Disable second stage notch filter n 1 Enable second stage notch filter Pn409 First Stage Notch Filter Frequency Setting Range Setting Unit Default Setting When Enabled Classification 50 to 5 000 1 Hz 5 000 Immediately Tuning Pn40A First Stage Notch Filter Q Value Setting Range Setting Unit Default Setting When ...

Page 213: ...tion with a large amplitude Always stay within the critical gain conditions If you use the torque reference filter and notch filters together the interference between the fil ters and the speed loop gain will be superimposed Allow leeway in the adjustments Guidelines are given below for gain settings 1 Speed Loop Gain Pn100 Hz and Position Loop Gain Pn102 s Stable gain Pn102 s 2π Pn100 4 Hz Critic...

Page 214: ... to determine the servo gains and model following control parameters yourself The block diagram for model following control is provided below Speed Loop Gain Pn100 Hz and Speed Loop Integral Time Constant Pn101 ms Stable gain Pn101 ms 4 000 2π Pn100 Hz therefore If Pn100 40 0 Hz then Pn101 4 000 2π 40 0 15 92 ms Example Model following control mKp mVFF mTFF M PG Tf Speed Speed pattern Time Movemen...

Page 215: ...p Description 1 Adjust the servo gains Refer to the following section for an example procedure Example Adjustment Procedure on page 8 33 Note 1 Set the moment of inertia ratio Pn103 as accurately as possible 2 Refer to the guidelines for manually tuning the servo gains and set a stable gain for the position loop gain Pn102 Example Adjustment Procedure on page 8 33 2 Increase the model following co...

Page 216: ...Setting Range Setting Unit Default Setting When Enabled Classification 10 to 20 000 0 1 s 500 Immediately Tuning For machines for which a high model following control gain cannot be set the size of the position deviation in model following control will be determined by the set ting of the model following control gain For a machine with low rigidity in which a high model following control gain cann...

Page 217: ...Classification 0 to 100 1 0 Immediately Tuning Pn10A Feedforward Filter Time Constant Setting Range Setting Unit Default Setting When Enabled Classification 0 to 6 400 0 01 ms 0 Immediately Tuning Feedback pulses Position loop gain Kp Pn109 Pn10A Differential Feedforward Feedforward Filter Time Constant Speed Speed pattern Time Movement reference Program table Input Signals Time Input pattern Inpu...

Page 218: ... mode switching level for acceleration Pn10E the speed loop is changed to P control Pn10C Mode Switching Level for Torque Reference Setting Range Setting Unit Default Setting When Enabled Classification 0 to 800 1 200 Immediately Tuning Pn10D Mode Switching Level for Speed Reference Setting Range Setting Unit Default Setting When Enabled Classification 0 to 10 000 1 min 1 0 Immediately Tuning Pn10...

Page 219: ...ng the Position Deviation as the Mode Switching Condition When the position deviation equals or exceeds the value set for the mode switching level for position deviation Pn10F the speed loop is changed to P control Pn10F PI Speed Speed reference Motor speed Time P control PI control Position deviation ...

Page 220: ... 1 1 Items That You Can Monitor 9 2 9 1 2 Operating Procedure 9 2 9 2 Monitoring SERVOPACK Status 9 3 9 2 1 System Monitor 9 3 9 2 2 Monitoring Status and Operations 9 3 9 2 3 I O Signal Monitor 9 5 9 3 Monitoring Machine Operation Status and Signal Waveforms 9 6 9 3 1 Items That You Can Monitor 9 6 9 3 2 Using the SigmaWin 9 6 Monitoring 9 ...

Page 221: ...y the product information monitor dialog box Select Monitor Read Product Information from the menu bar of the Main Window of the SigmaWin Monitor Items Information on SERVOPACKs SERVOPACK model SERVOPACK software version SERVOPACK special specifications SERVOPACK serial number SERVOPACK manufacturing date Information on Servomotors Servomotor model Information on Encoders Encoder resolution Encode...

Page 222: ... Use the following method to display the SERVOPACK s Status Monitor Window or Motion Mon itor Window Select Monitor Monitor Status Monitor or Monitor Monitor Motion Monitor from the menu bar of the Main Window of the SigmaWin The current status of the SERVOPACK is displayed If this check box is selected this dialog box will be dis played automatically when the SigmaWin starts The current signal st...

Page 223: ...utput Signal Status ALM Servo Alarm Output Sig nal INPOSITION Positioning Completion Output Signal TGON Rotation Detection Output Signal S RDY Servo Ready Output Signal CLT Torque Limit Status Out put Signal BK Brake Output Signal WARN Warning Output Sig nal NEAR Near Output Signal POSRDY Homing Completed Output Signal BUSY Busy Output Signal PAREA Program Specified Area Signal S ONS SERVO ON Stat...

Page 224: ...check wiring Checking Input Signal Wiring Change the signal status at the host controller If the input signal status on the window changes accordingly then the wiring is correct Checking Output Signal Wiring Click the Force Output Mode Button This will force the output signal status to change If the signal status at the host controller changes accordingly then the wiring is correct You cannot use ...

Page 225: ...ures for the SigmaWin AC Servo Drives Engineering Tool SigmaWin Online Manual Σ S Component Manual No SIEP S800001 06 Operating Procedures Select Trace Trace from the menu bar of the Main Window of the SigmaWin CN1 U V W 1 Kp M ENC CN2 Load SERVOPACK Input pattern Position reference speed Position amplifier deviation Feedback speed Speed reference Torque reference Speed conversion Electronic gear ...

Page 226: ... ON SERVO ON Input Signal DEC Homing Deceleration Switch Input Signal ALM RST Alarm Reset Input Signal P CL Forward External Torque Limit Signal N CL Reverse External Torque Limit Signal E STP Emergency Stop Input Signal Output Signals ALM Servo Alarm Output Signal INPOSITION Positioning Completion Output Signal POUT0 Program Step Number Output 0 Signal POUT1 Program Step Number Output 1 Signal PO...

Page 227: ...5 10 1 4 List of Warnings 10 15 10 1 5 Troubleshooting Warnings 10 16 10 1 6 List of Errors 10 17 10 1 7 Alarm Reset 10 18 10 1 8 Displaying the Alarm History 10 18 10 1 9 Alarm History Clear 10 19 10 2 Troubleshooting Based on the Operation and Conditions of the Servo Drive 10 20 10 3 Inspections and Guideline for Product Replacement Period 10 24 10 3 1 Inspections 10 24 10 3 2 Guideline for Prod...

Page 228: ... 1 time and lighting for 1 s A 0 A E Alternates between flashing 2 times and lighting for 1 s A 1 Alternates between flashing 3 times and lighting for 1 s A 4 Alternates between flashing 4 times and lighting for 1 s A 5 A 6 A D Alternates between flashing 5 times and lighting for 1 s A 7 Alternates between flashing 6 times and lighting for 1 s A 8 A C Lit A system error A B occurred or initializat...

Page 229: ...setting range No A 04A Parameter Setting Error 2 A PnB parameter setting is outside of the setting range No A 050 Combination Error A Servomotor with an unsupported capacity is selected in the parameters Yes A 051 Unsupported Device Alarm An unsupported Servomotor was selected in the parameters No A 0B0 Invalid SERVO ON Command Alarm The S ON SERVO ON signal was input from the host controller afte...

Page 230: ...SERVO ON state This alarm occurs if a refer ence is input and the setting of Pn520 Exces sive Position Deviation Alarm Level is exceeded before the limit is cleared Yes A E19 Program Table Checksum Error The program table was not correctly stored in flash memory Yes A E1A Program Table Version Mismatch The combination of firmware and program table versions is wrong Yes A E1B Program Table Out of R...

Page 231: ...se Implement countermea sures against noise page 4 4 Gas water drops or cutting oil entered the SERVOPACK and caused failure of SER VOPACK components Confirm the installation conditions The SERVOPACK may be faulty Replace the SERVOPACK A failure occurred in the SERVOPACK Turn the power supply to the SERVOPACK OFF and ON again If the alarm still occurs the SERVOPACK may have failed The SERVOPACK ma...

Page 232: ...tis fied Decrease the setting of the electronic gear ratio Pn20E Pn210 page 5 24 The speed of program jog operation went below the setting range when Pn533 Program Jog Speed was changed Check to see if the detec tion conditions are satis fied Increase the setting of Pn533 page 6 6 A 04A Parameter Set ting Error 2 The START and STOP signals are allo cated to the same pin with the same polarity Chec...

Page 233: ...K or contact with the FG Check for short circuits across the Servomotor connection terminals U V and W on the SERVO PACK or between the FG and terminals U V or W The SERVOPACK may be faulty Replace the SERVOPACK A heavy load was applied while the Ser vomotor was stopped or running at a low speed Check to see if the oper ating conditions exceed Servo Drive specifica tions Reduce the load applied to...

Page 234: ...nge Increase the decelera tion time or reduce the load A failure occurred in the SERVOPACK If an alarm still occurs even when the power supply voltage is within product specifications the SERVOPACK may be faulty Replace the SERVOPACK A 510 Overspeed The motor exceeded the maximum speed The order of phases U V and W in the motor wiring is not correct Check the wiring of the Servomotor Make sure tha...

Page 235: ...nd Reconsider the load and operating condi tions Or increase the motor capacity An excessive load was applied during opera tion because the Ser vomotor was not driven due to mechani cal problems Check the operation refer ence and motor speed Correct the mechanical problem A failure occurred in the SERVOPACK The SERVOPACK may be faulty Replace the SERVOPACK An unsupported Servo motor was selected i...

Page 236: ...cutting oil or faulty contact in connector caused by vibration Check the operating envi ronment Improve the operating environmental and replace the cable If the alarm still occurs replace the SERVO PACK A malfunction was caused by noise Connect the cables around the encoder correctly e g separate the Encoder Cable from the Servomotor Power Cable and ground the encoder A failure occurred in the SER...

Page 237: ...VO PACK A malfunction was caused by noise Connect the cables around the encoder correctly e g separate the Encoder Cable from the Servomotor Power Cable and ground the encoder A failure occurred in the SERVOPACK Connect the Servomo tor to another SERVO PACK and turn ON the power supply If no alarm occurs the SER VOPACK may be faulty Replace the SERVO PACK A failure occurred in the encoder Connect ...

Page 238: ... still occurs the SERVOPACK may be faulty Replace the SER VOPACK A C10 Servomotor Out of Control Detected in the SERVO ON state The order of phases U V and W in the motor wiring is not correct Check the Servomotor wiring Make sure that the Ser vomotor is correctly wired A failure occurred in the encoder If the motor wiring is correct and an alarm still occurs after turning the power supply OFF and...

Page 239: ...tion Overflow Alarm at SERVO ON The system changed to the SERVO ON state after the position devi ation exceeded the setting of Pn526 Excessive Position Deviation Alarm Level at SERVO ON in the SERVO OFF state Check the position devia tion in the SERVO OFF state Optimize the setting of Pn526 Excessive Posi tion Error Alarm Level at SERVO ON page 8 5 A D02 Position Deviation Overflow Alarm for Speed...

Page 240: ... may occur if the power supply was turned OFF while saving or initializing the jog speed table Initialize the jog speed table If that does not reset the alarm correct the jog speed table A E21 Jog Table Version Mismatch The combination of firmware and jog speed table versions is wrong Change the version of the jog speed table to a version that is compati ble with the firmware A E22 Jog Table Out o...

Page 241: ...eviation Overflow Alarm at SERVO ON The position deviation exceeded the following value in the SERVO ON state A 910 Overload This warning occurs before an overload alarm A 710 or A 720 occurs If the warning is ignored and operation is continued an alarm may occur A 941 Change of Parameters Requires Restart Parameters have been changed that require the power supply to be turned OFF and ON again A A...

Page 242: ...cessive Position Deviation Alarm Level to see if it is set to an appropriate value Optimize the setting of Pn520 page 8 5 A failure occurred in the SERVOPACK Turn the power supply to the SERVOPACK OFF and ON again If an alarm still occurs the SERVOPACK may be faulty Replace the SERVOPACK A 901 Position Deviation Overflow Alarm at SERVO ON The position deviation exceeded the following value in the ...

Page 243: ...1 and PnB23 to 0 page 5 27 E4EE Movement Prohibited by N LS The specified target position exceeds PnB23 Reverse Software Limit Check the specification of the target position Check the setting of PnB23 Reverse Software Limit Check the setting of PnB20 Movement Method rotational linear coordinates If the software limits are not being used select rotational coordinates with PnB20 Move ment Method or ...

Page 244: ...equired Operating Procedure Use the following display procedure 1 Select Alarm Display Alarm from the menu bar of the Main Window of the Sig maWin The Alarm Display Dialog Box will be displayed E58E Position Reference Out of Range Error A setting in the program table is wrong Check the settings page 7 13 E5DE Illegal Homing Reference Starting homing was requested when the homing method was not spe...

Page 245: ...ig maWin The Alarm Display Dialog Box will be displayed 2 Click the Alarm History Tab 3 Click the Clear Button The alarm history will be cleared 1 If the same alarm occurs consecutively within one hour it is not saved in the alarm history If it occurs after an hour or more it is saved 2 You can clear the alarm history by clicking the Clear Button The alarm history is not cleared when you reset ala...

Page 246: ...k the model of Ser vomotor that is being used and the setting of Pn08A Motor Selection Switch Make sure that the model of Servomotor that is being used agrees with the setting of Pn08A Motor Selection Switch page 5 9 The input signals START SEL etc are not being input cor rectly The programming reg istered in the program table is not correct Check the contents of the program table Correctly alloca...

Page 247: ...balanced Balance the coupling The bearings are defec tive Check for noise and vibration around the bearings Replace the Servomotor There is a vibration source at the driven machine Check for any foreign matter damage or deformation in the machine s moving parts Consult with the machine manufacturer The Encoder Cable does not satisfy specifications Check the Encoder Cable to see if it satisfies spe...

Page 248: ... Set Pn101 to an appro priate value The setting of Pn103 Moment of Inertia Ratio is not appropriate Check Pn103 Moment of Inertia Ratio Set Pn103 Moment of Inertia Ratio to an appropriate value Position Deviation without Alarm The Encoder Cable does not satisfy specifications Check the Encoder Cable to see if it satisfies specifications Use cables that satisfy the specifications There is excessive...

Page 249: ...f the Servo motor is dirty Visually check the sur face for dirt Clean dirt dust and oil from the surface There is an overload on the Servomotor Check the load status with the SigmaWin If the load is excessive reduce the load or replace the Servomotor with a Servomotor with a larger capacity The SERVOPACK was not found by an axis search from the SigmaWin The SigmaWin address setting and SERVO PACK ...

Page 250: ...c and electronic parts in the SERVOPACK are subject to deterioration over time Replace the SERVOPACK using the following part service life as a guideline Item Frequency Inspection Correction External Appearance At least once a year Check for dust dirt and oil on the surfaces To clean the SERVOPACK use compressed air or another means that will not create static electric ity Part Guidelines for Part...

Page 251: ...chapter provides information on the parameters 11 1 List of Parameters 11 2 11 1 1 Interpreting the Parameter Lists 11 2 11 1 2 List of Parameters 11 2 11 2 Parameter Recording Table 11 28 Parameter List 11 ...

Page 252: ...n or perform a software reset There are the following two classifications Setup Tuning Refer to the following section for details 5 1 1 Parameter Classification on page 5 3 n X Rotation Direction Selection Reference 0 Use CCW as the forward direction page 5 23 1 Use CW as the forward direction Reverse Rotation Mode n X Reserved parameter Do not change n X Reserved parameter Do not change n X Reser...

Page 253: ...Position Loop Gain 10 to 20 000 0 1 s 400 Immedi ately Tuning page 8 32 Pn103 2 Moment of Inertia Ratio 0 to 20 000 1 0 Immedi ately Tuning page 8 32 Pn109 2 Feedforward 0 to 100 1 0 Immedi ately Tuning page 8 41 Pn10A 2 Feedforward Filter Time Constant 0 to 6 400 0 01 ms 0 Immedi ately Tuning page 8 41 Continued on next page Continued from previous page Parameter No Size Name Setting Range Settin...

Page 254: ... 000 0 1 s 500 Immedi ately Tuning Continued on next page Continued from previous page Parameter No Size Name Setting Range Setting Unit Default Setting When Enabled Classi fication Reference n X Mode Switching Selection When Enabled Reference 0 Use the internal torque reference as the condition level setting Pn10C Immedi ately page 8 41 1 Use the speed reference as the condition level setting Pn1...

Page 255: ...ol Function Selections 0000h to 2210h 0010h After restart Setup Continued on next page Continued from previous page Parameter No Size Name Setting Range Setting Unit Default Setting When Enabled Classi fication Reference n X Anti Resonance Control Selection 0 Do not use anti resonance control 1 Use anti resonance control n X Anti Resonance Control Adjustment Selection Reference 0 Do not adjust the...

Page 256: ...se External Torque Limit 0 to 800 1 1 100 Immedi ately Setup page 5 25 Pn406 2 Emergency Stop Torque 0 to 800 1 1 800 Immedi ately Setup Pn408 2 Torque Related Function Selections 0000h to 1111h 0000h Setup Pn409 2 First Stage Notch Filter Frequency 50 to 2 000 1 Hz 2000 Immedi ately Tuning page 8 35 Pn40A 2 First Stage Notch Filter Q Value 50 to 1 000 0 01 70 Immedi ately Tuning page 8 35 Pn40B 2...

Page 257: ...23 1 refer ence unit 25600 Immedi ately Setup page 8 5 page 10 3 Pn526 4 Position Deviation Overflow Alarm Level at SERVO ON 1 to 1 073 741 823 1 refer ence unit 25600 Immedi ately Setup page 8 5 Pn528 2 Position Deviation Overflow Warning Level at SERVO ON 10 to 100 1 100 Immedi ately Setup page 8 5 Pn529 2 Speed Limit Level at SERVO ON 0 to 10 000 1 min 1 10000 Immedi ately Setup page 8 5 Pn52B ...

Page 258: ...ious page Parameter No Size Name Setting Range Setting Unit Default Setting When Enabled Classi fication Reference n X Program Jog Operation Pattern 0 Waiting time in Pn535 Forward by travel distance in Pn531 Number of move ments in Pn536 1 Waiting time in Pn535 Reverse by travel distance in Pn531 Number of move ments in Pn536 2 Waiting time in Pn535 Forward by travel distance in Pn531 Number of m...

Page 259: ...ce units s2 500000 Immedi ately Setup page 7 4 PnB2B 4 Deceleration Rate 1 to 99 999 999 Reference units s2 500000 Immedi ately Setup page 7 4 PnB2D 4 Positioning Completed Width INPOSITION Width 1 to 99 999 Reference Unit 10 Immedi ately Setup page 5 13 PnB2F 4 Near Signal Width NEAR Width 1 to 99 999 Reference Unit 10 Immedi ately Setup page 5 16 PnB31 2 Homing Method 0000 to 0005 0 After restar...

Page 260: ...change 0000h to 0002h 0000h After restart Setup PnB91 2 INPOSITION Control Switch 0000h to 0011h 0000h After restart Setup page 7 4 PnB92 2 Reserved parameter Do not change 0000h to 0002h 0001h After restart Setup Continued on next page Continued from previous page Parameter No Size Name Setting Range Setting Unit Default Setting When Enabled Classi fication Reference n X 0 When the HOME signal tu...

Page 261: ...nnector pin is disabled 3 Always use mode 1 jog speed table operation Note The signal allocation to the CN1 connector pin is disabled n X Signal Terminal Number 0 Input signal from CN1 3 1 Input signal from CN1 4 2 Input signal from CN1 5 3 Input signal from CN1 6 4 Input signal from CN1 8 5 Input signal from CN1 9 6 Input signal from CN1 10 7 Input signal from CN1 11 8 Input signal from CN1 12 9 ...

Page 262: ...N closes 1 Stop program table operation when the STOP signal turns OFF opens 2 3 Program table operation is not stopped n X Signal Terminal Number Same as PnBA0 n X n X Reserved parameter Do not change n X Reserved parameter Do not change n X Signal Usage Method 0 Jog forward while the input signal is ON closed 1 Jog forward while the input signal is OFF open 2 3 Forward jog operation is not perfo...

Page 263: ... n X Signal Terminal Number Same as PnBA0 n X n X Reserved parameter Do not change n X Reserved parameter Do not change n X Signal Usage Method 0 Turn ON close the PGMRES signal to reset and cancel program table operation 1 Turn OFF open the PGMRES signal to reset and cancel program table operation 2 3 Program table operation is not reset n X Signal Terminal Number Same as PnBA0 n X n X Reserved p...

Page 264: ...Step Selection Input signal is active when the input signal is OFF open 2 The SEL1 Program Step Selection Input signal is always active 3 The SEL1 Program Step Selection Input signal is always inactive n X Signal Terminal Number Same as PnBA0 n X n X Reserved parameter Do not change n X Reserved parameter Do not change n X Signal Usage Method 0 The SEL2 Program Step Selection Input signal is activ...

Page 265: ... Program Step Selection Input signal is active when the input signal is OFF open 2 The SEL3 Program Step Selection Input signal is always active 3 The SEL3 Program Step Selection Input signal is always inactive n X Signal Terminal Number Same as PnBA0 n X n X Reserved parameter Do not change n X Reserved parameter Do not change n X Signal Usage Method 0 The SEL4 Program Step Selection Input signal...

Page 266: ...nal is active when the input signal is OFF open 2 The SEL5 Program Step Selection Input signal is always active 3 The SEL5 Program Step Selection Input signal is always inactive n X Signal Terminal Number Same as PnBA0 n X n X Reserved parameter Do not change n X Reserved parameter Do not change n X Signal Usage Method 0 The system changes to the SERVO ON state power is supplied and operation is e...

Page 267: ...rns OFF opens 2 Homing deceleration switch is always ON 3 Homing deceleration switch is always OFF n X Signal Terminal Number Same as PnBA0 n X n X Reserved parameter Do not change n X Reserved parameter Do not change n X Signal Usage Method 0 Reset alarms when the input signal turns ON closes 1 Reset alarms when the input signal turns OFF opens 2 3 Do not reset alarms The signal is disabled n X S...

Page 268: ...Classi fication Reference n X Signal Usage Method 0 Enable the reverse external torque limit when the input signal turns ON closes 1 Enable the reverse external torque limit when the input signal turns OFF opens 2 Always enable the reverse external torque limit 3 Always disable the reverse external torque limit n X Signal Terminal Number Same as PnBA0 n X n X Reserved parameter Do not change n X R...

Page 269: ...leted 2 Do not use this signal n X Signal Terminal Number 0 Output signal from CN1 18 1 Output signal from CN1 20 2 Output signal from CN1 21 3 Output signal from CN1 22 4 Output signal from CN1 23 5 Output signal from CN1 24 6 Output signal from CN1 25 7 Output signal from CN1 26 8 Output signal from CN1 27 9 Output signal from CN1 28 A Output signal from CN1 29 B Output signal from CN1 30 C Outp...

Page 270: ...r output 1 is 1 1 Turn OFF open the output when program step number output 1 is 1 2 Do not use this signal n X Signal Terminal Number Same as PnBC0 n X n X Reserved parameter Do not change n X Reserved parameter Do not change n X Signal Usage Method 0 Turn ON close the output when program step number output 2 is 1 1 Turn OFF open the output when program step number output 2 is 1 2 Do not use this ...

Page 271: ... 1 1 Turn OFF open the output when program step number output 4 is 1 2 Do not use this signal n X Signal Terminal Number Same as PnBC0 n X n X Reserved parameter Do not change n X Reserved parameter Do not change n X Signal Usage Method 0 Turn ON close the output when program step number output 5 is 1 1 Turn OFF open the output when program step number output 5 is 1 2 Do not use this signal n X Si...

Page 272: ...nal turns ON closes 1 Release the brake when the brake signal turns OFF opens 2 Do not use this signal n X Signal Terminal Number Same as PnBC0 n X n X Reserved parameter Do not change n X Reserved parameter Do not change n X Signal Usage Method 0 Turn ON close the output when the servo is ready 1 Turn OFF open the output when the servo is ready 2 Do not use this signal n X Signal Terminal Number ...

Page 273: ... while the Servomotor is rotating 2 Do not use this signal n X Signal Terminal Number Same as PnBC0 n X n X Reserved parameter Do not change n X Reserved parameter Do not change n X Signal Usage Method 0 Turn ON close the output when the position deviation is equal to or greater than the setting of PnB2F Near Signal Width 1 Turn OFF open the output when the position deviation is equal to or greate...

Page 274: ... being detected 1 Turn OFF open the output while the encoder origin is being detected 2 Do not use this signal n X Signal Terminal Number Same as PnBC0 n X n X Reserved parameter Do not change n X Reserved parameter Do not change n X Signal Usage Method 0 Turn ON close the output while the Servomotor is operating 1 Turn OFF open the output while the Servomotor is operating 2 Do not use this signal...

Page 275: ...se the output within the program specfied area 1 Turn OFF open the output within the program specfied area 2 Do not use this signal n X Signal Terminal Number Same as PnBC0 n X n X Reserved parameter Do not change n X Reserved parameter Do not change n X Signal Usage Method 0 Turn ON close the output in the SERVO ON state 1 Turn OFF open the output in the SERVO ON state 2 Do not use this signal n ...

Page 276: ...hen ZONE output 0 is 1 1 Turn OFF open the output when ZONE output 0 is 1 2 Do not use this signal n X Signal Terminal Number Same as PnBC0 n X n X Reserved parameter Do not change n X Reserved parameter Do not change n X Signal Usage Method 0 Turn ON close the output when ZONE output 1 is 1 1 Turn OFF open the output when ZONE output 1 is 1 2 Do not use this signal n X Signal Terminal Number Same...

Page 277: ...0 Immedi ately Setup page 7 6 PnBE3 2 Pressing Time for Pressing Homing 0 to 10 000 1 ms 250 Immedi ately Setup page 7 6 PnBE4 2 Pressing Operation Completion Wait Time 0 to 10 000 1 ms 250 Immedi ately Setup Continued from previous page Parameter No Size Name Setting Range Setting Unit Default Setting When Enabled Classi fication Reference n X Signal Usage Method 0 Turn ON close the output when Z...

Page 278: ...ue Reference Immediately Pn10D 0 Mode Switching Level for Speed Reference Immediately Pn10E 0 Mode Switching Level for Acceleration Immediately Pn10F 0 Mode Switching Level for Position Deviation Immediately Pn121 100 Reserved parameter Do not change Immediately Pn123 0 Reserved parameter Do not change Immediately Pn140 0100h Model Following Control Related Selections Immediately Pn141 500 Model F...

Page 279: ...rgency Stop Torque Immediately Pn408 0000h Torque Related Function Selections Pn409 2000 First Stage Notch Filter Fre quency Immediately Pn40A 70 First Stage Notch Filter Q Value Immediately Pn40B 0 First Stage Notch Filter Depth Immediately Pn40C 2000 Second Stage Notch Filter Frequency Immediately Pn40D 70 Second Stage Notch Filter Q Value Immediately Pn40E 0 Second Stage Notch Filter Depth Imme...

Page 280: ...B21 99999999 Linear coordinates PnB20 0 Forward Software Limit P LS Rotational coordinates PnB20 0 Last Rota tional Coordinate After restart PnB23 99999999 Linear coordinates PnB20 0 Reverse Software Limit N LS Rotational coordinates PnB20 0 First Rota tional Coordinate After restart PnB25 0 Home Position After restart PnB27 2000 Reserved parameter Do not change After restart PnB29 500000 Accelera...

Page 281: ...7 0050h SEL0 Program Step Selection Input 0 Signal Allocation After restart PnBA8 0060h SEL1 Program Step Selection Input 1 Signal Allocation After restart PnBA9 0070h SEL2 Program Step Selection Input 2 Signal Allocation After restart PnBAA 0080h SEL3 Program Step Selection Input 3 Signal Allocation After restart PnBAB 0090h SEL4 Program Step Selection Input 4 Signal Allocation After restart PnBA...

Page 282: ...n After restart PnBCB 0002h S RDY Servo Ready Sig nal Allocation After restart PnBCC 0002h CLT Torque Limit Status Output Signal Allocation After restart PnBCD 0002h TGON Rotation Detection Output Signal Allocation After restart PnBCE 0002h NEAR Near Output Sig nal Allocation After restart PnBCF 0002h V CMP Speed Coinci dence Detection Output Signal Allocation After restart PnBD0 0070h PCO Encoder...

Page 283: ...estart PnBD9 0002h ZONE3 ZONE Output 3 Signal Allocation After restart PnBDB 0002h Reserved parameter Do not change After restart PnBE1 25 Pressing Torque for Press ing Homing Immediately PnBE2 250 Pressing Detection Time for Pressing Homing Immediately PnBE3 250 Pressing Time for Pressing Homing Immediately PnBE4 250 Pressing Operation Com pletion Wait Time Immediately Continued from previous pag...

Page 284: ...ing output signal status 5 22 CLLV 7 19 Computer Cables 2 14 confirming input signals 5 20 continuous output current 2 7 critical gain 8 37 current loop 8 32 custom tuning 8 3 D damping gain 8 24 DEC 7 19 deceleration rate 7 19 derating 3 7 derating rate 2 6 dimensional drawing 2 14 drive method 2 4 2 7 E Edit Parameters 5 6 electronic gear ratio settings 5 24 Emergency Stop Input 5 13 Emergency S...

Page 285: ...er frequency 8 35 notch filter Q value 8 35 notch frequency 8 35 NTn 7 20 numeric setting 5 4 O overload detection level 2 6 overvoltage category 2 7 P part service life 10 24 PGMSTEP 7 19 POS 7 19 position deviation overflow alarm 8 5 position deviation overflow alarm level at SERVO ON 8 7 position loop 8 32 position loop gain 8 3 8 33 Position Near Width 5 16 Positioning Completed Width 5 13 pos...

Page 286: ...peed Coincidence Detection Output 5 16 speed loop 8 32 speed loop gain 8 3 8 33 Speed Loop Integral Time Constant 8 34 stable gain 8 37 standard replacement period 10 24 status indicators 1 5 Status Monitor 9 3 storage humidity 2 7 storage temperature 2 7 surrounding air humidity 2 4 2 7 surrounding air temperature 2 4 2 7 T target position 7 19 thermal class 2 4 thrust load 2 5 time rating 2 4 TL...

Page 287: ...on Note Back cover Revision Address May 2016 1 1 Front cover Revision Format 5 3 1 Revision Pin No of SEL0 to SEL5 program step selection input signals 5 3 4 Revision CN1 pin No in the output signal allocation table Back cover Revision Address and format December 2014 All chapters Corrected mistakes Front matter Addition Compliance with EC Directives 2 5 7 Addition Wiring Specifications 10 1 2 and...

Page 288: ...0799 http www yaskawa co th YASKAWA ELECTRIC CHINA CO LTD 22F One Corporate Avenue No 222 Hubin Road Shanghai 200021 China Phone 86 21 5385 2200 Fax 86 21 5385 3299 http www yaskawa com cn YASKAWA ELECTRIC CHINA CO LTD BEIJING OFFICE Room 1011 Tower W3 Oriental Plaza No 1 East Chang An Ave Dong Cheng District Beijing 100738 China Phone 86 10 8518 4086 Fax 86 10 8518 4082 YASKAWA ELECTRIC TAIWAN CO...

Reviews: