Yamaha Portatone PSR-48, Authorized Product Manual
The Yamaha Portatone PSR-48 is a versatile electronic keyboard designed for musicians of all levels. Navigate its features and unleash your creativity with the help of the comprehensive Owner's Manual. Download this essential manual for free from our website, ensuring you make the most of your musical journey.
Share
Download


Reviews:
No comments
Related manuals for Portatone PSR-48

AW768
Brand: Alienware Pages: 13

CYPHER
Brand: Vortex Pages: 3

Chester Creek BigBlu KinderBoard
Brand: AbleNet Pages: 11

CFX
Brand: Boundless Pages: 22

VERSAKEY
Brand: ID Tech Pages: 16

SF-KB1005
Brand: Safire Pages: 16

K166-1259-UK
Brand: Kanex Pages: 2

K86R
Brand: I-Rocks Pages: 26
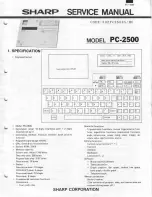
pc-2500
Brand: Sharp Pages: 29

F0254
Brand: FAAC Pages: 10

BFQ-575
Brand: Franklin Pages: 7

Wavestation
Brand: Korg Pages: 74

12848
Brand: Muirhead Pages: 2

VS-K300
Brand: Vook Pages: 15

SILVERLINE 302KS
Brand: Trust Pages: 10

VSACC25612-1
Brand: ViewSonic Pages: 15

KYBAC540-USBHY
Brand: Accuratus Pages: 1

HKB260UBKLC
Brand: Accuratus Pages: 1


