Yamaha N-100, Owner'S Manual
The Yamaha N-100 Service Manual is a comprehensive guide specifically designed to assist users in operating and maintaining the Yamaha N-100 product. This manual is available for free download at manualshive.com, allowing users to access essential instructions and troubleshooting tips to optimize their Yamaha N-100 experience.
Share
Download


Reviews:
No comments
Related manuals for N-100
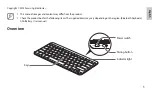
VG-KBD2000
Brand: Samsung Pages: 10
EJ-BT230
Brand: Samsung Pages: 11

iGrip
Brand: Alphagrip Pages: 2
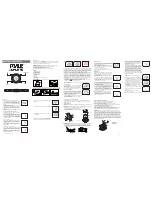
PHRM36
Brand: Pyle Pages: 1

KB335
Brand: Azio Pages: 5

CKSE-112B
Brand: XUMA Pages: 8

32000574
Brand: Saab Pages: 9

Subi88 MK II
Brand: Schubert Pages: 151

Chester Creek BigBlu KinderBoard
Brand: AbleNet Pages: 11

SL-6473-SSV
Brand: Speed Link Pages: 22

iStick TC60W
Brand: SC Pages: 49

177771
Brand: Manhattan Pages: 2

TP5-0556
Brand: DOBE Pages: 7

BC 30
Brand: Garmin Pages: 62

KB-9606
Brand: Panacom Pages: 12

PERIBOARD
Brand: perixx Pages: 21

IC-151
Brand: Franklin Pages: 30

BALLISTA200S
Brand: Primus Pages: 25


