Wolf cinema SDC-12, User Manual
Looking for the user manual for your Wolf cinema SDC-12? Look no further! Our website offers a hassle-free, free download of the SDC-12's user manual. Find all the information you need about this high-quality product at your fingertips, right at manualshive.com.
Share
Download


Reviews:
No comments
Related manuals for SDC-12

V311X
Brand: NEC Pages: 2

PA600X Series
Brand: NEC Pages: 235

PA1004UL-W
Brand: NEC Pages: 240

ImagePro 8888
Brand: Dukane Pages: 2

LC-SVGA860
Brand: Eiki Pages: 51

Insta-DE Series
Brand: Elite Screens Pages: 4

V9647
Brand: RS Pages: 4

ACD-10209
Brand: AccuDual Pages: 6

PJ WX4153
Brand: Ricoh Pages: 24

Stories Projector LTC050 Series
Brand: LEXIBOOK Pages: 2

M4310
Brand: Panamax Pages: 2

EH515T
Brand: Optoma Pages: 63

i3Projector L3002UW
Brand: Laser Techology Pages: 60

Precision VS11856
Brand: Precision Pages: 60

WUX450
Brand: Canon Pages: 9

XEED SX6
Brand: Canon Pages: 8

WUX400ST
Brand: Canon Pages: 2
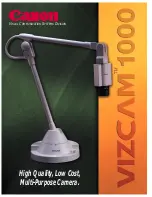
Vizcam 1000
Brand: Canon Pages: 4


