

Operational Menu Settings using the LTL Acorn Control Panel Screen
This quick start guide
will help you quickly set
up your camera for use.
Please ignore any reference
to downloads or CDs in the Ltl
Acorn manual, these are only
required for cellular cameras.
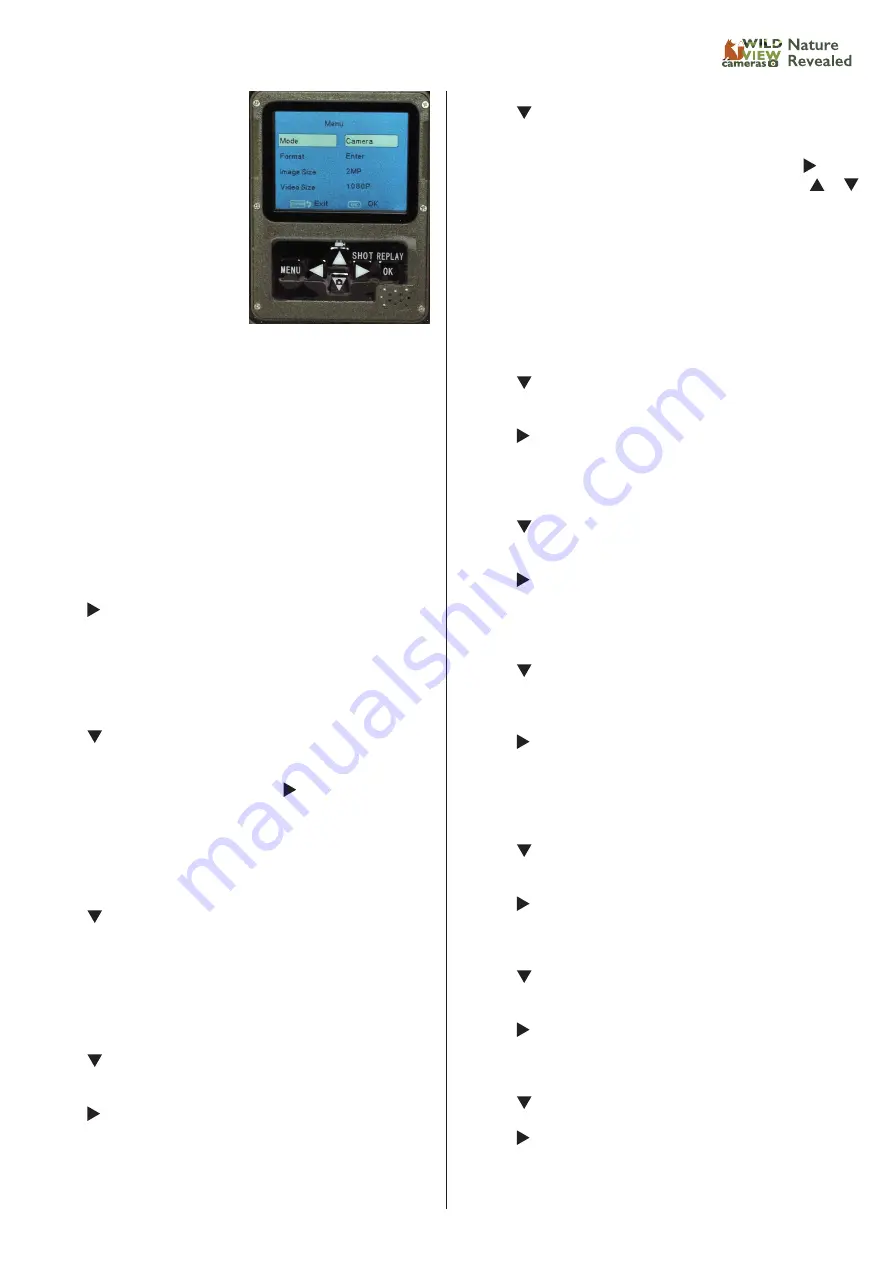
This screen is from the 5210a
but all Ltl Acorn cameras have
the same menu functions.
Before you start
• Ensure you have inserted batteries and an unlocked SD card.
• Open the bottom flap and switch to ‘Test’
• You will hear a chime, the screen will briefly show a picture
of an Acorn and then will show a live view.
• Press ‘Menu’
Note: When you change a menu setting you must always press
the OK button after each individual setting otherwise when
you scroll to the next option the previous change will be lost.
Basic Settings
Menu Screen 1
Mode
Use the
to highlight:
•
‘Cam’ for still images only,
•
‘Video’ for video clip only or
•
‘Cam+Video’ for 1 to 3 still images plus a video clip at each
trigger event.
Press OK to confirm your setting.
Use the
to highlight:
Format (only necessary if the card is not new)
Highlight and press OK button, Use the
to highlight YES,
press OK to format SD card.
Formatting the SD card will remove all recorded images and
video clips.
When you press OK it exits the main menu and returns you to
the control panel screen. Press ‘Menu’ again.
Use the
to highlight:
Image Size
Highlight and select
12MP (4000x3000 pixels)
5MP (2560x1920 pixels)
Press OK to confirm your setting.
Use the
to highlight:
Video Size
Use the
to highlight:
720P (1080x720 pixels) (5310 only)
640x480 or
320x240
Press OK to confirm your setting.
Menu Screen 2
Use the
to highlight:
Set Clock
Highlight and press OK button to enter setup. Use the
to
move across the screen (and down to the time) and the or
to scroll through the numbers.
Date format is Month/Date/Year
Time format Hours/Minutes/Seconds
To confirm your settings and exit the clock menu, press the OK
button again.
When you press OK to exit the clock menu it exits the main
menu and returns you to the control panel screen. Press ‘Menu’
again and scrolled down to:
Use the
to highlight:
Picture No
Use the
to highlight: 01, 02 or 03 Photos. Press the OK
button to confirm selection.
The camera will shoot either 1, 2 or 3 images depending on
your selection.
Use the
to highlight:
Video length
Use the
to select any time from 0 to 60 seconds. Press the
OK button to confirm selection.
If the trigger source remains in the frame the camera will
retrigger with a gap of approximately 4 seconds between clips.
Use the
to highlight:
Interval (the amount of time the camera is forced to wait
between triggers)
Use the
to select any time from 0 seconds to 60 minutes.
Press the OK button to confirm selection.
Remember that if you select anything other than 0 seconds the
camera will not trigger again until the set time has elapsed.
Menu Screen 3
Use the
to highlight:
Sense Level
Use the
to highlight:
Off, Low, Normal or High.
Press the OK button to confirm selection.
Use the
to highlight:
Time Stamp
Use the
to highlight: On or Off. Press the OK button to
confirm selection.
Provides data bar at bottom of still images as shown below.
Use the
to highlight:
Timer 1
Use the
to highlight: On.
Press OK to enter the timer setup menu.
Highlight and select start and stop times.
Press the OK button to confirm selection and return to the main
menu.
PTO


