background image

Whynter 1

4

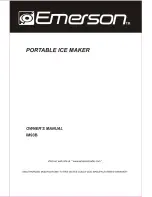
" Undercounter Automatic Stainless Steel Marine Ice Maker

23lb Daily Output 

Congratulations on your new Whynter product. To ensure proper operation, please read this Instruction Manual 

carefully before using this product. Keep this manual in a safe place for future reference. 

Model # : MIM-14231SS 

INSTRUCTION MANUAL


Summary of Contents for MIM-14231SS

Page 1: ...ce Maker 23lb Daily Output Congratulations on your new Whynter product To ensure proper operation please read this Instruction Manual carefully before using this product Keep this manual in a safe place for future reference Model MIM 14231SS INSTRUCTION MANUAL ...

Page 2: ...the environment Further information about the recycling of this product can be obtained from your local munici pal authority Thank you for choosing the Whynter 14 Undercounter Automatic Stainless Steel Marine Ice maker Please follow the instructions provided in this user guide to obtain the very best perfor mance from your ice maker We trust that your Whynter Ice Maker will provide the perfor manc...

Page 3: ...FICATIONS DISPOSAL INFORMATION 2 TECHNICAL INFORMATION 3 SAFETY PRECAUTIONS 4 PARTS AND CONTROL PANEL 5 LCD DISPLAY OVERVIEW 6 INSTALLATION AND OPERATING INSTRUCTIONS 7 8 CARE AND MAINTENANCE 9 TROUBLESHOOTING 10 WARRANTY INFORMATION 11 ...

Page 4: ...d in 24 hours with 12 lb storage capacity making it the perfect solution for your ice making needs in virtually any situation Sold sepa rately the optional flange kit MIM FK 14231 allows seamless and more finished installation Built in or freestanding installation front venting Makes 23 lbs of crescent shaped ice cubes in 24 hours No drain required Sleek stainless steel door and housing Stores up ...

Page 5: ... ice maker the front of the unit must be completely unobstructed The ice maker should not be located next to ovens grills or other sources of high heat The ice maker must be installed with all electrical and water connections in accordance with state and local codes A standard electrical supply properly grounded in accordance with the National Electrical Code and local codes and ordinances is requ...

Page 6: ...prong wall outlet is encountered it is your respon sibility and obligation to have it replaced with a properly grounded 3 prong wall outlet The ice maker should always be plugged into its own individual electrical outlet which has a voltage rating that matches the rating label on the appliance This provides the best performance and also prevents overloading boat wiring circuits which could cause a...

Page 7: ...on 8 Air Intake 9 Air Exhaust 10 Door 11 Rear Vent 12 Water Inlet Port 13 Power Supply Cord 14 Braided Stainless Steel Flexible Hose for water supply 15 Cabinet Flange Optional Sold Separately 16 Cabinet Flange Optional Sold Separately 1 2 3 4 5 6 7 8 10 11 12 13 14 15 16 9 Parts 15 and 16 for cabinet installation See Page 12 ...

Page 8: ...hould you desire to reverse the opening direction please follow the following reversal instructions Tools needed Flathead screwdriver Phillips screwdriver IMPORTANT Before you begin unplug the ice maker or disconnect power To remove door from hinges 1 Using a flathead screwdriver separate the hinge axis from hinge 1 2 Open the door about 20 Lift the door off the bottom hinge 2 and set the door asi...

Page 9: ...t Water supply Leveling the icemaker Recessed installation A recessed installation will allow you to install the ice maker under a counter or in a kitchen cabinet provided the required clearance space around the ice maker is respected This installation has the same requirements as a built in installation Built in installation If this method of installation is chosen it will still be necessary to a...

Page 10: ... connections in accordance with state and local codes The unit should be located on a hard and level surface that can support the unit when it is full It is im portant for the ice maker to be level in order to work properly If needed you can adjust the height of the ice maker by turning the feet See the Leveling the Ice Maker section A standard electrical supply 115 VAC only 60 Hz 15 A properly gr...

Page 11: ...y This is due to the rapid freezing of the ice cube This is trapped air in the water and does not affect the taste and quality of the ice The air intake and exhaust should be kept free of dust and lint to allow free airflow This unit should be defrosted approximately every 4 6 weeks or when frost on the ice maker wall is exces sive or 1 4 thick To defrost turn the unit off remove the ice cubes and...

Page 12: ...MIM FK 14231 FLUSH TO CABINET FLUSH TO DOOR INSTALLATION 1 Remove the flange and screws from the shipping carton 2 Using a flathead screwdriver carefully remove the ten pre installed decorative plugs from screw holes located on top left and right panels of the ice maker 3 Put the flange through the front of the icemaker on the cabinet 4 Adjust the feet to make sure the flange NOT touch the ground ...

Page 13: ...ing devices sharp or pointed tools when defrosting When defrosting or leaving open the unit turned off leave the door open This allows air to dry the inside of the cabinet reducing the chance for mildew and damage to the mold mecha nism s components Winterizing WARNING Disconnect power at source before working on the unit Do not winterize this unit with ANY type of anti freeze damage to the mold c...

Page 14: ... recommended operating temperatures that may lead to component failure Have the condenser cleaned at least once every six months 1 Unplug the ice maker or disconnect power 2 Remove the 2 screws on the front cover and gently pull it off 3 Remove dirt and lint from the condenser and the unit compartment with the brush attachment of a vacuum cleaner 4 Reassemble the front cover 5 Plug in the ice make...

Page 15: ...e fitting Cubes are partially formed are white at the bottom Not enough water in the water bin Check if the water supply pressure is be low 15 psi Check water supply may be restricted Check for a water leak at the water trough Noise during operation The feet are not leveled and locked Certain sounds are normal Level the feet See Leveling the ice maker See Normal Sounds The ice made is too large an...

Page 16: ...isions in the instructions Damage to the finish of the case or other appearance parts caused by wear Damage caused by repairs or alterations to the product by anyone other than authorized by the manufacturer Freight and Insurance cost for the warranty service DISCLAIMER OF IMPLIED WARRANTIES LIMITATION OF REMEDIES CUSTOMER S SOLE AND EXCLUSIVE REMEDY UNDER THIS LIMITED WARRANTY SHALL BE PRODUCT RE...

Reviews: