background image

S U M M I T

®

WARNING: Follow all leak-check

procedures carefully in this manual
prior to barbecue operation. Do this
even if barbecue was dealer assembled.

WARNING: Do not try to light the

Weber

®

 gas barbecue without first

reading the “Lighting” instructions in
this manual.

INFORMATION FOR THE INSTALLER:
This manual must remain with the owner,
who should keep it for future use.

WARNING:

1. Do not store or use petrol or other

flammable vapours and liquids in the
vicinity of this or any other appliance.

2. A gas supply cylinder not connected

for use should not be stored in the
vicinity of this or any other appliance.

DANGER

If you smell gas:
1. Shut off gas to the appliance.
2. Extinguish any open flames.
3. Open lid
4. If odour continues, keep away from the

appliance and immediately call your
gas supplier or your fire service.

Leaking gas may cause a fire or explosion
which can cause serious bodily injury or
death, or damage to property.

Y

OU


MUST


READ


THIS

 O

WNERS

 G

UIDE

BEFORE


OPERATING


YOUR


GAS


GRILL

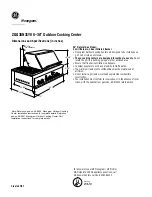
 LP Gas Grill Owners Guide

#

42080 GB 01/21/03

LP

42080

OUTDOOR USE ONLY.

Summary of Contents for Summit Gold D 42080

Page 1: ...pours and liquids in the vicinity of this or any other appliance 2 A gas supply cylinder not connected for use should not be stored in the vicinity of this or any other appliance DANGER If you smell gas 1 Shut off gas to the appliance 2 Extinguish any open flames 3 Open lid 4 If odour continues keep away from the appliance and immediately call your gas supplier or your fire service Leaking gas may...

Page 2: ... burners should go out during cooking turn off all gas valves Open the lid and wait five minutes before attempting to re light the gas flame while observing the Lighting Instructions Do not use charcoal briquettes or lava rock in your Weber gas barbecue While cooking never lean over the open barbecue or place hands or fingers on the front edge of the cooking box Should an uncontrolled flare up occ...

Page 3: ...s 11 Gas Instructions 27 Leak Checking 29 Operating 32 Grilling Methods 32 Lighting 34 Manual Lighting 35 Lighting the Side Burner 36 Lighting the Smoker 37 Lighting the Rotisserie 42 Troubleshooting 44 Side Burner Troubleshooting 45 Rotisserie Troubleshooting 46 Maintenance 47 Replacing Main Burners 48 Crossover Ignition System Operations 50 ...

Page 4: ...enance including but not limited to damage caused by insects within the burner tubes as set out in this owner s manual Deterioration or damage due to severe weather conditions such as hail hurricanes earthquakes or tornadoes discolouration due to exposure to chemicals either directly or in the atmosphere is not covered by this Limited Warranty There are no other express warranties except as set fo...

Page 5: ...be stored outdoors in a well ventilated place If the gas supply cylinder is not removed from the Weber gas barbecue the entire grill and the gas supply cylinder are to be stored in a well ventilated place outdoors Gas supply cylinders must be stored outdoors in a well ventilated area out of reach of children Disconnected gas supply cylinders must not be stored in a building garage or any other enc...

Page 6: ...nd wait for it to cool before cleaning CAUTION Do not clean your Flavorizer bars or cooking grates in a self cleaning oven For availability of replacement cooking grates and Flavorizer bars contact the Customer Service Representative in your region using the contact information sheet provided with your manual Outside surfaces Use a warm soapy water solution to clean then rinse with water CAUTION D...

Page 7: ... 22 23 24 26 33 34 36 37 38 39 40 41 42 44 48 49 50 51 65 70 72 73 74 75 76 78 83 84 85 86 87 88 89 90 93 54 32 59 9 10 13 12 52 4 6 7 15 18 25 28 29 30 31 35 43 45 60 62 69 77 20 16 17 79 81 91 82 92 58 63 67 66 68 71 64 3 55 56 46 47 61 53 21 11 5 27 80 ...

Page 8: ...ng Up Table 39 Front Frame Rail 40 Caster Frame Assembly 41 Door Bushing 42 Bottom Shelf 43 Mounting Clip 44 Caster Assembly 45 Left Door Assembly 46 10 16 x 3 4 Screw w Washer 47 Plastic Plug 48 Right Door 49 Hair Cotter Pin 50 Lid Assembly 51 1 4 20 x 1 1 4 inch Bolt 52 12 inch Cook Grate 53 10 24 Stainless Steel Hex Nut 54 Flavorizor Bar Assembly 55 IR Rain Cover 56 10 24 x 1 2 inch Stainless S...

Page 9: ...ist Lid 1 Cookbox 1 Left Frame Assembly 1 Right Frame Assembly 1 Side Table 1 Side Burner 1 Bottom Shelf 1 Rear Panel 1 Left Door 1 Right Door 1 Warming Rack 1 Warm Up Rack 1 Front Frame Rail 1 Rear Frame Rail 1 ...

Page 10: ...et 1 Flavorizor Bars 2 Sets Smoker 1 Stainless Steel Cooking Grates 3 Bottom Tray 1 Rotisserie 1 Parts List 1 2 inch Bolts 1 4 x 20 x 1 2 inch Bolt 8 Plastic Washer 1 Hinge Pin 2 Hair Pin Cotter 2 1 1 4 inch Bolts 1 4 x 20 x 1 1 4 inch Bolt 2 Nut Hex 1 4 x 20 Blk Zinc 2 Wing Nut 10 24 2 Nylon Washer 10 Cylinder Hanger 1 ...

Page 11: ... step check that frame rail 2 is on the side with the swing tables 3 The tab on frame rail 2 must be facing toward the wheels Place corrugated from each side of the Cookbox under the Caster and Wheel Frame Assembly to level the frames for Frame Rail Assembly ...

Page 12: ...12 2 b a ATTENTION Only start these bolts Do not tighten yet ...

Page 13: ...13 3 ...

Page 14: ...14 b c a 1 2 4 ATTENTION Completely remove both partially started bolts from top rear frame rail ATTENTION Reinstall both bolts through rear panel and into rear frame rail ...

Page 15: ...15 5 a 1 2 2 1 2 2 ATTENTION Remove packing tape holding the gas line and bracket 1 When installing cookbox route the gas line and bracket 1 inside the frame rails 2 ...

Page 16: ...16 1 2 3 b 6 ...

Page 17: ...17 7 1 2 1 2 c ...

Page 18: ...18 8 b a Matchlight Holder ...

Page 19: ...19 9 1 2 3 a b ...

Page 20: ...20 a b a b 10 ...

Page 21: ...21 1 2 a b 1 11 NOTE Igniter Wire 1 is located up under right side of control panel ...

Page 22: ...22 c d 1 2 CAUTION Hold burner cap 1 down while pushing side burner ignition wire 2 on ...

Page 23: ...23 a b 12 13 ...

Page 24: ...24 14 15 ...

Page 25: ...25 16 17 ...

Page 26: ...26 6 ...

Page 27: ...ection The hose connects to the manifold which screws into the manifold fitting 1 or pushes onto the manifold push on fitting 2 Connecting the Liquid Propane Cylinder WARNING Make sure that the LP cylinder valve is closed Close by turning valve clockwise DANGER Do not use an open flame to check for gas leaks Be sure there are no sparks or open flames in the area while you check for leaks Sparks or...

Page 28: ...cking is complete turn gas supply OFF at the source and rinse connections with water 1 2 3 WARNING The gas connections of your Summit gas grill have been factory tesated We do however recommend that you leak check all gas connections before operating your Summit gas grill Remove control panel Part required Phillips Screwdriver Remove the burner control knobs 1 The screws 2 need to be removed from ...

Page 29: ...rform leak checks open cylinder valve by turning the cylinder valve hand wheel anticlockwise WARNING Do not ignite burners when leak checking Check for leaks by wetting the connections with the soap and water solution and watching for bubbles If bubbles form or if a bubble grows there is a leak Check 1 Hose connection 2 Gas line to manifold connections 3 I R Burner gas line connection WARNING If t...

Page 30: ...w holes on both the control panel and control panel brackets Tighten screws Reinstall burner control knobs igniter wires if necessary Place corresponding control knobs down onto the valve stems From the underside of the control panel replace the two wires 1 2 of each igniter a Blue Tab with Black Wire b Yellow Tab with Black Wire c White Tab with Black Wire d Solid White Wire e Green Tab with Blac...

Page 31: ...nd that you refill the LP cylinder before it is completely empty To refill take LP cylinder to a Gas Propane dealer Removal of the gas supply cylinder 1 Shut off gas supply 2 Disconnect hose with regulator from the cylinder 3 Exchange empty cylinder for a full cylinder Connecting the Liquid Propane Cylinder WARNING Make sure that the LP cylinder valve is closed Close by turning valve clockwise DAN...

Page 32: ...Thanks to the unique design of the burners Flavorizer bars and the flexible temperature controls uncontrolled flare ups are virtually eliminated because YOU control the flames Because of the special design of the Flavorizer bars and burners excess fats are directed through the funnel shaped bottom tray into the grease catch pan The most important thing to know about grilling is which cooking metho...

Page 33: ...ltitudes Allow less cooking time in extremely hot weather Grilling times in charts and recipes are approximate Times can vary because of the weather or the amount size and shape of the food being grilled The temperature of your Summit gas grill may run hotter than normal for the first few uses Grilling conditions may require the adjustment of the burner controls to attain the correct cooking tempe...

Page 34: ...ated may have slight differences than the model purchased 1 Open the lid 2 Make sure all burner control knobs are turned OFF Push control knob down and turn anticlockwise to ensure that it is in the OFF position WARNING The burner control knobs must be in the OFF position before turning on the liquid propane cylinder tank valve 3 Turn the cylinder on by turning the cylinder valve anticlockwise WAR...

Page 35: ...ur face and body at least one foot away from the matchlight hole when lighting the barbecue 5 Push LEFT burner control knob down and turn to START HI 6 Insert match holder and lit match down through cooking grates and Flavorizer bars to ignite LEFT burner in each selected burner set WARNING If the burner does not light turn the LEFT burner control knob to OFF and wait 5 minutes to let the gas clea...

Page 36: ...control valve to START HI 5 Push igniter button and hold until burner ignites You will hear the igniter sparking CAUTION Side burner flame may be difficult to see on a bright sunny day 2 4 1 2 1 WARNING If the side burner does not light 1 Turn OFF the side burner control valve 2 Wait 5 minutes to let the gas clear before you try again or try to light with a match Lighting the side burner if the ma...

Page 37: ...ow the smoke to fully penetrate the food Light the smoker burner by following the instructions for Lighting The Smoker Burner After wood starts to smolder turn control knob to low Smoke will start in approximately 10 minutes and last as long as 45 minutes If you require more smoke flavor refill the smoker with wood chips and or chunks Keep the lid of the grill closed while cooking Note After refil...

Page 38: ... knob down and turn clockwise to ensure that it is in the OFF position WARNING The burner control knobs must be in the OFF position before turning on the liquid propane cylinder tank valve 5 Turn the cylinder on by turning the cylinder valve anticlockwise WARNING Do not lean over the open grill while lighting 6 Push smoker burner control knob down and turn to START HI 7 Push and hold down the Igni...

Page 39: ...urner control knobs must be in the OFF position before turning on the liquid propane cylinder tank valve 5 Turn the cylinder on by turning the cylinder valve anticlockwise 6 Put a match in the match holder and strike the match 7 Insert match holder and lit match down through cooking grates and Flavorizer bars to ignite smoker burner WARNING Do not lean over the open grill while lighting Keep your ...

Page 40: ...r onto the motor bracket 3 Put the spit forks on the rotisserie shaft Slide a spit fork from each side onto the shaft so that the tines are facing each other Reverse forks to each other so that one fork screw is on top 1 and one is on the bottom 2 as shown in illustration Screw in the split fork screws to hold the forks in place 4 Insert the rotisserie shaft in the motor Insert the pointed end of ...

Page 41: ...serie shaft through the center of the food 3 Slide the spit fork onto the shaft Insert the tines of both spit forks into the food The food should be centered on the shaft Tighten the spit fork screws 4 Place the motor in the bracket slide to lock 5 Insert the pointed end of the rotisserie shaft into the motor Place the handle end of the rotisserie onto the support rollers 6 The rotisserie shaft sh...

Page 42: ...ING The burner control knobs must be in the OFF position before turning on the liquid propane cylinder tank valve 4 Turn the cylinder on by turning the cylinder valve anticlockwise WARNING Do not lean over the open grill 5 Push rotisserie burner control knob down and turn to START HI Continue to hold the control knob down Continue to the next lighting step 6 Push and hold down the Igniter button u...

Page 43: ...re turning on the liquid propane cylinder tank valve 4 Turn the cylinder on by turning the cylinder valve anticlockwise 5 Put a match in the match holder and strike the match 6 Hold match holder and lit match by right side of rotisserie burner WARNING Do not lean over the open grill Keep your face and body at least one foot away from the matchlight hole when lighting the barbecue 7 Push rotisserie...

Page 44: ...ly coated with burned on grease Is the bottom tray dirty and not allowing grease to flow into catch pan All burners on high for 10 to 15 minutes for preheating Clean thoroughly See Section Cleaning Clean bottom tray Burner flame pattern is erratic Flame is low when burner is on HIGH Flames do not run the whole length of the burner tube Are burners clean Clean burners See Section Maintenance Inside...

Page 45: ...F position Make sure wire is connected between igniter and electrode Check that igniter lock nut is tight Note If the igniter works loose carefully tighten the igniter lock nut with an adjustable wrench or pliers Adjust igniter electrode to burner Gap should be 1 8 to 3 16 inch from tip of electrode to burner Spark should be a white blue color not yellow 1 Igniter Wire 2 Venturi Burner 3 1 8 to 3 ...

Page 46: ...ght burner by holding burner control knob down and continue holding down until 20 seconds after burner has ignited Is the igniter sparking Replace battery in igniter button module Reseat burner ring If problems cannot be corrected by using these methods please contact the Customer Service Representative in your region using the contact information sheet provided with your manual ...

Page 47: ...becue The burner tube air shutter is fitted with a stainless steel screen 1 to prevent spiders and other insects access to the burner tubes through the air shutter openings We recommend that you inspect the Spider Insect screens at least once a year See Section Annual Maintenance Also inspect and clean the the Spider Insect screens if any of the following symptoms should ever occur 1 The smell of ...

Page 48: ...s OFF at source 3 Disconnect regulator 4 Remove cooking grates 5 Remove Smoker box 6 Remove Flavorizer bars 7 To remove control panel refer to Remove the control panel under Check for Gas Leaks 8 Disconnect all ignition wires from the Ignition Module 9 Disconnect the Thermocouple from the IR Burner valve 10 Remove screws from the manifold assembly a Locate the screws on both sides of the manifold ...

Page 49: ...ift and twist the burner assembly slightly to separate the Crossover tube a from the burners b 13 Remove the Crossover tube 14 Pull the selected burner s tube s from manifold frame and replace with a new burner tube 15 To reinstall the manifold assembly reverse steps 7 through 14 ...

Page 50: ...ith a like brand battery You should hear the igniter sparking If the Crossover ignition system still fails to light contact the Customer Service Representative in your region using the contact information sheet provided with your manual Replace Igniter Batteries Parts required 1 AA alkaline battery per igniter Unscrew igniter button from top of control panel Remove igniter button and contact sprin...

Reviews: