Waveshare Alphabot2, User Manual
The Waveshare Alphabot2 is a versatile robotic platform for enthusiasts and hobbyists. It features a variety of sensors and modules for endless customization possibilities. Easily get started with the included User Manual - download it for free from manualshive.com. Start creating with the Alphabot2 today!
Share
Download


Reviews:
No comments
Related manuals for Alphabot2

S2
Brand: Parallax Pages: 28

TM
Brand: Omron Pages: 10

Robo 2.0 Fire Fighter
Brand: Artec Pages: 14

KR QUANTEC extra
Brand: Kuka Pages: 127

JetBot AI Kit
Brand: sparkfun Pages: 23

550047
Brand: Thames & Kosmos Pages: 56

SPARK
Brand: biomotum Pages: 39

Match LWR50L-21 Series
Brand: Zimmer Pages: 53

IRB 7600 - 500/2.55
Brand: ABB Pages: 482

Penguin
Brand: Parallax Pages: 24
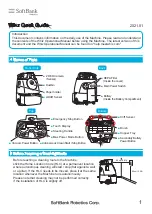
Whiz
Brand: SoftBank Pages: 4

MarsCat
Brand: Elephant Robotics Pages: 14

Panda 3
Brand: Elephant Robotics Pages: 37

Obi
Brand: DESIN Pages: 40

ONE A
Brand: bot'n roll Pages: 57


