QUICKSTART
GUIDE
VISIO-
EYE
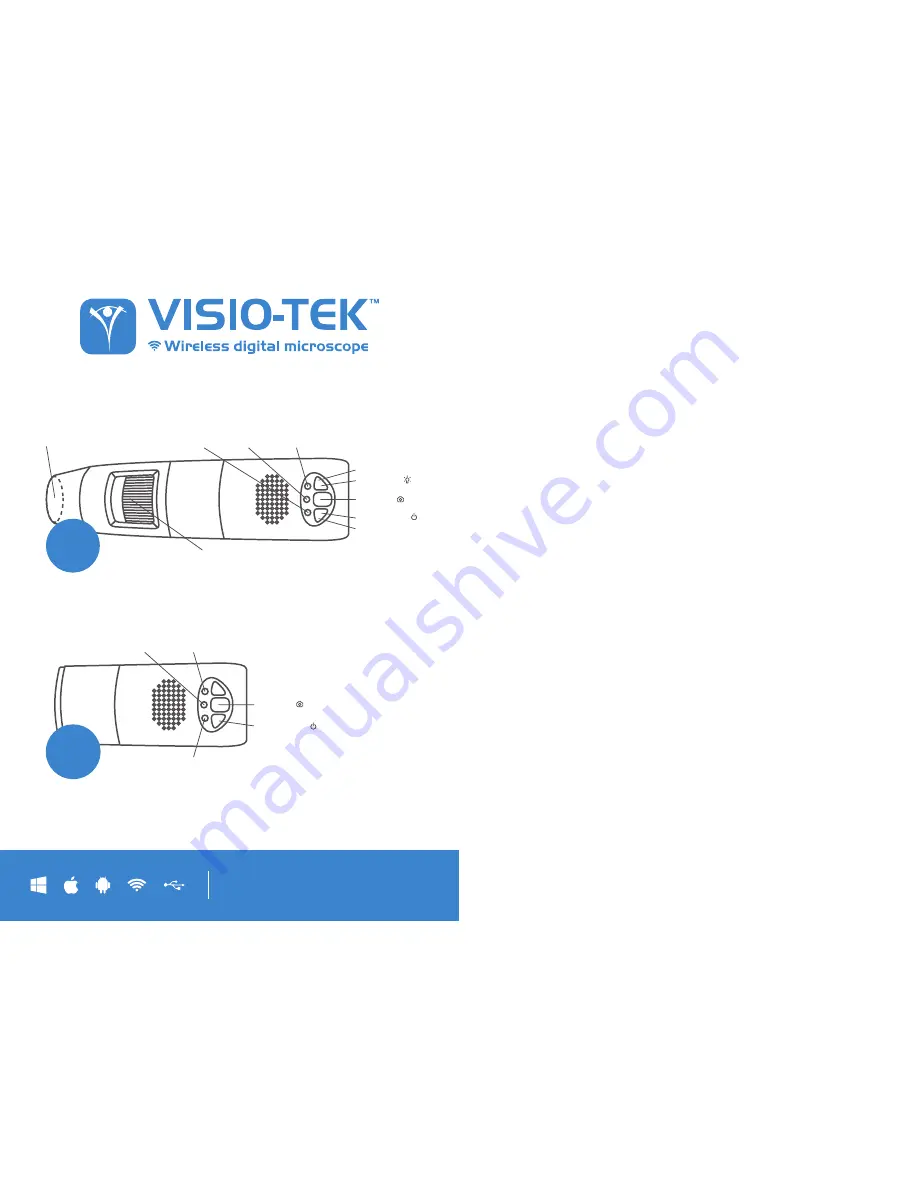
Battery
Indicator
Power
Indicator
Illumination &
Focus Cap
Focus & Magnification
Adjustement Wheel
Wi-Fi
Indicator
LED Regulator (-)
LED Regulator (+)
LED Switch ( )
Snapshot ( )
Power Button ( )
VISIO
Battery
Indicator
Wi-Fi
Indicator
Power
Indicator
Snapshot ( )
Power Button ( )
1.
WI-FI
CONNECTION
DOWNLOAD
THE APP
For Apple products:
install the app on your iPhone or iPad via the Apple App store. Simply
search for “Visio-tek” in the search box and you will see the App as the first result in the search.
For Android products:
install the app on your Android device by searching for “Visio-tek” in
the Google Play store.
CONNECT YOUR
DEVICE TO WI-FI
First turn your device on by holding the power button and wait for the green power indicator to
light up with a LED light. Wait approximately 20 seconds for the blue Wi-Fi indicator to light up.
A flashing blue light tells that the device has connected to Wi-Fi.
NETWORK
CONNECTION
Check the Wi-Fi connection on your phone, tablet or PC and search for available networks.
Look for the connection that’s most similar to SSID “
WiFi2SCOPE_xxxxxx
” and tap it.
You will be prompted for a password. Enter “
12345678
” without the parenthesis, press ‘
Ok
’
and you will be connected.
NOTE:
Entering password is only required the first time you connect your device.
VIEW
THE PICTURES
Open your Visio-tek App. Within roughly 5 seconds you will be able to see the images on the
device screen.
To view the video stream, check that the Wi-Fi indicator is flashing and connect to the video
stream. This can then be broadcasted to other devices if you wish.
Note that frame rate of live video will decrease by increasing number of receiving devices
connected simultaneously.
2


