SCANNER USER GUIDE
TABLE OF CONTENTS
1.
Scanner overview
2.
Switching On/Off
3.
Language selection
4. Use
5. Memory
6.
Connnecting the scanner to a computer
7.
Charging the battery
8.
Precautions for use
9.
Technical data
10. After sales services
1. SCANNER OVERVIEW
2. SWITCHING ON/OFF
Press the
On/Off
button (1) to turn on the scanner. Hold the
On/Off
button (1) for three seconds to turn off the scanner.
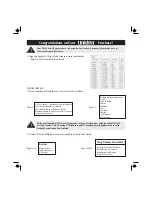
3. LANGUAGE SELECTION
Turn on the scanner. Use the Scroll buttons (8) to navigate to
Settings, press the
OK
button (3), then navigate to
Language
menu option and press the
OK
button (3) again. Use the
Scroll
buttons (8) to select your preferred language. Available languages
are English, French, Spanish, Italian, Portuguese, German, and
Polish. Press the
OK
button (3) again. This preference remains
stored in the scanner after the device is turned off.
4. USE
Turn on the scanner; the message “Scan” appears on the
Screen
(6). Press the
OK
button (3) to scan. You will see the following
message on the Screen (6):
Aim the Scanner
antenna
(4) at the transponder or the
implantation area.
The scanner can read the following transponders:
FDX-B & HDX (ISO 11784/85), FDX-A and EM4102.
If an ISO-compliant transponder is scanned, the screen (6)
displays the following:
This screen will appear after reading an FDX-B transponder that complies with
ISO standard 11784/85; the first three digits represent the manufacturer code
but can also represent the country code (country where the animal was identified,
according to ISO 3166-1 country code list).
Examples:
036 -> Australia
554 -> New Zealand
410 -> Korea
826 -> United Kingdom
The scanner displays the transponder code for 3 minutes before it automatically
switches itself off. Once the scanner is switched off, it is no longer possible to
display the last transponder code read.
When an FDX-A transponder is scanned, the screen (6)
displays the following:
If the reader cannot find the transponder, the screen (6)
displays:
You can perform the operation again by pressing the
OK
button (3).
Once the scanner has read a transponder, it will automatically
switch off after 3 minutes. It is possible to switch off the
scanner before this time by keeping the On/Off button (1)
pressed.
5. MEMORY
You can store up to 800 codes in the scanner’s memory.
To enable/disable the memory switch on the scanner and use
the
Scroll
buttons (8) to navigate to Memory option, press the
OK
button (3), then use the Scroll buttons (8) to navigate to
the
Enable/Disable
options. Use the
OK
button (3) to select
one of the two modes.
Once you have activated the memory and read a transponder
you can no longer deactivate the memory unless you are
transmitting the data. To transmit the data, use the Memory
menu option and you will see that the message “Send”
appears on the screen. Press the
OK
button (3). After sending
the data a new message “Press <OK> to erase” will appear for
8 seconds. If you press the
OK
button (3) within that period, a
new message “Press <OK> to confirm erase” appears. If you
press the
OK
button (3) again within 8 seconds the memory
will be deleted, and you can disable the memory.
1
2
3
On/Off button
Mini USB
OK button
Antenna
Battery Indicator
OLED screen
LED
Scroll buttons
Battery
4
8
7
6
5
9
Reading
FDXB
992 123456789012
Technology
Identifier
Country or manufacturer code
FDXA
123456789A
Technology
Identifier
No transponder
found !
83700502-NOTICE-BACKHOME-V800.indd 1
08/09/2020 10:32