Installation guidelines
For easier installation, programming and RF testing should be
done to check proper communication between the control
panel and all system devices before mounting system devices.
Install the detector and other system devices in the following
order:
>
Programming/RF Testing - program detector and all other
devices into the control panel and test RF communication from
each intended device location to the control panel.
>
Mounting - Mount detector at the tested location.
The ICT universal door contact is designed
for use with Videofied™ wireless security
systems.
The contact includes the following features :
• Completely wireless and powered by a
Lithium battery
• Dual tamper function provides detection
for both wall and cover tamper
• Transmits check-in/status signal every 8
minutes
•
Wired input for wired detectors
connection
Product presentation
Programming/RF Testing/Mounting
The following provides summarized steps for device
programming, testing and mounting. For complete details,
refer to the control panel installation manual.
1
Loosen the screw, open the box and
insert the batteries.
2
Close the box and tighten the screw.
3
Put control panel into configuration
mode.
4
Using a programmed keypad,
proceed through menus until the display
shows ADD A NEW DEVICE.
5
Press YES/OK. The display shows
PRESS PROGRAM BUTTON OF DEVICE.
6
Using a paperclip, press and release
the contact INIT button.
The contact LED flashes. Wait for the
keypad to display DETECTOR (1-24)
RECORDED.
7
Press YES/OK. The display shows
RADIO RANGE TEST?
Press YES/OK again. The detector LED
starts flashing and keypad display shows
TEST IN PROGRESS.
8
Take the detector to its intended
mounting location and make sure that
the LED flashes continuously, indicating
good communication with the control
panel.
9
Press YES/OK to end the radio range test then press ESC
NO.
10
The display shows AREA ASSIGNMENT AREA: 1. Press either
arrow button repeatedly until desired AREA number appears,
then press YES/OK.
11
The display shows PERIMETER DEVICE?
Press YES/OK or ESC NO, whichever is appropriate for this
device (a device configured as PERIMETER will be armed for
the “E” and perimeter special arming modes, only contacts
protecting the external accesses should be configured for
perimeter arming).
12
The display shows NAME + LOCATION:
Enter appropriate device name/location (up to 16 characters),
then press YES/OK. The display shows the device number and
name for confirmation.
13
Press YES/OK. The display shows:
FUNCTIONAL DEVICE TEST?
Caution: the panel records the current state of the detector
and the current state of the wired input as being the normal
state at the beginninfg of the functional device test :
• The door contact must be closed at the beginning of the
detection test to be configured as Normally Closed NC.
• If the wired input is open when recorded, it will be
configured as Normally Open NO(and conversely).
That setting cannot be changed unless the contact is
deleted from the panel programming and recorded again.
Press YES/OK again and verify detector operation. For example,
move the magnet next to the detector to make the LED go off,
then move the magnet away from detector to make LED turn on
indicating detection.
14
Press YES/OK to end detection verification.
15
The display shows ENTERING A NEW DEVICE?
Repeat steps 1 - 14 for remaining detectors.
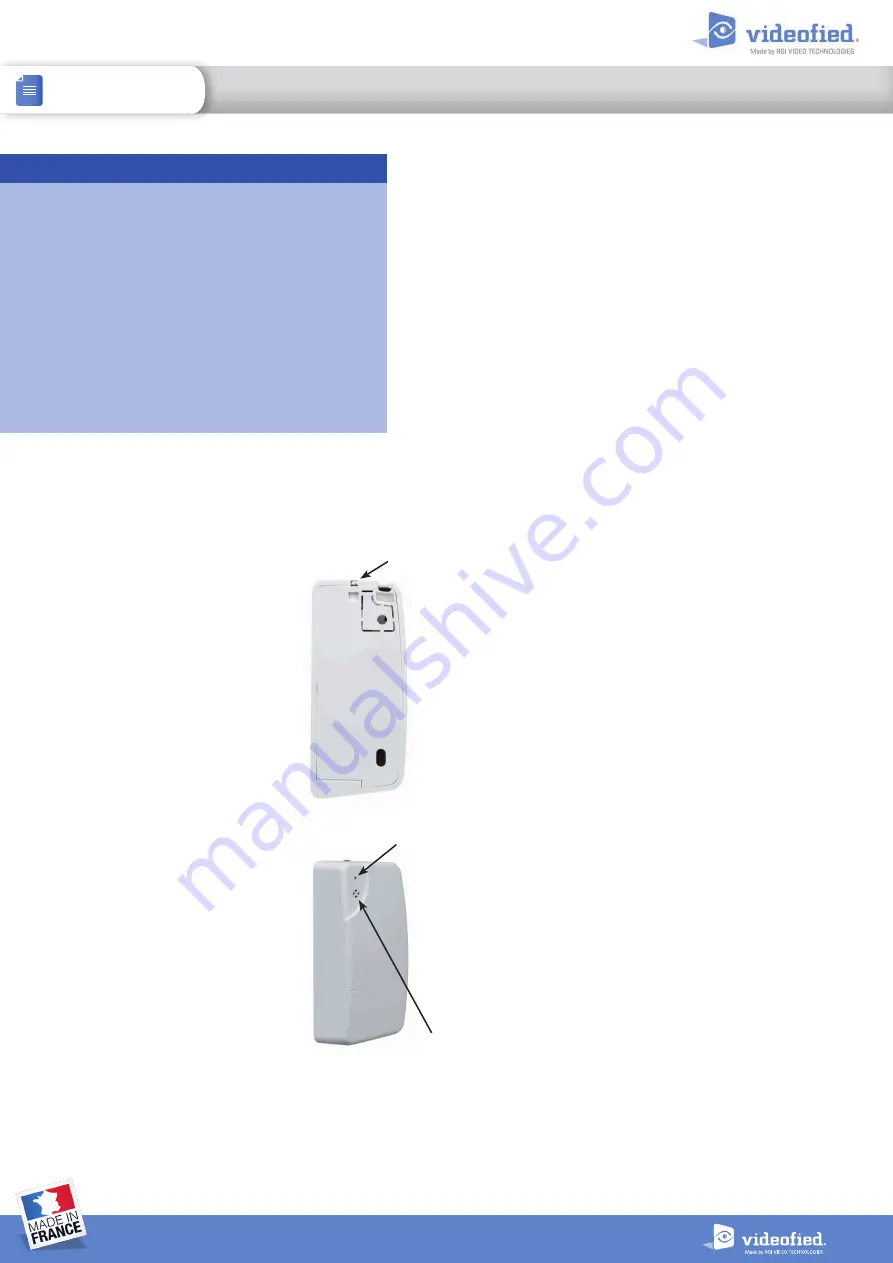
Screw
INIT button
LED
INSTALLATION SHEET
DOC. - REF. 219-ICT
MODIF. DATE : FEBRUARY 2017
VERSION : XX.XX.XX
1
INDOOR CONTACT TRANSMITTER
ICT 200/601/702/800