


©Vantage, 41380 / IS-0541-A / InFusion
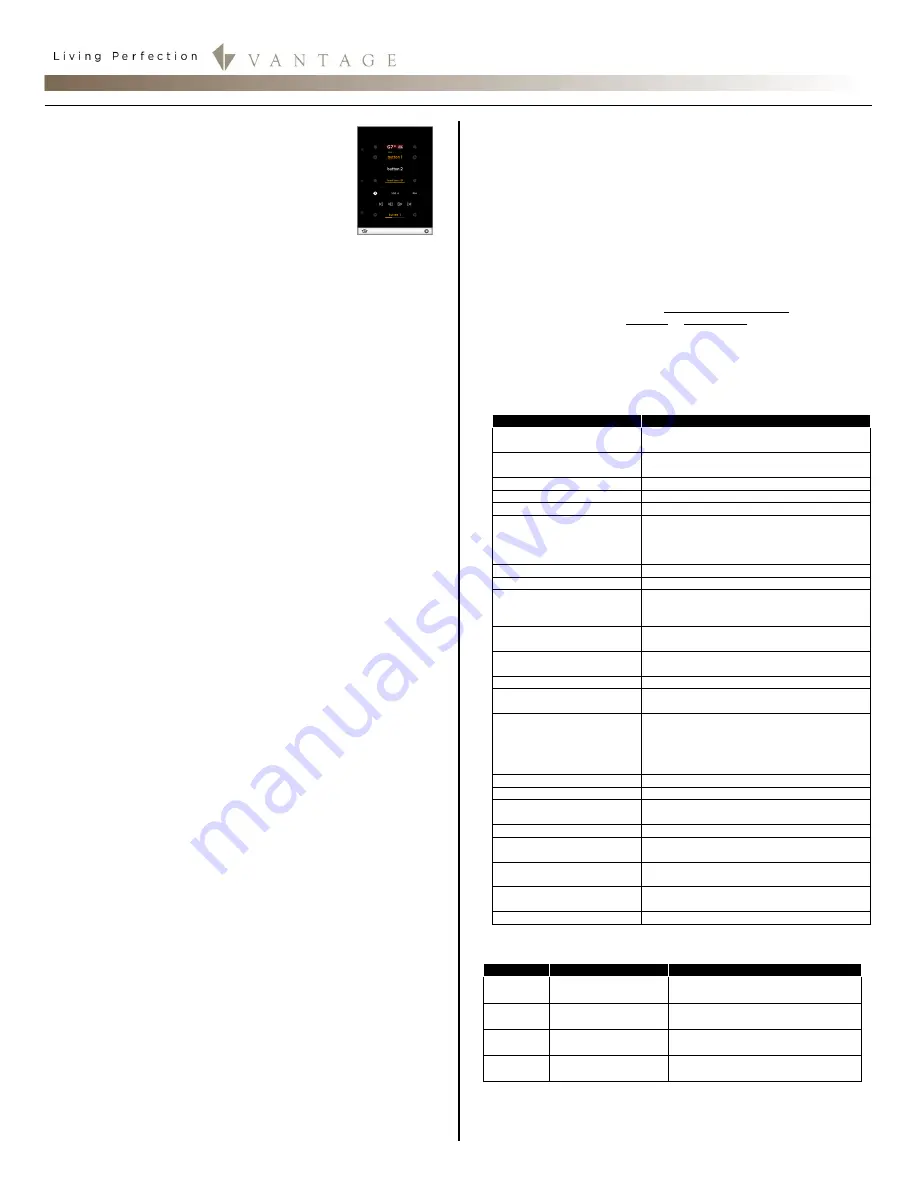
Equinox 40 LCD Keypad – MODEL: EQ40TB-TI
page 1 of 6
I N S T A L L A T I O N
V A N T A G E C O N T R O L S . C O M
V A N T A G E I N S T A L L G U I D E S
1061 South 800 East • Orem, Utah 84097 • Telephone 801 229 2800 • Fax 801 224 0355
Equinox 40 LCD Keypad – MODEL: EQ40TB-TI
Overview
Vantage's Equinox 40 LCD Keypad has been
designed to be located in the same space as a
traditional keypad, installed in a single gang wall
box. Scalable designs from one, two, or three
pages allow a perfect fit in most areas. Each
keypad can be configured with three
independent mini-widgets, making this an
eloquent choice for areas where lighting, AV
control, climate control, etc., are wanted, without the added
cost of a fully functional touchscreen or the wall clutter of
multiple gang keypads. Equinox 40 introduces Vantage’s
commitment to a consistent
user experience
interface across
platforms using auto-programming mini-widgets. The interface
uses intuitive gestures; swipe left and right to change pages,
touch and release for normal button operation, or press and
hold for dim-cycle, volume controls, etc.
Features/Operations Overview
Fits US/European single-gang box or low voltage bracket.
Available in a “Black Glass” finish.
Power & communication over station bus.
Accepts Six-wire pigtail with all functionality.
Update firmware from Design Center.
NOTE:
Screen turns a
gradient green during a firmware update.
Built-in ambient light sensor for “Active,” AUTO mode
screen brightness.
Built-in proximity activation, senses movement under 6”,
sets screen to
Active
brightness.
o
May also activate tasks that do not use a HOLD
trigger.
o
Proximity trigger will not re-trigger for 30 seconds
after no keypad usage or when the plus/minus signs
disappear (see
Steps moving from active to inactive
,
page 4).
o
Re-triggering may also be controlled through task
logic.
Up to three LCD pages available through Design Center
programming.
Each LCD page may have up to 5 scene buttons depending
on exclusion of AV mini-widget.
Raise/Lower graphical buttons via
minus
/
plus
(-/+) for
dimmable loads and volume control.
Text tracks status using two fixed colors for ON and OFF.
Dual operation mechanical button, bottom left and right;
o
left
navigates to home screen or settings screens with
press and hold,
o
right
may be programmed from Design Center.
Self discovering widgets for
fast
setup & programming.
Five programmable event sounds through Design Center.
Headers; select
one
of the following as a page header:
o
empty – displays nothing in the header;
o
temperature (only select one);
Internal temperature
External temperature
Heat set point
Cool set point
o
thermostat (select one thermostat only);
Displays internal temperature
Displays current mode setpoint – setpoint is
adjustable via
minus
/
plus
(-/+) buttons
Displays current mode – blue graphic for Cool,
red graphic for Heat, blue and red graphic for
Auto, and gray graphic for Off
Displays the word “heat” or “cool” and the
current mode graphic becomes more vivid when
system is actively heating or cooling
o
time –
HH:MM
format;
twelve hour clock only
o
weather;
Displays current outdoor temperature and a
graphic of current conditions.
AV mode – selecting an AV zone replaces bottom two
scene buttons on all three pages with pre-designed
common AV interface controls.
Local settings (accessed by a press and hold of Home
button);
o
volume (touch interaction audio feedback)
minus
/
plus
(-/+) touch interaction volume
off when dark
checkbox
o
Settings
Auto Mode
option
Active & Inactive
brightness settings
Advanced
Low trim – sets minimum brightness
percentage for auto mode,
Motion sense – sets proximity sensor’s
sensitivity.
Off When Dark
option.
o
Station information
Firmware, graphics, boot code & eprom versions
Serial number
use infusion settings
,* (Design Center settings)
option.
*NOTE: to unselect use infusion settings change any
setting on the Sound
or
Brightness setup screens.
Possible Screen Combinations:
1) Header, Scenes, Audio, 2) Header, Scenes,
3) Scenes, Audio, 4) Scenes only.
Station Reset – simultaneously, press and hold both
mechanical buttons for one second.
Specifications
Description
Specification
Dimensions, HWD
(at wall surface)
4.9” x 3.44” x 0.44”
124mm x 87mm x 11mm
Dimensions, HWD
(overall)
4.9” x 3.44” x 1.38”
124mm x 87mm x 35mm
Finished
Weight
11.2 oz. or 317.5g
Power
24V/36V via Station Bus
Surge Suppression
Yes
Maximum LCD Control
Points (CP) inc/-
buttons (with 3 pages)
Scenes only – 45 CP max.
Scenes & Header – 47 CP max.
Scenes & AV – 37 CP max.
Scenes, AV, & Header – 39 CP max
Maximum Gangs
Single Gang Only
LCD Button Status
Automatic (white = off, ochre = on)
Sound Option
Independent volume for each sound:
1 – touch interaction
5 – programmable event sounds
Wiring Connections
2 Wire 600V pigtail (included)
6 wire aux. pigtail (order separate)
Power for Aux. External
Devices
15 mA @ 12V DC
Station Bus Polarity
Auto-Switching
Station Wiring
configuration
Daisy-chain/Star/Branch
Station Bus Specification
2C, 16AWG / 1.31mm2, twisted, non-
shielded, <30pF per foot. Separate a
minimum of 12" / 30.5cm from other
parallel communication and/or high
voltage runs.
Station Buss Power Draw
2.85W on IC-24 / 2.85W on IC-36
Addressing
self addressing through software
Finish
TRIM - Titanium
TOUCHSCREEN – Black Glass
Glass Surface
Chemically Strengthened
Ambient Operating
Temperature
32-95°F -or- 0-35°C
Ambient Operating
Humidity
5-95% non-condensing
FreeRTOS™
Real-time scheduling provided by
FreeRTOS (www.freertos.org)
CE and RoHS Compliant
Yes
Character / Font Support
Equinox can render the following Unicode Codepoints*
Range
Typeface
Unicode Codepages (blocks)
U+0000 -
U+00FF
Rendered in
Gotham Book
Basic Latin, Latin-1 Supplement
U+0400 -
U+06FF
Rendered in Arial
Unicode MS
Cyrillic, Cyrillic Supplement,
Armenian, Hebrew, Arabic
U+2700 -
U+27FF
Rendered in Arial
Unicode MS
Dingbats
U+3000 -
U+30FF
Rendered in Arial
Unicode MS
CJK Symbols and Punctuation,
Hiragana, Katakana
* NOTE: Proper computer/keyboard setup or copy/paste is
required to produce many international characters from the
above Unicode Codepoints.
Summary of Contents for EQ40TB-TI
Page 7: ...Digital Distributed Audio Amplifier Instruction Manual 850D DA...
Page 8: ......
Page 38: ......


