background image

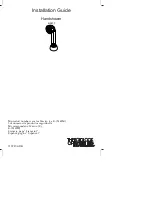
Thermostatic shower valve with adjustable rigid riser

VEL-149RRK-RO-CP
AQB-149RRK-RO-CP
ATM-149RRK-RO-CP 

Keep for future reference

Installation Guide

where inspiration flows

Vado

Wedmore Road, Cheddar, Somerset, England BS27 3EB

tel 01934 744466.      fax 01934 744345

aftersales

@

vado.com

www.vado.com

This instruction booklet covers model:

VEL-149RRK-RO-CP

AQB-149RRK-RO-CP
ATM-149RRK-RO-CP

Version 1, 1-3-18

Note: for illustrative purposes only the VEL model is shown.  

Please follow the same procedure to install the AQB & ATM.

Summary of Contents for VEL-149RRK-RO-CP

Page 1: ...nspiration flows Vado Wedmore Road Cheddar Somerset England BS27 3EB tel 01934 744466 fax 01934 744345 aftersales vado com www vado com This instruction booklet covers model VEL 149RRK RO CP AQB 149RR...

Page 2: ...installation 3 Operating Specifications 3 Contents of packaging 4 Dimensions 6 Installation Quick guide 7 Installation Off set connectors 12 Installation Quick fit connectors 13 Installation Shower ho...

Page 3: ...ke great care when installing this mixer not to damage its surface Please note if installing in an enclosed environment access should be left for servicing and maintenance No costs relating to inadequ...

Page 4: ...Accessory box 3 Valve Quick fit connectors Screws x 10 Wall plugs x 10 Offset connectors Hex key Filter washers Handset Place one of the rubber washer into the cone end of the hose and screw to the h...

Page 5: ...any hidden cables and pipes before drilling holes in the wall Remove the riser from the wall and the valve Drill the marked holes to a suitable depth for the wall plugs and secure with supplied screw...

Page 6: ...d position Slide the securing nut down and into the riser tighten the nut Pull the cover down over the nut Slide the wall bracket onto the riser bracket Remove the nut and seal from the top of the val...

Page 7: ...ilter washer Olive Nut Covers Screw the covers on each offset connector Place a rubber filter washer in each of the locking nuts on the valve and screw onto the connectors Slide on the olive screw on...

Page 8: ...to the inlet pipes The hot water should be connected to the left hand pipe Wall plugs 150mm Screws Warning Please check for any hidden cables and pipes before drilling holes in the wall Remove the nut...

Page 9: ...hand pipe Using PTFE tape screw on the 2 offset connectors followed by the covers Place a rubber filter washer in each of the locking nuts on the valve and screw onto the connectors some adjustment ca...

Page 10: ...10 11 Installation Quick guide 6 7 8 9 10 1 2 3 Installation Quick guide 5 4 1 2 4 3...

Reviews: