

Insert the Connections
CD into your CD-ROM drive. The
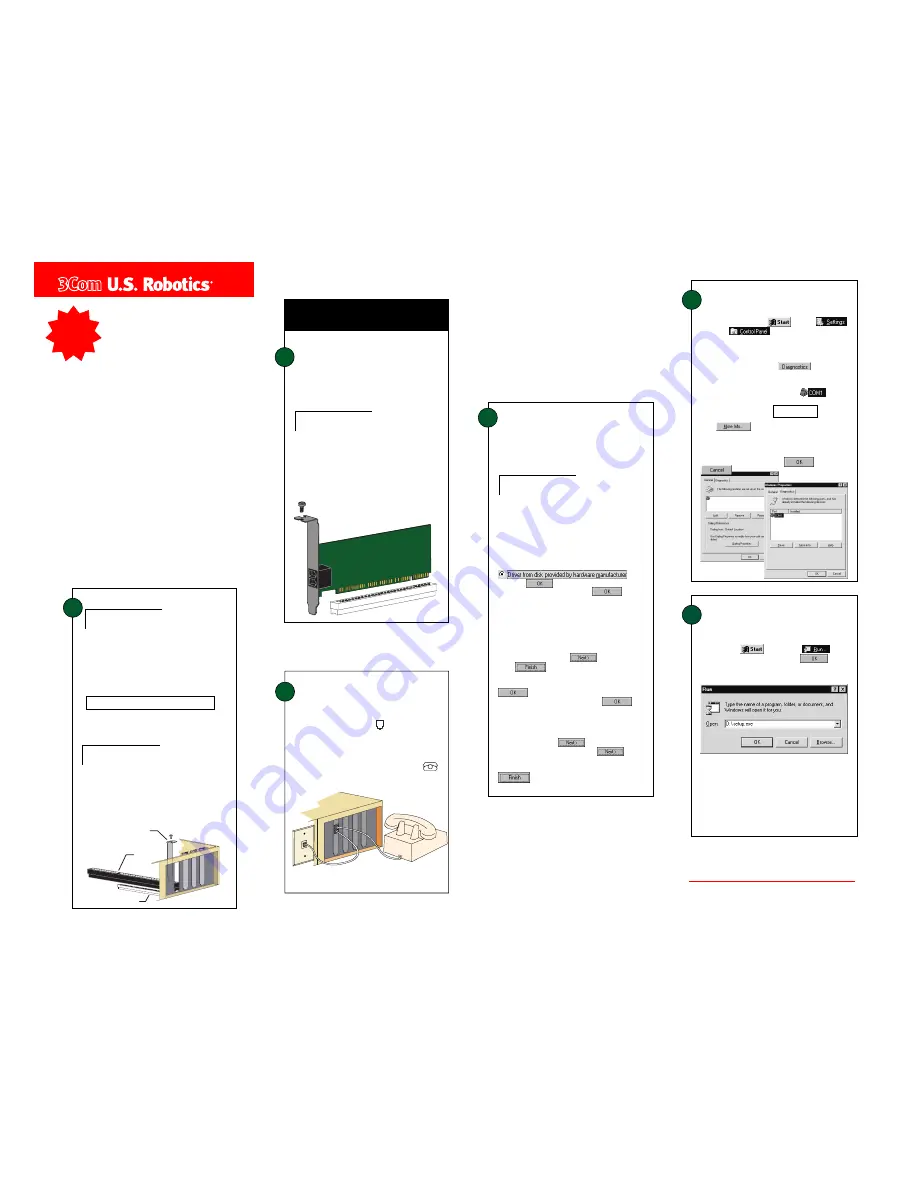
CD’s installation utility should start automatically. If it
does not, click
and then click
. In the
box, type
D:\setup.exe
and then click
. If your
CD-ROM drive uses a different letter, type that letter in
place of “D.”
The Setup Wizard on the CD guides you through
installing the Connections program group and
registering your modem.
For instructions on how to install software from the CD,
see the “Software Installation” chapter in the electronic
User’s Guide & Reference on the CD.
6
Install the
Connections
TM
CD and
register your modem.
3
Connect the modem to an
analog phone line.
1
Prepare for installation.
Write the modem’s serial number in the box below.
The serial number is located on the white bar code
sticker on the modem and on the modem’s box.
CAUTION:
To avoid risk of electrical shock, make
sure your computer and all peripheral devices are turned
off and unplugged from electrical outlets.
Shut down Windows. Turn off your computer and all
peripherals. Unplug your computer, and remove the
computer’s cover.
Unscrew and remove the expansion slot cover at the
back of an empty PCI expansion slot. The slot cover is
located on the back of the computer and covers an
opening on the computer case. The opening lines up
with the slot (inside the computer), which is usually
white plastic lined with metal.
When you are not using the modem, you can use a
telephone on the modem’s phone line. Plug the
telephone’s cord into the modem’s jack labeled
.
2
Insert the modem into the
empty PCI expansion slot.
Insert the modem, gold edge first, into the slot. The
modem will fit snugly. You may need to rock the
modem back and forth firmly to properly seat it into
the slot.
READ
ME
FIRST!
part number 1.024.1901
PCI Faxmodem
Installation
Guide
For Windows
®
NOTE:
Before you begin, we recommend you uninstall
any other modems you have in your system. Click
Windows
Start
,
Settings
, and then
Control Panels
,
Double-click
Modems
to see if there are any previously
installed modems on your system. Refer to your
modem
’
s documentation for instructions. If you have an
older U.S. Robotics modem, see the “Uninstalling a U.S.
Robotics Modem” chapter in your manual.
For troubleshooting help or to find out how to
contact technical support, see the other side of
this Guide.
If you install the enclosed Microsoft
®
products (Age of Em-
pires
™
, Money 99
™
, or Encarta 99
®
), they will be located in
the Start menu in the Programs group. For customer sup-
port on these products, call 888 410 2291 between the hours
of 9:00 am - 6:00 pm Central Standard Time.
Plug one end of the provided phone cord into the
jack on the modem labeled
and plug the other
end into an analog phone wall jack.
The modem’s metal bracket will cover the opening
on the back of the computer. Secure the modem
with the screw you removed in step 1. Replace the
computer’s cover.
NOTE:
Properly seating this modem in the slot can be
difficult, because it requires more force than some other
internal modems. Use firm downward pressure. When
the modem is properly installed, you will no longer see
any part of the gold edge.
When your desktop returns, verify that your modem is
properly installed. Click
, point to
,
and click
. Double-click the Modems
Modems
Modems
Modems
Modems
icon. When the “Modems Properties” screen appears,
you should see a description of your modem. Windows
NT users will also see a COM port setting. If you have
Windows 95 or 98, click the
tab, and then
click the COM port next to the description of your
modem. Write down the COM port to which your
modem is assigned (for example,
) in the
box below.
Click
. When the modem’s command set
appears in the box, you will have confirmation that your
modem is functioning properly. If you do not see the
command set, see the Troubleshooting section on the
back of this Guide. Click
then click
.
COM Port:
Your Modem Description Here
Your Modem Description
Here
5
Verify that the modem is
properly installed.
3Com and U. S. Robotics are registered trademarks; x2 and
Connections are trademarks of 3Com Corporation. Windows is a
registered trademark of Microsoft Corp. All other trademarks are used for identification purposes only and may be trademarks
and/or registered trademarks of their respective companies. Copyright ©1998 3Com Corporation. All rights reserved.
IMPORTANT! In accordance with the ITU-T standard for 56K transmissions, this modem is capable of receiving downloads at up
to 56 Kbps and sending at up to 31.2 Kbps. Due to FCC regulations on power output, receiving speeds are limited to 53 Kbps.
Actual speeds may vary. This product requires compatible analog phone line and server equipment. See www.3com.com/56k
for details.
PCI expansion slot
ISA expansion slot
expansion slot cover
4
Install the modem drivers.
If you are running Windows 95 and you are unsure
what version you have, right-click M
M
M
M
My Computer
y Computer
y Computer
y Computer
y Computer, and
select P
P
P
P
Properties
roperties
roperties
roperties
roperties, and click Gener
Gener
Gener
Gener
General
al
al
al
al. Your operating
system is listed under “System.”
If you have Windows 95
If you have Windows 95
If you have Windows 95
If you have Windows 95
If you have Windows 95
Version A:
Version A:
Version A:
Version A:
Version A:
Turn your computer on. When the “New Hardware
Found” screen appears, insert your driver diskette into
your 3.5-inch drive and choose
and
then click
.
Type
A:\
in the box and then click
. If your
3.5-inch drive uses a different letter, type that letter
in place of “A.”
If you have Windows 95
If you have Windows 95
If you have Windows 95
If you have Windows 95
If you have Windows 95
Version B:
Version B:
Version B:
Version B:
Version B:
Turn your computer on. When the “Update Device
Driver Wizard” screen appears, insert your driver diskette
into your 3.5-inch drive and insert your driver diskette into
your 3.5-inch drive and click
.
Click
. When the “Insert Disk” screen
appears, make sure you have the driver diskette
inserted into the computer’s 3.5-inch
drive. Click
. When the “Copying Files” screen
appears, type
A:\
in the box and click
.
If you have Windows 98:
If you have Windows 98:
If you have Windows 98:
If you have Windows 98:
If you have Windows 98:
Turn your computer on. When the “Add New Hardware
Wizard” screen appears, insert your driver diskette into your
3.5-inch drive and click
. Select
Search for the
best driver for your device
and click
. Select
Floppy disk drives
. If the location of your 3.5-inch drive is
not A:\ change it on the bottom section of this screen. Click
. You will be prompted to repeat this process
to install the voice driver files.
NOTE:
If your computer does not immediately detect
new hardware, shut down Windows and restart your
computer. If it still does not detect new hardware, you
will need to complete this step manually. Click Start,
Settings, and then Control Panels. Double-click
Modems, and click Add. Follow the onscreen
instructions for a manual installation.


