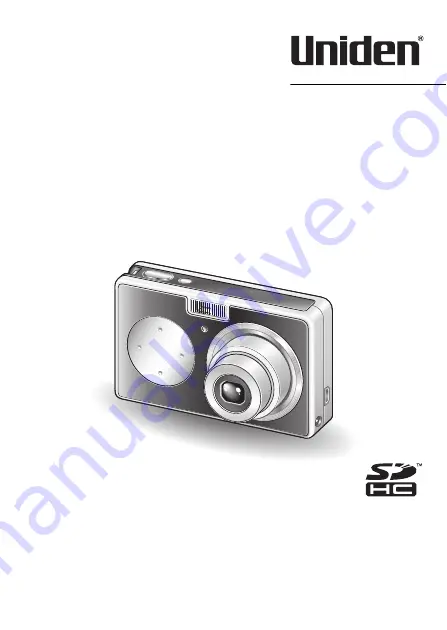
background image

UDC-7M

INSTRUCTION MANUAL

Digital Camera

Congratulations on your purchase of the Uniden UDC-7M Digital Camera.

• Please be sure to read this Instruction Manual before you begin using your 

camera.

• Save this manual for future reference.
• Review the separate booklet “SAFETY MANUAL” before operating your camera.

Summary of Contents for UDC7M

Page 1: ...ations on your purchase of the Uniden UDC 7M Digital Camera Please be sure to read this Instruction Manual before you begin using your camera Save this manual for future reference Review the separate...

Page 2: ...lar installation If this equipment does cause harmful interference to radio or television reception which can be determined by turning the equipment off and on the user is encouraged to try to correct...

Page 3: ...English ii kFOR CANADIAN USERS i This Class B digital apparatus complies with Canadian ICES 003...

Page 4: ...ll turn off when the battery pack is fully charged h Charging takes approximately 90 minutes 2 Open the battery card compartment cover and insert the battery pack h The battery card compartment cover...

Page 5: ...s the shutter button Single shot mode A still image is captured Sequential shots mode Shooting begins Release the shutter button to discontinue shooting Video clip recording mode Recording begins To s...

Page 6: ...y switches to the Playback Screen h Press the l or m button to display the video clip you wish to play back h Video clips are indicated by a video clip pattern along the top and bottom of the screen 2...

Page 7: ...ON AND OFF 18 DATE AND TIME SETTING 20 BASIC OPERATION BEFORE TAKING PICTURES 23 CAPTURING AND PLAYING BACK STILL IMAGES 30 SHOOTING SEQUENTIAL SHOTS 37 VIDEO CLIP RECORDING AND PLAYBACK 38 USING THE...

Page 8: ...ONITOR BRIGHTNESS 84 SCREEN LANGUAGE 85 TV SYSTEM SETTING 86 AUTO POWER OFF FUNCTION 87 FILE No RESET FUNCTION 88 INITIALIZING THE CARD MEMORY AND INTERNAL MEMORY 91 RESETTING THE CAMERA SETTINGS 93 C...

Page 9: ...d shooting Recording a video clip on page 38 Shooting single shots on page 30 SHOOTING SEQUENTIAL SHOTS on page 37 Log the date and time of your photos DATE AND TIME SETTING on page 20 Zoom in on the...

Page 10: ...raphing people USING THE SCENE FUNCTION portrait mode night view portrait mode face chaser mode on page 42 FLASH SETTING red eye reduction on page 47 Photographing landscapes USING THE SCENE FUNCTION...

Page 11: ...ing still images on page 32 Search for image data 9 image display playback on page 33 Magnify an image Magnifying zooming in the image on page 34 Change the angle of view ROTATE IMAGE on page 67 Slide...

Page 12: ...rsa COPY DATA on page 70 Delete files Erasing files on page 35 Protect images from accidental erasure IMAGE PROTECT on page 66 Format a card INITIALIZING THE CARD MEMORY AND INTERNAL MEMORY on page 91...

Page 13: ...pack battery pack 1 i Lithium ion battery pack charger and power cord i Dedicated USB interface cable 1 i Dedicated video interface cable 1 i SAFETY MANUAL safety precautions booklet Please read this...

Page 14: ...SD Memory Card i Multi Media Card What card means in this manual i In this manual SD Memory Cards and Multi Media Cards that can be used in this digital camera are referred to as card i The cards in t...

Page 15: ...ions and more k Abundant scene functions You can select from a variety of preset settings aperture shutter speed etc for specific shooting conditions k Speedy mode switching Switch the shooting mode f...

Page 16: ...s to the computer s hard disk You can connect it to a printer for direct printing of your photos Or take the card to a photo shop to have your photos printed there Dedicated USB interface cable Dedica...

Page 17: ...11 English SETUP PARTS NAMES Front Lens A V OUT terminal Self timer indicator Microphone DC IN terminal Flash on off button Shutter button...

Page 18: ...ok button Playback button Battery card compartment cover n button o button l button m button Strap holder Illumination sensor Detects the ambient brightness and automatically adjusts the brightness o...

Page 19: ...pplied power cord to the socket on the battery pack charger h Insert the connector straight and securely 3 Plug the power plug into a power outlet h Recharging begins h During recharge the CHARGE indi...

Page 20: ...e a malfunction If there is interference to your TV or radio during recharging i Move the battery pack and charger further away from the TV or radio Ambient temperature during recharging i It is recom...

Page 21: ...s turned off and it is therefore recommended that the battery pack be removed from the camera if it is not going to be used for a long time Note that when the battery pack is removed for a long period...

Page 22: ...correct h When inserting the battery pack be careful of the latch that secures it 1 2 4 3 Open battery card compartment cover on the side of the camera Insert the battery pack Insert all the way until...

Page 23: ...l it is completely inserted or released i If you remove your finger too soon the card may spring out and become lost or hit someone in the eye HINT Shooting without a card installed i When a card is i...

Page 24: ...was last turned off In the playback mode 1 Press the playback button for at least one second h The Playback Screen appears on the monitor pages 32 and 39 Turning off the camera 1 Press the on off but...

Page 25: ...the on off button or the playback button to turn it back on i You can change the setting for the time elapsed before the camera automatically turns off page 87 i When the camera is connected to a comp...

Page 26: ...he m button h The Option Menu appears 3 Press the n or o button to select CLOCK SET and press the ok button or the m button h The Clock Set Screen appears h The current date and time settings are show...

Page 27: ...button to change the time setting 4 Press the m button to select the Y M D indication 5 Press the n or o button to change the displayed date order h Press the o button to change the displayed date ord...

Page 28: ...ttery will maintain the date and time settings However there is a small chance the settings may be lost The backup will last for about 7 days It is recommended to check that the date and time settings...

Page 29: ...sure that the lens and flash are not blocked by your fingers or the handstrap HINT i Images captured in the still image shooting mode can be rotated when they are played back page 67 i When the optic...

Page 30: ...ct focus The following examples are some of the situations where the autofocus function may not work i Subjects with low contrast very bright subjects at the center of the image or dark subjects or lo...

Page 31: ...and far objects are present Use the focus lock function to lock the focus on an object at the same distance as the desired subject then reposition the camera to compose the picture i Fast moving subj...

Page 32: ...me the playback button is pressed the camera switches between the shooting mode and the playback mode HINT To turn the camera on in the playback mode i Press the playback button for at least 1 second...

Page 33: ...the on off button to turn the camera on 2 Press the n button h The screen to set the shooting mode and the self timer appears 3 Press the m button to select the shooting mode 4 Press the ok button h T...

Page 34: ...e you shoot or the normal display mode in which the setting indications are turned off providing a full view of the subject 1 Press the on off button to turn the camera on 2 Press the ok button h Each...

Page 35: ...ory or on the card installed in the camera i When a card is installed in the camera the data is recorded on the card If no card is installed the data is recorded in the camera s internal memory Taking...

Page 36: ...quential shots please see page 37 Shooting single shots 1 Set the camera to the single shot mode page 27 2 Press the shutter button halfway h Engage the autofocus by pressing the shutter button halfwa...

Page 37: ...o focus on you can refocus for example by changing the shooting angle i The large target mark appears when the camera focuses on a wide area in the center of the screen About the focus indicator i A g...

Page 38: ...ous or next image To display the previous image Press l To display the next image Press m h To return to Shooting Screen press the playback button If the camera was turned on by pressing the playback...

Page 39: ...e the orange frame to the desired image and press the ok button Instead of pressing the ok button you can press T on the zoom switch to show the image full screen 100 100 100 0001 0001 0001 0002 0002...

Page 40: ...nification increases with each press of T on the zoom switch To return to normal size Magnification decreases with each press of W P on the zoom switch h Press the ok button to return to the normal 10...

Page 41: ...Set the camera to the playback mode and press the delete button h The Delete Screen appears ALL FILES Erases all the data 1 FILE Erases one file at a time 3 Delete the files To delete all the files 1...

Page 42: ...ccidental erase cannot be erased To erase protected files set the protect setting for the file to off page 66 and then follow the file delete procedure HINT To quickly delete a still image immediately...

Page 43: ...subject h Note that if the shutter button is released during shooting shooting stops immediately HINT About the focus when shooting sequential shots i When sequential shots are captured the autofocus...

Page 44: ...gth of the video clip and the remaining recording time available are shown on the monitor h It is not necessary to continue pressing the shutter button while shooting 3 End the recording h Press the s...

Page 45: ...back button for at least 1 second h The video clip just recorded appears on the monitor h Video clips are indicated by a video clip pattern along the top and bottom of the screen 5 Press the ok button...

Page 46: ...back is paused press and hold the m button During reverse playback While playback is paused press and hold the l button To accelerate playback Forward playback During forward playback press the m butt...

Page 47: ...for a video clip is very large i Therefore be aware that if the video clip is uploaded to a computer to be played back the computer may not be able to play back the video fast enough making it appear...

Page 48: ...ting Features Shooting mode setting c P t X Auto The camera makes the optimum settings m m m Y Sports Capture a split second image of a fast moving subject m m m Z Portrait Enhance the three dimension...

Page 49: ...ivid colors of flowers m m m a Still image with audio Shoot a still image and add a voice memo m n n q Blur reduction Minimize the effects of camera shake m m n k Snow beach For photographing bright s...

Page 50: ...shutter button to take the picture then speak into the microphone h During recording be careful not to obstruct the microphone with your fingers for example h Audio recording begins During recording t...

Page 51: ...searches for the subject s face When it detects the face an orange frame appears h Do not press the shutter button halfway until the orange frame appears The camera cannot search when the autofocus i...

Page 52: ...y When T on the zoom switch is pressed again the mode changes to the digital zoom mode and zooming continues 3 Take the picture HINT Can t access the digital zoom i The digital zoom cannot be used whe...

Page 53: ...h only when required In a backlight situation if only the center of the image is very dark the flash will operate to compensate auto m The flash will operate with every image captured regardless of th...

Page 54: ...flash operates according to the selected mode HINT When auto is selected i The k icon indicating the flash setting is not shown on the Shooting Screen When auto or red eye reduction is selected i When...

Page 55: ...menu appears 2 Use the n and o buttons to select the desired self timer setting and press the ok button h The self timer is set and you are returned to the Shooting Screen y The image is captured abou...

Page 56: ...shutter button one more time to restart the self timer i To cancel self timer photography set the self timer setting to off c i After the self timer picture is snapped the self timer is automatically...

Page 57: ...nd o The focus operates within the ranges shown below pan Still image shooting i At maximum aperture 2 2 m 7 22 ft to i At minimum aperture 1 3 m 4 27 ft to Video clip recording i Wide end At maximum...

Page 58: ...1 Set the camera to a shooting mode page 27 2 Press the menu button h The Recording Menu corresponding to the shooting mode set in step 1 appears h The Recording Menu can be canceled by pressing the...

Page 59: ...53 English ACCESSING THE RECORDING MENU Overview of the Recording Menu 1 2 3 4 5 6 RESOLUTION FOCUS MODE ISO WHITE BALANCE EXPOSURE INSERT DATE ON IMAGE OFF RECORDING MENU...

Page 60: ...2 304 pixels f Shoot at 2 592 1 944 pixels g Shoot at 2 048 1 536 pixels h Shoot at 1 024 768 pixels Shoot at 640 480 pixels Video clip recording mode d Shoot at 640 480 pixels 5 Shoot at 320 240 pix...

Page 61: ...the video clip recording mode select CLIP SIZE and press the ok button h The resolution menu or video size menu appears Single shot sequential shots mode Video clip recording mode 3 Select the desire...

Page 62: ...button 3 Press the menu button h The recording mode is enabled 4 Press the shutter button h Audio recording begins During recording the length of the audio track and the remaining recording time avail...

Page 63: ...uring fast forward or fast reverse press the n button Fast forward During forward playback press the m button The speed changes each time the m button is pressed as follows Normal playback 2 5 10 15 P...

Page 64: ...itor AF seeker Once the focus is locked on a subject page 30 it follows the subject The focus point automatically changes to remain continuously focused on a moving subject 1 Display the Recording Men...

Page 65: ...activated the seeker mark appears on the focused subject i During focus lock even if the focused subject moves the seeker mark automatically follows the subject i If the camera loses the focus lock on...

Page 66: ...ISO and press the ok button h The ISO sensitivity menu appears 3 Select the desired icon and press the ok button h The ISO sensitivity is set HINT i By setting a higher ISO sensitivity you can set hi...

Page 67: ...balance To use any of the other white balance settings proceed to step 3 3 Select the desired icon and press the menu button h This completes the white balance setting HINT To cancel the white balanc...

Page 68: ...ng Menu page 52 2 Select EXPOSURE and press the ok button h The screen to adjust the exposure appears 3 Use the n and o buttons to select the desired exposure numerical value and press the ok button h...

Page 69: ...to select the desired setting and press the ok button h The date imprint mode is set and you are returned to the Recording Menu HINT About the capture date and date imprinting i When an image is edit...

Page 70: ...playback settings 1 Press the playback button h The display changes to the Playback Screen 2 Press the menu button h The Playback Menu appears h The Playback Menu is canceled when the menu button is...

Page 71: ...trast correction page 68 h Add contrast light and dark to the image to make it clearer 4 File copy page 70 h Copy files from the card to the internal memory or vice versa 5 Print instructions page 72...

Page 72: ...rotect mode is set for the data h The protect mark B indicates that the data is locked CAUTION i Even if the protect mode is set for certain data files they will be erased if the card is reformatted p...

Page 73: ...ess the ok button h The screen to rotate the image appears 3 Select YES and press the ok button h Each time the ok button is pressed the image is rotated another 90 degrees HINT i On the 9 image displ...

Page 74: ...on Screen appears YES Proceed with the contrast correction EXIT Return to the Playback Menu 3 Select YES and press the ok button h Image processing begins h During image processing Processing is shown...

Page 75: ...e modified image is saved 5 Select the desired method to save the modified image and press the ok button h The modified image is saved and you are returned to the Contrast Correction Screen HINT Conce...

Page 76: ...isplay the Playback Menu page 64 3 Select FILE COPY and press the ok button h The screen to copy files appears 4 Select the copy direction INT MEM CARD Copy image data from the internal memory to the...

Page 77: ...to the copy destination EXIT You are returned to the screen to copy files step 3 6 Select the desired type of copy When selecting COPY SINGLE 1 Press the l or m button to display the image you wish t...

Page 78: ...int settings apply to all the still images on the card ALL CLEAR Clear all the print settings HINT About the DPOF format i DPOF Digital Print Order Format is a print order format You can connect your...

Page 79: ...t print settings are applied to all the still images on the card 3 Press the ok button h The Date Copies Print Screen appears h If EACH IMAGE was selected press the l or m button to display the desire...

Page 80: ...ted prints h Press W on the zoom switch to add a check mark next to 5 Press the ok button h This completes the settings for the number of prints and date imprinting h If you press the menu button you...

Page 81: ...l Clear Screen appears YES Clear the print settings for all images EXIT Cancel the clear procedure and return to the screen to set the print settings 4 Select YES and press the ok button h All the pri...

Page 82: ...n h Slideshow playback starts h To stop slideshow playback press the ok button or menu button HINT i Audio data is not played during slideshow playback TIME Adjust the transition speed the period that...

Page 83: ...button h The Information Screen appears h If the ok button is pressed again the Information Screen is canceled 1 Resolution setting 2 Resolution 3 Scene function setting 4 Image number 5 Protect sett...

Page 84: ...back Menu see page 64 2 Press the n or o button to select the option tab 3 h The Option Menu appears To exit the Option Menu To return to the Shooting Screen or Playback Screen Press the menu button T...

Page 85: ...lish DISPLAYING THE OPTION MENU Overview of the Option Menu 1 2 3 4 5 6 7 8 9 AUTO POWER OFF FILE NO RESET FORMAT RESET SETTINGS CLOCK SET SOUND POST VIEW 3sec BRIGHTNESS LANGUAGE TV SYSTEM OPTION MEN...

Page 86: ...ges are displayed 6 TV system setting page 86 h Select the type of TV signal that is output from the camera s A V OUT terminal 7 Auto power off page 87 h Specify the time elapsed before the auto power...

Page 87: ...RN ON OFF Mute or enable the sound that is produced when the camera is turned on or off SHUTTER Select the sound that is produced when the shutter button is pressed KEY SW Select the sound that is pro...

Page 88: ...each operation sound appears ON Activates the sound OFF Deactivates the sound If OPERATION VOL or PLAY VOLUME is selected h The screen to select the volume setting appears h You can select a volume se...

Page 89: ...y the Option Menu page 78 2 Select POST VIEW and press the ok button h The Post View Menu appears h When OFF is selected the post view image is not displayed 3 Select the desired setting and press the...

Page 90: ...page 78 2 Select BRIGHTNESS and press the ok button h The Monitor Brightness Menu appears h When set to AUTO the illumination sensor page 12 detects the ambient brightness and automatically adjusts t...

Page 91: ...veral languages 1 Display the Option Menu page 78 2 Select LANGUAGE and press the ok button h The screen to select the display language appears 3 Select the desired language and press the ok button h...

Page 92: ...on h The TV System Menu appears NTSC Outputs NTSC video signals PAL Outputs PAL video signals 3 Select the desired setting and press the ok button h The selected TV system is set HINT If no image appe...

Page 93: ...n Menu page 78 2 Select AUTO POWER OFF and press the ok button h The screen to set the standby time appears RECORDING Set the standby time for the shooting mode PLAYBACK Set the standby time for the p...

Page 94: ...nsequently it results in more than one card containing images with the same numbers By setting the file number reset function to OFF even if the card is reformatted or the card is replaced with anothe...

Page 95: ...n Card A When the highest image number on Card B before replacing is higher than the highest image number on Card A the file name of the next recorded image continues from last file name recorded on C...

Page 96: ...r reset function is OFF 3 Select OFF and press the ok button h The file number reset function was set to OFF HINT i Until the file number reset function is turned ON consecutive file names are assigne...

Page 97: ...switch is set to the LOCK position Proceed with the reformat procedure after setting the lock switch to the unlocked position 1 To reformat a card install it in the camera To reformat the camera s int...

Page 98: ...fore reformatting a card any data you want to keep should be copied to your personal computer s hard disk or other storage medium Caution regarding disposing transferring the card recovering data from...

Page 99: ...o the factory preset settings NO Do not change the settings and return to the Option Menu 3 Select YES and press the ok button h The camera settings are reset to the factory preset settings HINT i Not...

Page 100: ...ge 131 1 Press the on off button to turn the camera on To check the remaining number of still images Set the shooting mode to the single shot or sequential shots mode page 27 To check the remaining vi...

Page 101: ...a new card or save the images to a computer and then erase them page 35 from the card i When the remaining number of images or the remaining video recording time is 0 it may be possible to capture a...

Page 102: ...ambient temperature is low may appear early for an incorrect indication of the remaining charge Also depending on the conditions of use of the camera or the ambient conditions temperature etc the ind...

Page 103: ...r the ambient temperature temperatures below 10 C 50 F the number of images that can be saved on a fully charged battery pack will vary greatly i It is recommended that you prepare an extra battery pa...

Page 104: ...with the camera is used to play back voice memos and audio recordings as well Voice memo playback see page 32 Audio playback see page 57 CAUTION Insert and pull out the cable carefully i When connecti...

Page 105: ...quired Correct operation cannot be guaranteed for models with upgraded Windows systems Macintosh A model with a standard equipped USB port and preinstalled with Mac OS 9 0 9 1 9 2 Mac OS X 10 1 or lat...

Page 106: ...URL may change About file names when the card is replaced i If the file number reset function is set to off even when the card is replaced consecutive numbering of folder numbers and file names conti...

Page 107: ...to the computer h Connect the camera s USB VIDEO terminal to the computer s USB connector h The USB Connection Screen appears on the camera s monitor CARD READER PictBridge CANCEL SELECT SELECT OK OK...

Page 108: ...terminal sockets on the devices Push the plugs in straight when connecting them If undue force is used to connect a cable it may permanently damage the connector pins in the terminal socket i Do not...

Page 109: ...ent on your computer 2 Select an action h Select the desired procedure from the UDC 7M E window Dismounting the camera CAUTION i To disconnect your camera be sure to follow the procedure below Failure...

Page 110: ...alled in your camera exactly like you would the data in the other computer drives Dismounting the camera CAUTION i To disconnect your camera be sure to follow the procedure below Failure to follow thi...

Page 111: ...ther computer drives Dismounting the camera CAUTION i To disconnect your camera be sure to follow the procedure below Failure to follow this procedure may cause faulty operation of your computer or lo...

Page 112: ...ning the images you wish to print in the camera 2 Turn the printer on use the supplied USB interface cable to connect the camera to the printer h Connect the camera s A V OUT terminal to the printer s...

Page 113: ...on response is slower i If the camera is powered by the battery pack for printing make sure that the remaining battery charge is sufficient Insert and pull out the cable carefully i When connecting th...

Page 114: ...lected image Procedure to select one still image and print it 1 Complete the printing setup page 106 2 Press the l or m button h Display the image you wish to print 1 1 DATE DATE DATE PRINT PRINT PRIN...

Page 115: ...k next to 4 Press the ok button h Printing begins HINT To cancel printing 1 During printing press the o button h The Confirm Cancel Printing Screen appears 2 Select YES and press the ok button h If EX...

Page 116: ...h Press the n or o button to specify the number of prints h Press the n or o button until the desired number of prints is displayed Specifying dated prints h Press W on the zoom switch to add a check...

Page 117: ...image that is set to print page 72 is displayed 4 Press the ok button h Printing begins h Printing begins about 1 minute after the ok button is pressed HINT i In step 3 if you press the l or m button...

Page 118: ...ge Menu appears 3 Select the printer settings tab v and press the ok button h The Printer Settings Menu appears DATE STAMP Print the date the photo was taken MEDIA TYPE Specify the type of paper used...

Page 119: ...parameters as desired h The contents of the settings that can be made for each parameter will differ depending on the printer When V VALUES is selected h The images will be printed according to the se...

Page 120: ...it up before using it Why is the battery pack consumed so quickly The ambient temperature is very low Keep the battery pack in an environment of 10 to 40 C 50 to 104 F The battery pack life has expire...

Page 121: ...ter size or larger and for printing a close up of part of a photo trimming g For printing standard photo photo service sizes h For photos displayed on a web page or sent as e mail attachments What is...

Page 122: ...tor When used in cold weather why does the image seem to leave traces as it moves Condition due to the liquid crystals Not a malfunction Spots that appear in the monitor only appear in the monitor and...

Page 123: ...correctly and when the image is locked in focus gently press the shutter button all the way to capture the image Why is there no image z is shown This may happen when trying to play back images store...

Page 124: ...e playback of data that has been edited using a computer Printing Why does a message appear during PictBridge printing There is a problem with the printer Please refer to the instruction manual for yo...

Page 125: ...ould purchase the necessary power outlet plug adaptors for the countries in which the battery charger will be used Please note that product support may not be available abroad Why does the System erro...

Page 126: ...k is dead Recharge the battery pack 13 The battery pack has not been inserted correctly Reinsert the battery pack making sure to orient them correctly 16 The camera turns off by itself The power save...

Page 127: ...Erase the images that are not necessary Save the images to separate media then erase all the images from the card 35 91 The flash does not operate The flash off mode is selected Set the flash to auto...

Page 128: ...ensitivity setting is too high Set the ISO sensitivity to a lower setting 60 Monitor No playback image appears The playback mode is not active Press the playbackbutton 26 Viewing images The image is t...

Page 129: ...7 The subject was too bright Use the exposure correction function 62 The ISO sensitivity setting is incorrect Set the ISO sensitivity to t 60 The image is not in focus The subject is too close to the...

Page 130: ...r capturing images 30 32 Image editing You cannot edit or rotate an image The protect mode is set Cancel the protect mode 66 Misc The Image is protected message appears and the data cannot be erased Y...

Page 131: ...g single shots The macro focus range setting is not available The macro focus range setting is not available The flash is disabled even when shooting single shots The AF seeker p focus mode setting is...

Page 132: ...igital photography devices for the images stored on removable memory cards However it is not guaranteed that all devices will support the DCF standard Video clips QuickTime Movie Photo JPEG Audio reco...

Page 133: ...5 frames second e 160 120 pixels 15 frames second White balance Full auto TTL manual setting possible Lens 3 0 optical zoom lens f 6 3 mm to 18 9 mm 35 mm film camera conversion 38 mm to 114 mm Autofo...

Page 134: ...to fireworks etc During flash 1 30 to 1 2 000 sec Sequential shots mode 1 2 to 1 2 000 sec Video clip recording mode 1 30 to 1 10 000 sec Sensitivity Single shot mode sequential shots mode Auto equiva...

Page 135: ...us AF seeker Self timer Approx 2 second delay 10 second delay Ambient environment Temperature 0 to 40 C 32 to 104 F operation 20 to 60 C 4 to 140 F storage Humidity 30 to 85 operating no condensation...

Page 136: ...ated regrouped jack Audio output 880 mVrms 1 1 dBs 2 2 k or less monaural Video output 1 0 Vp p 75 unbalanced sync negative composite video NTSC color TV system PAL TV system switchable from the Optio...

Page 137: ...ta that can actually be stored may differ depending on the card brand etc i The continuous shooting time for each video clip will differ depending for example on the card capacity environmental condit...

Page 138: ...pack BT 1003 Ambient environment Temperature 0 to 40 C 32 to 104 F recharge 20 to 60 C 4 to 140 F storage Humidity 20 to 80 no condensation Dimensions 46 W 21 2 H 91 D mm 1 81 W 0 83 H 3 58 D Weight...

Page 139: ...rom the contents of this manual i Uniden Corporation shall not be held responsible for any problems resulting from the use of this camera i Uniden Corporation declines all responsibility for damages d...

Page 140: ......

Reviews: