

Quick Installation Guide
ADCP02A 2-Port DVI USB KVM Switch w/ Audio, Mic, & Hub
http://www.uniclass.com.tw Rev. 1.5 Copyright© All rights reserved.
Quick Installation Guide
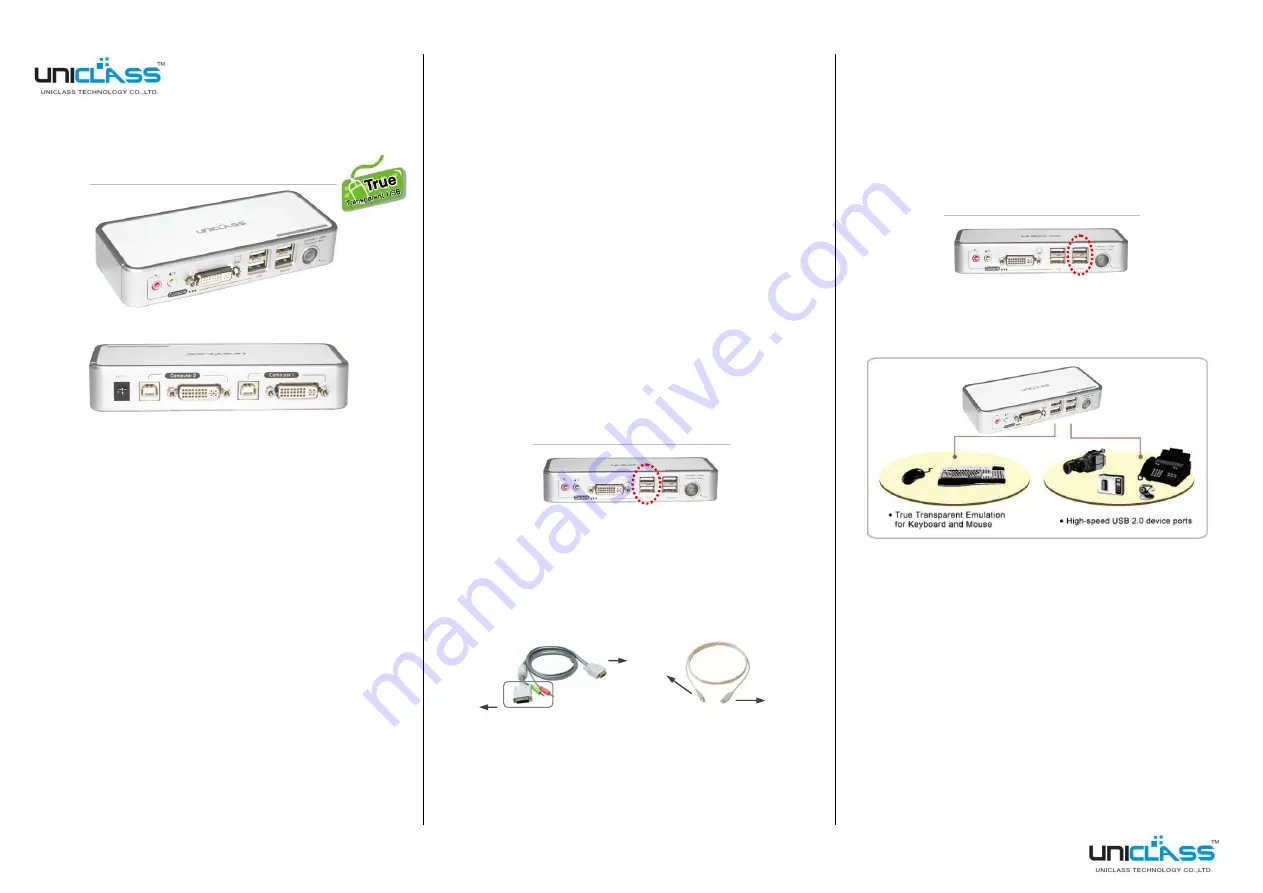
ADCP02A - Front View
ADCP02A – Rear View
2-Port Compact Desktop
DVI USB KVM Switch w/ Audio, Mic, & Hub
ADCP02A
Thank you for purchasing the ADCP02A Compact Desktop DVI
USB KVM Switch! With our highly reliable and quality product,
user can enjoy countless benefits from using it.
INTRODUCTION
The ADCP02A is a 2-port Compact Desktop DVI USB KVM
Switch with audio and microphone switching function. It features
our latest True Transparent USB (TTU) Emulation Technology.
The TTU Technology ensure ultimate compatibility to all types of
advanced keyboards and mice, giving users a best experience in
seamless KVM switching, either in gaming or any other critical
computer operation. Its independent audio/mic switching function
allows an uninterrupted audio experience on a same connected
computer even when you switch to another computer.
This KVM switch adopts the DVI technology for digital video
signal transmission over the cable to reduce undesired distortion
from conventional analog/digital conversion. Both digital video
(1920 x 1200) and analog video (2048 x 1536) are supported.
Its audio & mic switching function offers you uninterrupted
multimedia experience while performing KVM switching. Multi-
platform support for PC and Mac is available. For users who
might need to use a hotkey preceding sequence other than two
scroll locks, we also offer five key alternatives for free
configuration.
The ADCP02A features the Active Sync Replication™ (A.S.R.)
technology that offers a full-time DDC emulation for best video
compatibility with new type of Operating System that requires
more critical DDC communication.
INSTALLATION
Step 1.
Connect the shared USB keyboard, mouse, monitor,
speaker/headphone and microphone to corresponding
ports on console section of your KVM front panel.
Note:
The left two USB ports on the front panel are for
USB keyboard and mouse. See below image.
.
Step 2.
Power the shared monitor on.
Step 3.
Plug in the KVM switch.
Step 4.
Connect computers to KVM PC ports, using the slim 3-
in-1 KVM combo cables and the USB cables (see below
images). After you have connected the KVM and
computers properly, you can operate the KVM switch
immediately.
Note 1: If you need to connect a computer with an analog video
display (HDB15) to the KVM switch, you need to use a HDB15-
DVI adapter for connection.
Note 2: Some older computers with USB interface might need
to manually enable the USB option in the BIOS settings before
you can use any USB devices. If your USB interface does not
work, please check the USB option in the BIOS.
Note 3: If you use Windows 95/98/SE or Mac OS and has not yet
installed a USB mouse on your computer, there might be an error
message telling you that mouse is not detected and prompting
you to decide whether to ignore the same message in the future,
and yet you will find there is no mouse movement to disable this
message. So it is suggested that you should installed your USB
mouse on your computer first, before connecting it to this KVM
Switch.
Step 5.
Connect each of your USB devices to the USB 2.0
device ports (right two USB ports on the front panel).
You can now begin to use the KVM switch.
OPERATION
There are two methods to control your KVM Switch for PC, hub
port control and audio/mic port selection: using (1) the front-panel
push button, and (2) keyboard hotkeys
(1) Front-panel button
The front-panel button allows you a direct control over KVM
switching operation. Simply press the button to toggle to the
other PC port (together with hub port control and/or audio/mic
port, if binding is enabled). By default, PC port switching, hub
port control and audio/mic port switching are bound together,
unless you specify the audio to be fixed a specific port.
(2) Keyboard hotkeys
For keyboard hotkeys, please refer to the “Quick Reference
Sheet”.
Connect
to PC
Connect
to KVM
(Type B)
Connect
to PC
(Type A)


