U-Line Nugget, Quick Start Manual
The U-Line Nugget is a top-of-the-line portable ice maker that produces small, chewable ice nuggets in just minutes. Ensure a hassle-free setup with our Quick Start Manual, available for free download at manualshive.com. This comprehensive manual provides step-by-step instructions to maximize your ice-making experience.
Share
Download


Reviews:
No comments
Related manuals for Nugget

TC-21FL-ISO
Brand: Waeco Pages: 108

EC47Q
Brand: Buffalo Tools Pages: 8

Accelero Mono PLUS
Brand: Arctic Pages: 2

GKN 16820 W
Brand: Grundig Pages: 23
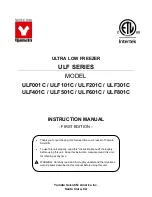
ULF001C
Brand: Yamato Pages: 20

HSA32530N
Brand: Beko Pages: 72

HSA29540N
Brand: Beko Pages: 88

HSA 32520
Brand: Beko Pages: 65

HSA 24531
Brand: Beko Pages: 47

HS22340
Brand: Beko Pages: 36

HSA37540CHN
Brand: Beko Pages: 36

HSA40520F
Brand: Beko Pages: 56

HSA 29530
Brand: Beko Pages: 48

HSA 24540
Brand: Beko Pages: 48

HS218540
Brand: Beko Pages: 44

HSA 13530 -
Brand: Beko Pages: 48

HSA32540
Brand: Beko Pages: 55

HS221530N
Brand: Beko Pages: 76


