


350BR BROADBAND ROUTER
1
UK
A
B C D E F
G
H
I
J
K
L
M
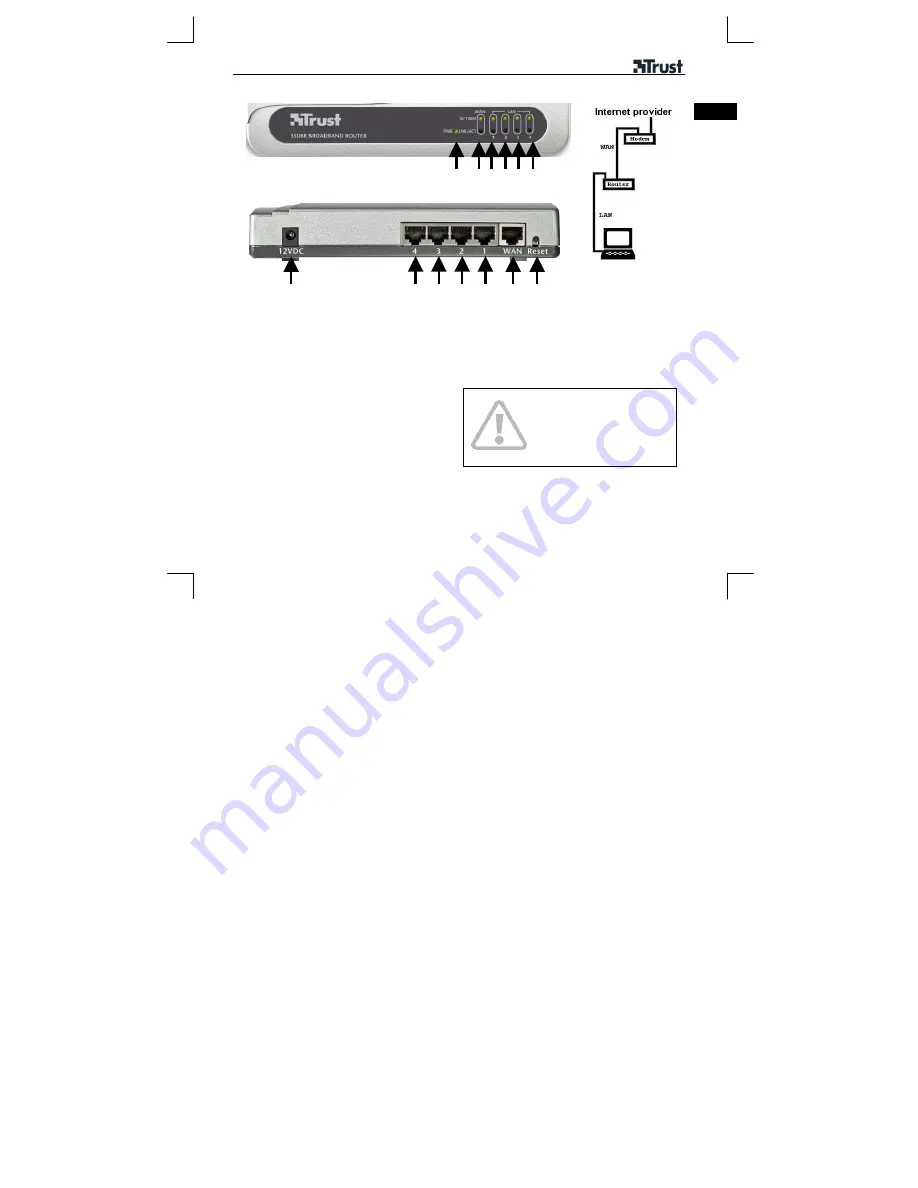
Product information
A
: Power LED
B
: LED for WAN port
C
: LED for LAN port 1
D
: LED for LAN port 2
E
: LED for LAN port 3
F
: LED for LAN port 4
G
: Connection for the mains
power supply
H
: LAN port 4
I
: LAN port 3
J
: LAN port 2
K
: LAN port 1
L
: WAN port
M
: Reset switch
Contents
Steps 1-7
Connecting
Steps 8-26
Internet settings
Appendix A Checking the network settings
Appendix C Resetting the router
Caution:
This manual contains
important security and safety
information. Read the entire manual
before connecting the product.


