background image

ALTOPARLANTE AMPLIFICATO ALTA POTENZA CON TROLLEY
Manuale d'uso  e collegamento

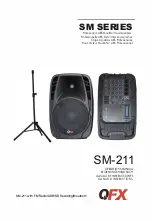
POWER PORTABLE SPEAKER WITH TROLLEY
Connection and Operation Manual

HAUT-PARLEUR PORTABLE AMPLIFIE AVEC TROLLEY
Mode d'emploi et branchement

BEWEGLICHER LAUTSPRECHER MIT TROLLEY
Gebrauchs- und Anschlusshandbuch

ALTAVOZ AMPLIFICADO PORTATIL CON TROLLEY
Manual para el uso y la conexión

LED

DISPLAY

USB/ SD 

PLAYER

XF 1750KB

Guida d’uso
User guide

DISCO

LIGHT

120 W 

MAX

BT

BLUETOOTH

Per informazioni integrative ed aggiornamenti su questo prodotto visita www.trevi.it 
For additional information and updates of this product see www.trevi.it

Summary of Contents for XF 1750KB

Page 1: ...t branchement BEWEGLICHER LAUTSPRECHER MIT TROLLEY Gebrauchs und Anschlusshandbuch ALTAVOZ AMPLIFICADO PORTATIL CON TROLLEY Manual para el uso y la conexión LED DISPLAY USB SD PLAYER XF 1750KB Guida d uso User guide DISCO LIGHT 120 W MAX BT BLUETOOTH Per informazioni integrative ed aggiornamenti su questo prodotto visita www trevi it For additional information and updates of this product see www t...

Page 2: ......

Page 3: ...HUMIDITE ACHTUNG ACHTUNG DAS GERÄT NICHT ÖFFNEN IM INNERN BEFINDEN SICH KEINE VOM BENUTZERSELBSTINSTANDSETZBARENTEILEUNDAUCHKEINEERSATZTEILE FÜR JEGLICHE SERVICEARBEITEN WENDEN SIE SICH BITTE AN EINE TREVI AUTORISIERTEN KUNDENDIENSTSTELLE GEFAHR ELEKTRISCHER SCHLÄGE NICHT DER FEUCHTIGKEIT UND DEM REGEN AUSSETZEN ATENCION ATENCION NO ABRIR EL APARATO EN SU INTERIOR NO HAY MANDOS QUE PUEDAN SER MANI...

Page 4: ...TREVI Controllare sempre prima di ricaricare l apparecchio che i cavi di alimentazione e di collegamento siano installati correttamente Nessuna sorgente di fiamma nuda quali candele accese dovrebbe essere posta sull apparecchio L apparecchio non deve essere esposto a stillicidio o a spruzzi d acqua e nessun oggetto pieno di liquido quali vasi deve essere posto sull apparecchio Conservare il presen...

Page 5: ... AAA non fornite facendo attenzione alla polarità indicata e richiudere il coperchio 1 MIC VOL regolazione Volume Mic1 2 microfono wireless 2 Regolazione Volume principale 3 Tasto MODE USB SD BT AUX IN 4 TastoLED attivazione disattivazioneLedfrontali DiscoLight 5 Tasto Stand by 6 Tasto PLAY PAUSA tenere premuto per qualche secondo per disattivare la voce guida 7 Tasto PREV Precedente 8 Tasto NEXT ...

Page 6: ...z Dalla funzione Stand by l apparecchio si riaccende utilizzando il tasto 5 sull unità oppure il tasto 19 del telecomando o portandolo l interruttore principale POWER ON OFF 17 dalla posizione AC alla posizione OFF attendendo 3 secondi e poi portando l interruttore nuovamente sulla posizione AC Se apparecchio è in funzione batteria Dalla funzione Stand by l apparecchio si riaccende utilizzando il ...

Page 7: ...re i tasti NEXT 30 e 9 LAST 28 sul telecomando per la selezione dei brani RIPRODUZIONE SU INGRESSO USB SD 1 Accendere l apparecchio 2 Inserire una memoria USB o una scheda SD nei corrispettivi ingressi 10 La riproduzione viene avviata automaticamente 3 Per mettere in pausa la riproduzione premere il tasto PLAY 6 sull unità oppure il tasto 22 del telecomando sul display comparirà la scritta PAUS 4 ...

Page 8: ...strerà 00 01 E possibile usare anche il microfono durante la registrazione Note Quando si attiva la funzione Registrazione alcuni comandi dell apparecchio vengono inibiti questi riprenderanno la loro normale funzione quando la registrazione verrà arrestata La funzione di registrazione potrebbe non supportare alcuni dispositivi USB SD questo è dovuto all incompatibilità di alcuni processori REGISTR...

Page 9: ...ti lato maggiore inferiore a 25 cm L adeguata raccolta differenziata per l avvio successivo dell apparecchiatura dimessa al riciclaggio al trattamento e allo smaltimento ambientale compatibile contribuisce ad evitare possibili effetti negativi sull ambiente e sulla salute e favorisce il riciclo dei materiali di cui è composta l apparecchiatura Lo smaltimento abusivo del prodotto da parte dell uten...

Page 10: ...take it to the nearest TREVI authorised service centre Before switching on the appliance always check that the power cable and the connection cable are properly installed The apparatus shall not be exposed to dripping or splashing water No objects filled with liquid such as vases should be placed on the unit No naked flame sources such as lighted candles should be placed on Keep this manual CARE A...

Page 11: ...C 7 PREV PREVIOUS SONG 8 NEXT NEXT SONG 9 TREBLE 10 USB SD CARD INPUT 11 BASS 12 ECHO 13 MIC EQ 14 MIC INPUT TO INSERT WIRED MIC 15 CHARGING INPUT JACK AC INPUT 16 AUX INPUT 17 POWER SWITCH POWER ON OFF 18 LED battery status 15 16 17 18 19 Power on off 20 Repeat key single repeat repeat all 21 0 9 keys 22 Bouton Play pause the sound will be muted when paused 23 Volume 24 MUTE 25 MODE key Choose fr...

Page 12: ...sing the button 5 on the unit or the button 19 on remote control or by switching the POWER ON OFF 17 from the AC position to the OFF position waiting for 3 seconds and then turning the switch back to the AC position If appliance is operating battery In Stand by mode the appliance switch ON by pressing the button 5 on the unit or the button 19 on remote control or by switching the POWER ON OFF 17 f...

Page 13: ...yback press the PLAY button 6 on the unit or the key 22 of the remote control 5 Press the NEXT 8 or key NEXT 30 on remote control while listening to switch to the next track Press the PREV 7 or 9 LAST 28 on remote to go to the previous tracks 6 Using the numeric keypad 21 on remote control you can directly enter the number of the song you want to play 7 Press once REPEAT button 20 on the remote th...

Page 14: ...SB SD play mode Press the record key to go into recording mode The current sound output will stop and go to mute status The screen shows Recording The recording will start when the screen displays 00 01 You can use a microphone to record If you connect the USB SD card for the first time to the speaker the system will create a folder named VOICE Note When the Recording function is activated some ap...

Page 15: ...onger side of less than 25 cm Appropriate separate collection for the decommis sionedequipmentforrecycling processingandenvironmentallycompatibledisposalhelpspreventnegativeimpactontheenvironment and human health and promotes recycling of the materials making up the product Illegal dumping of the product by the user entails the application of administrative sanctions stated in Legislative Decree n...

Page 16: ...e agréé TREVI le plus proche Contrôlez toujours avant d allumer l appareil que les câbles d alimentation et les câbles de branchement sont correctement installés L appareil ne doit pas être exposé à des éclaboussures d eau Aucun objet rempli de liquide comme des vases doivent être placés sur l appareil Aucune source de flamme nue telle que des bougies allumées doivent être placés sur Conservez ce ...

Page 17: ...Entrées MIC 2 MIC 1 15 Prise d alimentation secteur 16 Entrée AUX IN 17 Interrupteur POWER ON OFF allumées éteindre 18 Témoin lumineux de la batterie 19 24 20 25 21 26 27 22 23 28 29 30 19 Bouton allumées éteindre 20 Bouton REPEAT répétition d une seule piste répétition de toutes les pistes 21 Touches numériques 0 9 22 Bouton Play Pausa 23 Volume 24 Bouton MUTE 25 Bouton MODE sélection de la fonct...

Page 18: ...e de courant à l aide d un câble 230V 50Hz A partir de la fonction stand by l appareil se rallume en appuyant sur le bouton 5 de l appareil ou sur le bouton 19 de la télécommande ou en tournant l interrupteur principal POWER ON OFF 17 de la position AC à la position OFF en attente de 3 secondes puis en tournant l interrupteur à la position AC Si l appareil est en fonctionnement batterie A partir d...

Page 19: ...e et l utilisation de NEXT 8 et PREV 7 ou les boutons NEXT 30 et 9 LAST 28 sur la télécommande pour sélectionner les pistes ENTRÉE USB SD 1 Allumez l appareil 2 Insérez une clé USB ou une carte SD dans les entrées correspondantes 10 La lecture commence automatiquement 3 Pour interrompre la lecture appuyez sur le bouton PLAY 6 sur l appareil ou sur la bouton 22 de la télécommande l écran affiche l ...

Page 20: ...chera 00 01 Le microphone peut également être utilisé pendant l enregistrement Remarque Lorsque la fonction Enregistrement est activée certaines commandes de l appareil sont inhibées elles reprennent leur fonction normale lorsque l enregistrement est arrêté La fonction d enregistrement peut ne pas prendre en charge certains périphériques USB SD cela est dû à l incompatibilité de certains processeu...

Page 21: ...ent ayant le côté plus long de moins de 25 cm collecte séparée appropriée pour l équi pement mis hors service pour le recyclage le traitement et l élimination respectueuse de l environnement contribue à éviter les effets négatifs sur l environnement et la santé humaine et favorise le recyclage des matériaux qui composent le produit le dumping illégal du produit par l utilisateur substitutions l ap...

Page 22: ...sich an die nächstgelegene autorisierte TREVI Kundendienststelle wenden Vor dem Einschalten des Geräts ist sicherzustellen dass Netzkabel und Anschlusskabel korrekt installiert sind Das Gerät darf nicht mit Wasser oder Spritzwasser ausgesetzt werden Keine Gegenstände die mit Flüssigkeit gefüllt ist wie Vasen auf das Gerät gestellt werden Keine offenen Flammen wie brennende Kerzen platziert werden ...

Page 23: ...18 Einsetzen der Batterien Den Deckel im hinteren Bereich der Fernbedienung entfernen die beiden AAA Batterien Nicht mitgeliefert unter Beachtung der richtigen Polarität einlegen und den Deckel wieder schließen 19 Ein Aus 20 Wiederholungstaste einzelne Wiederholung alle wiederholen 21 0 9 Tasten 22 Bouton Play pause der Ton wird stummgeschaltet wenn er pausiert 23 Volumen 24 MUTE 25 MODE Taste Wäh...

Page 24: ...e angeschlossen ist Aus der Stand by Funktion schaltet sich das Gerät mit der Taste 5 am Gerät oder der Taste 19 auf der Fernbedienung oder durch Drehen des Hauptschalters POWER ON OFF 17 von der Position AC in die Stellung OFF wieder ein 3 Sekunden warten und dann den Schalter in die Position AC zurückdrehen Wenn das Gerät mit Batterie betrieben wird Aus der Stand by Funktion wird das Gerät mit d...

Page 25: ...XT 30 und 9 LAST 28 für die Auswahl der Lieder SPIELEN SIE AUF INPUT USB SD 1 Schalten Sie das Gerät ein 2 Stecken Sie einen USB Speicher oder eine SD Karte in die entsprechenden Eingänge 10 Die Wiedergabe startet automatisch 3 Um die Wiedergabe anzuhalten drücken Sie die PLAY Taste 6 auf dem Gerät oder der Taste 22 auf der Fernbedienung wird im Display das Symbol Paus zeigen 4 Um die Wiedergabe f...

Page 26: ...ginnt wenn auf dem Bildschirm 00 01 angezeigt wird Das Mikrofon kann auch während der Aufnahme verwendet werden Hinweis Wenn die Aufnahme Funktion aktiviert ist sind einige Gerätesteuerungen gesperrt Sie nehmen ihre normale Funktion wieder auf wenn die Aufnahme gestoppt wird Die Aufnahmefunktion unterstützt möglicherweise einige USB SD Geräte nicht dies liegt an der Inkompatibilität einiger Pro ze...

Page 27: ...äte mit längeren Seite von weniger als 25 cm auf Null Die angemessene getrennte Sammlung für die stillgelegte Anlagen für Recycling Aufbereitung und umweltgerechte Entsorgung trägt dazu bei die Umwelt und die menschliche Gesundheit negative Auswirkungen zu vermeiden und begünstigt das Recycling der Materialien das Produkt zusammengesetzt Illegal Dumping des Produkts durch den Benutzer Entails die ...

Page 28: ...a de corriente y lleve el aparato al centro de asistencia autorizado TREVI más cercano Siempre compruebe que los cables de alimentación y de conexión estén instalados correctamente antes de encender el aparato El aparato no debe exponerse a goteos o salpicaduras de agua Los objetos que contengan líquidos como floreros debe ser colocado en la unidad No hay fuente de llamas como una vela encendida s...

Page 29: ...fono 14 MIC 2 MIC 1 entradas 15 Toma de corriente de la red eléctrica 16 Entrada AUX IN 17 Interruptor de POWER ON OFF encendido apagado 18 Indicador LED Batería cargada 15 16 17 18 19 24 20 25 21 26 27 22 23 28 29 30 19 Clave encendido apagado 20 Botón REPEAT repetir una sola pista repetir todas las pistas 21 Teclas numéricas 0 9 22 Botón Reproducir Pausa 23 Volumen 24 Botón MUTE 25 Botón MODE se...

Page 30: ...nción de espera el aparato se enciende nuevamente usando el botón 5 en la unidad o el botón 19 en el control remoto o girando el interruptor principal POWER ON OFF 17 desde la posición AC a la posición OFF esperando 3 segundos y luego llevando el interruptor a la posición AC Si el electrodoméstico está funcionando con batería Desde la función de espera el aparato se enciende nuevamente usando el b...

Page 31: ...de la NEXT 8 y PREV 7 o las teclas NEXT 30 y 9 LAST 28 en el mando a distancia para seleccionar pistas REPRODUCCIÓN DE ENTRADA USB SD 1 Encienda la unidad 2 Inserte una memoria USB o una tarjeta SD en la USB SD 10 La reproducción se inicia automáticamente 3 Para pausar la reproducción pulse el botón PLAY 6 en la unidad o la tecla 22 del mando a distancia la pantalla mostrará el icono PAUS 4 Para r...

Page 32: ...menzará cuando la pantalla muestre 00 01 El micrófono también se puede usar durante la grabación Nota Cuando la función de Grabación está activada algunos controles del dispositivo están inhibidos estos retomarán su función normal cuando la grabación se detenga La función de grabación puede no ser compatible con algunos dispositivos USB SD esto se debe a la incompatibilidad de algunos procesadores...

Page 33: ...la recogida selectiva apropiado para el equipo fuera de servicio para su reciclaje tratamiento y eliminación ambientalmente compatible ayuda a prevenir el impacto negativo sobre el medio ambiente y la salud favoreciendo el reciclaje de los materiales que componen el producto El vertido ilegal del producto por los usuarios conlleva la aplicación de las sanciones administrativas establecidas en el D...

Page 34: ...34 XF 1750KB NOTE ...

Page 35: ......

Page 36: ...www trevi it dms zidi TREVI DOCXF1750KB pdf Trevi S p A Strada Consolare Rimini San Marino 62 47924 Rimini Rn Italia Tel 0541 756420 Fax 0541 756430 www trevi it e mail info trevi it Made in CHINA EN If you will not find your language on the instruction manual please go on our website www trevi it to find it FR Si vous ne trouverez pas votre langue sur le mode d emploi veuillez vous visiter sur no...

Reviews: