background image

OWNER

,

S   MANUAL

SG-1991

The 

FIRST

 thing to do after unpacking your new

cordless telephone is:

CHARGE THE BATTERY !

Please read and follow the few instructions on

PAGE 2

BEFORE YOU DO ANYTHING ELSE.

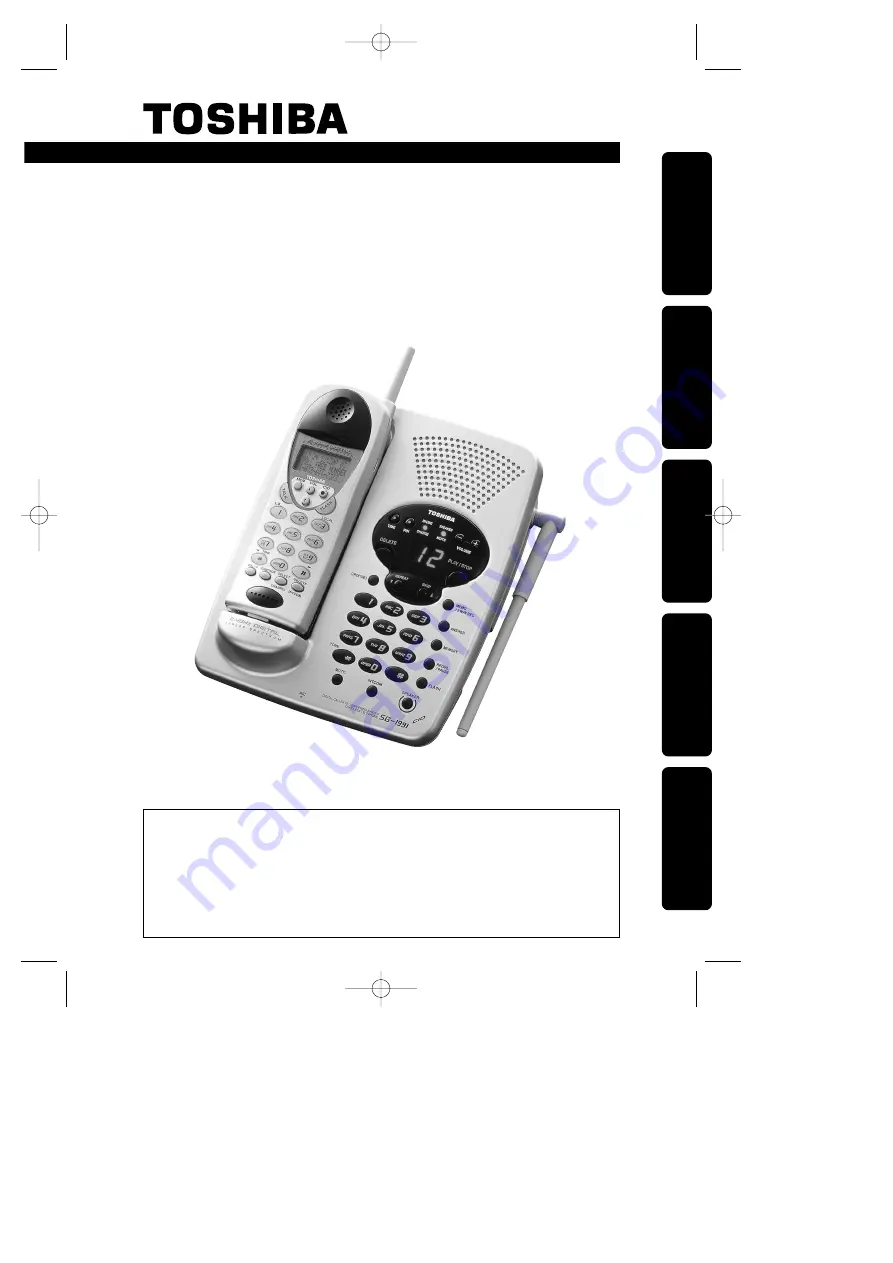
2.4GHz DIGITAL SPREAD SPECTRUM CORDLESS TELEPHONE
DIGITAL ANSWERING SYSTEM

Preparation

Basics

Caller ID/Call waiting

Answering System

Additional Information

SG-1991.qxd  7/4/1 7:29 PM  Page 1

Summary of Contents for SG-1991

Page 1: ...s CHARGE THE BATTERY Please read and follow the few instructions on PAGE 2 BEFORE YOU DO ANYTHING ELSE 2 4GHz DIGITAL SPREAD SPECTRUM CORDLESS TELEPHONE DIGITAL ANSWERING SYSTEM Preparation Basics Caller ID Call waiting Answering System Additional Information SG 1991 qxd 7 4 1 7 29 PM Page 1 ...

Page 2: ...the base unit s charging cradle The IN USE CHARGE LED should light If not see TROUBLESHOOTING page 51 The battery charging period has now started From now until the 12 16 hours period is complete do not let anything cause the handset to be removed from electrical contact with the base unit s charging pins or power to be removed from the base unit SECOND Before you can take advantage of the Caller ...

Page 3: ... telephone and digital answering system The Toshiba cordless telephone features a 16 digit x 3 line dot matrix liquid crystal display LCD for caller ID on Call Waiting and speed dial programming and calling The sleek new design provides face up battery charging even when wall mounted Other features are summarized below Voice Guidance Time Stamp Long Standby Battery Life 10 days 3 Way Conversation ...

Page 4: ... area code 16 Using the handset and belt clip Option 17 Basics BASIC OPERATION 18 Making a call 18 Receiving a call 19 Switching from the speakerphone to the handset 19 3 Number Redial From the handset 19 Redial from the base 20 Interference or static 20 Handset earpiece volume setting 20 Base speaker volume setting 20 Handset ringer volume setting 21 Handset ringer off 21 Base ringer volume setti...

Page 5: ... CID number to memory 37 Deleting caller ID data 38 Call Waiting 39 Call waiting options 40 Answering system SETTING THE ANSWERING MACHINE 42 Setting the number of rings 42 Setting the recording time 43 Setting the clock 43 Setting the PIN Number 44 USING THE ANSWERING MACHINE 45 Turning the answering machine ON OFF 45 Recording the greeting message 45 Checking and switching greeting message 46 Pl...

Page 6: ...ot allow anything to rest on the power cord Do not locate this product where the cord can be stepped on or tripped over 8 Do not overload wall outlets and extension cords as this can result in the risk of fire or electric shock 9 Never push objects of any kind into this product through cabinet slots as they may touch dangerous voltage points or short out parts that could result in a risk of fire o...

Page 7: ...INSTRUCTIONS BATTERIES 1 Use only the appropriate type and size battery pack specified in the instruction manual provided for this product 2 Do not dispose of the battery pack in a fire The cell may explode Check with State and local codes for possible special disposal instructions 3 Do not open or mutilate the battery pack Released electrolytes are corrosive and may cause damage to the eyes or sk...

Page 8: ...tton page 15 to 16 40 FUNCTION Antenna VOLUME RINGER button Up arrow button VOLUME RINGER button Down arrow button page 20 to 21 31 to 40 VOL VOL Caller ID button page 34 to 38 CID button page 39 FLASH button page 15 to 16 26 to 29 31 to 40 SELECT button page 20 CHANNEL button page 36 L D 1 button page 36 LOCAL 3 button page 31 to 32 38 DELETE button page 18 to 19 TALK button Left arrow button pag...

Page 9: ...on page 45 to 46 GREETING button page 43 TIME IN USE CHARGE LED buttons page 46 VOLUME button page 45 to 48 PLAY STOP button page 43 44 46 to 48 REPEAT Microphone button page 48 MEMO 2 WAY REC Antenna button page 44 PIN button page 18 to 25 47 SPEAKER button page 43 to 44 46 SKIP LED display Speed Dial Index Card Part RC005157 button page 21 MUTE button page 23 to 24 INTCOM button page 39 FLASH bu...

Page 10: ... 120V 60Hz DC9V Connect the AC adaptor to a continuous power supply AC ADAPTOR INFORMATION Use only the supplied AC adaptor or one matching its specifications exactly with this product Incorrect voltage may damage the unit or cause it to function improperly Preparation Raise the antenna to vertical position Fasten the AC adaptor cord to prevent it from being disconnected Telephone Line Cord Single...

Page 11: ...ut the template on this page and use it to position two screws minimum length of 13 8 inches into the wall with the heads protruding about 1 4 inch INSTALLATION Raise the antenna Flip the hook tab over so the tab holds the handset Single Line Telephone Jack RJ11C Power Outlet AC 120 V 60 Hz AC Adaptor Wall mount template IMPORTANT Before mounting select a wall area of sufficient strength If mounti...

Page 12: ...lack and red wires 3 Place the battery pack in the battery compartment 4 Put the battery cover back by sliding until it snaps into place Make sure not to get the wires of the battery pack caught in the cover 5 Place the handset on the base unit Be sure the IN USE CHARGE LED lights If the IN USE CHARGE LED does not light make sure the AC adaptor is plugged in securely INSTALLATION DIG ITAL CAL LER ...

Page 13: ...ery is too low to operate properly you will be unable to answer the call or the call will be disconnected The redial memory numbers backup for up to 2 minutes while you replace the battery pack If you must replace the battery pack during a telephone call complete the replacement of the battery pack within 30 seconds and you can return to the original call Low Battery 13 Preparation NOTES Use only ...

Page 14: ...the following instructions SETTING THE TONE PULSE SWITCH Set the TONE PULSE switch to TONE Place a call If the call does not connect with the TONE setting set the TONE PULSE switch to PULSE FUNCTION TONE PULSE switch VOL VOL CHANNEL SELECT SG 1991 qxd 7 4 1 7 29 PM Page 14 ...

Page 15: ...ING CALLER ID ON CALL WAITING This function is preset to ON so that you will receive caller ID on Call Waiting when you subscribe to both local telephone company services When you set this function to Opt you can use pre programmed six call waiting options See page 40 Call Waiting Options If you do not subscribe to these services be sure to set this function to OFF 1 Press The LCD displays the cur...

Page 16: ...ber within your area code only the last 7 digits of the phone number are dialed when you set the area code During call back however the phone will include the area code from where the call originated when it automatically redials the number To avoid this problem always be sure to set the area code of your phone so that the phone will automatically exclude the area code when the incoming code is th...

Page 17: ...et connected Pressing the button of the handset also controls the connected headset s volume If you place the handset on the base unit while the headset is connected be sure the handset is placed properly BELT CLIP You can attach an optional Belt Clip part RC009263 to the handset in order to carry it on your belt Attaching the Belt Clip to the Handset Insert the Belt Clip tabs into the holes on ea...

Page 18: ...ss 3 Listen for the dial tone 4 Dial the number OR 1 Pick up the handset 2 Dial the number then press To hang up press or return the handset to the base Auto Standby TALK TALK TALK Handset Off The Base 1 Press 2 Listen for the dial tone 3 Dial the number OR Dial the number then press TALK TALK TALK VOL RING RDL P FLASH VOL RING TONE DIG ITAL CAL LER ID ANS WER ING SYS TEM COR DLE SS TEL EPH ONE CI...

Page 19: ...one pick up the handset from the base unit Then you can continue talking with the handset 3 NUMBER REDIAL FROM THE HANDSET You can redial any of the last three numbers dialed from the handset 1 Press in standby mode The last dialed number Redial 1 appears Each time you press the LCD displays one of the three last dialed numbers Redial 1 to Redial 3 2 After the desired number has been selected pres...

Page 20: ...uring a call press to select another channel The LCD displays Scanning while changing channels HANDSET EARPIECE VOLUME SETTING To adjust the earpiece volume press or during a call NOTE When you press in Maximum mode or in Low mode an error tone sounds BASE SPEAKER VOLUME SETTING To adjust the speaker volume press buttons The numbers 1 10 are displayed on the base indicating the volume levels 1 bei...

Page 21: ...witch on the base unit BASE MUTE You can temporarily turn off the Base microphone so that the person you are talking with cannot hear you Diring a call press To cancel mute press or TONE PAUSE HANDSET EXAMPLE To make a call 0 12345678 with tone dialing in pulse mode press 8 7 6 5 4 3 2 1 RDL P 0 TONE PAUSE MUTE SPEAKER MUTE VOL VOL VOL Ringer Off To To temporarily switch to tone dial When the hand...

Page 22: ... the handset to join the 3 way conversation 2 To hang up return the handset to the base or press on the handset The base will still be connected to the caller NOTE Pressing on the base while dialing with the handset will set the 3 way conversation mode and dialing is not affected SPEAKER TALK TALK SPEAKER SPEAKER To To temporarily switch to tone dial When the base is set to pulse mode To enter a p...

Page 23: ...hile the base unit is being used for talking on an outside line the handset produces a busy tone and the intercom is disabled INTERCOM FROM BASE TO HANDSET 1 Press button The HANDSET and BASE beep The LCD displays the following message 2 Press or button to answer on the handset The LCD displays the following message 3 Begin speaking 4 When you finish press button on the base unit or button on the ...

Page 24: ...coming call from the handset to the base unit or from the base unit to the handset FROM THE HANDSET TO THE BASE UNIT 1 To transfer the call press button on the handset while speaking The call is placed on hold and the base unit beeps The LCD displays the following message 2 Press or button to answer on the base unit 3 To complete the transfer press button to disconnect the handset FROM THE BASE TO...

Page 25: ...ND THE BASE You can monitor the room where the base unit is located using the handset 1 Press button on the handset The LCD displays the following message 2 While the beep is sounding press button on the handset The LCD displays the following message 3 When you finish monitoring press button TALK TALK DELETE INTCOM INTCOM INTCOM Basics Paging Base Intercom SG 1991 qxd 7 4 1 7 29 PM Page 25 ...

Page 26: ...operation the operation will be cancelled STORING NUMBERS AT THE HANDSET You can store up to 20 digits including and PAUSE as a telephone number and up to 13 characters as a name in one memory address 1 Pick up the handset and press and hold till a beep sounds 2 Enter a two digit number 01 20 or press to select a free memory location number MEM MEM TALK VOL RING VOL RING RDL P Memory Store 01s s 0...

Page 27: ...ress to delete characters as needed 7 Press A confirmation beep sounds and the number is stored 8 The LCD returns to Memory Store screen To store more names and numbers return to step 2 If you do not store a name only the memory location Memory01 appears 9 To finish the operation press or return the handset to the base unit MEM SELECT CHANNEL DELETE RDL P SELECT CHANNEL SELECT CHANNEL Store Name S...

Page 28: ...ice to enter a space 7 Press once 8 Press six times 6 3 3 3 8 SELECT CHANNEL MEM Number of times key is pressed Keys 1 2 3 4 5 6 7 8 9 1 A B C a b c 2 D E F d e f 3 G H I g h i 4 J K L j k l 5 M N O m n o 6 P Q R S p q r s 7 T U V t u v 8 W X Y Z w x y z 9 blank 0 0 9 WX Y Z 8 TUV 7 PQ RS 6 MNO 5 JKL 4 GHI 3 DEF 2 ABC 1 STEPS FOR ENTERING NAMES AND SPECIAL CHARACTERS Refer to the letters on the nu...

Page 29: ...RS AT THE BASE 1 Press while in the standby mode 2 Enter the phone number max 20 digits 3 Press again 4 Press the number to be assigned to this phone number A long beep indicates that the number has been stored successfully 5 Write down the associated destination name s on the SPEED DIAL INDEX 9 0 MEMORY MEMORY DELETE DELETE SELECT CHANNEL 0 9 8 7 6 5 4 3 2 1 1 SELECT CHANNEL 3 DIG ITAL CAL LER ID...

Page 30: ...s The selected number will be dialed NOTE If you press while you are selecting a location memory selection is cancelled and the handset returns to standby DIALING A STORED NUMBER AT THE BASE UNIT 1 Press 2 Press 3 Enter the memory location 0 9 you want to dial NOTE If you press a memory dial number which has not been programmed or if you press buttons other than 0 9 on the base unit short beeps ar...

Page 31: ...k 5 To edit data go to step a To delete data go to step b a EDITING THE NAME AND TELEPHONE NUMBER Use the number buttons and or buttons to edit the name See Storing Numbers on page 26 for instructions on how to enter names 1 Press to erase a character at the cursor position The next character on the right moves to the cursor position 2 Press 3 Press to erase numbers and enter the correct number 4 ...

Page 32: ... the LCD returns to the Memory Store display 3 Press or return the handset to the base unit DELETING STORED NUMBERS AT THE BASE UNIT 1 Press twice 2 Enter the memory location 0 9 you want to delete A confirmation tone sounds and the number is erased MEMORY MEM DELETE SELECT Delete Memory01 Yes s sNo Memory01 Deleted Memory Store 01s sTed Doe 02 DOE JOHN SG 1991 qxd 7 4 1 7 29 PM Page 32 ...

Page 33: ...one of the following messages When invalid data is received Incomplete Data When a private name is received Private Name When a private number is received Private Number When an unknown name is received Unknown Name When an unknown number is received Unknown Number 2 When you pick up the phone the display changes to Talk NOTES If you answer a call before the Caller ID message is received for examp...

Page 34: ...s incoming call 3 Press to return to standby mode CALLING BACK FROM THE CALLER ID LIST 1 Pick up the handset and press Then press or to display the number you wish to call 2 Press The displayed number will be dialed NOTE To enter a number for a long distance call see EDITING CALLER ID DATA page 36 It is not necessary to add a 1 when dialing some area codes If in doubt check your local telephone di...

Page 35: ...ion NOTE Before you use for area code setting and cancellation make sure the AREA CODE is set See page 16 3 After editing Caller ID data you can make the call or store procedures To make a call press TALK LOCAL 3 LOCAL 3 L D 1 CID CALLER ID CALL WAITING 1 7 9 30AM 12 Ted Doe 456 7890 1 7 9 30AM 12 Ted Doe 1 456 7890 1 7 9 30AM 12 Ted Doe 1 123 456 7890 key L D 1 1 7 9 30AM 12 Ted Doe 123 456 7890 ...

Page 36: ...e sounds and the Caller ID data is stored Press to return to standby If you select a memory location which is already stored Press to select and press A confirmation tone sounds and the new data overwrites the old data The LCD returns to the Caller ID display screen If you select The LCD returns to the Caller ID display screen Press to return to standby mode CID SELECT CHANNEL CID SELECT CHANNEL M...

Page 37: ...D data If there is none the LCD displays the number of calls If you select the LCD returns to the Call ID display screen 4 Press to return to standby DELETE ALL CALLER ID DATA 1 Press and press 2 Press or to select Yes or No 3 Press or If you select a confirmation tone sounds and the LCD displays Total 00 If you select the LCD displays the number of Caller ID calls 4 Press to return to the standby...

Page 38: ...e answering a call check to see that the caller s name and telephone number are displayed on the screen To switch to the waiting call press on the handset The first caller is put on hold 2 To switch back to the first caller press again BASE 1 To switch to the waiting call press on the base 2 Press again to switch between calls NOTES Pressing without having received a Call Waiting signal may discon...

Page 39: ...nced 1s sAsk to Hold 2 Tell Busy 3 Answer Drop 1 Press FUNCTION Press or or number key 1 6 Press SELECT You receive a call waiting call A list of options appears For more information on the options see the table on page 41 Select one of six options To select Conference press or scroll down to Conference Allows you to speak with your first and second caller to have a 3 way conference call The list ...

Page 40: ...r you are busy and the waiting call is disconnected 3 Answer Drop 1 Disconnects 1st caller and answers 2nd caller 4 Conference Starts a 3 way conference call with both callers 5 Drop First Disconnects 1st caller 6 Drop Last Disconnects 2nd caller NOTES When using each of the options listed above an extra charge might apply Not all options are available in all areas Check with your local telephone ...

Page 41: ... SKIP TIME SETTING THE NUMBER OF RINGS Select one of three ring time settings by sliding the RING TIME switch on the side of the base unit 2 2 rings 4 4 rings TS TOLL SAVER MODE The phone answers at the second ring when there are new messages and the fourth ring when there are no new messages When you check the message from the outside phone hang up if you hear the third ring to save the toll char...

Page 42: ... day of the week by pressing or When the correct day is announced corresponding to the number on the LED display press 3 Select the Hour by pressing or When the correct number appears on the LED display press 4 Select the Minute by pressing or When the correct number to appears on the LED display press 5 Select AM PM by pressing or At the correct display or press You hear a long beep and the new d...

Page 43: ...IN 1 Press and hold till a beep sounds in the standby mode The LED display shows 2 Press or to select the left digit of the PIN 3 When your desired number appears on the LED display press 4 Press or to select the right digit of the PIN 5 When your desired number appears on the LED display press The new PIN you entered will be announced NOTE You can check the current PIN by pressing at any time PIN...

Page 44: ...GE You can record a personalized greeting message or use the prerecorded message When a call is received the answering machine answers the call and plays the greeting message 1 Press and hold on the base unit till a beep sounds Record your greeting message over the microphone from 2 seconds up to 30 seconds 2 When you finish press or The greeting message just recorded will automatically be played ...

Page 45: ...layback see the table below for more operation To playback the message Press To repeat the previous message Press within 2 seconds after the beginning of message To repeat the current message Press after 2 seconds after the beginning of message To skip the message Press To go backward and repeat a Press and hold until your message you choose desired message number appears on the display To delete ...

Page 46: ... will be played NOTE To maintain maximum record time it is a good idea to delete the old messages SCREENING INCOMING CALLS You can screen calls when the answering machine is on 1 After the answering machine answers the base speaker lets you hear the caller as the machine records the message 2 To answer the call immediately simply pick up the handset or press or press if the handset is away from th...

Page 47: ...gin speaking close to the microphone 3 When you finish recording press or RECORDING A PHONE CONVERSATION 2 WAY REC You can record a telephone conversation that is already in progress with the handset up to 10 minutes The conversation is stored and played back like an incoming message 1 During a call with the handset press and hold till a beep sounds Recording starts and both parties hear the inter...

Page 48: ...sages The unit automatically starts playing the recorded messages 3 Press and the appropriate number button that corresponds to the operation you want see TABLE OF COMMANDS on next page 4 When you have finished press and or hang up to exit the system NOTES When entering your security code PIN the second digit must be entered within 2 seconds after the first one If you enter a wrong security code P...

Page 49: ...the message To skip to the next message during playback To delete individual messages during playback To stop operation To turn the answering system on To record a memo message After you finish recording a up to 4 minutes memo message press To stop recording or or To record your greeting message After you finish recording your greeting message press To stop recording or or To turn the answering sy...

Page 50: ...adaptor of the base unit is disconnected Plug the AC adaptor into the base unit and the AC 120V outlet The battery is low Place the handset on the base unit to recharge Telephone line cord is disconnected Check both ends of the telephone jack The previous call was not disconnected Press or to disconnect the line Trouble with the telephone line Check an extension line Outlet used is controlled by a...

Page 51: ...er and electrical appliances Press to select a clearer channel or relocate the base unit Excessive line noise Check with another telephone The volume control is set too high Reduce volume to a lower setting The base antenna is not in a vertical position Lift the antenna to a vertical position The phone needs to be reset Disconnect the AC adaptor and reconnect it within a few seconds This is normal...

Page 52: ... REC TIME to 1 or 4 minute setting You are not calling from a touch tone phone Call from a touch tone phone The security code PIN you entered was wrong Make sure you entered the correct security code PIN If the answering machine is turned off let the phone ring at least 10 times The line will connect and you will hear several short beeps Press and enter your security code PIN This is normal The re...

Page 53: ...e ring twice before you answer the call Set the TONE PULSE switch to TONE Place a call If the call does not connect with the TONE setting set the TONE PULSE switch to PULSE Setting the Tone Pulse Switch Area Code Answering a Call Making a Call TONE PULSE switch With the handset With the base Press SPEAKER and speak 1 Press CID then press or to display the number you want to dial 2 Press TALK then ...

Page 54: ... número de teléfono 2 Presione TALK 3 Presione TALK para cortar Presione TALK para hablar NOTA Para indicar el dato de identificación del que llama haga sonar dos veces el teléfono antes de contestar a la llamada Código de área Contestación de una llamada Realización de una llamada Ajuste el selector TONE PULSE a TONE Realice una llamada Si la llamada no se conecta con el ajuste en TONE cambie el ...

Page 55: ... you the opportunity to correct the problem Also you need to know that the phone company does have the right to make changes in their lines and or equipment If these changes might affect your telephone equipment or require changes in the telephone equipment or its connection the phone company will notify you in writing so you have the chance to take whatever action is necessary to ensure uninterru...

Page 56: ...w limitation on how long an implied warranty lasts when an action may be brought or the exclusion or limitation of incidental or consequential damages so the above provisions may not apply to you In The Continental United States contact www toshiba com tacp In Hawaii contact Toshiba Hawaii Inc 327 Kamakee Street Honolulu HI 96814 808 591 9261 Limited One 1 Year Warranty of Labor and parts TACP THI...

Page 57: ...sde un teléfono de teclado Después que su teléfono conteste introduzca y el código de seguridad PIN presionando cada dígito durante 1 segundo como mínimo Si introduce correctamente y el PIN su teléfono emitirá un tono de invitación después del anuncio Luego introduzca el mandato y un número presionando las teclas B Para reproducir los mensajes recibidos y los memorandos presione 2 Para saltar pres...

Page 58: ...ING THE OGM KEY IN AND PIN REPETICIÓN DE MENSAJE GRABACIÓN DE MENSAJE DE MEMORANDO BORRADO DE MENSAJE REPRODUCCIÓN DE MENSAJE SALTO DE MENSAJE ACTIVACIÓN DE CONTESTACIÓN DETENCIÓN DE GRABACIÓN OPERACIÓN GRABACIÓN DE MENSAJE DE CONTESTACIÓN DESACTIVACIÓN DE CONTESTACIÓN durante la reproducción durante la reproducción ACCESO AL CONTROL REMOTO 1 2 4 5 7 8 3 6 9 PIN MONITOR DE SALA DURANTE LA REPRODUC...

Page 59: ...1746BA RC009822 Printed in China IMPORTANT We suggest you record the following information and retain for your records along with your bill of sale or equipment document Model no Serial no Purchase date Dealer Dealer address 2001 TOSHIBA AMERICA CONSUMER PRODUCTS INC SG 1991 qxd 7 4 1 7 29 PM Page 60 ...

Reviews: