background image

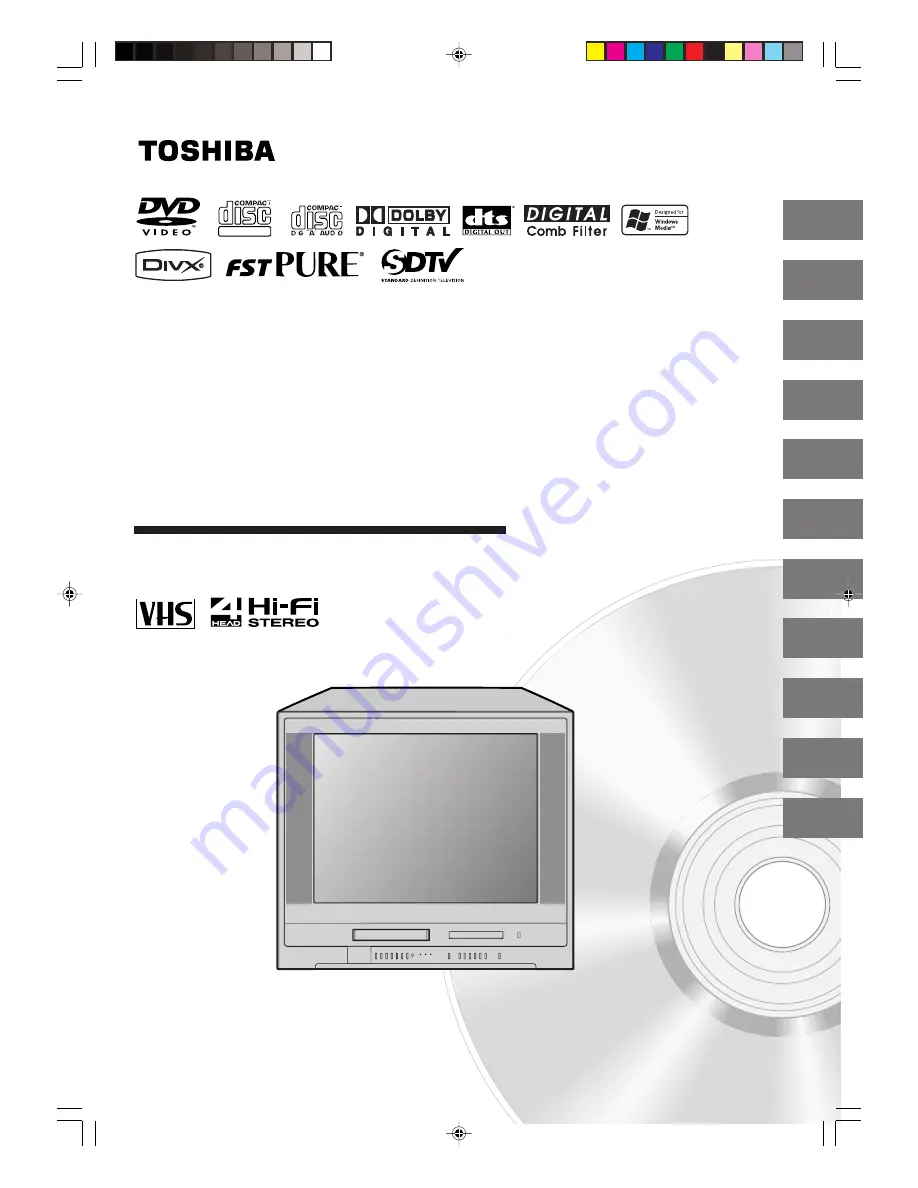
COMBINATION FLAT COLOR
TELEVISION AND VIDEO CASSETTE
RECORDER / DVD VIDEO PLAYER

MW27H62

OWNER’S MANUAL

2

13

19

40

45

49

Introduction

Connections

Basic setup

Playback

(VCR)

Recording

(VCR)

Other functions

(VCR)

DIGITAL VIDEO

©2006 Toshiba Corporation

51

54

66

72

Basic playback

(DVD)

Advanced

playback

(DVD)

Function setup

(DVD)

Others

This device does not tape-record copy protected DVD video discs.

24

TV operation

 5V60101A [E]Cover

2/22/06, 1:02 PM

1

Summary of Contents for MW27H62

Page 1: ...9 Introduction Connections Basic setup Playback VCR Recording VCR Other functions VCR DIGITAL VIDEO 2006 Toshiba Corporation 51 54 66 72 Basic playback DVD Advanced playback DVD Function setup DVD Others This device does not tape record copy protected DVD video discs 24 TV operation 5V60101A E Cover 2 22 06 1 02 PM 1 ...

Page 2: ...trend and larger TVs are popular purchases however they are not always supported on the proper TV stands Sometimes TVs are improperly secured or inappropriately situated on dressers bookcases shelves desks audio speakers chests or carts As a result TVs may fall over causing unnecessary injury Toshiba Cares The consumer electronics industry is committed to making home entertainment enjoyable and sa...

Page 3: ...stall in accordance with the manufacturer s instructions 8 Do not install near any heat sources such as radiators heat registers stoves or other apparatus including amplifiers that produce heat 9 Do not defeat the safety purpose of the polarized or grounding type plug A polarized plug has two blades with one wider than the other A grounding type plug has two blades and a third grounding prong The ...

Page 4: ...uding but not limited to PIP POP windows closed captions video game patterns TV station logos stock tickers and websites Special Formats that do not use the entire screen including but not limited to widescreen or letterbox format media viewed on a 4 3 aspect ratio display with gray or black bars at the top and bottom of the screen or 4 3 aspect ratio format media viewed on a widescreen 16 9 aspec...

Page 5: ...following measures Reorient or relocate the receiving antenna Increase the distance between the equipment and receiver Connect the equipment into an outlet on a circuit different from that to which the receiver is connected Consult the dealer or an experienced radio TV technician for help CAUTION Changes or modifications not expressly approved by the party responsible for compliance with the FCC F...

Page 6: ... the surface of the unit If you use a chemical saturated cloth to clean the unit follow that product s instructions Notes on moisture condensation Moisture condensation damages the unit Please read the following carefully Moisture condensation occurs for example when you pour a cold drink into a glass on a warm day Drops of water form on the outside of the glass In the same way moisture may conden...

Page 7: ...and Second Audio Program SAP 38 Setting the digital setup digital mode 39 Playback VCR Loading and unloading a cassette tape 40 Cassette tape playback 41 Special playback 42 Convenient function 43 Recording VCR Recording a TV program 45 One touch Timer Recording OTR 46 Timer recording 47 Other functions VCR Duplicating a video tape 49 Recording a DVD CD disc 50 Basic playback DVD Playing a disc 51...

Page 8: ...or disassembly is prohibited On handling discs Do not touch the playback side of the disc Do not attach paper or tape to discs On cleaning discs Fingerprints and dust on the disc cause picture and sound deterioration Wipe the disc from the center outwards with a soft cloth Always keep the disc clean Do not use any type of solvent such as thinner benzine commercially available cleaners or antistati...

Page 9: ... MP3 and WMA music players and certain cameras with USB connectivity that comply with the standards for the USB Mass Storage Class of USB compatible equipment Because there are a broad variety of such devices some functions of your storage device may not operate properly with the TV or it may not operate at all with the TV From the USB port this TV is designed to display compatible JPEG WMA MP3 an...

Page 10: ...AUDIO L R VIDEO IN LINE IN 2 jacks STOP EJECT button Cassette loading slot S VIDEO AUDIO L R VIDEO IN LINE IN 2 jacks 49 CHANNEL buttons 25 REW Rewind button 41 REC OTR button PLAY button 41 FF Fast Forward button 41 Remote sensor 12 OPEN CLOSE button VOLUME buttons 24 SKIP button STOP button PLAY button SKIP button POWER button POWER indicator 20 REC OTR indicator TIMER REC indicator USB Port 18 ...

Page 11: ...al describe the function on the remote control See the page in for details DVD MENU button Use the DVD MENU button to display the menu included on many DVD video discs To operate a menu follow the instructions in DVD menu 57 5V60101A E p06 12 2 22 06 1 02 PM 11 ...

Page 12: ...tion buttons 1 2 3 Remote control basics Inserting batteries Approx 5 meters Caution Never throw batteries into a fire Notes Be sure to use AAA size batteries Dispose of batteries in a designated disposal area Batteries should always be disposed of with the environment in mind Always dispose of batteries in accord ance with applicable laws and regulations If the remote control does not operate cor...

Page 13: ...n lead wire to the combiner not supplied Connect the VHF 300 ohm twin lead wire to the 300 75 ohm matching transformer Attachthetransformertothecombiner then attach the combiner to the antenna jack Connect the VHF 75 ohm cable and UHF 300 ohm twin lead wire to the combiner not supplied Attach the combiner to the antenna jack Combination VHF UHF antenna Separate VHF and UHF 300 ohm twin lead wires ...

Page 14: ...service which requires the use of a converter descrambler box connect the incoming 75 ohm coaxial cable to the converter descrambler box Using another 75 ohm coaxial cable connect the output jack of the converter descrambler box to the antenna jack on the unit Follow the connections shown below Set the unit to the output channel of the converter descrambler box usually channel 3 or 4 and use the c...

Page 15: ... S Video out S Video cable not supplied To S Video IN To Video IN yellow To AUDIO L R IN white red Notes If your camcorder has S video you can use an S video cable plus the standard audio cables instead of a standard video cable for better picture quality Do not connect both a standard video cable and an S video cable at the same time or the picture performance will be unacceptable You can also us...

Page 16: ...r s owner s manual and set the amplifier so that you can enjoy Dolby Surround Pro Logic sound 3 With an amplifier not equipped with Dolby Digital Connect the equipment as follows This connection is only suitable for Video CDs and Audio CDs Amplifier equipped with Dolby Surround Pro Logic Connecting to an amplifier equipped with a DTS decoder Digital Theater Systems DTS DTS is a high quality surrou...

Page 17: ...O OUT jack of the unit to the COAXIAL input of a Receiver or Processor Refer to the owner s manual of the connected equipment as well When you connect the unit to other equipment be sure to turn off the power and unplug all of the equipment from the wall outlet before making any connections The output sound of the unit has a wide dynamic range Be sure to adjust the receiver s volume to a moderate ...

Page 18: ...mory card from any memory reader music player or camera connected to the USB port of the TV unless the TV is off or in DISC mode Do not connect or disconnect the TV s power cord while any USB storage device is connected to the TV This restriction applies no matter what the operating mode of the TV Review the instructions for your USB storage device and comply with them in using the device with the...

Page 19: ...he TV screen 1 2 3 Now the CH PROGRAM and AUTO CLOCK starts After the starting setup is completed the TV channel appears on the screen 4 Notes The starting setup function will work only when you press POWER for the first time In AUTO CLOCK setting it may take more than 10 minutes to read the EDS signal for one channel which has only Time of day or Local time zone The process of CH PROGRAM may take...

Page 20: ... cable box must be left on The Auto Clock adjustment is not effective when there is a difference of more than 5 minutes exists between the built in clock time and the actual time When shipped from factory the AUTO CLOCK is set to ON But if you do not want auto clock set Adjustment Press MENU then press or to select option 1 Press or to select AUTO CLOCK 2 Press or to select OFF 3 Press MENU repeat...

Page 21: ...t saving time setting is not available When there is no daylight saving time in your area always select OFF position in step 3 When you want to set the daylight saving time manually on the first Sunday in April you set to ON and on the last Sunday in October you set to OFF ON OFF AUTO for manual setting forward one hour for manual setting back one hour for automatic setting read EDS in the signal ...

Page 22: ...n or Press MENU then press or to select option EXAMPLE Setting the clock to 8 30 AM 25th SAT March 2006 1 After setting the clock date and time starts functioning automatically 5 Press or to select CLOCK SET then press 2 Press or to set the month then press 3 Set the day year and time as in step 3 then press ENTER 4 To make corrections anytime during the process Press or repeatedly until the item ...

Page 23: ... a digital signal press once the digital information will appear While operating a tape Press DISPLAY to display the information on the screen To cancel the display press DISPLAY again Day of the week Channel Tape speed Real time tape counter Clock Stereo and second audio program VCR operation Tape in Auto repeat Hi Fi stereo TV VCR VCR operation Recording Rec Pause Play Fast forward Rewind Stop E...

Page 24: ...ble channels may be represented by channel numbers that include a dash e g 85 002 These digital channel numbers may not match the numbers in the channel line up provided by your cable company This is not a malfunction If a channel with no broadcast is selected the sound will auto matically be muted If a station being viewed stops broadcasting the TV will auto matically shut itself off after 15 min...

Page 25: ...elease CH or The channel auto matically stops at the next channel set into memory For proper operation before selecting channels they should be set into the memory See page To memorize channels CHANNEL RETURN This button allows you to go back to the last channel selected by pressing CH RTN Press CH RTN again to return to the last channel you were watching Note The CHANNEL RETURN feature is invalid...

Page 26: ... caption signal may not be decoded in the following situations when a video tape has been dubbed when the signal reception is weak when the signal reception is non standard NOTICE OF POSSIBLE ADVERSE EFFECTS ON TV PICTURE DISPLAY Avoid displaying stationary images on your TV screen for extended periods of time Fixed non moving patterns or images including but not limited to PIP POP windows closed ...

Page 27: ...then press or Press or to select the desired setting then press ENTER You can select from among the following items and parameters TEXT SIZE AUTO SMALL STANDARD LARGE TEXT TYPE AUTO DEFAULT MONO W SERIF PROP W SERIF MONO W O SERIF PROP W O SERIF CASUAL CURSIVE SMALL CAPITALS TEXT EDGE AUTO NONE RAISED DE PRESSED UNIFORM LEFT DROP SHADOW RIGHT DROP SHADOW TEXT COLOR AUTO BLACK WHITE RED GREEN BLUE ...

Page 28: ...his unit with an antenna set the TV CABLE selection to the TV position When shipped from the factory this selection is in the CABLE position Automatic memory tuning Press MENU in the TV mode then press or to select option 1 Press or to select CH PROGRAM 2 Press to start CH PROGRAM The unit will begin memorizing all the channels available in your area 3 Analog tuning Digital tuning When channel pro...

Page 29: ...NU repeatedly until the menu screen is cleared 5 Press MENU in the digital mode then press or to select option Press or to select DIGITAL SETUP then press 1 2 Press or to select ADD ERASE then press Select the desired channel to be memorized or deleted using Then press to select either ADD or ERASE 4 Press or to select ADD ERASE then press 3 Repeat step 4 for other channels you want to add or eras...

Page 30: ...ber buttons 0 9 then press ENTER If you input a wrong number press CANCEL 3 appears instead of the number Setting the V Chip An age limitation can be set to forbid children to watch programs according to TV RATING and MOVIE RATING level set To use the V Chip function you must register a password To change password Enter the new password using Number buttons 0 9 then press ENTER 2 In the V CHIP men...

Page 31: ... want Press or to select TV RATING then press or to display the desired setting 2 OFF MOVIE RATING is not set G All ages PG Parental guidance PG 13 Parental guidance less than 13 years old R Under 17 years old Parental guidance suggested NC 17 17 years old and above X Adult only Press or to display ON Now your settings were set into the memory 6 Press MENU repeatedly until the menu screen is clear...

Page 32: ...cel the one hour automatic shut off To cancel the ON TIMER follow above steps 1 5 then press or to select CANCEL Press MENU repeatedly until the menu screen is cleared After setting the ON TIMER OFF TIMER will be highlighted If you wish to set the OFF TIMER press then follow the steps 4 6 on page If you want to correct the digits while setting press or until the item you want to correct then press...

Page 33: ...o set the desired hour then press Notes To cancel the OFF TIMER function To cancel OFF TIMER follow above steps 1 5 press or to select CANCEL Press MENU repeatedly until the menu screen is cleared To confirm the ON OFF TIMER Press PROGRAM twice to indicate the programs on the screen Press MENU repeatedly until the menu screen is cleared 7 PROGRAM MENU ON OFF TIMER ON TIMER 12 00AM DIGITAL CH 51 00...

Page 34: ...escribed in the following table Press or to select the item you want to adjust then press or to adjust the setting 2 3 3 3 3 3 To return all adjustments to the factory preset levels Press CANCEL while making picture adjustments Picture control adjustment Adjusting the picture preference Press or to select MODE then press 1 2 Press MENU then press or to select option Mode Picture quality SPORTS Bri...

Page 35: ...option then press Press or to select COLOR TEMPERA TURE then press 1 2 Press or to select the desired color temperature then press ENTER 3 After your desired setting press MENU repeatedly until the menu screen is cleared 4 Mode Picture Quality COOL Blueish MEDIUM Neutral WARM Reddish 3 3 3 3 3 To return all adjustments to the factory preset levels Press CANCEL while making picture adjustments MENU...

Page 36: ...C SIZE will typically display the image stretched taller squeezed available not available ZOOM 16 9 4 3 format program analog or External input Picture size 4 3 4 3 format program digital 16 9 Squeeze format program digital Input source 16 9 picture size If receiving a 4 3 format digital program the 16 9 PIC SIZE is not available If receiving a 4 3 format analog program selecting 16 9 PIC SIZE wil...

Page 37: ...actory preset levels Press CANCEL while making sound adjustments CANCEL MENU BASS Press or to adjust the bass sound TREBLE Press or to adjust the treble sound BALANCE Press or to obtain an equal sound level from both speakers Setting the StableSound The StableSound feature limits the highest volume level to prevent extreme changes in volume when the signal source is changed In the left step 2 pres...

Page 38: ...d right speakers When mono broadcasting is received no indication is displayed If the broadcast signal is not strong enough or clear stereo sound is not available press AUDIO SELECT to change to mono sound The noise should be eliminated Press it again to return to the stereo sound Listening to SAP Second Audio Program When the TV is turned on or a channel selection is made SAP will appear on the s...

Page 39: ...coder or other digital audio system to the coaxial digital audio output on the TV Follow the left steps 1 2 1 Press or to select DIGITAL OUTPUT then press or to select PCM or DOLBY DIGITAL 2 Press MENU repeatedly until the menu screen is cleared 3 Checking the digital signal strength You can check the strength of the digital signal by viewing the digital signal meter Follow the left steps 1 2 1 Pr...

Page 40: ... be inserted Automatic playback When loading a cassette tape without an erase prevention tab playback will start automatically Automatic power ON When you insert a cassette tape the unit power will turn ON automatically 2 Erase prevention tab Adhesive tape Remove the cassette tape Erase prevention tab Unloading To prevent accidental erasure To prevent accidental erasure Tape speed and maximum reco...

Page 41: ...erecorded tape after the DVD playback you must set the unit to TV VCR mode using the TV VCR button This unit selects the playback tape speed SP or SLP auto matically When you select the TV VCR mode during DVD playback DVD playback will change to the still mode and after 5 minutes it will change to the resuming playback mode automatically 2To start playback Playback Rewind or forward the tape To re...

Page 42: ... for 4 seconds on the screen Press PAUSE STILL during playback Press SLOW one by one The picture advances frame by frame To return to playback press PLAY or PAUSE STILL SPEED SEARCH TIMES Digital tracking controls Still picture Slow motion Frame by frame picture Notes SP ismoreappropriateaslessnoiseappearedduringsearch and still playback for tape recorded in SP The audio output is muted during PIC...

Page 43: ...video tape will be played until its end The tape will automatically rewind to the beginning and the playback will be repeated Using the real time tape counter Press DISPLAY 1 Press COUNTER RESET to set the counter to 00 00 00 2 Begin Playback or Recording to start the tape the counter will display the elapsed time 3 When you wish to make the counter disappear press DISPLAY once again 4 The on scre...

Page 44: ...check and clean by the qualified service personnel Notes DO NOT ATTEMPT TO CLEAN THE VIDEO HEADS OR SERVICE THE UNIT BY REMOVING THE REAR COVER Video heads may eventually wear out and should be replaced when they fail to produce clear pictures To help prevent video head clogging use only good quality VHS tapes Discard worn out tapes Good Picture Snowy Picture Video head cleaning Video head cleanin...

Page 45: ...turn on 1 Press SPEED to select the desired tape speed SP or SLP The tape counter and SP or SLP will appear on the screen for about 4 seconds 2 Select TV or CABLE to the appropriate position 3 TV VHF UHF channels CABLE Cable TV channels Press Direct channel selection 0 9 or CH to select the channel to be recorded 4 Press REC will appear on the screen for about 4 seconds and the REC OTR indicator o...

Page 46: ...ress the button again to stop recording after 30 minutes Each additional press of REC will increase recording time as shown below up to a maximum of 6 hours OTR will appear on the screen 5 Press STOP will appear on screen for about 4 seconds Notes If you wish to watch the DVD playback during the recording or the OTR press DVD to change to DVD mode and perform the DVD playback The channel cannot be...

Page 47: ...le If a tape without an erase prevention tab is in the unit the tape will be ejected Press MENU then press or to select option Preparation Press TV VCR to select the TV VCR mode Load a cassette tape with the erase prevention tab intact Check the time and date are correct Example Program a timer recording for 23rd day channel 25 001 Digital Channel 7 00 9 30 PM Tape speed SLP 1 Press or to select o...

Page 48: ...il the recording is canceled or the tape reaches the end During timer recording the automatic rewinding mechanism does not function You can correct or cancel the programed setting in program confirm mode 8 00 11 00 9 00 10 00 Program 1 Prog 1 Deleted Parts Non Recorded Portion Parts Prog 2 Prog 3 Program 2 Program 3 Recording Control Settings Press PROGRAM once The TV screen displays the timer pro...

Page 49: ...set the Speed to the SP mode on the recording VCR for best results 1 Press INPUT repeatedly to select AUDIO VIDEO input position VIDEO1 or VIDEO2 will appear on the screen 2 Press PLAY on the playback VCR or camcorder 3 Press REC 4 Press STOP when you finish after duplicating 5 VIDEO1 on the rear panel VIDEO2 on the front panel Preparation Press TV VCR to select the TV VCR mode Load a cassette tap...

Page 50: ...top a DVD CD disc press DVD to change to DVD mode then press STOP 5 Notes You may not record the beginning of the disc so start to playback the disc then start to record You cannot record the disc with copy guard function DISC IS COPY PROTECTED will show up on the TV screen for approx 4 seconds Recording a DVD CD disc You can record disc material in DVD Audio CD etc onto a video tape with this uni...

Page 51: ...ar on the screen Reading display will change to No Disc If DVD disc has already loaded play back will start automati cally 3 Press OPEN CLOSE The disc tray opens 4 Place a disc on the disc tray Basic playback There are two different disc sizes Place the disc in the correct guide on the disc tray If the disc is out of the guide it may damage the disc and cause the unit to malfunction Do not place a...

Page 52: ...and close the disc tray Do not push the disc tray while it is moving Doing so may cause the unit to malfunction Do not push up on the disc tray or put any objects other than discs on the disc tray Doing so may cause the unit to malfunction In many instances a menu screen will appear after playback of a movie is completed Prolonged display of an on screen menu may damage your television set permane...

Page 53: ...eeding chapters or tracks Playback starts from the beginning of the current chapter or track When you press twice in quick successions playback starts from the beginning of the preceding chapter or track A prohibition symbol may appear at the upper right of the screen This symbol means either the feature you tried is not available on the disc or the unit cannot access the feature at this time This...

Page 54: ...layback The center part of the image will be zoomed in Each press of ZOOM will change the ZOOM 1 x 1 3 2 x 1 5 and 3 x 2 0 This unit will allow you to zoom in on the frame image You can then make selections by switching the position of the frame Notes You can select the Pause Slow or Search playback in the zoom mode Some discs may not respond to zoom feature Use the title chapter and time recorded...

Page 55: ...Repeat is prohibited when PBC is on To resume normal playback Press REPEAT A B again Off appears on the screen Repeat playback A B Repeat playback PLAY MODE REPEAT A B Repeat playback A B Repeat playback 1PressPLAYMODEduringplaybackorstopmode Press PLAY MODE again to clear the screen 3 2 Notes Some discs may not work with the repeat operation In case of Video CD with PBC Repeat functions are prohi...

Page 56: ...ber you want to change then press CANCEL 2 Press Number buttons 0 9 to overwrite the new track number To clear the program one by one Select Mode to Program press B A to select the right column then press C Dto select the track number Then press CANCEL To clear all the programs In the left column press C D to select Clear Program Then press ENTER Notes In playing back the Video CD with PBC you can...

Page 57: ...ected title will start 3 Note Depending on the DVD you may not be able to select the title Depending on the DVD a title menu may simply be called a menu or title in the instructions supplied with the disc 2 Press DVD MENU during playback The DVD menu appears on the screen Press DVD MENU again to resume playback at the scene when you pressed DVD MENU Press to select the desired item Some DVDs allow...

Page 58: ... disc no sound will be heard from the unit s speakers In case of Video CD playback Audio type changes as follows each time you press AUDIO SELECT AUDIO SELECT When playing back a disc recorded with subtitles you can select the subtitle language or turn the subtitle off To turn off the subtitle press SUBTITLE until Off appears The on screen display will disappear after a few seconds 1 Notes Dependi...

Page 59: ... above steps 1 2 then press ENTER repeatedly until PBC appear Note You can also turn off the PBC by pressing number button 1 and ENTER in the stop mode To turn on the PBC 1 DISPLAY ENTER PLAY MODE 1 2 3 Play Mode Repeat Off Program Playback Mode Off CHAPTER NO DVD 00 15 25 01 41 39 Title 1 3 Chapter 2 24 1 1 Eng Dolby Digital 1 2 Eng 1 1 ELAPSED TIME ANGLE NO DISC OPERATION TITLE NO TOTAL TIME AUD...

Page 60: ... USB Mass Storage in the recorded order 1 Use MP3 WMA JPEG DivX software that records data alphabetically or numerically 2 Insert two or three digit number in the head of file name ex 01 02 or 001 002 3 Refrain from making too many sub folders CAUTION Some MP3 WMA JPEG DivX CDs USB Mass Storage cannot be played back depending on the recording conditions The CD R RW or USB Mass Storage that has no ...

Page 61: ... ENTER then press or to select file type from the list Music Picture or Movie 3 Press ENTER to add remove check mark Checked file type will be displayed in the file browser 4 Press RETURN to save the setting Press DVD USB to display the media selection window Press B or A to select the DISC mode or the USB mode then press ENTER You cannot select the mode if DISC USBmediaisnotinserted In the file b...

Page 62: ...SE STILL during the slide show the slide show stops temporary 4 appears briefly on the screen If the picture appears upside down or sideways press ANGLE repeatedly until it s right side up Press PLAY or SKIP again to resume the slide show When the slide show playback finished the file list ap pears To stop the slide show press STOP The file list ap pears Slide show playback 1 When PLAY is pressed ...

Page 63: ... file at a root directory playback does not begin automatically 2 DivX playback 75 Playing DivX VOD content DivX VOD content is protected by DRM Digital Rights Management system This restricts playback of content to specific registered devices If the incorrect DRM file is loaded Authorization Error This player is not authorized to play this video will appear on the screen When you attempt to play ...

Page 64: ... ENTER to select Random Press PLAY The Random playback will start To resume normal playback Select Mode Off in step 2 Notes The program is canceled when you open the disc tray or turn the power off The track repeat function is canceled when SKIP or is pressed In case of Audio CD the function of A B Repeat also can be used See A B Repeat playback 1 2 3 1 2 3 Folder 1 Folder 2 MP3 1 MP3 2 MP3 3 Sele...

Page 65: ...or C D to select Add To Program Then press ENTER All marked files are added into the program list When you finish storing all the files you want into the Program list select Edit Mode again and press ENTER to release edit mode Press C D to select Program View then press ENTER Program View shows only the programed files that you have added in Step 2 Program View In the Program View press PLAY The f...

Page 66: ...lt settings to customize performance to your preference ENTER C D B A Repeat steps 3 and 5 to change other settings To select another operation go back to step 2 by pressing B repeatedly Press C or D to select the desired section then press B or A First option will be highlighted Press C or D to select the desired option 4 Then press A or ENTER The selectable setting will appear SETUP DVD VCD CD R...

Page 67: ...aspect ratio of your TV To turn ON or OFF the operational status display on the screen To select a preferred picture mode from Video Film or Auto To select a preferred setting for the slide show playback To select ON or OFF for DRC Dynamic Range Control To select a preferred parental level for the parental setting Input 4 digit password to set the parental level To display your 8 character registr...

Page 68: ...nguage you can perform it by TV MENU see page 23 TV Screen You have the following screen sizes to choose from 4 3 Letter box Select this mode when connecting to a conventional TV When playing back a wide screen DVD disc it displays the wide picture with black bands at the top and bottom of screen 4 3 Pan scan It displays the wide picture on the whole screen with left and right edges automatically ...

Page 69: ...back of video content pictures Note Depending on the disc pictures may be cut off or doubled In this case select Video On Loud sound such as explosion is toned down slightly when played back This is suitable when it is connected to a stereo Off It plays back at the recording level on the disc Notes This function works only during playback of Dolby Digital recorded discs The level of Dynamic Range ...

Page 70: ...an be played back Level 1 DVD software for adults cannot be played back 3 Press C or D to select from the level 1 to level 8 The limitation will be more severe as the level number is lower Then press ENTER 4 Press OPEN CLOSE to activate Parental control setting Notes Depending on the discs the unit cannot limit playback Some discs may not be encoded with specific rating level information though it...

Page 71: ...VD disc Depending on the DVD disc the disc may try to temporarily cancel the rating level that you have set It is up to you to decide whether to cancel the rating level or not Note This temporary cancellation of rating level will be kept until the disc is ejected When the disc is ejected the original rating level will be set again automatically 1 Enter the password with Number buttons 0 9 Then pre...

Page 72: ...25 Thai 3018 Bihari 1218 Hungarian 1831 Oriya 2528 Tibetan 1225 Breton 1228 Icelandic 1929 Panjabi 2611 Tigrinya 3019 Bulgarian 1217 Indonesian 1924 Pashto Pushto 2629 Tonga 3025 Burmese 2335 Interlingua 1911 Persian 1611 Turkish 3028 Byelorussian 1215 Irish 1711 Polish 2622 Turkmen 3021 Cambodian 2123 Italian 1930 Portuguese 2630 Twi 3033 Catalan 1311 Japanese 2011 Quechua 2731 Ukrainian 3121 Chi...

Page 73: ...ances such as drills or hair dryers SNOW If the unit is located far from the TV station in a fringe reception area where the signal is weak small dots may appear in the picture If the signal is extremely weak the installation of a larger external antenna may be necessary RADIO FREQUENCY INTERFERENCE RFI Caused by two way radios this type of interference produces moving ripples or diagonal streaks ...

Page 74: ...e local interference TV station experiencing problems Picture control is not adjusted Possible local interference Antenna CABLE connector is not connected or possible local interference TV station experiencing problems Antenna CABLE connector is not connected or possible local interference Cable TV channel is scrambled CABLE connector is not connected TV CABLE selection is set to the TV position C...

Page 75: ... 5 m or reduce the light of the room Clear the path of the beam Replace the batteries Insert correctly SYMPTOMS CAUSE POSSIBLE SOLUTIONS PAGE VCR REMOTE CONTROL DVD The playback picture has occasional distortion The disc is dirty It is in fast forward or fast reverse playback No disc is inserted An unplayable disc is inserted The disc is placed upside down The disc is not placed within the guide T...

Page 76: ...with features and or specifications that may be added in the future AC 120 V 60 Hz 150 W 4 W 27 in 676 6 mm diagonal 1 13 16 x 3 7 8 inches 45 7 x 99 1 mm 8 Ω x 2 2 5 W 2 5 W 97 0 lbs 44 kg 29 1 8 inches 740 mm 25 3 8 inches 645 mm 19 7 16 inches 493 mm NTSC standard ATSC standard 8VSB QAM 181 channel freq synthesized VHF 2 13 UHF 14 69 CATV 125 Channels UHF VHF 75 Ω coaxial NTSC 4 Rotary heads Hi...

Page 77: ...r warrants the picture tube in this TV Combination against defects in materials or workmanship for a period of two 2 years after the date of original retail purchase DURING THIS PERIOD TACP WILL AT TACP S OPTION REPAIR OR REPLACE A DEFECTIVE PICTURE TUBE WITH A NEW OR REFURBISHED PICTURE TUBE WITHOUT CHARGE TO YOU PROVIDED THAT IF A DEFECTIVE PICTURE TUBE IS REPAIRED OR REPLACED AFTER NINETY 90 DA...

Page 78: ... state thereof is hereby limited to ninety 90 days from the date you discover or should have discovered the defect This limitation does not apply to implied warranties arising under the law of any state of the U S A THIS WARRANTY GIVES YOU SPECIFIC LEGAL RIGHTS AND YOU MAY ALSO HAVE OTHER RIGHTS WHICH MAY VARY FROM STATE TO STATE IN THE U S A SOME STATES OF THE U S A DO NOT ALLOW LIMITA TIONS ON T...

Page 79: ...79 Others Memo 5V60101A E p77 Back 2 22 06 1 08 PM 79 ...

Page 80: ...Printed in Thailand J5V60101A SH06 02 N ColorStream FST Pure and StableSound are registered trademarks of Toshiba America Consumer Products L L C 5V60101A E p77 Back 2 22 06 1 08 PM 80 ...

Reviews: