background image

TORK DGM100

DIGITAL TIME SWITCH

SEVEN DAY

READ INSTRUCTIONS CAREFULLY BEFORE SETTING UNIT

FEATURES

Single channel controller 

7 day scheduling  

Special day scheduling 

32 set points

2 second momentary output for use with low voltage
latching relays, mechanically held contactors, electri-
cally (magnetically) held contactors.  

Battery back-up uses standard 9 volt non-recharge-
able (not supplied). Lithium averages 450 hours of
power outage; Alkaline averages 175 hours

Manual override to the next scheduled event 

Automatic daylight saving - user selectable 

Automatic leap year compensation

AM/PM or 24 hour format - user selectable

INSTALLATION

UNIT IS TO BE INSTALLED BY A LICENSED ELECTRICIAN

Unit contains 2 SPDT relays. Left relay will close
for 2 seconds between C & NO when an ON pulse
is scheduled. Right relay will close for 2 seconds
between C & NO when an OFF pulse is scheduled.

NOTE: C & NC of right relay is used to OPEN elec-
trically held contactors.

1.  To remove unit from enclosure: Push tab on right

to swing unit to the left and remove.

2.  Mount the enclosure at eye level using screws or

other suitable fastening device. Bring supply and
load wires in through bottom or side knockouts.
DO NOT USE TOP.

Input wires to controller must be dedicated i.e. no
other loads connected to the same circuit.

3.  Install a standard 9 volt lithium or alkaline battery

(not supplied) by gently squeezing the right side of
the battery cover on the front of the unit and pull
to open. Pull out the battery connector and con-
nect the battery. Reinstall battery cover. Lithium
should be replaced every 3-5 years, Alkaline
every year.

NOTE: Unit can be fully programmed using battery
power only.

4.  Reinstall unit by reversing step #1 above and con-

nect wires to unit as per suggested wiring dia-
grams. See illustration on enclosure label.

KEY FUNCTIONS

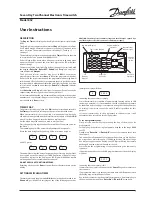
DAY/MONTH: Press to advance the day in the CLK
mode. Press to advance the Month in the DATE
mode.

HOUR/DATE: Press to set the Hours in the CLK
mode and in the Schedule SET mode. Press to
advance Date in the DATE mode.

MIN/YEAR: Press to set the Minute in the CLK mode
and in the Schedule SET mode. Press to advance
Year in the DATE mode.

OVERRIDE: Press to alter the Load status and/or to
Override scheduled event.

MODE: Press to advance to next mode without
affecting the scheduled memory information.
Sequence is: RUN, CLK, DATE, schedule SET. In
the SET mode, unit automatically reverts to the
RUN mode if no entries are made for 5 minutes.

SP DAY: Press during RUN mode to execute the
“SPECIAL DAY” schedule everyday. LCD will display
D in upper right corner. Pressing SP DAY again will
toggle the unit back to normal 7 day program opera-
tion.

2

DAY

MONTH

HOUR

DATE

MIN

YEAR

OVER-

RIDE

MODE

SP

DAY

ON/

OFF

ENTER


http://waterheatertimer.org/Tork-Digital-timers-and-manuals.html


______________________________________________________

Summary of Contents for DGM100

Page 1: ...n right to swing unit to the left and remove 2 Mount the enclosure at eye level using screws or other suitable fastening device Bring supply and load wires in through bottom or side knockouts DO NOT USE TOP Input wires to controller must be dedicated i e no other loads connected to the same circuit 3 Install a standard 9 vol not supplied by gently the battery cover on th to open Pull out the b nec...

Page 2: ...power only 4 Reinstall unit by reversing step 1 above and con nect wires to unit as per suggested wiring dia grams See illustration on enclosure label KEY FUNCTIONS DAY MONTH Press to advance the day in the CLK mode Press to advance the Month in the DATE mode HOUR DATE Press to set the Hours in the CLK mode and in the Schedule SET mode Press to advance Date in the DATE mode MIN YEAR Press to set t...

Page 3: ... mode You can recognize that the unit is in the RUN mode when the real time including seconds is displayed NOTE Once you select and ENTER the above for mat either AM PM or 24 hour military you can not alter it without removing all power to the unit by dis connecting the battery and line power 3 SU AM OFF TO SET CLOCK Press MODE key display s Press DAY MONTH key to HOUR key to set present h MIN key...

Page 4: ...AVING The user may select either standard U S option or no daylight saving at all 1 U S OPTION Daylight saving is automatically set when entering the current month date year The unit will add one hour on the first Sunday in April and subtract one hour on the last Sunday in October You never need to look up the tables or enter the spring and fall correction dates yourself 2 NO DAYLIGHT SAVING The u...

Page 5: ...O TU WE TH FR SA Individual days SU MO TU WE TH FR SA and D for Special Day usually a holiday A special holiday schedule can be entered if you want to be able to repeat this particular schedule on holidays only 2 Press HOUR key to set hour check AM PM 3 Press MIN key to set minutes 4 Once desired days are set press ON OFF key to set ON or OFF pulse If all of the information you entered is correct ...

Page 6: ...k to the setting just entered However the unit will correct itself at the next scheduled event and no further alteration will be necessary SPECIAL DAY HOLIDAY To execute this schedule at any time simply press the SP DAY key while the unit is in the RUN mode A letter D will appear in the upper right corner and the Special Day schedule previously set will repeat for as many days as you want If no sc...

Page 7: ...the unit is in the set mode Then press ENTER key to advance to the next open set point Enter new schedule as indicated in section To Set Schedule DELETE If you choose to delete a schedule simply modify the HOURS and MINUTES until the time dis play reads This will occur after scrolling past 11 P M with the HOUR key and 59 with the MIN key Then press ENTER to delete the event OVERRIDE In order to te...

Reviews: