TMG TMG-DT3080-PRO, Product Manual
The TMG TMG-DT3080-PRO is a cutting-edge product designed for professionals seeking superior performance. Enhance your experience by accessing the free Product Manual available for download from our website. Find all the information you need to make the most of your purchase. Don't miss out on this essential resource.
Share
Download


Reviews:
No comments
Related manuals for TMG-DT3080-PRO
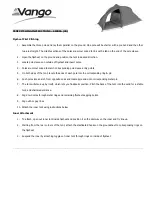
SIERRA
Brand: Vango Pages: 6

Everest Series
Brand: Z-SHADE Pages: 2

Double Peak Star Marquee
Brand: Hercules Pages: 12

GREAT DIVIDE RT
Brand: Jack Wolfskin Pages: 11

Tornado 6
Brand: Chinook Pages: 2

STARTENT Big 8
Brand: Inventini Pages: 15

10x10 Grow Tent
Brand: Gorilla Pages: 6

SIBLEY 300 DELUXE
Brand: canvascamp Pages: 3

Sibley 600 Twin Utimate
Brand: canvascamp Pages: 4

3
Brand: canvascamp Pages: 3

Castle Pop-Up Tent
Brand: Oypla Kids Pages: 2

22098-22
Brand: belavi Pages: 15

YSCM2006
Brand: Yescom Pages: 8

Hayling 4 Air
Brand: Kampa Pages: 6

Semi PRO 9x12m
Brand: Dancover Pages: 6

NP10847
Brand: PATIOJOY Pages: 8

43992
Brand: Zolia Pages: 3

Free Standing Canopy
Brand: Patriot Docks Pages: 5


