©
Thor3D, 2019
Quick Start Guide – Drake 3D Scanner
1.
Charge the scanner for 1.5 hours.
2.
Unplug the charger.
3.
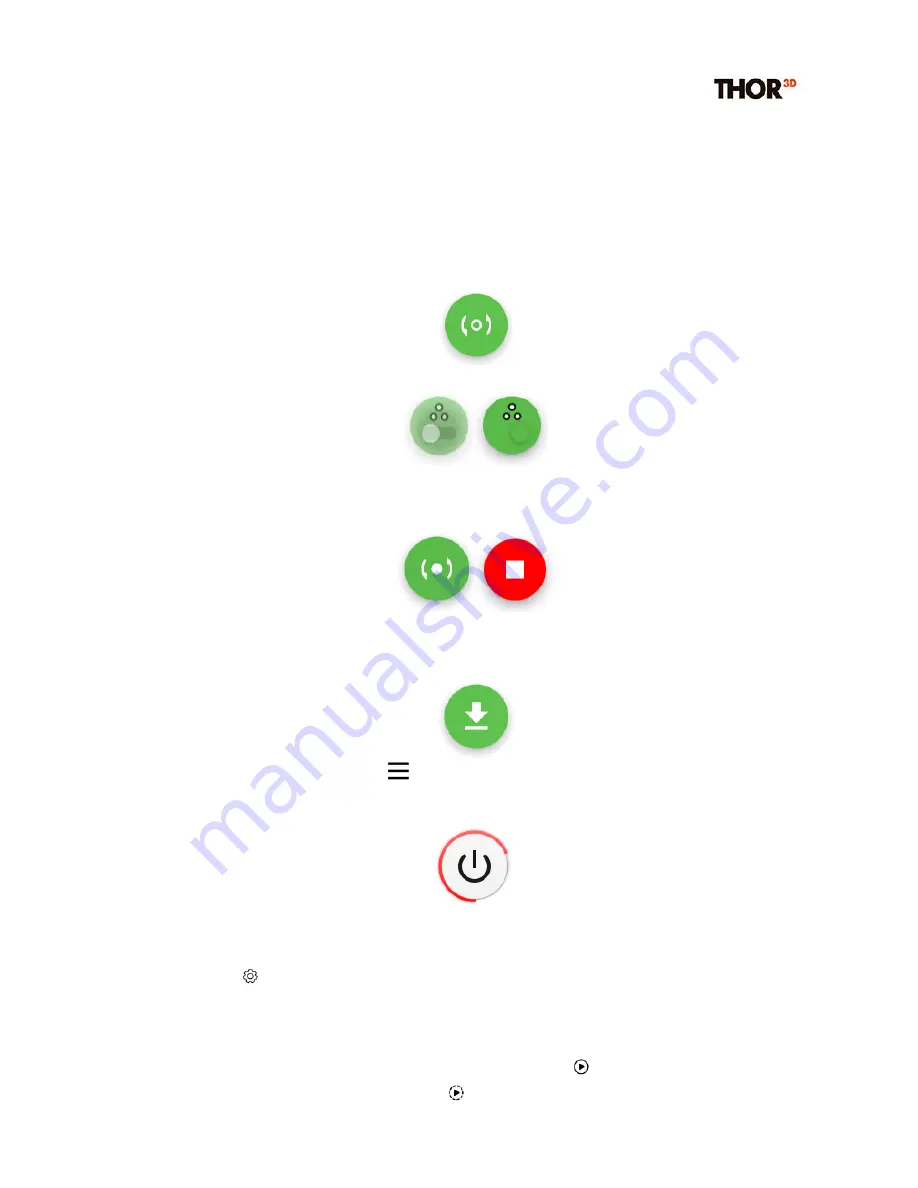
To turn on, press the green button under the screen and wait for the software to load.
4.
Press the “Preview” button
.
5.
Choose whether you want to scan with or without markers.
6.
Aim the scanner at the object you would like to scan to analyze the correct starting position. When
the object is in view, press the “Start” button to begin scanning
and “Stop” when finished
.
7.
Plug-in the USB flash drive into the USB port located on the scanner. Wait 5-10 seconds for it to be
recognized by the software. Press “Save” to transfer data from the scanner’s internal hard
-drive
onto the USB drive.
8.
Turn the scanner off by pressing the
button on the left side of the screen and then pressing and
holding the “power off” button on the bottom of the side panel for 2 seconds.
9.
Plug the USB drive into your PC or laptop and transfer the data to the computer. Open Thor3D
Suite and drag-and-drop this data into the software.
10.
Go to Settings
and choose the appropriate settings for your model. Generally, the most
important settings to consider are “Resolution” (try
2mm
for MAXI,
0.7mm
for MIDI and
0.3mm
for
MINI
), “Fill Holes” (try
by
radius
), and
“Max Hole Radius”
(try
10mm
for MAXI,
1mm
for MIDI and
0.5mm
for MINI).
Leave every other option at default to start with and press “OK”.
11.
Then, if you need a textured model (geometry and color), press
or
F6
. If you only want
geometry of the object only (no color), press
or
F5
. Depending on your computer and the