background image

xBrick HEX 16

×

8W RGBAW UV

LED floodlight

user manual

Summary of Contents for STAIRVILLE xBrick HEX 16x8W RGBAW UV
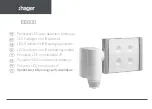
Page 1: ...xBrick HEX 16 8W RGBAW UV LED floodlight user manual ...

Page 2: ...Musikhaus Thomann Thomann GmbH Hans Thomann Straße 1 96138 Burgebrach Germany Telephone 49 0 9546 9223 0 E mail info thomann de Internet www thomann de 20 01 2020 ID 451258 ...

Page 3: ...llation 9 5 Starting up 11 6 Connections and controls 12 7 Operating 15 7 1 Starting the device 15 7 2 Operating controls on the device 15 7 3 Remote control 20 7 4 Functions in DMX modes 22 8 Technical specifications 30 9 Plug and connection assignments 31 10 Troubleshooting 32 11 Cleaning 33 12 Protecting the environment 34 Table of contents xBrick HEX 16 8W RGBAW UV 3 ...

Page 4: ... further information and details on the following points Download This manual is also available as PDF file for you to download Keyword search Use the search function in the electronic version to find the topics of interest for you quickly Online guides Our online guides provide detailed information on technical basics and terms Personal consultation For personal consultation please contact our te...

Page 5: ...signal word indicates an immediate dangerous situation that will result in death or serious injury if it is not avoided WARNING This combination of symbol and signal word indicates a possible dangerous situation that can result in death or serious injury if it is not avoided NOTICE This combination of symbol and signal word indicates a possible dangerous situation that can result in mate rial and ...

Page 6: ...ntinuous use DANGER Danger for children Ensure that plastic bags packaging etc are disposed of properly and are not within reach of babies and young children Choking hazard Ensure that children do not detach any small parts e g knobs or the like from the unit They could swallow the pieces and choke Never let children unattended use electrical devices DANGER Electric shock caused by high voltages i...

Page 7: ...for example after transport at low outside temperatures Dust and dirt inside can damage the unit When operated in harmful ambient conditions dust smoke nicotine fog etc the unit should be maintained by qualified service personnel at regular intervals to prevent overheating and other malfunction NOTICE Power supply Before connecting the device ensure that the input voltage AC outlet matches the vol...

Page 8: ...e unit or an optionally available IR remote control item no 354223 n 4 segments can be controlled separately n Universally applicable as blinder flood light or effect light n 30 preprogrammed automatic shows n Sound control n Master Slave mode n Clear OLED display four lines n Robust metal housing For technological reasons the light output of LEDs decreases over their lifetime This effect increase...

Page 9: ...e must always be below 40 C 104 F NOTICE Use of stands When mounting the device onto a stand ensure that the stand is in a safe and stable position and that the weight of the device does not exceed the maximum permissible load capacity of the stand NOTICE Possible data transmission errors For error free operation make use of dedicated DMX cables and do not use ordinary microphone cables Never conn...

Page 10: ...Please note that this device must not be connected to a dimmer Installation LED floodlight 10 ...

Page 11: ...hat the output of the last DMX device in the daisy chain is terminated with a resistor 110 Ω W When you configure a group of devices in master slave mode the first unit will con trol the other units for an automatic sound activated synchronized show This func tion is ideal when you want to start a show immediately Connect the DMX output of the master device to the DMX input of the first slave devi...

Page 12: ...wer supply 4 Power Out Lockable Power Twist output socket for power supply 5 Display 6 Mode Activates the main menu 7 Setup Selects an option of the respective operating mode 8 Up Increases the displayed value by one 9 Down Decreases the displayed value by one 10 Openings for fastening a safety rope Rear panel Connections and controls LED floodlight 12 ...

Page 13: ...11 DMX Out DMX output 12 DMX In DMX input 13 Infrared sensor option for optionally available remote control Front panel Connections and controls xBrick HEX 16 8W RGBAW UV 13 ...

Page 14: ...ed 17 PRG Enables the Programme mode 18 STROBE Turns the Stroboscope effect on and off 19 Dimming Brightness control 20 Decreases the displayed value by one 21 0 9 Numeric buttons for entering a numerical value directly 22 Buttons for colour selection 23 Increases the displayed value by one 24 SOUND Activates the sound control Remote control Connections and controls LED floodlight 14 ...

Page 15: ...he sub menu 1 Auto use Up Down to choose between Yes to enable or No to disable automatic operation Automatic operation can only be activated when the unit is operating in stand alone mode or as master in a master slave combination This setting is only relevant if the device is not controlled via DMX 1 Select the submenu 2 Program and confirm with Setup 2 If you select the programme 01 in 1 Mode s...

Page 16: ...2 Use Up Down in 1 Red to adjust the intensity of the red colour between 000 off and 255 full 3 Use Up Down in 2 Green to adjust the intensity of the green colour between 000 off and 255 full 4 Use Up Down in 3 Blue to adjust the intensity of the blue colour between 000 off and 255 full 5 Use Up Down in 4 White to adjust the intensity of the white colour between 000 off and 255 full 6 Use Up Down ...

Page 17: ...n the range from 00 to 31 1 Press simultaneously Mode and Setup to lock the display 2 Press simultaneously Mode and Setup again to unlock the display On the display the time counts up for 3 seconds ð The display is now unlocked 3 In the menu 7 Settings 4 Lock you can activate or deactivate this function Sound control Locking the display Operating xBrick HEX 16 8W RGBAW UV 17 ...

Page 18: ...inning and flat profile at the end The below figure schematically shows the adjustable dimmer curves Depending on the selected DMX value 1 the device lights with a brightness 2 between 0 and 100 Confirm the selection with Setup 3 Use Up Down in 2 Dimmer Speed to choose between Fast and Smooth 4 Use Up Down in 3 Dmx Fail to choose between Off blackout on DMX signal failure and Hold freezing the sta...

Page 19: ...e temperature sensor Please ensure a timely repair so that the device can be used nor mally Connection Fail Communication failure of the slave devices The floodlight can not be controlled These are the possible reasons for this n The communication connection is faulty n The slave controller chip is dam aged Please ensure a timely repair so that the device can be used normally Temperature C Excessi...

Page 20: ... can only be remote controlled if it s neither working in DMX mode nor in Master Slave Use ON OFF to blackout the unit or cancel the blackout Press AUTO The unit now operates in automatic stand alone mode Blackout Auto mode Operating LED floodlight 20 ...

Page 21: ... running speed of the programmes Use and to press STROBE to select a value between 01 slow and 99 fast in steps of 5 to turn on a Strobe effect Press again STROBE to turn the strobe effect off Or you select 00 to blackout the unit 1 Press SOUND This activates a sound controlled colour sequence 2 Use and to select a mode between 00 and 28 3 Then press again SOUND and use and to select a value betwe...

Page 22: ...3 0 255 Intensity blue 0 to 100 all segments 4 0 255 Intensity white 0 to 100 all segments 5 0 255 Intensity amber 0 to 100 all segments 6 0 255 Intensity UV 0 to 100 all segments 7 4 2 Functions in 8 channel DMX mode Channel Value Function 1 0 255 Dimmer 0 to 100 2 0 255 Intensity red 0 to 100 all segments 3 0 255 Intensity green 0 to 100 all segments 4 0 255 Intensity blue 0 to 100 all segments ...

Page 23: ...ent 3 4 12 0 255 Intensity UV 0 to 100 segment 3 4 7 4 4 Functions in 24 channel DMX mode Channel Value Function 1 0 255 Intensity red 0 to 100 segment 1 2 0 255 Intensity green 0 to 100 segment 1 3 0 255 Intensity blue 0 to 100 segment 1 4 0 255 Intensity white 0 to 100 segment 1 5 0 255 Intensity amber 0 to 100 segment 1 6 0 255 Intensity UV 0 to 100 segment 1 7 0 255 Intensity red 0 to 100 segm...

Page 24: ...5 Intensity red 0 to 100 segment 1 3 0 255 Intensity green 0 to 100 segment 1 4 0 255 Intensity blue 0 to 100 segment 1 5 0 255 Intensity white 0 to 100 segment 1 6 0 255 Intensity amber 0 to 100 segment 1 7 0 255 Intensity UV 0 to 100 segment 1 8 0 255 Intensity red 0 to 100 segment 2 9 0 255 Intensity green 0 to 100 segment 2 10 0 255 Intensity blue 0 to 100 segment 2 11 0 255 Intensity white 0 ...

Page 25: ...to 100 segment 1 4 0 255 Intensity blue 0 to 100 segment 1 5 0 255 Intensity white 0 to 100 segment 1 6 0 255 Intensity amber 0 to 100 segment 1 7 0 255 Intensity UV 0 to 100 segment 1 8 0 255 Intensity red 0 to 100 segment 2 9 0 255 Intensity green 0 to 100 segment 2 10 0 255 Intensity blue 0 to 100 segment 2 11 0 255 Intensity white 0 to 100 segment 2 12 0 255 Intensity amber 0 to 100 segment 2 ...

Page 26: ...immer 1 8 Programme 01 9 16 Programme 02 17 24 Programme 03 25 32 Programme 04 33 40 Programme 05 41 48 Programme 06 49 56 Programme 07 57 64 Programme 08 65 72 Programme 09 73 80 Programme 10 81 88 Programme 11 89 96 Programme 12 97 104 Programme 13 105 112 Programme 14 113 120 Programme 15 121 128 Programme 16 129 136 Programme 17 137 144 Programme 18 145 152 Programme 19 153 160 Programme 20 16...

Page 27: ...R 255 G 255 B 0 W 75 A 0 UV 0 56 62 R 0 G 255 B 0 W 255 A 0 UV 0 63 69 R 0 G 255 B 0 W 150 A 0 UV 0 70 76 R 0 G 255 B 0 W 50 A 0 UV 0 77 83 R 0 G 255 B 0 W 0 A 0 UV 0 84 90 R 0 G 255 B 50 W 0 A 0 UV 0 91 97 R 0 G 255 B 150 W 0 A 0 UV 0 98 104 R 0 G 255 B 255 W 0 A 0 UV 0 105 111 R 0 G 255 B 255 W 75 A 0 UV 0 112 118 R 0 G 255 B 255 W 150 A 0 UV 0 119 125 R 0 G 0 B 255 W 255 A 0 UV 0 126 132 R 0 G ...

Page 28: ...255 B 255 W 255 A 255 UV 255 Programme selection if channel 26 9 240 0 255 Stroboscope effect increasing speed Programme selection if channel 26 241 255 0 8 Sound mode 00 9 17 Sound mode 01 18 26 Sound mode 02 27 35 Sound mode 03 36 44 Sound mode 04 45 53 Sound mode 05 54 62 Sound mode 06 63 71 Sound mode 07 72 80 Sound mode 08 81 89 Sound mode 09 90 98 Sound mode 10 99 107 Sound mode 11 1085 116 ...

Page 29: ... 197 Sound mode 21 198 206 Sound mode 22 207 215 Sound mode 23 216 224 Sound mode 24 225 233 Sound mode 25 234 242 Sound mode 26 243 251 Sound mode 27 252 255 Sound mode 28 28 0 4 No function 5 255 Stroboscope effect increasing speed Operating xBrick HEX 16 8W RGBAW UV 29 ...

Page 30: ...y Lockable Power Twist output socket DMX control XLR chassis socket 3 pin Power consumption 128 W Operating supply voltage 100 240 V 50 60 Hz Protection class IP20 Mounting options hanging standing Dimensions W H D 388 mm 87 mm 194 mm Weight 4 7 kg Ambient condi tions Temperature range 20 C 40 C Relative humidity 50 non condensing Outdoor capable No Colour mixture RGBAW UV LED type x in 1 Floor ho...

Page 31: ...cket the result of an incorrect connection may be a destroyed DMX controller a short circuit or just a not working light show The unit offers a 3 pin XLR socket for DMX output and a 3 pin XLR plug for DMX input Please refer to the drawing and table below for the pin assignment of a suit able XLR plug Pin Configuration 1 Ground shielding 2 Signal inverted DMX cold signal 3 Signal DMX hot signal Int...

Page 32: ...main fuse 1 Check the DMX connectors and cables for proper connection 2 Check the address settings and the DMX polarity 3 Try using another DMX controller 4 Check whether the DMX cables run near or parallel to high voltage cables that may cause damage or interference to a DMX interface circuit 5 Check the displays in information mode see Ä Information mode on page 19 If the procedures recommended ...

Page 33: ...e device n Clean with a soft cloth using our lamp and lens cleaner item no 280122 n Always dry the parts carefully The fan grids of the device must be cleaned of any contamination such as dust etc on a regular basis Before cleaning switch off the device and disconnect mains oper ated devices from the mains Only use pH neutral solvent free and non abrasive cleaning agents Clean the unit with a slig...

Page 34: ...tional or local regulations regarding hazardous waste To protect the environment dispose of empty batteries at your retail store or at appropriate collection sites This product is subject to the European Waste Electrical and Electronic Equipment Directive WEEE in its currently valid version Do not dispose with your normal household waste Dispose this device through an approved waste disposal firm ...

Page 35: ......

Page 36: ...Musikhaus Thomann Hans Thomann Straße 1 96138 Burgebrach Germany www thomann de ...

Reviews: