background image


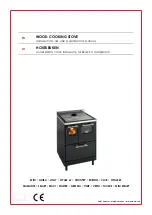
Summary of Contents for DORICA MAIOLICA

Page 1: ......

Page 2: ...F CONTROLS 0 5 1 DESCRIPTION OF CONTROL PANEL AND REAR PANEL 0 5 1 DESCRIPTION OF THE CONTROL PANEL 0 5 1 2 APPLIANCE REAR PANEL 0 5 2 DAY AND TIME SETTING 0 5 3 ON OFF PROGRAMMING 0 5 3 1 ON OFF PROGRAMMING DISPLAY 0 5 4 OPERATING LEVEL SETTING 0 6 USE OF THE APPLIANCE 0 6 1 SWITCHING ON THE APPLIANCE 0 6 2 ADJUSTING COMBUSTION AND VENTILATION 0 6 3 INFRARED REMOTE CONTROL 0 6 4 OPERATION OF THE ...

Page 3: ...LET 0 9 3 1 CHIMNEY TYPES 0 9 3 2 FLUE OUTLET FLUE SYSTEM COMPONENTS 0 10 ALARMS 0 11 ELECTRICAL WIRING 0 12 INFORMATION FOR THE SKILLED TECHNICIAN 0 12 1 MAIN COMPONENTS AND THEIR OPERATION 0 12 2 REQUIREMENTS NECESSARY FOR CORRECT INSTALLATION AND OPERATION 0 12 3 TROUBLESHOOTING CAUSE SOLUTION 0 13 SPARE PARTS 0 13 1 SPARE PARTS DORICA PAG 1 5 0 13 2 SPARE PARTS DORICA PAG 2 5 0 13 3 SPARE PART...

Page 4: ...Page 4 e manutenzione ...

Page 5: ...Page 5 e manutenzione EC DECLARATION OF CONFORMITY ...

Page 6: ...r deteriorated contact the manufacturer for a replacement copy If the appliance is sold or transferred to another user ensure that the guide is handed over with it If this manual is lost and or damaged it is mandatory to ask the manufacturer for a replacement copy Thermorossi S p A retains copyright on these service instructions These instructions may not be reproduced or communicated to third par...

Page 7: ...ppliance is installed as these actions could cause health problems Do not expose plants or animals directly to the hot air flow as this could have noxious effects on them It is strictly forbidden to use any type of fuel liquid solid to light the appliance the appliance must light up automatically as designed and described in this installation use and maintenance booklet in this regard it is strict...

Page 8: ...Not detected Not detected Not detected Efficiency at rated power 90 2 90 2 90 2 90 2 Efficiency at reduced power 84 2 84 2 84 2 84 2 CO concentration in exhaust gas with 13 O2 at rated power mg M3 188 188 188 188 CO concentration in exhaust gas with 13 O2 at rated power mg M3 Not detected Not detected Not detected Not detected Power supply voltage and frequency 220 V 50 HZ 220 V 50 HZ 220 V 50 HZ ...

Page 9: ... thermal value 4000 4500 Kcal Kg and density of 620 630 Kg m less than 0 7 ash content It is strictly forbidden to use any pellet type other than that specified above The use of fuel that does not comply with the above specifications not only immediately invalidates the warranty for the appliance but can also create dangerous situations Do not use the appliance as an incinerator at the risk of voi...

Page 10: ... and fireproof protection is placed between the object and the appliance ref Uni 10683 Failure to observe this instruction will immediately invalidate the warranty The installer must issue a certificate of conformity for the installation which includes the design plans and the following documents a Report containing the type of materials utilised b Project as defined in Article 5 of Ministerial De...

Page 11: ... polystyrene elements A then with extreme care remove each of the ceramic elements once you have removed the ceramic indicated with the letter C remove the polystyrene element D followed by the ceramic E To unpack the metalcolor casing follow the instructions illustrated in Figure 2 firstly open the box and remove the 2 polystyrene elements E and remove the side panel F Proceed to remove the polys...

Page 12: ...Page 12 e manutenzione Figura 1 E C B A A D Figura 2 E E F G G ...

Page 13: ...e indications in Figure 6 that is by slightly bending the tabs until the ceramic is securely fastened Continue the procedure by mounting ceramics 6 7 8 and 9 using the assembly logic described above Figure 1 Lastly mount the ceramic 10 remove the tank cover as indicated in Figure 7 and slightly loosen by one turn the 3 screws indicated with the letter C Next remove support D by lifting it and pull...

Page 14: ...Page 14 e manutenzione Figura 4 2 Figura 7 C Figura 6 5 Figura 5 3 4 ...

Page 15: ...ed Next mount the ceramic 5 following the indications in Figure 6 that is by slightly bending the tabs until the ceramic is securely fastened Continue the procedure by mounting ceramics 6 the metal side panel 7 and the ceramic 9 Figure 1 Lastly mount the ceramic 10 remove the tank cover as indicated in Figure 7 and slightly loosen by one turn the 3 screws indicated with the letter C Next remove su...

Page 16: ...Page 16 e manutenzione Figura 2 A B 1 A Figura 3 A 1 A Figura 4 2 Figura 5 3 ...

Page 17: ...Page 17 e manutenzione Figura 8 D 10 Figura 9 C 10 Figura 6 5 Figura 7 C ...

Page 18: ...sembled symmetrically with the generator the connection to the flue outlet in this case must be carried out as indicated in figures 1 2 3 Pay particular attention when assembling the smoke outlet pipe as it must be no less 15 mm from the control panel Figure 2 if the pipe is positioned close to the panel it would certainly damage the control panel damage which is not covered by warranty Installed ...

Page 19: ...the screws removed earlier Figure 5 Pay particular attention when assembling the smoke outlet pipe as it must be no less 10 mm from the control panel Figure 6 if the pipe is positioned close to the panel it would certainly damage the control panel damage which is not covered by warranty Installed in this way the hot air can be channelled to the back using only the RH side vent It is strictly forbi...

Page 20: ...e smoke detected by the smoke probe reaches a temperature over 60 C The fan can be set to any of 6 speed levels displayed by the 6 bars progressively coming on on the display 7 when the appliance is on the ventilation cannot be switched off 5 1 DESCRIPTION OF CONTROL PANEL AND REAR PANEL 5 1 DESCRIPTION OF THE CONTROL PANEL All controls and indicators are presented here below 1 Appliance on off an...

Page 21: ...motion the light must come on 5 2 DAY AND TIME SETTING The appliance must be energised and the rear switch in position 1 The words START or WORK or OFF could be present on the display 7 To set the time and the day of the week carry out the procedures described below Press button 6 once the word DATA will appear on the display followed by the words illustrated in the figure on the left To set the d...

Page 22: ...in the figure below on the right the program for Monday has been copied to Tuesday Press button 2 again to copy the program to Wednesday Thursday In the programming menu if you wish for example to edit the programming for Sunday press button 3 and or 4 to go to Sunday and then press button 1 If the second on off cycle is not required simply set the ON2 time as 00 00 and the OFF2 time as 00 00 The ...

Page 23: ...s called LEVEL 1 If you are using pellets with an out of standard incidence of residues after combustion in the brazier alternative levels may be selected LEVEL 2 this program increases the smoke suction unit speed acceleration program Level 2 increases air delivery to the burner which promotes the combustion of tightly compacted pellets this program reduces combustion efficiency LEVEL 0 when usin...

Page 24: ...suitable distance It is strictly prohibited to disconnect the appliance from the electrical power mains while it is in operation 6 1 SWITCHING ON THE APPLIANCE Before using the appliance check that all the movable parts are in place also remove any labels and stickers from the glass to avoid having permanent traces remain on the surfaces Always ensure that the brazier is clean and seated correctly...

Page 25: ...F phases repeatedly press button 6 on the appliance s control panel until the word THERMOCOMFORT appears on the display 7 followed by the words Thermocomfort Off To activate the Thermocomfort function simply press the button 3 on the appliance s control panel Thermocomfort On To return to the original operating function simply press the button 6 again on the appliance s control panel At the end of...

Page 26: ...r for long periods of time AUTO 3 program the Thermocomfort ON symbol is steady on the display of the appliance In program AUTO 3 the room temperature thermostat is enabled The remote control adjusts the ventilation and combustion automatically in relation to the target room temperature set in display area 8R The desired room temperature is displayed in area 8R You can vary the desired room temper...

Page 27: ... parts of the radio control Do not store the radio control in very hot environments High temperatures could shorten the life of the electronic devices damage the batteries and deform or even melt plastic parts Do not store the radio control in cold environments When it heats up when it returns to normal operating temperature humidity could form inside it and damage the electronic circuits Do not d...

Page 28: ...16 metres using 1 vent up to 8 metres using 2 vents up to 6 metres using 3 vents up to 4 metres using 4 vents The appliance is supplied with both fittings already mounted The air can be ducted from the front or the back of the appliance by acting on the 2 levers indicated in Figure 1 and Figure 2 to completely or partially channel the air to the right rear pipe act on lever A Figure 1 to completel...

Page 29: ...RATING WITH THE ADDITIONAL ROOM TEMPERATURE THERMOSTAT not supplied An additional room temperature thermostat can be installed by connecting it to the board as indicated in Figure 1 The operating principle is as follows When the room temperature reaches the set temperature only during the WORK phase the thermostat closes the contact and the appliance shifts to the minimum room fan speed and minimu...

Page 30: ...thermal hysteresis that is not less than 2 C 8 CLEANING AND MAINTENANCE 8 1 FOREWORD Before commencing any operation disconnect the appliance from the electric power outlet Your pellet appliance needs maintenance it requires a few simple basic but frequent control and general cleaning operations This will guarantee consistently smooth operation and optimal efficiency of the appliance In the event ...

Page 31: ...ier as shown in figure 5A The front profiles the glass elements and the casing must be cleaned when the appliance has cooled with a special soft microfibre cloth for delicate surfaces such as lenses glasses monitors etc and water CAUTION a daily deposit of soot and combustion residues on the glass is quite normal It is normal for the ash to fall to the floor when the door is opened CAUTION after c...

Page 32: ...Page 32 e manutenzione Figura 2 B B A V Figura 3 V1 ...

Page 33: ...Page 33 e manutenzione Figura 4A Figura 4 B ...

Page 34: ...Page 34 e manutenzione Figura 4 C Figura 5 A 1 ...

Page 35: ... Hz 0 3 A OUTPUT 5 5 V 750 but the battery charger must be connected to a 220 240V 50Hz power mains To obtain a total recharge of the batteries they must be charged for at least 5 days lower charge times could reduce the duration and life of the batteries It is completely normal during the battery recharge process for symbols and or lines to appear haphazardly on the display The optimal battery au...

Page 36: ... must be disposed of safely 8 5 REPLACING THE BUFFER BATTERY OF THE CONTROL PANEL Inside the control panel there is a buffer battery type CR 16 32 When the time and programming are not being memorised this malfunction is not considered a defect as it is the result of normal wear consumption replace the battery by removing the 4 screws at the back of the control panel The dead battery must be dispo...

Page 37: ...is not possible the section of the ventilation openings must be enlarged by at least 50 9 2 2 VENTILATION OF THE ADJACENT ROOMS The air flow can also be obtained from an adjacent room as long as the adjacent room is equipped with direct ventilation in compliance with the paragraphs described above only appliances connected to the exhaust pipe are installed in the room that is ventilated the adjace...

Page 38: ...e liner wall directly in contact with the smoke and possibly also insulation and outer casing wall that may be supplied by different manufacturers or by the same manufacturer Relining operation involving the installation of a specific pipe in an existing shaft even if newly constructed made of non combustible materials free from obstructions and for single use 9 3 2 FLUE OUTLET FLUE SYSTEM COMPONE...

Page 39: ...st meets the wall It is strictly forbidden to apply mesh to the end of the outlet tube as it could cause the appliance to malfunction LEGENDA KEY COMIGNOLO E CANNA FUMARIA SECONDO NORMA UNI 10683 CHIMNEY CAP AND FLUE OUTLET ACCORDING TO UNI 10683 STANDARD 2 metri MAX 2 metres MAX Pendenza non inferiore al 5 Minimum slope 5 Ispezione INSPECTION Tutte le tubazioni devono essere termicamente isolate ...

Page 40: ...on 1 the appliance will begin a new start up phase It is mandatory to empty and clean the brazier before repeating the START phase pellets emptied from the brazier must not be fed into the tank AL OP this occurs when the smoke outlet is partially blocked To reset the alarm the power to the appliance must be switched off then on by turning the switch 0 1 at the back of the appliance Before restarti...

Page 41: ... Motoriduttore spia verde Ratio motor green LED Termostato riarmo Reset thermostat Aspiratore fumi 220V 50 Hz Smoke suction unit 220V 50 Hz Ventilatore Ambiente Room fan Resistenza Heater Fusibile 3 15 A Fuse 3 15 A 220 V 50 Hz Comandi Pannello Termostato Amb Termostato 95 Crono modem 9 8 6 7 5 Aspiratore fumi 220 V 50 Hz Motoriduttore spia verde Ventilatore Ambiente 5 1 2 1 3 2 4 Fusibile 3 15 A ...

Page 42: ...huts down Display shows the inscription AL T max Once the causes for the overtemperature have been identified and remedied the appliance can be reactivated by unscrewing the plastic cover of the thermostat located at the back of the appliance and pressing the button the appliance temperature must have considerably dropped GLOW PLUG It is activated in the START phase Heats the air to 800 C which as...

Page 43: ...HE PASSAGE OF SMOKE EMPTY THE BURNER AND CLEAN IT UP AS INDICATED IN PARA 8 THEN REMOVE THE TERMINAL AND REPLACE IT WITH A MORE SUITABLE ONE THEN CHECK THE SMOKE EXHAUST AS IT COULD BE DIRTY OR CLOGGED BURNER IS DIRTY EMPTY THE BURNER AND CLEAN IT UP AS INDICATED IN PARA 8 THE DOOR IS NOT FIRMLY CLOSED WORN GASKET CLOSE THE DOOR FIRMLY REPLACE THE GASKET EMPTY THE BURNER AND CLEAN IT UP AS INDICAT...

Page 44: ...E THE HEAT ELSEWHERE SEPARATE THE SPACES THE APPLIANCE SHOULD OPERATE FOR MORE TIME AND WITH MORE POWER THE APPLIANCE IS OFF BUT THERE ARE UNBURNT PELLETS IN THE BRAZIER PELLET TANK IS EMPTY DISPLAY SHOWS THE INSCRIPTION AL PE EMPTY THE BURNER AND CLEAN IT UP AS INDICATED IN PARA 8 THEN FILL UP THE TANK THE PROGRAMMING AND OR TIME DO DOES NOT REMAIN IN THE MEMORY THE BUFFER BATTERY TYPE CR1632 INS...

Page 45: ...9 ROSSA 70015630 BIANCA 70015634 BEIGE 70015019 ROSSA 70015630 BIANCA 70015634 BEIGE 70015663 GRIGIA 70015663 GRIGIA 70015668 BIANCO 70015669 BEIGE 70015670 EASY 70015667 ROSSO 70015668 BIANCO 70015669 BEIGE 70015670 EASY 70015633 BIANCA 70015637 BEIGE 70015665 GRIGIA 70015632 BIANCA 70015636 BEIGE 70015664 GRIGIA 70015021 ROSSA 70015632 BIANCA 70015636 BEIGE 70015664 GRIGIA Dorica 1 ...

Page 46: ...70015021 ROSSA 70015632 BIANCA 70015636 BEIGE 70015640 NERA 70015021 ROSSA 70015632 BIANCA 70015636 BEIGE 70015640 NERA 70015022 ROSSA 70015633 BIANCA 70015637 BEIGE 70015641 NERA 70015020 ROSSA 70015631 BIANCA 70015635 BEIGE 70015639 NERA 70015020 ROSSA 70015631 BIANCA 70015635 BEIGE 70015639 NERA 70015020 ROSSA 70015631 BIANCA 70015635 BEIGE 70015639 NERA 70015020 ROSSA 70015631 BIANCA 70015635 ...

Page 47: ...zione porta 70015112 Cerniera 70015112 Cerniera 60011215 Dado ribassato 60004195 Dado 60004195 Dado 60011215 Dado ribassato 70015120 70012276 Bracere 70012277 Catalizzatore 70015680 Scheda potenza completa 70015023 Retro 60010344 Termostao 95 c 70015110 Supporto vetro canalizz 70015025 Vetro canalizzazione 70015688 Coperchio completo 60010831 60010831 60013774 Coppia guide 70015026 Vetro Dorica 3 ...

Page 48: ...ne 13 4 SPARE PARTS DORICA PAG 4 5 COM N O 60005254 60013559 70015673 Aspiratore completo 70015973 60011428 60010188 60010188 60010149 Coclea 60013555 Portasonda 60013339 Aspiratore 60013342 Dorica 4 60011630 Condensatore ...

Page 49: ...560 Batteria CR1632 60006637 70013584 Radiocomando comp 60011787 Batteria ricaricabile 60011788 Caricabatterie 60013118 Supporto a muro 60013119 Coperchio batterie 60013139 70015088 Pannello completo 60011656 Interruttore 0 1 60011750 Termostato riarmo 125 c Dorica 5 60010185 Boccola 70010402 Gruppo alimentazione pellet 60011428 Guarnizione 70010325 Flangia 70010234 Bussola fissaggio motore 600117...

Page 50: ...70015630 BIANCA 70015634 BEIGE 70015019 ROSSA 70015630 BIANCA 70015634 BEIGE 70015663 GRIGIA 70015663 GRIGIA 70015668 BIANCO 70015669 BEIGE 70015670 EASY 70015667 ROSSO 70015668 BIANCO 70015669 BEIGE 70015670 EASY 70015633 BIANCA 70015637 BEIGE 70015665 GRIGIA 70015632 BIANCA 70015636 BEIGE 70015664 GRIGIA 70015021 ROSSA 70015632 BIANCA 70015636 BEIGE 70015664 GRIGIA Dorica plus 1 ...

Page 51: ...70015021 ROSSA 70015632 BIANCA 70015636 BEIGE 70015640 NERA 70015021 ROSSA 70015632 BIANCA 70015636 BEIGE 70015640 NERA 70015022 ROSSA 70015633 BIANCA 70015637 BEIGE 70015641 NERA 70015020 ROSSA 70015631 BIANCA 70015635 BEIGE 70015639 NERA 70015020 ROSSA 70015631 BIANCA 70015635 BEIGE 70015639 NERA 70015020 ROSSA 70015631 BIANCA 70015635 BEIGE 70015639 NERA 70015020 ROSSA 70015631 BIANCA 70015635 ...

Page 52: ...ta 70015112 Cerniera 70015112 Cerniera 60011215 Dado ribassato 60004195 Dado 60004195 Dado 60011215 Dado ribassato 70015120 70012276 Bracere 70012277 Catalizzatore 70015680 Scheda potenza completa 70015023 Retro 70015983 60010344 Termostao 95 c 70015110 Supporto vetro canalizz 70015025 Vetro canalizzazione 70015688 Coperchio completo 60010831 60010831 60013774 Coppia guide 70015026 Vetro Dorica pl...

Page 53: ...PARTS DORICA PLUS PAG 4 5 COM N O 60005254 60013559 70015983 70015986 70015673 Aspiratore completo 70015973 60011428 60010188 60010188 60010149 Coclea 60013555 Portasonda 60013339 Aspiratore 60013342 Dorica plus 4 60011630 Condensatore ...

Page 54: ...60013560 Batteria CR1632 60006637 70013584 Radiocomando comp 60011787 Batteria ricaricabile 60011788 Caricabatterie 60013118 Supporto a muro 60013119 Coperchio batterie 60013139 70015088 Pannello completo 60011656 Interruttore 0 1 60011750 Termostato riarmo 125 c Dorica plus 5 60010185 Boccola 70010402 Gruppo alimentazione pellet 60011428 Guarnizione 70010325 Flangia 70010234 Bussola fissaggio mot...

Page 55: ...porta Door gasket Scheda potenza completa Complete power board Aspiratore completo Complete suction unit Coclea Screw feeder Portasonda Probe holder Aspiratore Suction unit Condensatore Condenser Radiocomando comp Complete remote control Batteria ricaricabile Rechargeable battery Caricabatteria Battery charger Supporto a muro Wall mount Coperchio batterie Battery cover Pannello comandi Control pan...

Page 56: ...Page 56 e manutenzione NOTES ...

Reviews: