Thermasol ThermaTouch TT7 Series, Installation Manual
The Thermasol ThermaTouch TT7 Series offers a luxurious showering experience with its innovative features. To ensure proper installation and optimal performance, it is essential to refer to the comprehensive Installation Manual. This manual can be easily downloaded for free from manualshive.com, providing step-by-step instructions for hassle-free setup.
Share
Download


Reviews:
No comments
Related manuals for ThermaTouch TT7 Series
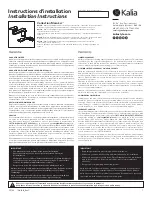
Moroka BF1916
Brand: Kalia Pages: 4

Pulsify S 24382 0 Series
Brand: Hans Grohe Pages: 2

CEE ART SP B0780
Brand: Samo Pages: 24

Pulsify 105 1jet 24130700
Brand: Hans Grohe Pages: 6

RAINSHOWER
Brand: Grohe Pages: 34

SUPERNOVA SDOP Series
Brand: RAVAK Pages: 16

Raindance Rainfall
Brand: Hans Grohe Pages: 48

C1-1020
Brand: Lefroy Brooks Pages: 10

E940330-BLV
Brand: Jacob Delafon Pages: 4

Napoleon
Brand: Dorf Pages: 2

YG20012R
Brand: Toto Pages: 24

AXOR Arco 11605 Series
Brand: Hans Grohe Pages: 12

AXOR Mondaro 18033 Series
Brand: Hans Grohe Pages: 18

Finoris 110 76210 Series
Brand: Hans Grohe Pages: 56

MINORCA
Brand: identités Pages: 13

AXOR PuraVida 28557 Series
Brand: Hans Grohe Pages: 16

AXOR Montreux 16510 1 Series
Brand: Hans Grohe Pages: 28

Axor Citterio M 34714001
Brand: Hans Grohe Pages: 32


