

Quick Start Guide
-
Forum
TM
(IMA-240)
Getting to Know Your Sound System
Make note of the location of the speakers and ceiling sensor in your classroom. Ensure that you have unpacked and charged your battery-powered
microphones. Keep this guide handy for future reference.
a
a
a
v
.
a
a a
a
.
a
.
.
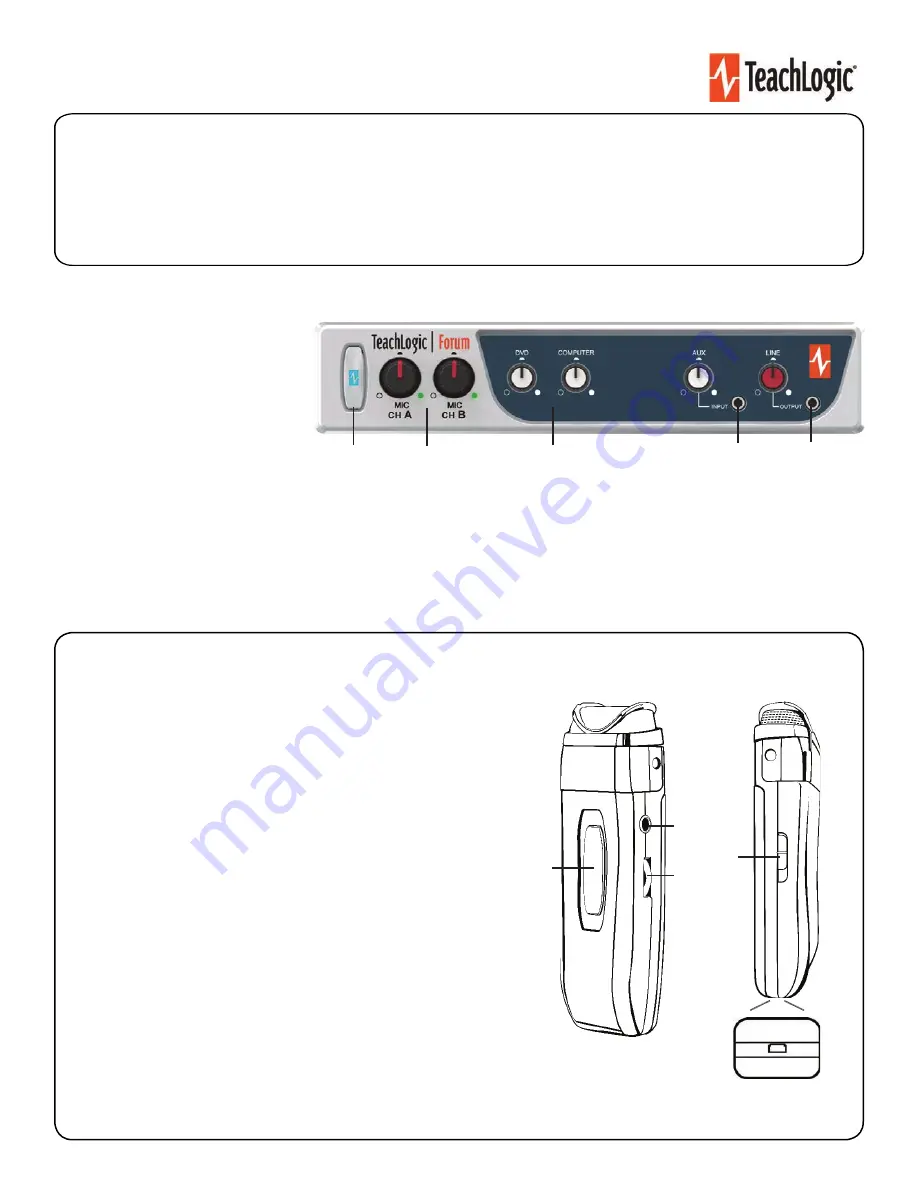
Power & Status Indicator
• Red: OFF
• Blue: ON and activated
• Amber: STANDBY
.
Mic Channels/Volume Controls
• Green light: Microphone on and connected to
channel
• No light: Microphone is not on; and/or sensor is not plugged
in; and/or sensor is not receiving mic signal
3.
Input Volume Controls
• Controls volume of connected external
devices
(1)
STEP 2. USING THE SAPPHIRE
TM
PENDANT MICROPHONE
1.
Power button and status indicator
• Solid Red: OFF
• Solid Blue: ON
• Solid Purple: External devices quieted
2.
Mute microphone:
Briefl
y press power button once (flashing blue).
Unmute microphone:
Briefly press power button again (solid blue).
3.
Aux Input:
Connects devices (like music player) to microphone.
4.
Priority Switch:
Changes volume of devices plugged into amp inputs
• To increase/decrease volume level: Slide button up or down
• To immediately quiet volume level of external device: Push button once
• To resume volume level of external device: Push button again
5.
Gain Switch
• There are 3 levels to adjust your microphone volume
: Normal | -3 dB | -6 dB
• You may
increase/
reduce the volume
to accommodate changes in room noise.
•
6.
USB Charge Port
(found on the bottom of the mic)
1
2
3
4
6
5
1
4.
Input Jack and Volume Control
• Connects additional external devices to the system (ex. iPhone or mp3 player)
5.
Output Volume Control and Output Jack
• Connects devices for recording lessons
•
Use one input + one output to connect to computer for video conferencing
3
4
5
STEP
1
. USING THE
AMPLIFIER
2


