TEAC DVD-ROM Installation Guide
—
1—
The TEAC DVD-ROM drive is designed for use in IBM PC or compatible
computers. It features a 5.25-inch standard chassis and a powered tray for convenient
disc loading.
The TEAC DVD-ROM drive can read or play DVD and CD discs in a variety of
formats, including DVD-ROM, DVD-video, DVD-R, DVD-RW, DVD+RW, CD-
ROM, CD audio, CD-R, CD-RW, Video CD and more.
DVD discs supported have a playback capacity of 4.7GB to 17GB.
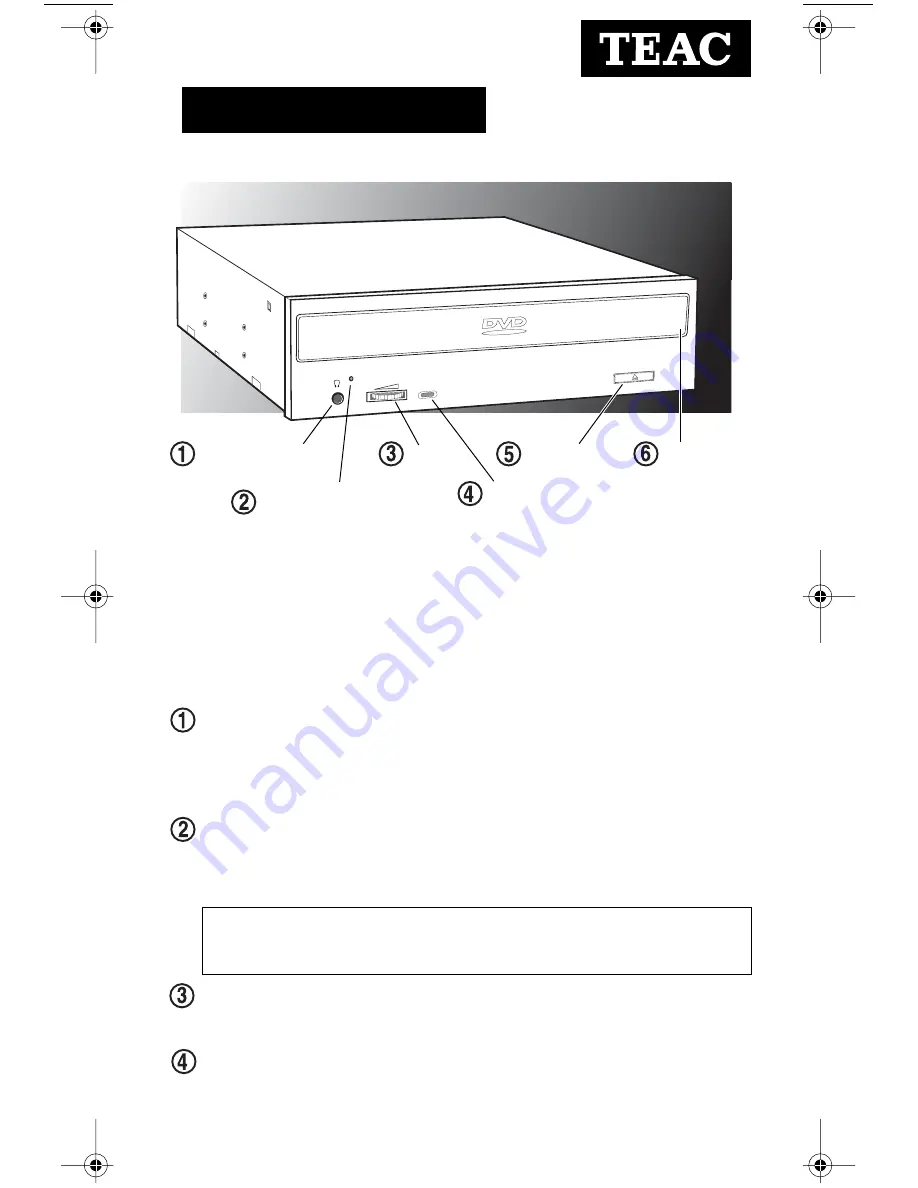
headphone jack:
You can connect headphones or external speakers (that use a
3.5 mm stereo mini-plug) to this jack to listen to audio from a DVD or CD being
played in your TEAC DVD-ROM drive. For external speakers, connect a stereo
adapter to split the output into separate cables for the left and right channels.
Such adapters convert a male stereo mini-jack to two female phono jacks.
emergency eject mechanism:
If the eject button fails, first
turn off the power
to the computer
and then insert a small, thin rod (such as a straightened paper
clip) into the emergency eject mechanism opening and press firmly to eject the
disc.
volume control:
Use the volume control to adjust audio volume. Turning the
control to the right increases the volume. (Lower the volume before you play a
disc to protect your hearing and speakers.)
LED indicator:
The DVD-ROM drive features an LED indicator light on the
front panel. Various operations are indicated as per the following table:
disc tray
headphone jack
volume
eject button
LED indicator
emergency eject
mechanism opening
16X DVD-ROM Drive
control
Installation Guide
Caution:
Do not use the emergency eject mechanism when the LED
indicator is lit or flashing or you may seriously damage the disc or
the DVD-ROM drive.
®
DV-516E
DVD 16X_short.fm Page 1 Wednesday, November 27, 2002 11:44 AM