background image

IF YOU NEED ADDITIONAL ASSISTANCE WITH SETUP OR OPERATING AFTER 
READING OWNER’S MANUAL, PLEASE CALL TOLL FREE 

1-800-968-3429

, OR 

VISIT OUR WEB SITE AT 

http://www.SylvaniaConsumerElectronics.com

TO RECEIVE DIGITAL/ANALOG SIGNAL, YOU MUST CONNECT ANTENNA.

INSTRUCCIONES EN ESPAÑOL INCLUIDAS

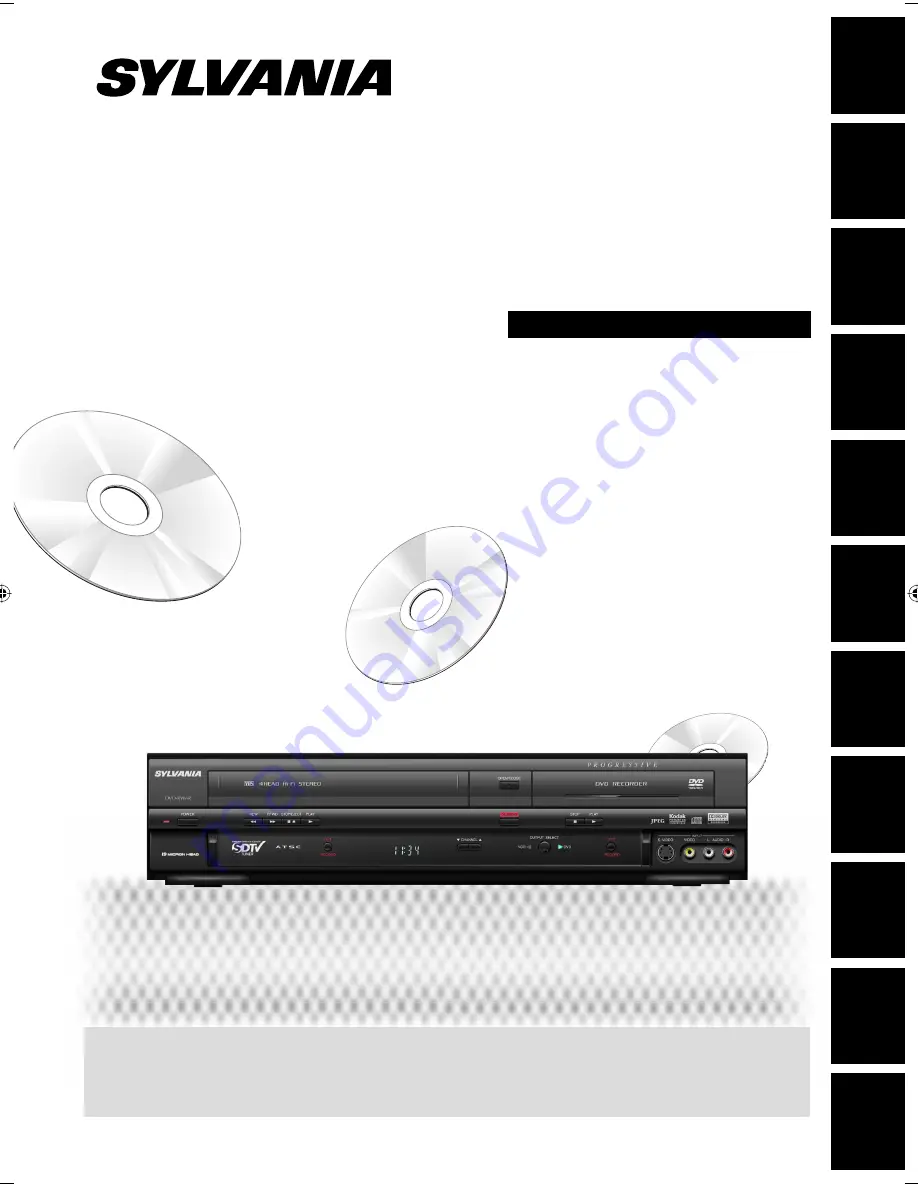
Digital Video Disc Recorder with

Video Cassette Recorder

Owner’s Manual

ZV450SL8

© 2007 Funai Electric Co., Ltd.

Disc 

Management

Recording

Playback

Introduction

Connections

Basic Setup

Editing

Function 

Setup

VCR Functions

Others

Español

E9H10UD.indd   1

E9H10UD.indd   1

2007/02/19   14:55:06

2007/02/19   14:55:06

Summary of Contents for ZV450SL8

Page 1: ...www SylvaniaConsumerElectronics com TO RECEIVE DIGITAL ANALOG SIGNAL YOU MUST CONNECT ANTENNA INSTRUCCIONES EN ESPA OL INCLUIDAS DigitalVideoDiscRecorderwith VideoCassetteRecorder Owner s Manual ZV450...

Page 2: ...ful interference to radio or television reception which can be determined by turning the equipment off and on the user is encouraged to try to correct the interference by one or more of the following...

Page 3: ...ptacles and the point where they exit from the appliance 13 Outdoor Antenna Grounding If an outside antenna or cable system is connected to the product be sure the antenna or cable system is grounded...

Page 4: ...t If there are questions regarding your TV set compatibility with this 525p DVD player please contact our customer service center For safety and optimum performance of this unit Install the unit in a...

Page 5: ...ideo heads after a long period of use or the usage of rental or worn tapes can cause this problem If a streaky or snowy picture appears during playback the video heads in your unit may need to be clea...

Page 6: ...ack INFORMATION ON PLAYBACK 54 Structure of Disc Contents 54 BASIC PLAYBACK 55 Direct Playback 55 Playback from the Title List 56 Playing Back an Audio CD and a CD RW R with MP3 JPEG Files 57 Using th...

Page 7: ...esired point on a disc by title chapter track or time Virtual surround system You can enjoy stereophonic space through your existing 2 channel stereo system Playing back MP3 JPEG Kodak Picture CD file...

Page 8: ...yers Finalization necessary DVD menu will be created Playable only on VR mode compatible unit Finalization recommended Playable on most DVD players Finalization necessary DVD menu will be created Avai...

Page 9: ...n the right on your DVD If these region symbols do not appear on your DVD you cannot play back the DVD in this unit The number inside the globe refers to region of the world A DVD labeled for a specif...

Page 10: ...t mode is selected 13 DUBBING button DVD VCR Press to start VCR to DVD DVD to VCR duplication which you set in the main menu 14 CHANNEL L K buttons DVD VCR Press to change the channel up and down 15 D...

Page 11: ...e 6 VIDEO IN jack L1 DVD VCR Use to connect external device with a RCA video cable 7 AUDIO IN jacks L1 DVD VCR Use to connect external device with a RCA audio cable 8 S VIDEO IN jack L1 DVD VCR Use to...

Page 12: ...h the environment in mind Always dispose of batteries in accordance with applicable laws and regulations If the remote control does not operate correctly or if the operating range becomes reduced repl...

Page 13: ...ode Press to change the channel up and down VCR mode Press to change the channel up and down Press to adjust the tracking during playback or in slow motion of the cassette tape While playback is in st...

Page 14: ...e tape is in the unit Appears during duplication process VCR Appears when this unit is in VCR output mode Appears when the timer recording is proceeding in VCR Appears when VCR is in the timer recordi...

Page 15: ...rd of this unit and your TV to the AC outlet 1 Disconnect the power cord of your TV from the AC outlet 2 Disconnect RF coaxial cable from antenna input jack of your TV 3 Connect cables to the unit Mak...

Page 16: ...you set the RF modulator s channel 3 4 switch For more details follow the manual supplied with the RF modulator Note The quality of picture may become poor if this unit is connected to an RF modulator...

Page 17: ...are as follows RF coaxial cable x 1 RCA audio cable L R x 1 RCA video cable x 1 Please purchase the rest of the necessary cables at your local store Note to CATV system installer This reminder is pro...

Page 18: ...ables used in this connection are as follows RCA audio cable L R x 1 RCA video cable x 1 Please purchase the rest of the necessary cables at your local store Make one of the following connections depe...

Page 19: ...plied cables used in this connection are as follows RCA audio cable L R x 1 Please purchase the rest of the necessary cables at your local store MD deck or DAT deck can be also connected through coaxi...

Page 20: ...VCR indicator is lit Note You cannot switch to another mode DVD or VCR during in the timer standby mode THEVCR DVDRECORDERSWITCHING 1 2 3 4 5 6 7 8 9 0 POWER OPEN CLOSE DISPLAY VCR DVD CH PLAY STOP RE...

Page 21: ...paper sales accounted for 80 percent of the industry s advertising revenues DTV 6 1 1 5 5 2 5 3 5 4 1 Broadcast station 2 Program title max 2 lines displayed 3 Audio language Other is displayed when t...

Page 22: ...playback 6 Each icon means Search Audio Subtitle Angle Repeat Marker Noise Reduction Zoom Surround 7 Indicates an operation status Disc Information Menu DVD mode 0 00 00 HIFI SP 12 00AM 4 5 3 2 1 This...

Page 23: ...ay the main menu Then use K L to select a menu and press ENTER to display the menu These menus provide entries to all main functions of the unit 1 General Setting To go to general setting menu 2 Timer...

Page 24: ...ivable channels in the area where this TV is used will be memorized Cable When using basic cable The channels broadcasted in CATV are automatically scanned and memorized Auto Presetting Now CH 1 To ca...

Page 25: ...Scan The unit will start getting channels available in your area To cancel the auto channel preset during scanning Press RETURN or SETUP to cancel 5 When scanning is over press SETUP to exit To cycle...

Page 26: ...continue Adding Deleting Channels CHANNEL SETTING You may want to add or delete TV channels if your channel lineup changes or if you no longer watch some channels Adding channels is only available for...

Page 27: ...that you can continue adding or deleting channels 7 Press SETUP to exit DIGITAL 5 Select the channel number to delete Only the major channel is displayed in Manual Preset menu The channel number displ...

Page 28: ...er is off Leave it off for several minutes to give this unit time to set the clock Auto Clock Setting This unit can set the time and date automatically by referring to a PBS station Make sure The ante...

Page 29: ...ight saving time ON MAR NOV has been selected as the default 1 Press SETUP and use K L to select General Setting then press ENTER 2 Use K L to select Clock then press ENTER Clock menu will appear 3 Us...

Page 30: ...up to 5 to 7 seconds to switch the digital TV channels In digital TV broadcasting 2 or more channels called minor channels are simultaneously broadcast on one main channel called major channel About d...

Page 31: ...ed Note The timer recording for digital TV cannot record any audio language other than English AUDIO does not control external device audio When there is only one audio channel on the broadcast pressi...

Page 32: ...nalog TV program available in second audio or stereo you have to select either Stereo or SAP in Channel menu beforehand Refer to the following table to check an appropriate setting Selected audio Broa...

Page 33: ...OSD Language Screen Saver FL Dimmer CC Style V Chip CC Style DTV CC User Setting Font Size Font Style Edge Type Font Opacity Font Color Back Opacity Back Color DTV CC OFF Service1 Service2 Service3 Se...

Page 34: ...Back Opacity Back Color 5 Use K L to select ON then press ENTER General Setting Playback Display Video Recording Clock Channel Reset All OSD Language Screen Saver FL Dimmer CC Style V Chip CC Style D...

Page 35: ...Back Opacity Back Color Edge Type None Raised Depressed Uniform L Shadow R Shadow Font Opacity Font opacity of the displayed caption can be switched as below General Setting Playback Display Video Re...

Page 36: ...o select Format Mode then press ENTER DVD Menu Format Finalize Start Format Mode 5 Use K L to select Video mode or VR mode then press ENTER 6 Press SETUP to exit 7 Insert a brand new disc Formatting w...

Page 37: ...ON Delete All Playlist Start Format Mode Selection menu will appear and prompt you to confirm 5 Use K L to select Yes then press ENTER Formatting will start If you want to cancel formatting select No...

Page 38: ...Aspect Ratio for Video Mode Recording You can set aspect ratio for video mode recording 1 Press SETUP and use K L to select General Setting then press ENTER 2 Use K L to select Recording then press E...

Page 39: ...e protected This operation may take awhile to be completed To prevent accidental recording editing or erasing the titles you can protect them from DVD Menu Note To cancel the disc protect When you ins...

Page 40: ...Aspect Ratio Video mode Dubbing Mode Make Recording Compatible Auto Finalize Disc Full End of Timer Rec Disc Full ON OFF General Setting Playback Display Video Recording Clock Channel Reset All Auto C...

Page 41: ...s operation may take awhile to be completed 5 Finalizing is completed You will need to finalize discs to play back on other DVD players Finalizing may take several minutes up to an hour Since the proc...

Page 42: ...ressed finalizing is continued You cannot cancel finalizing DVD R once it has started Note Finalizing a disc in video mode automatically creates a DVD menu Even after DVD RW in VR mode is finalized yo...

Page 43: ...only be made on CPRM compatible DVD RW formatted in VR mode and CPRM recordings can only be played back on DVD players that are specifically compatible with CPRM Making discs playable in other DVD pla...

Page 44: ...REC SPEED to select a recording speed Refer to Recording Speed on page 43 for DVD SP 2 00 5 Press DTV TV to select analog TV or digital TV then use CH K L or the Number buttons to select a desired cha...

Page 45: ...recording When the unit clock has not been set the space for a date and time of title names will be blank When you record a TV program onto video mode DVD RW or DVD R you have to select the TV channe...

Page 46: ...he programmed channel for timer recording 2 minutes before the programmed starting time and the recording in progress for VCR will be canceled UNLESS their recording channels are the same If their rec...

Page 47: ...ess TIMER PROG or SETUP When 2 or more programs are overlapped Timer program overlapped appears and the overlapped program will be displayed in blue To correct the timer program refer to Checking canc...

Page 48: ...0AM 1 00AM DTV125 1 New Program Each error number means E1 22 E37 39 Recording error other than below E35 PCA full 1 E23 24 Unrecordable disc E36 Already finalized video format disc E25 28 Copy prohib...

Page 49: ...will appear momentarily around the start point as the unit attempts to record Please insert a recordable disc If a cassette tape with an erase protection tab is not in the cassette compartment or ther...

Page 50: ...ll Progressive TV Aspect Select Video Select Video L1 Rear L2 Front 6 Use K L to select the input jack type to connect then press ENTER If you want to use VIDEO IN jack select Video In If you want to...

Page 51: ...use the input jacks on the front of this unit Select L2 by using INPUT SELECT or CH K L You can also select L1 or L2 by using the Number buttons For L1 press 0 0 1 For L2 press 0 0 2 4 Press REC SPEE...

Page 52: ...e DVD RW R or the cassette tape Refer to pages 44 and 93 Make sure Insert a recordable disc and a cassette tape with an erase protection tab Note for recording to a cassette tape The cassette tape s e...

Page 53: ...Make Recording Compatible Dubbing Mode VCR DVD DVD VCR 5 Press SETUP to exit Press DVD 6 Press PLAY B Then press PAUSE F at the point you wish to start recording 7 Press VCR Make sure to select a rec...

Page 54: ...ck 2 track 3 track 4 track 5 MP3 JPEG folder 1 folder 2 file 1 file 2 file 3 file 4 file 5 Title Divided contents of a DVD video disc Roughly corresponds to a story title in short stories Chapter Divi...

Page 55: ...ray It may take awhile to load the disc completely 4 Press PLAY B to start playback If you are playing back a DVD video a menu may appear Refer to Using the Title Disc Menu on page 58 5 Press STOP C o...

Page 56: ...Title Delete Add To Playlist Playback will start 6 Press STOP C once to stop playback temporarily Refer to Resume Playback on page 59 To eject the disc press OPEN CLOSE A to open the disc tray then r...

Page 57: ...ill start When selecting folder The files in the folder will appear Use K L to select the file or folder you want to play back then press ENTER Press PLAY B ENTER or B to move to any lower hierarchies...

Page 58: ...is a service to convert photographs taken by a conventional film camera into digital data and write the data on a CD You can enjoy picture images on the TV set by playing back the Picture CDs For deta...

Page 59: ...ayback will resume from the point at which it stopped last You can resume playback at the same point even if you turn off the unit To cancel the resume playback and start playing back the disc from th...

Page 60: ...l audio connection When using digital audio connection COAXIAL the LPCM sound 2 channel will be output Step by Step Playback Press DVD first 1 During playback press PAUSE F Playback will be paused and...

Page 61: ...hese are displayed excluding the current zoom rate Zoom area will be displayed 4 Use K L B to select a desired zoom position then press ENTER Zoom playback will start This feature allows you to assign...

Page 62: ...r the search playback will start automatically Title Chapter Search Note In search mode display total numbers of each search contents title chapter time are shown as a denominator 1 5 1 5 0 01 00 1 23...

Page 63: ...5 0 01 00 1 23 45 DVD Video e g audio CD 1 5 CD 0 00 15 0 05 00 The number next to will be highlighted To move to the number next to press B When time search is not available and time counter are not...

Page 64: ...atedly 1 Use K L to select A B then press ENTER 2 Press ENTER at the desired starting point A 3 Press ENTER at the desired ending point B Track The current track or file will be played back repeatedly...

Page 65: ...TUP in stop mode 2 Use K L to select CD Playback Mode then press ENTER CD Playback Mode menu will appear 3 Use K L to select Program Play then press ENTER 4 Use K L to select a desired track then pres...

Page 66: ...and video as you prefer depending on the contents of the disc you are playing back When playing back a DVD video recorded with 2 or more soundtracks these are often in different languages you can swi...

Page 67: ...rmation should be on the disc case if the disc contains multi angle scenes Press DVD first 1 During playback press DISPLAY 2 Use B to select then press ENTER 1 5 1 5 DVD 0 01 00 1 23 45 Video Angle ic...

Page 68: ...RN to exit the title list Edit the recorded disc You will find editing discs is easy This unit offers convenient edit functions which are possible only with DVD RW R You can edit the following from a...

Page 69: ...The Full Recorded disc The Full Recorded disc Delete The Full Recorded disc After the disc is fully recorded DVD RW DVD R When a title is deleted from DVD RW in VR mode the recordable disc space will...

Page 70: ...ER Title List 1 2 JAN 1 07 12 00AM CH10 LP 12 00PM 2 00 00 JAN 1 07 CH10 LP 4 5 6 1 2 3 ORG Play From Start Edit Title Delete Add To Playlist 4 Use K L to select Yes then press ENTER Title List 1 2 JA...

Page 71: ...K L to select Yes then press ENTER Title List 1 2 JAN 1 07 12 00AM CH10 LP 12 00AM 2 00 00 JAN 1 07 CH10 LP 4 5 6 1 3 2 ORG Create a Playlist Yes No The title is added to playlist 5 Press RETURN or S...

Page 72: ...Yes No Are you sure will appear Use K L to select Yes and then press ENTER DVD Menu Format Finalize Disc Protect OFF ON Delete All Playlist Delete entire play list Yes No Are you sure Yes No Playlist...

Page 73: ...his operation may take awhile to be completed You can put a name on the disc and change it from this menu 1 Press DVD first In stop mode press TOP MENU Title list original or playlist will appear For...

Page 74: ...e letters press CLEAR repeatedly Press and hold CLEAR to delete all letters Use s B to move the cursor to the left and right You can enter up to 30 letters Note Undefined letters in a title name are s...

Page 75: ...ep 4 the chapter mark will be deleted e g Add Edit Chapter Mark Add Yes No JAN 1 07 12 00AM CH10 LP 1 Chapter 2 3 ORG 1 25 47 A new chapter mark will be added 6 Press RETURN 7 Press RETURN again and t...

Page 76: ...e SKIP H G REV E FWD D PLAY B and PAUSE F again to move to the end point and press ENTER Edit Scene Delete Start End Preview Delete JAN 1 07 12 00AM CH10 LP 1 15 00 1 PL The cursor will move to Previe...

Page 77: ...n press ENTER Edit Scene Delete Are you sure Yes No JAN 1 07 12 00AM CH10 LP 1 40 03 1 PL The part of the title is deleted 6 Press RETURN and then RETURN or STOP C to exit Data will be written onto th...

Page 78: ...12 00AM CH10 LP 1 25 47 1 PL The title will be divided into 2 new titles Both title names are identical 7 Press RETURN or STOP C to exit Data will be written onto the disc momentarily Writing to Disc...

Page 79: ...ENTER Edit Title Combining 1 2 JAN 31 07 11 00PM CH8 LP 11 00PM 0 30 00 JAN 31 07 CH8 LP PL 1 1 2 4 5 6 2 3 Combine selected titles Yes No The 2 titles will combine into a single title Title List 1 2...

Page 80: ...title in the original list 4 Press RETURN and then RETURN or STOP C to exit Data will be written onto the disc momentarily This operation may take awhile to be completed To protect a whole disc VR mo...

Page 81: ...TURN or STOP C to exit Data will be written onto the disc momentarily This operation may take awhile to be completed For titles in video mode DVD RW you can set or edit chapter at every time interval...

Page 82: ...Set the language for audio Subtitle Language page 87 OFF English French Spanish Other Set the language for subtitles Angle Icon page 87 ON OFF Set whether to display the angle icon or not Still Mode...

Page 83: ...ratio of your TV Select Video page 50 L1 Rear Video In S Video In Set the video input type for the external input L2 Front Video In S Video In Recording Auto Chapter page 38 OFF 5 minutes 10 minutes 1...

Page 84: ...udio Language Subtitle Language Angle Icon Still Mode Submenu will appear 4 Refer 1 to 7 on pages 85 to 87 and set the selected item 5 When you finish with the setting press SETUP to exit 1 2 3 4 5 6...

Page 85: ...Language Subtitle Language Angle Icon Still Mode Parental Lock All 8 7 6 5 4 3 2 1 Change Password Yes No General Setting Playback Display Video Recording Clock Channel Reset All Parental Lock Audio...

Page 86: ...is compatible with 96kHz PCM select 96kHz 96kHz sound will be output Note When playing back disc with copyright protection Even if you select 96kHz the sound will be down sampled at 48kHz C Dolby Digi...

Page 87: ...om the disc menu if it is available Press CLEAR to erase numbers entered incorrectly 6 Angle Icon Default ON Set to ON to show the angle icon during the playback Use K L to select a setting then press...

Page 88: ...u will appear 4 Refer to 1 to 5 on page 89 and set the selected item For 4 refer to pages 33 35 5 When you finish with setting press SETUP to exit 1 2 3 4 5 6 7 8 9 0 POWER OPEN CLOSE DISPLAY VCR DVD...

Page 89: ...ou have not set the password first use the Number buttons to set the access password then press ENTER The number you entered will be stored as the access password General Setting Playback Display Vide...

Page 90: ...Refer 1 to 2 on page 91 and set the selected item For 3 refer to Connection to an External Device on page 50 5 When you finish with the setting press SETUP to exit Video SETUPS 1 2 3 4 5 6 7 8 9 0 PO...

Page 91: ...our setting will be activated Note If your TV is compatible with progressive scan 525p 480p you are recommended to use the component video cable commercially available to connect this unit to the TV R...

Page 92: ...splay Video Recording Clock Channel Reset All Reset to factory defauit Yes No Are you sure Yes No Your setting in recording will be initialized Reset All SETUPS Note The settings listed below will rem...

Page 93: ...ess VCR first Before recording make sure The appropriate external input position L1 L2 to which your external tuner is connected is selected by pressing INPUT SELECT There is a cassette tape with an e...

Page 94: ...n stop mode and the DVD keeps the current mode Unlike a timer recording you can perform the following operations during the one touch timer recording Turning off the power One touch timer recording wi...

Page 95: ...e the picture on TV screen during playback still mode Press PAUSE F Each time you press the button the picture will be forwarded by one frame If the picture begins to vibrate vertically during the sti...

Page 96: ...amplifier is correct When the unit is in pause mode or in slow motion playback mode sound is not output This is not a malfunction When the unit is in fast forward or fast reverse mode sound is not out...

Page 97: ...fter recording pages 41 42 The disc does not start playback from the beginning Resume playback was activated page 59 Press STOP C twice You have inserted a disc whose title menu or DVD menu automatica...

Page 98: ...After that press OPEN CLOSE A to take out the disc The disc canceled during the repairing process MAY NOT work V C R Picture noise appears Head cleaning for VCR may be necessary Refer to Auto head cl...

Page 99: ...cording Error This disc is protected and not recordable You are trying to record on to the protected disc which is set in DVD Menu menu Release the disc protect setting in DVD Menu menu page 39 Record...

Page 100: ...e box It depends on your connection configurations For more details please kindly contact your cable satellite provider Can I connect this unit directly to a TV which only has an antenna in jack using...

Page 101: ...apanese 5647 Javanese 5669 Kannada 5760 Kashmiri 5765 Kazakh 5757 Kinyarwanda 6469 Kirghiz 5771 Kirundi 6460 Korean 5761 Kurdish 5767 Laothian 5861 Latin 5847 Latvian Lettish 5868 Lingala 5860 Lithuan...

Page 102: ...iles You can copy MP3 files on CD RW R from the computer and play back the files on this unit PCM pulse code modulation The most common system of encoding digital audio found on CD and DAT Excellent q...

Page 103: ...frequency synthesized tuning system Channel coverage ATSC NTSC Terrestrial CATV VHF 2 13 UHF 14 69 2 13 A W W 1 W 94 analog W 1 W 84 A 5 A1 5A Terminals Front Audio input RCA jack x 2 2V rms input imp...

Page 104: ...n el modo VR Se recomienda finalizar Se puede reproducir en la mayor a de los reproductores de DVD Es necesario finalizar se crear el men de DVD Discos reproducibles Tipo de disco DVD VIDEO CD DA CD R...

Page 105: ...IN VIDEO OUT DVD VCR AUDIO IN L R VIDEO IN o ANT IN parte trasera de este aparato antena de VHF UHF cable coaxial de RF parte trasera de su televisor cable de audio RCA cable de video RCA empresa de T...

Page 106: ...en ser grabados s lo una vez El disco DVD RW pueden ser grabados y borrados muchas veces 2 Para seleccionar la velocidad de grabaci n presione REC SPEED SP 2 00 Buena Deficiente 18 min 36 min 72 min 1...

Page 107: ...e grabaci n ESPA OL Reproducci n Grabaci n con Temporizador 2H 2 00 Fcha ENE 02 CH DTV125 1 DVD Empieza Termina GRAB a Vel 2H 2H 2 00 Fcha ENE 02 CH DTV125 1 DVD Empieza Termina GRAB a Vel 2H 12 00AM...

Page 108: ...OR MODELS FUNAI CORP AND ITS REPRESENTATIVES OR AGENTS SHALL IN NO EVENT BE LIABLE FOR ANY GENERAL INDIRECT OR CONSEQUENTIAL DAMAGES ARISING OUT OF OR OCCASIONED BY THE USE OF OR THE INABILITY TO USE...

Page 109: ...isc properly Verbatim DVD R 8x DVD RW 2x JVC DVD RW 4x Maxell DVD R 8x 16x Performance of any other discs are not guaranteed The number inside the globe refers to region of the world This unit can pla...

Page 110: ...2 00 AM 6 Press STOP C to stop recording Use K L to select the type of broadcasting signal then press ENTER The unit will start getting channels available in your area Initial Setting Channel Preset M...

Reviews: