background image

IF YOU NEED ADDITIONAL ASSISTANCE WITH SETUP OR OPERATING AFTER 
READING OWNER’S MANUAL, PLEASE CALL TOLL FREE 

1-800-968-3429

, OR 

VISIT OUR WEB SITE AT 

http://www.SylvaniaConsumerElectronics.com

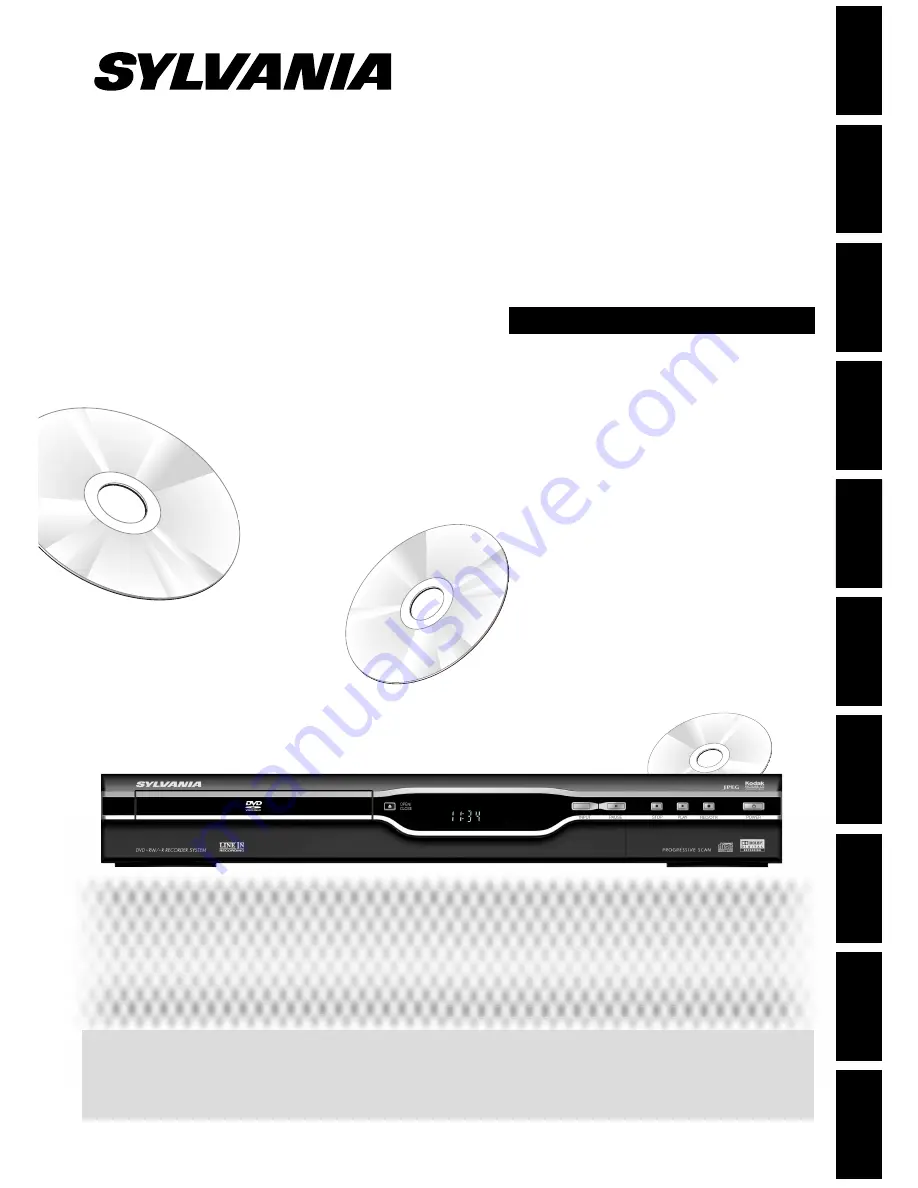
THIS UNIT HAS NO TUNER SYSTEM, YOU MUST CONNECT TO EXTERNAL TUNER.

INSTRUCCIONES EN ESPAÑOL INCLUIDAS

Disc 

Management

Recording

Playback

Introduction

Connections

Basic Setup

Editing

Function Setup

Others

Español

Digital Video Disc Recorder

Owner’s Manual

ZC320SL8B

© 2007 Funai Electric Co., Ltd.

Summary of Contents for ZC320SL8B

Page 1: ...WEB SITE AT http www SylvaniaConsumerElectronics com THIS UNIT HAS NO TUNER SYSTEM YOU MUST CONNECT TO EXTERNAL TUNER INSTRUCCIONES EN ESPAÑOL INCLUIDAS Disc Management Recording Playback Introduction Connections Basic Setup Editing Function Setup Others Español DigitalVideoDiscRecorder Owner s Manual ZC320SL8B 2007 Funai Electric Co Ltd ...

Page 2: ...ul interference to radio or television reception which can be determined by turning the equipment off and on the user is encouraged to try to correct the interference by one or more of the following measures 1 Reorient or relocate the receiving antenna 2 Increase the separation between the equipment and receiver 3 Connect the equipment into an outlet on a circuit different from that to which the r...

Page 3: ...tlet only one way This is a safety feature If you are unable to insert the plug fully into the outlet try reversing the plug If the plug should still fail to fit contact your electrician to replace your obsolete outlet Do not defeat the safety purpose of the polarized plug 12 Power Cord Protection Power supply cords should be routed so that they are not likely to be walked on or pinched by items p...

Page 4: ...definition output If there are questions regarding your TV set compatibility with this 525p DVD player please contact our customer service center For safety and optimum performance of this unit Install the unit in a horizontal and stable position Do not place anything directly on top of the unit Do not place the unit directly on top of the TV Shield it from direct sunlight and keep it away from de...

Page 5: ... discs so that fingerprints and dust do not adhere to the surfaces of the discs Always store the disc in its protective case when it is not used Kodak Picture CD COMPATIBLE is a trademark of Eastman Kodak Company 2007 Funai Electric Co Ltd All rights reserved No part of this manual may be reproduced copied transmitted disseminated transcribed downloaded or stored in any storage medium in any form ...

Page 6: ...yback 42 Playback from the Title List 43 Playing Back an Audio CD and a CD RW R with MP3 JPEG Files 44 Using the Title Disc Menu 45 Pause 45 SPECIAL PLAYBACK 46 Resume Playback 46 Fast Forward Fast Reverse Playback 46 Skipping TV Commercials During Playback 46 Rapid Playback 47 Step by Step Playback 47 Slow Forward Slow Reverse Playback 47 Zoom 48 Marker Setting 48 SEARCH 49 Title Chapter Search 4...

Page 7: ...u want to watch You can easily find the part you want to watch using the search function Search for a desired point on a disc by title chapter track or time Virtual surround system You can enjoy stereophonic space through your existing 2 channel stereo system Playing back MP3 JPEG Kodak Picture CD files You can enjoy MP3 JPEG Kodak Picture CD files which are recorded on CD RW R Playback Available ...

Page 8: ...ayers Finalization necessary DVD menu will be created Playable only on VR mode compatible unit Finalization recommended Playable on most DVD players Finalization necessary DVD menu will be created Available Features Recording Features Record TV programs Reuse by deleting the current contents Record 16 9 size pictures Record copy once programs Create chapters at fixed intervals auto chapter Editing...

Page 9: ...right on your DVD If these region symbols do not appear on your DVD you cannot play back the DVD in this unit The number inside the globe refers to region of the world A DVD labeled for a specific region can only play back on the unit with the same region code The following discs will not play back on this unit CD ROM Compact Disc Interactive CD I Video Single Disc VSD DVD ROM DVD audio Unfinalize...

Page 10: ...art a recording Press repeatedly to start one touch timer recording 8 POWER y ybutton Press to turn the unit on and off If timer programmings have been set press to set the unit in timer standby mode 9 AUDIO input jacks L2 Use to connect external device with a RCA audio cable 10 VIDEO input jack L2 Use to connect external device with a RCA video cable 11 S VIDEO input jack L2 Use to connect the S ...

Page 11: ...igital decoder or other device with a digital audio coaxial input jack with a digital audio coaxial cable 6 S VIDEO OUT jack Use to connect the S video input of a TV monitor AV receiver or other device with an S video cable 7 AUDIO OUT jacks Use to connect a TV monitor AV receiver or other device with a RCA audio cable 8 S VIDEO IN jack L1 Use to connect the S video output of external device with ...

Page 12: ...hould always be disposed of with the environment in mind Always dispose of batteries in accordance with applicable laws and regulations If the remote control does not operate correctly or if the operating range becomes reduced replace batteries with new ones When necessary to replace batteries in the remote control always replace both batteries with new ones Never mix battery types or use new and ...

Page 13: ... 0 8 button During playback press to play back in a slightly faster slower while keeping the audio quality just as normal playback 13 REC OTR button Press once to start a recording Press repeatedly to start the one touch timer recording 14 OPEN CLOSE A button Press to open or close the disc tray 15 INPUT SELECT button Press to select the appropriate input 16 AUDIO button Press to display the audio...

Page 14: ...ming or OTR has been set and is proceeding Flashes when all timer recordings have been finished Appears during recording process Flashes when a recording pauses Appears when a disc is in this unit 4 Displays the following Elapsed playback time Current title chapter track file number Recording time remaining time Clock Selected external input position Remaining time for one touch timer recording Fr...

Page 15: ...tional Electrical Code which provides guidelines for proper grounding in particular specifying that the cable ground shall be connected to the grounding system of the building as close to the point of cable entry as possible ANT IN VHF UHF antenna RF coaxial cable Cable TV company or rear of your TV disconnect Disconnect 2 OUT IN rear of your TV external tuner ANT IN AUDIO IN L R VIDEO IN AUDIO OU...

Page 16: ...elect Video Select Video L1 Rear L2 Front 6 Use K L to select the input jack type to connect then press ENTER If you want to use VIDEO IN jack select Video In If you want to use S VIDEO IN jack select S Video In General Setting Playback Display Video Recording Clock Reset All Progressive TV Aspect Select Video Select Video L1 Rear L2 Front L2 Front Video In S Video In 7 Press SETUP to exit NB090 D...

Page 17: ...witch the input selector on your TV to an appropriate external input channel Press a button on the TV s original remote control that selects an external input channel until the DVD recorder s opening picture appears Check your TV owner s manual for details To set progressive scan mode refer to page 78 This unit is compatible with the progressive scan system The feature provides you the higher qual...

Page 18: ...coded audio connect to a Dolby Digital decoder Stream Connecting to an MD deck or DAT deck PCM If not connected to any external devices PCM To complete these settings refer to page 73 this unit Note The audio source on a disc in a Dolby Digital multi channel surround format cannot be recorded as digital sound by an MD or DAT deck By connecting this unit to a Dolby Digital decoder you can enjoy hig...

Page 19: ...this manual only one disc type is indicated as an example This unit uses the following on screen displays and menus to guide you to the easy operations The on screen displays give you the information on the loaded disc the disc file in playback etc The menus allow you to change the various kinds of settings for playing back recording or editing to suite your preference On Screen Display Menu GUIDE...

Page 20: ...use K L to select a menu and press ENTER to display the menu These menus provide entries to all main functions of the unit 1 General Setting To go to general setting menu 2 Timer Programming To program a timer recording 3 Title List To call up the title list 4 DVD Menu To set up the DVD setting 5 CD Playback Mode To set up the CD playback setting CD Playback Mode is available only when an audio CD...

Page 21: ... K L to select your desired language then press ENTER to set language Initial Setting OSD Language English Français Español 3 Press ENTER to activate Clock Setting Initial Setting Clock Setting 4 Proceed to step 4 in Clock Setting on page 22 NB090 DVD RECORDER POWER ZOOM OPEN CLOSE DISPLAY PLAY REV FWD STOP REC OTR SKIP SKIP PAUSE MENU LIST TOP MENU AUDIO SETUP X1 3 0 8 ENTER CM SKIP REC SPEED TIM...

Page 22: ...deo Recording Clock Reset All Clock Setting JAN 01 2007 MON 12 00 AM Your setting will be activated The clock start counting when you press ENTER 5 Press SETUP to exit Note Your clock setting will be lost if either there is a power failure or this unit has been unplugged for more than 30 seconds For setting the day year hour and minute the Number buttons can also be used You can set the built in c...

Page 23: ...select Format then press ENTER DVD Menu Format Finalize 4 Use K L to select Format Mode then press ENTER DVD Menu Format Finalize Start Format Mode 5 Use K L to select Video mode or VR mode then press ENTER 6 Press SETUP to exit 7 Insert a brand new disc Formatting will start Formatting 90 8 Formatting is completed 100 is indicated Note The recording format setting is effective only for DVD RW You...

Page 24: ...de Selection menu will appear and prompt you to confirm 5 Use K L to select Yes then press ENTER Formatting will start If you want to cancel formatting select No DVD Menu Format Finalize Disc Protect OFF ON Delete All Playlist Start Format Mode Are you sure Yes No 6 Formatting is completed 100 is indicated Formatting 100 Note When you reformat the disc the contents of the disc are erased For DVD R...

Page 25: ...ated depending on the remaining time of the disc Setting Aspect Ratio for Video Mode Recording You can set aspect ratio for video mode recording 1 Press SETUP and use K L to select General Setting then press ENTER 2 Use K L to select Recording then press ENTER Recording menu will appear 3 Use K L to select Aspect Ratio Video mode then press ENTER 4 Use K L to select your desired setting then press...

Page 26: ...ile to be completed To prevent accidental recording editing or erasing the titles you can protect them from DVD Menu Note To cancel the disc protect When you insert a disc protected with this unit Disc Protect ON OFF will appear instead of OFF ON DVD Menu Format Finalize Disc Protect ON OFF Delete All Playlist To release the protect for the disc select Yes at step 4 NB090 DVD RECORDER POWER ZOOM O...

Page 27: ...Setting Playback Display Video Recording Clock Reset All Auto Chapter Auto Finalize Aspect Ratio Video mode Replace Disc Menu Auto Finalize Disc Full End of Timer Rec Disc Full ON OFF General Setting Playback Display Video Recording Clock Reset All Auto Chapter Auto Finalize Aspect Ratio Video mode Replace Disc Menu Auto Finalize Disc Full End of Timer Rec End of Timer Rec ON OFF Your setting will...

Page 28: ...eted 5 Finalizing is completed You will need to finalize discs to play back on other DVD players Finalizing may take several minutes up to an hour Since the process of the finalization fills empty space of the disc a shorter recording period on the disc will require a longer time period for finalization Do not unplug the power cord during finalization NB090 DVD RECORDER POWER ZOOM OPEN CLOSE DISPL...

Page 29: ...n its process If No is selected and ENTER or RETURN is pressed finalizing is continued You cannot cancel finalizing DVD R once it has started Note Finalizing a disc in video mode automatically creates a DVD menu Even after DVD RW in VR mode is finalized you can still record or edit After you finalize DVD RW in video mode or DVD R you cannot edit or record anything else on that disc If you insert a...

Page 30: ...y be made on CPRM compatible DVD RW formatted in VR mode and CPRM recordings can only be played back on DVD players that are specifically compatible with CPRM Making discs playable in other DVD players Finalize For DVD RW R it is necessary to finalize the disc after recording in order to play back the disc on other DVD players Refer to pages 27 29 When video mode DVD RW or DVD R are finalized a DV...

Page 31: ...ss STOP C to exit the title list 4 Press REC SPEED to select a recording speed Refer to Recording Speed on page 30 SP 2 00 5 Press INPUT SELECT to select the appropriate external input position L1 L2 to which your external tuner is connected Then select the desired channel to record on the external tuner Follow the steps to record TV programs from an external tuner This unit has no tuner system so...

Page 32: ...me press STOP C Note When you press REC OTR recording starts immediately and continues until the disc is full or you stop recording When the unit clock has not been set the space for a date and time of title names will be blank You cannot change the recording speed during the recording pause mode You can change a channel to be recorded during the recording pause mode Note for one touch timer recor...

Page 33: ...ng Display Timer Programming 1 1 MON JAN 01 10 00AM 2H 1 00 JAN 2 07 12 00 AM L1 SP Date Start End L1 L2 JAN 02 12 00AM 1 00AM L1 New Program 1 5 3 4 2 1 Title of a timer program Contains date time channel recording speed of the program 2 Current date and time 3 Recording speed and length of the recording 4 Timer program list 5 Total number of pages and current page 2 pages maximum You can program...

Page 34: ...aining recordable space of the disc when you select the recording speed Date JAN 02 L1 L2 L1 Speed 2H 2H 1 00 Start 12 00AM End 1 00AM 7 Press ENTER when all items are entered Your program setting will be stored To set another program repeat steps 2 to 7 To exit press TIMER PROG or SETUP When 2 or more programs are overlapped Timer program overlapped appears and the overlapped program will be disp...

Page 35: ...e timer standby mode Timer Programming 1 1 TUE JAN 02 10 00AM Date Start End L1 L2 E41 JAN 02 12 00AM 1 00AM L1 New Program Each error number means E1 22 E37 39 Recording error other than below E35 PCA full 1 E23 24 Unrecordable disc E36 Already finalized video format disc E25 28 Copy prohibited program E40 Some portion has not been recorded because of program overlapping Recording did not start a...

Page 36: ...an the current time the recording will start right after you turn the power off The Priority of Overlapped Settings Note for DVD recording When the recording time of 2 programs are overlapped or the end time of a program and the start time of another program is the same the first 2 minutes at the longest of the subsequent program will be cut off If the cut off portion comes up to 3 minute or more ...

Page 37: ...al on how to set the timer Make sure to set the satellite link standby mode when you finish setting 1 Press SETUP 2 Use K L to select Timer Programming then press ENTER 3 Use K L to select Satellite Link then press ENTER Timer Programming Satellite Link Timer Programming 4 Use K L to select the time and recording speed then press ENTER Satellite Link Start Speed 5 00PM 2H To Standby Mode 5 Use K L...

Page 38: ... in Clock Setting on page 22 You cannot set the end time for the satellite link timer recording on this unit Recording picture will be distorted if the copy protection signal is being detected during satellite link timer recording You can record the satellite link by using S video input jacks on the rear panel Refer to page 39 for more information When a regular timer recording and the satellite l...

Page 39: ...tput to this unit use AUDIO L jack of L2 Front After making the connection as described above make sure to select the appropriate video input type by following the steps in SETTINGS FOR THE VIDEO INPUT on page 16 front of this unit rear of this unit IN OUT Y PR CR PB CB L R L R VIDEO IN VIDEO OUT S VIDEO AUDIO IN L1 S VIDEO AUDIOOUT COAXIAL COMPONENT VIDEO OUT DIGITAL AUDIO OUTPUT PCM BITSTREAM UT...

Page 40: ...n the front of this unit Select L2 by using INPUT SELECT or INPUT 5 Press REC SPEED to select a recording speed Refer to Recording Speed on page 30 6 Press REC OTR on the unit to start recording 7 Start playback on the external device to record from 8 Press STOP C on the unit to stop recording This operation may take awhile to be completed Before recording from an external device refer to the inst...

Page 41: ...ter 2 chapter 1 chapter 2 chapter 3 audio CD track 1 track 2 track 3 track 4 track 5 MP3 JPEG folder 1 folder 2 file 1 file 2 file 3 file 4 file 5 Title Divided contents of a DVD video disc Roughly corresponds to a story title in short stories Chapter Divided contents of a title This corresponds to a chapter in a story Track Divided contents of an audio CD Folder Divided contents of a MP3 JPEG dat...

Page 42: ...pletely 4 Press PLAY B to start playback If you are playing back a DVD video a menu may appear Refer to Using the Title Disc Menu on page 45 5 Press STOP C once to stop playback temporarily Refer to Resume Playback on page 46 Note Some discs may start playback automatically NB090 DVD RECORDER POWER ZOOM OPEN CLOSE DISPLAY PLAY REV FWD STOP REC OTR SKIP SKIP PAUSE MENU LIST TOP MENU AUDIO SETUP X1 ...

Page 43: ...CH10 SP 12 00AM 0 12 00 JAN 1 07 CH10 SP 4 5 6 1 3 2 ORG Play From Start Edit Title Delete Add To Playlist Playback will start 6 Press STOP C once to stop playback temporarily Refer to Resume Playback on page 46 To eject the disc press OPEN CLOSE A to open the disc tray then remove the disc before turning off the unit Note Some discs may start playback automatically You can also start playback by ...

Page 44: ...der The files in the folder will appear Use K L to select the file or folder you want to play back then press ENTER Press PLAY B ENTER or B to move to any lower hierarchies Press s or RETURN to move back to the previous hierarchy Hints for audio CD tracks and MP3 JPEG files Folders are shown by Audio CD tracks are shown by MP3 files are shown by 3 JPEG files are shown by The system can recognize u...

Page 45: ...th MP3 JPEG Files cont d The Picture CD is a service to convert photographs taken by a conventional film camera into digital data and write the data on a CD You can enjoy picture images on the TV set by playing back the Picture CDs For details of Kodak Picture CD contact a shop that provides developing service of Kodak Inc 1 Press TOP MENU Picture CD 1 2 4 5 6 1 2 3 Image 1 To exit the Picture CD ...

Page 46: ...sume playback at the same point even if you turn off the unit To cancel the resume playback and start playing back the disc from the beginning press STOP C again while the playback is stopped Resume Playback Note For MP3 JPEG files playback will resume from the beginning of the file at which playback was stopped Note Forward reverse speed will be indicated with icons as follows forward approx spee...

Page 47: ...Audio is PCM during rapid playback mode except when using digital audio connection When using digital audio connection COAXIAL the LPCM sound 2 channel will be output Step by Step Playback 1 During playback press PAUSE F Playback will be paused and sound will be muted 2 Press SKIP i repeatedly Playback will advance one frame at a time when you press SKIP i with the sound muted To play back step by...

Page 48: ...will be displayed 4 Use K L B to select a desired zoom position then press ENTER Zoom playback will start This feature allows you to assign a specific point on a disc to be called back later 1 During playback press DISPLAY 2 Use B to select then press ENTER within 1 second or wait for 1 second to display the marker list e g DVD video 1 5 1 5 DVD 0 01 00 1 23 45 Video 3 Use K L to select a desired ...

Page 49: ...a desired chapter number to search then press ENTER After the search playback will start automatically Title Chapter Search Note In search mode display total numbers of each search contents title chapter time are shown as a denominator 1 5 1 5 0 01 00 1 23 45 DVD Video total number of titles total number of chapters total time of the title Using SKIP j SKIP i 1 During playback press SKIP i to skip...

Page 50: ...number next to will be highlighted To move to the number next to press B When time search is not available and time counter are not displayed 3 Use K L B or the Number buttons to enter a desired time to search then press ENTER After the search playback will start automatically Note Time search is available only in the same track file or title Time Search SEARCH ...

Page 51: ...current disc will be played back repeatedly A B Desired section can be played back repeatedly 1 Use K L to select A B then press ENTER 2 Press ENTER at the desired starting point A 3 Press ENTER at the desired ending point B Track The current track or file will be played back repeatedly Group The current folder will be played back repeatedly You can play back a disc randomly instead of playing bac...

Page 52: ...ess ENTER CD Playback Mode menu will appear 3 Use K L to select Program Play then press ENTER 4 Use K L to select a desired track then press ENTER or B CD Playback Mode Program Play 0 00 00 Total Repeat this step until you program all the desired tracks 5 Press PLAY B CD Playback Mode Program Play 0 31 07 Total 09 04 10 06 Program playback will start Slide Show You can select the display time betw...

Page 53: ...GUAGE CODE on page 85 You can select the format of audio and video as you prefer depending on the contents of the disc you are playing back When playing back a DVD video recorded with 2 or more soundtracks these are often in different languages you can switch them during playback When playing back audio CD you can switch L R stereo L left or R right 1 During playback press DISPLAY then proceed to ...

Page 54: ...ns multi angle scenes 1 During playback press DISPLAY 2 Use B to select then press ENTER 1 5 1 5 DVD 0 01 00 1 23 45 Video Angle icon appears when a switching camera angle is available Angle will switch each time you press ENTER Note Angle icon does not appear on the TV screen if you set Angle Icon to OFF in Playback menu Refer to page 74 1 During playback press DISPLAY 2 Use B to select then pres...

Page 55: ... playback status of the selected title Press RETURN to exit the title list Edit the recorded disc You will find editing discs is easy This unit offers convenient edit functions which are possible only with DVD RW R discs You can edit the following from a title list Assigning a name to a title Dividing a title Combining titles Adding titles to a playlist Erasing all playlist Setting or releasing th...

Page 56: ...l Recorded disc After the disc is fully recorded DVD RW DVD R When a title is deleted from DVD RW in VR mode the recordable disc space will be increased When the last title is deleted from DVD RW in video mode the recordable space will be increased When a title is deleted from DVD R the recordable space will NOT be increased The deleted title cannot be crea ted the space Once all editings are made...

Page 57: ...1 07 L1 LP 4 5 6 1 2 3 ORG 3 Use K L to select Title Delete then press ENTER Title List 1 2 JAN 1 07 12 00AM L1 LP 12 00PM 2 00 00 JAN 1 07 L1 LP 4 5 6 1 2 3 ORG Play From Start Edit Title Delete Add To Playlist 4 Use K L to select Yes then press ENTER Title List 1 2 JAN 1 07 12 00AM L1 LP 12 00PM 2 00 00 JAN 1 07 L1 LP 4 5 6 1 2 3 ORG Delete this title Yes No After that Are you sure will appear s...

Page 58: ...e List 1 2 JAN 1 07 12 00AM L1 LP 12 00AM 2 00 00 JAN 1 07 L1 LP 4 5 6 1 3 2 ORG Create a Playlist Yes No The title is added to playlist 5 Press RETURN or STOP C to exit Writing on the disc starts It may take awhile to write the data on a disc Note To delete a title from the playlist refer to DELETING TITLES on page 57 To delete all titles in the playlist refer to Erasing All Playlist on page 59 W...

Page 59: ...inalize Disc Protect OFF ON Delete All Playlist Delete entire playlist Yes No Are you sure will appear Use K L to select Yes and then press ENTER DVD Menu Format Finalize Disc Protect OFF ON Delete All Playlist Delete entire play list Yes No Are you sure Yes No Playlist is deleted Writing on the disc starts It may take awhile to write the data on a disc Note Deleting a playlist will not increase t...

Page 60: ...e to be completed You can put a name on the disc and change it from this menu 1 In stop mode press TOP MENU Title list original or playlist will appear For DVD RW VR mode press MENU LIST to switch between Original and Playlist if the disc is recorded in VR mode 2 Use K L s B to select a desired title then press ENTER e g VR mode DVD RW original Title List 1 2 JAN 1 07 12 00AM L1 LP 12 00PM 2 00 00...

Page 61: ...cter set will be changed to the previous input mode automatically To delete letters press CLEAR repeatedly Press and hold CLEAR to delete all letters Use s B to move the cursor to the left and right You can enter up to 30 letters Note Undefined letters in a title name are shown by If you delete them adjoining letters may change to or other Guide to Edit Title Name EDITING DISCS Putting Names on Ti...

Page 62: ...d Edit Chapter Mark Add Yes No JAN 1 07 12 00AM L1 LP 1 Chapter 2 3 ORG 1 25 47 A new chapter mark will be added 6 Press RETURN 7 Press RETURN again and then RETURN or STOP C to exit Data will be written onto the disc momentarily This operation may take awhile to be completed You can put chapter marks in each title Once a chapter is marked you can use it for the chapter search feature Note The max...

Page 63: ...ew Delete JAN 1 07 12 00AM L1 LP 1 00 00 1 PL Then use SKIP H G REV E FWD D PLAY B and PAUSE F again to move to the end point and press ENTER Edit Scene Delete Start End Preview Delete JAN 1 07 12 00AM L1 LP 1 15 00 1 PL The cursor will move to Preview The bar at the bottom of the screen indicates the total and the elapsed time of the title and the area selected for deletion is indicated in red Yo...

Page 64: ... Yes No JAN 1 07 12 00AM L1 LP 1 40 03 1 PL The part of the title is deleted 6 Press RETURN and then RETURN or STOP C to exit Data will be written onto the disc momentarily This operation may take awhile to be completed Note When a scene is deleted from an original the scene on the playlist will also be deleted You cannot select Scene Delete if the number of chapter marks in the original or playli...

Page 65: ... to select Yes then press ENTER Edit Title Dividing Yes No JAN 1 07 12 00AM L1 LP 1 25 47 1 PL The title will be divided into 2 new titles Both title names are identical 7 Press RETURN or STOP C to exit Data will be written onto the disc momentarily Writing to Disc 90 This operation may take awhile to be completed Playlist You can divide one title into 2 new titles Note You cannot divide a title o...

Page 66: ...07 11 00PM L1 LP 11 00PM 0 30 00 JAN 31 07 L1 LP PL 1 1 2 4 5 6 2 3 Combine selected titles Yes No The 2 titles will combine into a single title Title List 1 2 JAN 1 07 12 00AM L1 LP 12 00PM 2 30 00 JAN 1 07 L1 LP PL 1 4 5 6 2 3 5 Press RETURN or STOP C to exit Data will be written onto the disc momentarily This operation may take awhile to be completed Playlist You can combine 2 titles into a sin...

Page 67: ...Edit Protect OFF ON JAN 1 07 12 00AM L1 LP 1 ORG 1 25 47 will appear on the title in the original list 4 Press RETURN and then RETURN or STOP C to exit Data will be written onto the disc momentarily This operation may take awhile to be completed To protect a whole disc VR mode DVD RW only Select Disc Protect OFF ON from the DVD Menu then select Yes Refer to SETTING A DISC TO PROTECT on page 26 To ...

Page 68: ...n onto the disc momentarily This operation may take awhile to be completed For titles in video mode DVD RW you can set or edit chapter at every time interval You can clear the chapter mark too You can specify the interval of chapter marks for titles last more than 5 minutes Note You cannot select a chapter mark interval that exceeds the length of a title The length of chapters may slightly deviate...

Page 69: ...ream Set the type of sound signal which outputs from the digital audio output jack Disc Menu Language page 73 English French Spanish Other Set the language for disc menu language Audio Language page 73 Original English French Spanish Other Set the language for audio Subtitle Language page 74 OFF English French Spanish Other Set the language for subtitles Angle Icon page 74 ON OFF Set whether to di...

Page 70: ...o Chapter page 25 OFF 5 minutes 10 minutes 15 minutes 30 minutes 60 minutes Insert chapter marks at even time interval Auto Finalize page 27 Disc Full ON OFF Set the unit to finalize the disc automatically End of Timer Rec ON OFF Aspect Ratio Video mode page 25 Auto 4 3 16 9 Set a aspect ratio for video mode recording Clock Clock Setting page 22 Set the clock Reset All page 79 Yes No Set to the de...

Page 71: ...red item then press ENTER 1 2 3 4 5 6 7 Parental Lock Audio Out Disc Menu Language Audio Language Subtitle Language Angle Icon Still Mode Submenu will appear 4 Refer 1 to 7 on pages 72 to 74 and set the selected item 5 When you finish with the setting press SETUP to exit NB090 DVD RECORDER POWER ZOOM OPEN CLOSE DISPLAY PLAY REV FWD STOP REC OTR SKIP SKIP PAUSE MENU LIST TOP MENU AUDIO SETUP X1 3 0...

Page 72: ...ental Lock All 8 7 6 5 4 3 2 1 Change Password Yes No General Setting Playback Display Video Recording Clock Reset All Parental Lock Audio Out Disc Menu Language Audio Language Subtitle Language Angle Icon Still Mode Parental Lock All 8 7 6 5 4 3 2 1 Password Input Yes Your setting will be activated B A password has been set already Use the Number buttons to enter the current password General Sett...

Page 73: ...will be output in 48kHz 96kHz If your amplifier decoder is compatible with 96kHz PCM select 96kHz 96kHz sound will be output Note When playing back disc with copyright protection Even if you select 96kHz the sound will be down sampled at 48kHz C Dolby Digital Default Stream Use K L to select a setting then press ENTER General Setting Playback Display Video Recording Clock Reset All Parental Lock A...

Page 74: ...numbers entered incorrectly 6 Angle Icon Default ON Set to ON to show the angle icon during the playback Use K L to select a setting then press ENTER General Setting Playback Display Video Recording Clock Reset All Parental Lock Audio Out Disc Menu Language Audio Language Subtitle Language Angle Icon Still Mode Angle Icon ON OFF Your setting will be activated 7 Still Mode Default Auto Select Auto ...

Page 75: ...TER 3 Use K L to select a desired item then press ENTER OSD Language Screen Saver FL Dimmer 1 2 3 Selection menu will appear 4 Refer to 1 to 3 on page 76 and set the selected item 5 When you finish with setting press SETUP to exit NB090 DVD RECORDER POWER ZOOM OPEN CLOSE DISPLAY PLAY REV FWD STOP REC OTR SKIP SKIP PAUSE MENU LIST TOP MENU AUDIO SETUP X1 3 0 8 ENTER CM SKIP REC SPEED TIMER PROG RET...

Page 76: ...n on the TV screen Use K L to select a setting then press ENTER General Setting Playback Display Video Recording Clock Reset All OSD Language Screen Saver FL Dimmer Screen Saver OFF 5 minutes 10 minutes 15 minutes 30 minutes Your setting will be activated 3 FL Dimmer Default Bright Set the front panel display brightness Use K L to select a setting then press ENTER General Setting Playback Display ...

Page 77: ...en press ENTER Progressive TV Aspect Select Video 1 2 3 Submenu will appear 4 Refer 1 to 2 on page 78 and set the selected item For 3 refer to Connection to an External Device on page 39 5 When you finish with the setting press SETUP to exit Video SETUPS NB090 DVD RECORDER POWER ZOOM OPEN CLOSE DISPLAY PLAY REV FWD STOP REC OTR SKIP SKIP PAUSE MENU LIST TOP MENU AUDIO SETUP X1 3 0 8 ENTER CM SKIP ...

Page 78: ...progressive scan 525p 480p you are recommended to use the component video cable commercially available to connect this unit to the TV Refer to Method 3 on page 17 If not use the RCA video cable and set the progressive scan to OFF or press and hold SETUP for more than 3 seconds during DVD playback When selecting No or not pressing any buttons on the unit or remote control within 15 seconds at step ...

Page 79: ... Yes No 4 Select Yes again using K L then press ENTER General Setting Playback Display Video Recording Clock Reset All Reset to factory defauit Yes No Are you sure Yes No Your setting in recording will be initialized Reset All SETUPS Note The settings listed below will remain unchanged even after resetting to the factory default Clock setting Channel setting OSD language setting Parental lock sett...

Page 80: ... unit does not have a tuner to receive TV broadcasting You must connect this unit to an external tuner to record TV programs page 15 Sound There is no sound Clean the disc with a cleaning cloth Re connect all connections securely Check if the connecting cord is damaged Check the connections to the amplifier input Check if the input device setting on the amplifier is correct When the unit is in pau...

Page 81: ... to the instruction manual supplied with the disc The language for the sound track cannot be changed The title does not have the multilingual audio tracks The DVD video prohibits the changing of the language for the sound track The subtitle language cannot be changed or turned off Multilingual subtitle are not recorded on the DVD video The angles cannot be changed Multi angles are not recorded on ...

Page 82: ... there is a power failure or unplugging during recording finalizing formatting or editing even after Repairing disappears a repairing process will begin automatically just after turning the unit on again It may take several minutes up to about several hours In a case you intend to cancel the repairing process If you intend to cancel the repairing process press OPEN CLOSE A on the front panel then ...

Page 83: ...Recording Error This disc is protected and not recordable You are trying to record on to the protected disc which is set in DVD Menu menu Release the disc protect setting in DVD Menu menu page 26 Recording Error Disc is full No area for new recording You are trying to record onto the disc which has no space for recording Insert the recordable disc with enough recording space Recording Error You ca...

Page 84: ...r recording channel and leave the external tuner on pages 15 33 36 Can I record one channel while watching another channel using an external tuner It depends on your connection configurations For more details please kindly contact at your local store Can I change the channels on the external tuner using the remote control of this unit No Changing the channels on the external tuner using this unit ...

Page 85: ...e 5647 Javanese 5669 Kannada 5760 Kashmiri 5765 Kazakh 5757 Kinyarwanda 6469 Kirghiz 5771 Kirundi 6460 Korean 5761 Kurdish 5767 Laothian 5861 Latin 5847 Latvian Lettish 5868 Lingala 5860 Lithuanian 5866 Macedonian 5957 Malagasy 5953 Malay 5965 Malayalam 5958 Maltese 5966 Maori 5955 Marathi 5964 Moldavian 5961 Mongolian 5960 Nauru 6047 Nepali 6051 Norwegian 6061 Occitan 6149 Oriya 6164 Oromo Afan 6...

Page 86: ...y back the files on this unit MP3 MPEG audio layer 3 MP3 is a method of compressing files You can copy MP3 files on CD RW R from the computer and play back the files on this unit PCM pulse code modulation The most common system of encoding digital audio found on CD and DAT Excellent quality but requires a lot of data compared to formats such as Dolby Digital and MPEG audio For compatibility with d...

Page 87: ...format 48 kHz Dolby Digital Terminals Front Audio input RCA jack x 2 2V rms input impedance more than 22kΩ Video input RCA jack x 1 1Vp p 75Ω S video input Mini DIN 4 pin x 1 Y 1Vp p 75Ω C 286mVp p 75Ω Rear Audio input RCA jack x 2 2V rms input impedance more than 22kΩ Audio output RCA jack x 2 2V rms output impedance more than 1kΩ Video input RCA jack x 1 1Vp p 75Ω Video output RCA jack x 1 1Vp p...

Page 88: ...e alta densidad de un super audio CD Discos no Reproducibles Los reproductores de DVD con pueden reproducir DVD RW grabados en modo VR Discos grabables y reproducibles Tipo de disco DVD RW DVD R Logotipo Formato Puede formatearse en modo VR o modo de video Formateado automáticamente en modo de video Modo de video Modo VR Tiempo máximo de grabación 480 minutos 12 centímetros 144 minutos 8 centímetr...

Page 89: ...decuado Presione un botón que seleccione un canal externo de entrada en el control remoto original del televisor hasta que aparezca la imagen inicial del grabador de DVD Para obtener detalles consulte el manual del propietario de su televisor Selección de un Canal de Entrada Externo en el Televisor Configuración de la Entrada de Video 1 Presione SETUP y utilice K L para seleccionar Ajuste general ...

Page 90: ...SP 2 00 Buena Deficiente 18 min 36 min 72 min 108 min 144 min 60 min 120 min 240 min 360 min 480 min Discode8cm Discode12cm XP 1H SP 2H LP 4H EP 6H SLP 8H Calidaddelvideo yelsonido Modo de grabación Tiempo de grabación 3 Presione INPUT SELECT para seleccionar la posición adecuada de la entrada externa L1 L2 a la cual está conectado su sintonizador externo Luego seleccione en el sintonizador extern...

Page 91: ...oras de inicio y finalización Seleccione la velocidad de grabación Seleccione la posición adecuada de la entrada externa L1 L2 a la cual está conectado su sintonizador externo NB090 DVD RECORDER POWER ZOOM OPEN CLOSE DISPLAY PLAY REV FWD STOP REC OTR SKIP SKIP PAUSE MENU LIST TOP MENU AUDIO SETUP X1 3 0 8 ENTER CM SKIP REC SPEED TIMER PROG RETURN CLEAR SPACE DEF ABC MNO JKL GHI WXYZ REPEAT TUV PQR...

Page 92: ...OOR MODELS FUNAI CORP AND ITS REPRESENTATIVES OR AGENTS SHALL IN NO EVENT BE LIABLE FOR ANY GENERAL INDIRECT OR CONSEQUENTIAL DAMAGES ARISING OUT OF OR OCCASIONED BY THE USE OF OR THE INABILITY TO USE THIS PRODUCT THIS WARRANTY IS MADE IN LIEU OF ALL OTHER WARRANTIES EXPRESS OR IMPLIED AND OF ALL OTHER LIABILITIES ON THE PART OF FUNAI ALL OTHER WARRANTIES INCLUDING THE WARRANTY OF MERCHANTABILITY ...

Reviews: