background image

COLOR TV/DVD/VCR TRIPLE  COMBO

SRCD223B 

(23 inch)

SRCD227B 

(27 inch)

OWNER’S
MANUAL

As an E

NERGY

 S

TAR


Partner, our company has 

determined that this product meets 
the E

NERGY

 S

TAR

    guidelines for 

energy efficiency. E

NERGY

 S

TAR

    is 

a U.S. registered mark.

®

®

®

If you need additional operating assistance after reading this owner’s
manual, please call

TOLL FREE : 1-800-968-3429.

Please read before using this equipment

INSTRUCCIONES EN ESPAÑOL INCLUIDAS.

This Owner’s Manual is

made of recycled paper.

SUPPLIED ACCESSORIES

Batteries

Remote Control Unit

ACCESSORIES

2 AA Batteries

NE204UD

PART NO.

Owner’s Manual

0EMN02178

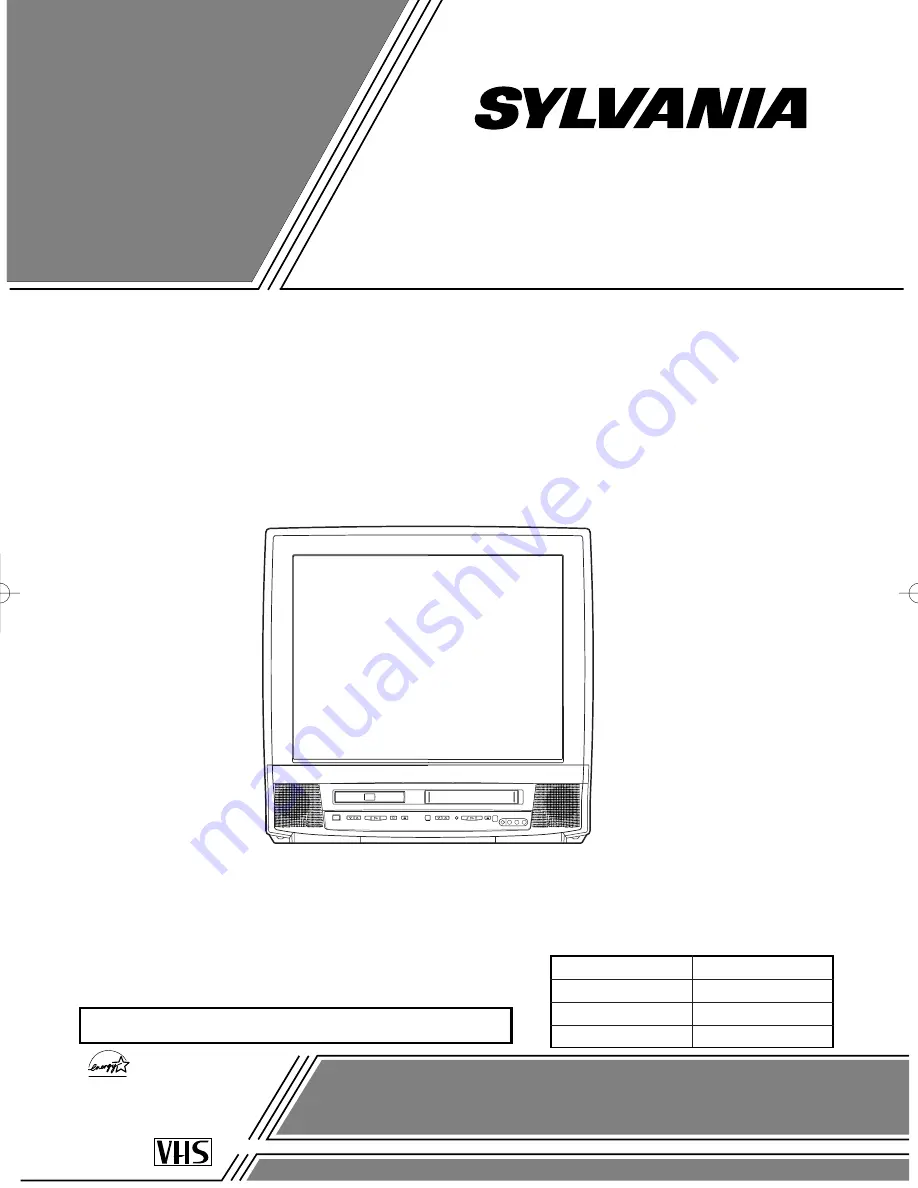
27” MODEL ILLUSTRATED

TD945_955UF(P01-35).QX33  04.7.30  2:17 PM  Page 1

Summary of Contents for SRCD223B, SRCD227B

Page 1: ...RGY STAR is a U S registered mark If you need additional operating assistance after reading this owner s manual please call TOLL FREE 1 800 968 3429 Please read before using this equipment INSTRUCCIONES EN ESPAÑOL INCLUIDAS This Owner s Manual is made of recycled paper SUPPLIED ACCESSORIES Batteries Remote Control Unit ACCESSORIES 2 AA Batteries NE204UD PART NO Owner s Manual 0EMN02178 27 MODEL IL...

Page 2: ...et and the back or bottom are provided for ventilation and to ensure reliable operation of the TV DVD VCR and to protect it from over heating and these openings must not be blocked or cov ered The openings should never be blocked by placing the TV DVD VCR on a bed sofa rug or other similar surface This TV DVD VCR should never be placed near or over a radiator or heat register This TV DVD VCR shoul...

Page 3: ...ring Service Unplug this TV DVD VCR from the wall outlet and refer servicing to qualified service personnel under the following conditions a When the power supply cord or plug is damaged or frayed b If liquid has been spilled or objects have fallen into the TV DVD VCR c If the TV DVD VCR has been exposed to rain or water d If the TV DVD VCR does not operate normally by follow ing the operating ins...

Page 4: ... FCC WARNING This equipment may gener ate or use radio frequency energy Changes or modifications to this equipment may cause harmful interference unless the modifications are expressly approved in the instruction man ual The user could lose the authority to oper ate this equipment if an unauthorized change or modification is made IMPORTANT COPYRIGHT INFORMATION Unauthorized copying broadcasting pu...

Page 5: ...ting a cold room or under conditions of high humidity If a DVD is played in a TV DVD VCR which has moisture it may damage the DVD and TV DVD VCR Therefore when the condensation occurs inside the unit turn the POWER on and allow at least 2 hours for the unit to dry out The serial number of this product may be found on the back of the unit No other TV DVD VCR has the same serial number as yours You ...

Page 6: ...BACK 27 AUTO REPEAT PLAYBACK 27 C SEARCH 28 ZERO RETURN 28 TIME SEARCH 28 INDEX SEARCH 29 C SPECIAL FEATURES 29 REAL TIME TAPE COUNTER 29 AUTO REWIND EJECT 29 C RECORDING 30 NORMAL RECORDING 30 SKIPPING UNWANTED SCENES DURING RECORDING 30 OTR One Touch Recording 31 COPYING A VIDEO CASSETTE Requires a VCR or camcorder 31 C TIMER 32 AUTOMATIC TIMER RECORDING 32 TIMER PROGRAM EXTENSION 33 HINTS FOR A...

Page 7: ... tape speeds SP LP SLP Two different recording tape speeds SP SLP Auto Head Cleaner Automatically cleans video heads as you insert or remove a cassette Zero Return The tape returns to counter of 0 00 00 by rewinding or fast forwarding Still Freeze the picture at any time for close viewing of a particular scene Digital Auto Tracking DTR Automatically adjusts the tracking for each tape you play Rent...

Page 8: ... mode You can select the desired audio language and sound mode if different languages and modes are available on a disc Parental lock You can set the control level to limit playback of discs which may not be suitable for children Automatic detection of discs This player automatically detects if the loaded disc is DVD audio CD or MP3 on disc Playback MP3 disc On screen display Information about the...

Page 9: ... VCR TV VCR P 28 Press to stop the tape motion Press in the Stop mode to remove tape from the TV VCR DVD 17 Remote sensor window 18 HEADPHONE Jack To connect headphone not supplied for personal listening 19 VIDEO input Jack Connect to the video output jack of a video camera or VCR video game REMOTE CONTROL Fig 2 1 POWER Button TV VCR P 15 DVD P 37 Press to turn the power on and off 2 VOLUME X Y Bu...

Page 10: ...u 30 CLEAR Button P 39 Resets a setting 31 MODE Button DVD P 41 Activates program playback or random playback mode 32 SEARCH MODE Button DVD P 39 Press to locate a desired point 33 AUDIO Button DVD P 42 Press to select a desired audio language or sound mode 34 SUBTITLE Button DVD P 42 Press to select a desired subtitle language 35 REPEAT Button DVD P 40 Repeats playback of the current disc title c...

Page 11: ...TV VCR DVD will ONLY record and view the same channel VHF UHF SEPARATE ANTENNAS In some areas it will be necessary to use an outdoor antenna Antenna Cable Connections Continued on the Next Page ANT L AUDIO OUT R COAXIAL 1 ANT IN OUT or VHF UHF Antenna Not supplied VHF UHF Combiner Not supplied Flat twin lead cable UHF Antenna Not supplied VHF Antenna Not supplied From Cable System 75 ohm Coaxial C...

Page 12: ...ed to call the CATV sys tem installer s attention to Article 820 40 of the NEC that provides guidelines for proper ground ing and in particular specifies that the cable ground shall be connected to the grounding sys tem of the building as close to the point of cable entry as practical CONNECTING TO EXTERNAL INPUT JACKS When you watch a program recorded on an another source VCR or video camera use ...

Page 13: ... amplifier equipped with digital input jacks such as MD Deck or DAT Deck NOTES The audio source on a disc in a 5 1 channel Dolby Digital surround format cannot be recorded as digital sound by an MD or DAT deck Be sure to turn off the power to all components in the system before connecting another component Refer to the Owner s Manuals for the components to be connected to the TV DVD VCR Set Dolby ...

Page 14: ... to turn off the power to all components in the system before connecting another component Refer to the Owner s Manuals for the components to be connected to the TV DVD VCR If connected to a receiver with Dolby Digital decoder set DOLBY DIGITAL to ON for audio output in the setup mode See page 45 to set DOLBY DIGITAL to ON Unless connected to a receiver with Dolby Digital decoder set DOLBY DIGITAL...

Page 15: ...owest memorized channel If you want to recall the selected channels you can select the desired channel directly with the remote con trol number buttons or the CHANNEL button K or L TV VCR DELETING OR ADDING CHANNEL The channels you no longer receive or seldom watch can be deleted from the memory Of course you can add the deleted channel into the memory again 1 Select CHANNEL SET UP Press the SETUP...

Page 16: ...utomatically will advance one hour in April then reverse one hour in October When Daylight Saving Time is ON the clock will change automatically as follows First Sunday of April At 2 AM the clock imme diately changes to 3 AM Any timer programming you have set to occur between 2 AM and 3 AM will not record Last Sunday of October At 2 AM the clock immediately changes to 1 AM Make sure Press the POWE...

Page 17: ...ess the Arrow button B 7 Select the minute Press the Arrow button K or L until the desired minute appears Example 40 8 Start the clock Press the SETUP button on the remote control Although seconds are not displayed they begin counting from 00 when you press the SETUP button on the remote control Use this feature to synchronize the clock with the correct time NOTE When unplugging the AC cord or if ...

Page 18: ...Clock signal Auto Clock Setting is not possible Please use Manual Clock Setting on page 17 Press the SETUP button to exit the screen NOTE During Auto Clock CH Search the picture may be distorted This is normal 4 Enter the channel number that contains the Automatic Clock Setting Signal Press the SETUP button on the remote control Press the Arrow button K or L to select SETTING CLOCK Press the ENTER...

Page 19: ...NEL button o or pin the DVD mode you can change the TV channels Even if you turn off the TV DVD VCR in the DVD mode when you turn it on again it will go into the TV VCR mode TV VCR Arrow button s Arrow button B BRIGHT to decrease to increase brightness brightness CONTRAST to decrease to increase contrast contrast COLOR to pale to brilliant TINT to purple to green SHARPNESS to soft to clear PICTURE...

Page 20: ...lays a black box on the TV screen this means that the TV DVD VCR is set to the TEXT mode To clear screen select CAPTION1 CAP TION2 or OFF Make sure TV DVD VCR power must be turned on TV VCR 1 Select CAPTION Press the SETUP button on the remote control Press the Arrow button K or L to point to CAPTION 2 Select your desired caption menu Press the ENTER button until your desired caption menu appears ...

Page 21: ...suitable for children under 14 TV MA Mature audience only V CHIP SET UP SUB RATINGS When you select the ratings of TV Y7 TV PG TV 14 or TV MA you will have the option of selecting sub rating categories 1 Select V CHIP SET UP Press the SETUP button on the remote control Press the Arrow button K or L to select V CHIP SET UP Then press the ENTER button 2 Enter Access code Use the number buttons on th...

Page 22: ...ted under 17 requires accompa nying parent or adult guardian NC 17 No one under 17 admitted X Mature audience only V CHIP SET UP TV RATING B MPAA RATING CHANGE CODE G VIEW PG VIEW PG 13 VIEW B R BLOCK NC 17 BLOCK X BLOCK ACCESS CODE _ _ _ _ 5 Exit the V Chip setting mode Press the SETUP button on the remote control to exit the screen CHANGE ACCESS CODE To change access code follow the steps 1 Sele...

Page 23: ...hile the TV DVD VCR is set in monaural MONO mode HIFI disappears from the TV screen NOTE If you play non HIFI tapes while the TV DVD VCR is set in HIFI HIFI will dis appear from the TV screen and the TV DVD VCR will play automatically in monaural MTS RECORDING MONITOR MODE Type of broadcast Display on STEREO SAP Hi Fi audio track 2 channel Normal audio the TV screen SELECTION L channel R channel t...

Page 24: ... must select the recording mode either TV AUDIO STEREO or SAP when you record a broadcast Refer to MTS RECORDING MONITOR MODE If you select second audio when second audio is not available the TV DVD VCR will record normal audio The TV DVD VCR records automatically MTS broadcasts in HIFI stereo sound unless you select SAP mode recording before you begin recording TV VCR SETUP TIMER PROGRAMMING SETT...

Page 25: ... VCR wait until the tape has warmed to room temperature and the moisture has evaporated Avoid extreme heat high humidity and magnetic fields Do not tamper with the cassette mechanism Do not touch the tape with your fingers INSERTING A CASSETTE Insert the cassette in the direction as shown Push in gently but continuously on the center back of the cassette until it is drawn into the TV DVD VCR The T...

Page 26: ...ed in either a forward or reverse direction by pressing the F FWD or REW button during playback in the SP LP SLP modes NOTE If you press the F FWD or REW button on the front panel in the DVD mode the VCR forward or reverse will start Please press the STOP EJECT button once to stop it twice to eject it 2 Press it again and the TV DVD VCR will now search in super high speed in the LP SLP modes only ...

Page 27: ...h is blank for more than 10 seconds 1 Select USER S SET UP Press the SETUP button on the remote control Press the Arrow button K or L to point to USER S SET UP Then press the ENTER button 2 Select ALL or BLANK Press the Arrow button K or L to point to REPEAT PLAY Press the ENTER button repeatedly until your desired selection ALL or BLANK appears 3 Exit the Repeat Play setting Press the SETUP butto...

Page 28: ...ction will not operate in recording mode This function is not operative when a cassette tape is not inserted in the TV DVD VCR In the example below To watch a program after 2 hour 50 minutes from the present position in either direction 1 Insert a tape 2 Select TIME SEARCH mode Press the SETUP button on the remote control Press the Arrow button K or L to point to TIME SEARCH Then press the ENTER b...

Page 29: ...nning of desired program NOTE Every time an index signal is skipped the number in the program indicator decreases by one 4 After Index Search When the preset program is reached the TV DVD VCR will start playback automatically A video cassette must be inserted in the TV DVD VCR for this function to work The number of Index Searches can be set up to 20 This function will not operate in the recording...

Page 30: ...ted to a cable box or satellite box the TV DVD VCR must be on CH3 or CH4 then the channel to be recorded must be selected on the cable box or satellite box 2 Select the tape speed Press the SPEED button to select the desired tape speed SP SLP 3 Begin recording Press the RECORD button 4 Stop recording Press the STOP button when recording is completed TV VCR NORMAL RECORDING Press the PAUSE button t...

Page 31: ... 2 Select the tape speed Press the SPEED button to select the desired tape speed SP SLP 3 Begin OTR Press the REC OTR button on the TV DVD VCR as many times as needed The recording length will be determined by the number of times you press the REC OTR button Each additional push will increase the recording time by 30 minutes It is set up to 8 hours TV VCR OTR One Touch Recording Push es Display Re...

Page 32: ...ER PROGRAMMING Press the SETUP button on the remote control Confirm TIMER PROGRAM MING is pointed by pressing the Arrow button K And press the ENTER button If you have not yet set the clock MANUAL CLOCK SET appears If so follow stops 3 to 8 on page 17 Then set the timer recording 2 Select your desired program position 1 8 Press the Arrow button K or L to select the desired program position Then pr...

Page 33: ... the SETUP button on the remote control to return to TV mode While recording is in progress 1 Press the POWER button 2 Press the STOP EJECT button on the TV DVD VCR TV VCR 5 Set beginning hour Press the Arrow button K or L until the desired hour appears Example 7 PM for 7 30PM Then press the Arrow button B 6 Set beginning minute Press the Arrow button K or L until the desired minute appears Exampl...

Page 34: ...P Press the SETUP button on the remote control Press the Arrow button K or L to point to USER S SET UP Then press the ENTER button TV VCR 2 Set AUTO RETURN to ON Press the Arrow button K or L to point to AUTO RETURN Press the ENTER button until ON appears 3 Auto Return will begin When all the timer recordings are completed the TV DVD VCR will rewind to the beginning of the recorded program s NOTE ...

Page 35: ... number combinations Please check with your local cable company The following is a chart of common cable channel designations TV Display TV Display TV Display TV Display TV Display TV Display TV Display TV Display CATV channel TV Display W 80 W 81 W 82 W 83 W 84 W 65 W 66 W 67 W 68 W 69 W 70 W 71 W 72 W 73 W 74 W 75 W 76 W 77 W 78 W 79 W 55 W 56 W 57 W 58 A 4 A 3 A 2 A 1 W 59 W 60 W 61 W 62 W 63 W...

Page 36: ...th region codes other than 1 or ALL DVD ROM DVD RAM Never play back otherwise malfunc tion may result CD ROM VSD CDV Only plays back the audio part CD G Only plays back the sound CD I Never play back otherwise malfunction may result SACD Photo CD Never play back otherwise malfunc tion may result Video CD Never play back otherwise malfunc tion may result Any other discs without compatibility indica...

Page 37: ...y stop for a moment This happens when the 1st layer switches to the 2nd layer This is not a mal function GENERAL FEATURES DVD may contain menus to navigate the disc and access special features Press the appropriate number buttons or use the Arrow buttons L K s B to high light your selection in the DVD main menu and press the ENTER button to confirm NOTES Select DVD mode by pressing the SELECT butt...

Page 38: ...to x50 and x100 MP3 CD DVD V FAST FORWARD REVERSE SEARCH PAUSE 1 During playback press the PAUSE button Playback will pause and sound will be muted 2 To continue playback press the PLAY button CD DVD V SLOW FORWARD SLOW REVERSE 1 During playback press the PAUSE button 2 Press and hold down the FWD g or REV hbutton for a few seconds 3 Each press and hold down the FWD g or REV h button repeatedly to...

Page 39: ...buttons on the remote control Playback will start at the selected Chapter or Track Press the CLEAR button to erase the incorrect input For single digits press 0 first DVD V 2 TIME SEARCH 1 During playback press the SEARCH MODE button three times CD twice to display the Time Search on the TV screen 2 Within 30 seconds enter a desired disc time using the Number buttons on the remote control Playback...

Page 40: ...ll repeat playback CD DVD V PROGRAM You may determine the order in which tracks will play 1 In stop mode press the MODE button The PROGRAM screen will appear 2 Press the Arrow button or to select a track then press the ENTER button Press the CLEAR button to erase the most recently entered program 3 Repeat step 2 until you have selected all the tracks you want to play in the program 4 Press the PLA...

Page 41: ... 48kHz Constant bit rate 112kbps 320kbps 3 MP3 MP3 PLAYBACK 1 Press the SEARCH MODE button during playback The FILE LIST will appear 2 Select a desired track using the Arrow but tons K L s B Press the Arrow button B when you want to go to the next hierarchy Press the Arrow button s when you want to go back to the previous hierarchy 3 Press the PLAY button to start playback NOTES Press the SEARCH M...

Page 42: ...ter pressing the SUBTITLE button several times the disc does not have subtitles in that language If you choose a Language that has a 3 letter language code the code will be displayed every time you change the Subtitle language setting If you choose any other languages will be displayed instead Refer to page 44 DVD V SUBTITLE LANGUAGE CAMERA ANGLE Some DVD discs contain scenes which have been shot ...

Page 43: ...how the current Track The elapsed and remaining playing time of the cur rent track will be displayed 2 Press the DISPLAY button again to show current Total Track The elapsed and remaining playing time of the cur rent total track will be displayed 3 Press the DISPLAY button again to exit the display You can check the information about the current disc by pressing the DISPLAY button on the remote co...

Page 44: ...language code is written in bracket Language Code A B Abkhazian 4748 Afar 4747 Afrikaans 4752 Albanian 6563 Amharic 4759 Arabic 4764 Armenian 5471 Assamese 4765 Aymara 4771 Azerbaijani 4772 Bashkir 4847 Basque 5167 Bengali Bangla 4860 Bhutani 5072 Bihari 4854 Bislama 4855 Breton 4864 Bulgarian 4853 Burmese 5971 Byelorussian 4851 C E Cambodian 5759 Catalan 4947 Chinese CHI 7254 Corsican 4961 Croati...

Page 45: ...L ON DOWN SAMPLING ON You can change certain aspects of the DVD display screens and on screen messages on the TV screen 1 Press the SETUP button twice in STOP mode so that the DVD SETUP menu appears If the menu does not appear press the PLAY button the STOP button then the SETUP button twice 2 Press the Arrow button B to select CUS TOM then press the ENTER button CUSTOM mode will appear 3 Press th...

Page 46: ...en press the ENTER button 3 Press the Arrow buttons s B to select PARENTAL then press the ENTER button 4 Enter your four digit password then press the ENTER button 5 Press the Arrow buttons K L to select PARENTAL LEVEL then press the ENTER button 6 Press the Arrow buttons K L to select the desired level 7 Press the SETUP button to exit NOTES When doing this for the first time enter any 4 digits ex...

Page 47: ...nna is being used check for broken wire Adjust COLOR control Poor Reception on Some Channels Try a new channel if OK then possible station trouble Ghosts in Picture Is antenna connected to terminal on the back of the set If outside antenna is being used check for broken wire Check for local interference Weak Picture Try a new channel if OK then possible station trouble Is antenna connected to term...

Page 48: ... illegal copy or the tape duplicating show any captions The tape box company accidentally left out the captioning signals during the mentions it being closed captioned copying process My TV screen shows a black box You are in the TEXT mode Select CAPTION mode to CAPTION on certain channels OFF PROBLEM CORRECTIVE ACTION Picture OK Sound Poor Try a new channel if OK then possible station trouble Che...

Page 49: ...o is output This TV DVD VCR does not support DTS audio This is not a mal function Distorted picture There are some cases where pictures may be slightly distorted which are not a sign of a malfunction Although pictures may stop for a moment this is not a malfunction Audio or subtitle language The selected language is not available for audio or subtitles on the DVD does not match the set up This is ...

Page 50: ...uctions included with the video head cleaner before use Clean video heads only when problems occur SERVICING Should your TV DVD VCR become inoperative do not try to correct the problem by yourself There are no user serviceable parts inside Turn off unplug the power cord and please call our help line at 1 800 488 1222 to locate an Authorized Service Center IF THE LASER OPTICAL PICKUP UNIT IS DIRTY ...

Page 51: ...and flutter Below the measurement limitation 0 001 W PEAK EIAJ Designs and specifications are subject to change without notice If there is a discrepancy between languages the default language will be English TV VCR DVD GENERAL SPECIFICATIONS ELECTRICAL SPECIFICATIONS Sound output 2 speakers 1W 8 ohm OTHER SPECIFICATIONS Terminals Antenna input VHF UHF CATV 75 ohm unbalanced F type Video input RCA ...

Page 52: ... Presione este botón para grabar manualmente Este botón también activa la función de grabación instan tánea OTR La función OTR sólo está disponible durante el modo TV VCR 14 Botón REW para VCR Presione este botón para rebobinar la cinta o para ver la imagen rápidamente en dirección de retroceso durante el modo de reproducción Búsqueda en direc ción de retroceso 15 Botón FWD para VCR Presione este ...

Page 53: ...DE CONVERTIDOR DECODIFICADOR Utilice esta conexión si su sistema de televisión por cable se conecta directamente a su televisor DVD videograbadora sin una caja de convertidor Con esta conexión podrá 1 Utilizar el mando a distancia del televisor DVD videograbadora para seleccionar canales 2 Programar uno o más canales decodificados para grabación automática controlada por temporizador NOTA Este tel...

Page 54: ...e la flecha 2 Inserte 2 pilas AA en el compartimiento de las pilas en el sentido indicado por las marcas de polaridad 3 Vuelva a poner la cubierta PARA INSERTAR LAS PILAS CONEXIÓN A UN SISTEMA ESTÉREO NOTAS Asegúrese de desconectar la alimentación de todos los componentes del sistema antes de conectar otro componente Consulte el manual de instrucciones de su sistema estéreo y de cualquier otro com...

Page 55: ...visor DVD videograbadora Presione el botón POWER para encender el televi sor DVD videograbadora 3 Seleccione ENGLISH ESPAÑOL o FRANÇAIS Presione el botón ENTER para seleccionar ENG LISH inglés ESPAÑOL o FRANÇAIS francés indica el idioma seleccionado 4 Inicie el preajuste automático Presione el botón de flecha K o L para señalar AUTOPRESELECCION Luego presione el botón ENTER El sintonizador explora...

Page 56: ... Roebuck and Co Get it fixed at your home or ours Our Home For repair of carry in items like vacuums lawn equipment and electronics call or go on line for the location of your nearest Sears Parts Repair Center 1 800 488 1222 Call anytime day or night U S A only www sears com To purchase a protection agreement on a product serviced by Sears 1 800 827 6655 U S A 1 800 361 6665 Canada Para pedir serv...

Reviews: