background image

Mr

S

team

®

CU Series Steambath Generators

Installation,Operation & Maintenance Manual

!

CAUTION

TABLE OF CONTENTS

Before Installing   . . . . . . . . . . . . . . . . . . . . . . . . . . . .

2

Steam Room Requirements  . . . . . . . . . . . . . . . . . . . .

2

Locating the Steambath Generator  . . . . . . . . . . . . . .

3

Dimensional & Clearance Specifications  . . . . . . . . . .

4

Selecting the Steambath Generator  . . . . . . . . . . . . .

5

Installation

Plumbing, Water Supply, Steam Line, Steam Head,  
Acrylic Shield . . . . . . . . . . . . . . . . . . . . . . . . . . . . . . . . . .6
Drain, Safety Valve

 . . . . . . . . . . . . . . . . . . . . . . . . . .

7

Electric  . . . . . . . . . . . . . . . . . . . . . . . . . . . . . . . . . . . .

7

Wiring  . . . . . . . . . . . . . . . . . . . . . . . . . . . . . . . . . . . .

8

Control Circuit Wiring Diagrams . . . . . . . . . . . . . . . .9-12

F1 Plus

Kit Contents  . . . . . . . . . . . . . . . . . . . . . . . . . . . . . . . . . . . . . .13
Control Installation  . . . . . . . . . . . . . . . . . . . . . . . . . . . . . . . .14
Operating Temperature Sensor Installation  . . . . . . . . . . . . . .15
High Limit Operating Temperature Sensor Installation

 . . . .

15

CU-HL Installation  . . . . . . . . . . . . . . . . . . . . . . . . . . . .16

Automatic Blowdown System

Kit Contents  . . . . . . . . . . . . . . . . . . . . . . . . . . . . . . .17
Installation  . . . . . . . . . . . . . . . . . . . . . . . . . . . . . . . .18

Auxiliary Manual Reset Low Water Cutoff  . . . . . . . . .19

P

rinciples of Operation  . . . . . . . . . . . . . . . . . . . . . .

20

Operating and Testing

Automatic Blowdown, F1 Plus Control, CU-HL . . . . .21

Warning Signs  . . . . . . . . . . . . . . . . . . . . . . . . . . . . . . .22

Pre-Operation Check  . . . . . . . . . . . . . . . . . . . . . . . .

22

Operation

Automatic Blowdown Instructions  . . . . . . . . . . . .

23

Manual Blowdown Instructions  . . . . . . . . . . . . . .23

Maintenance Instructions  . . . . . . . . . . . . . . . . . . . .24
24-hour and 7-day Time Switches  . . . . . . . . . . . . . .25
Water Gauge & Gauge Glass Installation  . . . . . . . .26

Use and Care . . . . . . . . . . . . . . . . . . . . . . . . . . . . .27

Trouble Shooting   . . . . . . . . . . . . . . . . . . . . . . . . . .28

Check

PC Boards, Probes, Steam Solenoid Valve, 
F1 Plus Control, Heating Element . . . . . . . . . . . . .29

Element Replacement Instructions  . . . . . . . . . . . . .30

CU 360 – CU 1400  . . . . . . . . . . . . . . . . . . . . . . . . .31
CU 2000 – CU 4500  . . . . . . . . . . . . . . . . . . . . . . . .32

Replacement Parts List  . . . . . . . . . . . . . . . . . . . .33-34

A Division of Sussman-Automatic Corporation

43-20 34th Street, Long Island City, NY 11101
(718) 937-4500 • 1-800 767- 8326 
Fax: (718) 472-3256 • Website: www.mrsteam.com
Email: [email protected]

signals a situation where  injury or product damage
may occur if you do not follow instructions.

states a hazard may cause serious injury or death if 
precautions are not followed.

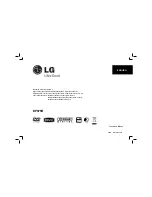
Typical CU Series Steambath Generator

(for illustrative purposes only)

_________________

IMPORTANT NOTE:

As you follow these instructions, you will notice
warning and caution symbols. This information is
important for the safe and efficient installation and
operation of this steam generator. There are two
types of potential hazards that may occur during this
installation and operation:

!

WARNING

PUR 100376   08/03

Western Regional Offices

9410 S. La Cienega Blvd. Los Angeles CA 90301
(310) 216-6565 • 1-800 727-8326 
Fax: (310) 216-2944 

MODELS: 

CU-360 through 

CU-4500

Summary of Contents for MrSteam CU Series

Page 1: ...er Gauge Gauge Glass Installation 26 Use and Care 27 Trouble Shooting 28 Check PC Boards Probes Steam Solenoid Valve F1 Plus Control Heating Element 29 Element Replacement Instructions 30 CU 360 CU 1400 31 CU 2000 CU 4500 32 Replacement Parts List 33 34 A Division of Sussman Automatic Corporation 43 20 34th Street Long Island City NY 11101 718 937 4500 1 800 767 8326 Fax 718 472 3256 Website www m...

Page 2: ...lines for the proper and safe operation of a spa facility including steamrooms Steamroom construction information is available from the Tile Council of America Inc at 864 646 8453 or www tileusa com 1 Steam room must be completely enclosed with full walls door floor and ceiling 2 It is recommended that a gasketed door be used for heat sealing and steam containment Windows skylights and the like th...

Page 3: ...nerator in accordance with items 1 4 above and within 25 feet of the steam room Reference Dimensional Clearance Specifications information on page 4 See page 5 for guidance if generator is more than 25 feet from steam room 6 Install steambath generator on a solid and level surface See Pages 4 and 5 for additional details 7 Provide access to the steambath generator for servicing See page 4 for Dime...

Page 4: ...level controls 4 IMPORTANT Minimum clearance from combustible surfaces Refer to Fig 2 above for legend A 1 above top of CU generator B Front of CU generator suitable for alcove installation only D 1 from rear of CU generator EL 1 from left side of CU generator ER 16 from right side of CU generator F Type of flooring C suitable for combustible flooring Steam Outlet High Limit Pressure Control Opera...

Page 5: ...mrooms are serviced by one 1 CU generator the combined resultant room volume of the two rooms should not exceed 1000 cubic feet 3 Each room must be operated with the appropriate F1 Plus temperature control system inclusive of the room oper ating temperature control and the high limit temperature control 4 In any case the purchase and or owner operator must consult with a designer architect and or ...

Page 6: ...am generator and steam solenoid valve 5 Use of unions in plumbing lines is recommended Steam Head 3 4 N P T 1 For steam rooms constructed of tile marble or similar non porous heat resistant materials for the enclosure locate steam head 12 inches above steam room floor and install MrSteam PN CU 103412 acrylic shield on each steamhead IMPORTANT For Steam rooms using acrylic fiberglass or other non h...

Page 7: ..._______________________________________ CU 750 18 87 50 75 44 22 18 ___________________________________________________________________________________________________ CU 1000 24 116 67 100 58 29 24 ___________________________________________________________________________________________________ CU 1250 30 145 84 125 73 37 29 ______________________________________________________________________...

Page 8: ...onal and local electric codes 3 IMPORTANT Insure all electrical connections are sufficiently tightened prior to energizing generator See Page 7 Item 5 Substitution of components or modification of wiring systems voids warranty and can lead to dangerous operating conditions 4 The F1 Plus Temperature Sensor and High Limit Temperature sensor s must be located inside the steam room Locate approximatel...

Page 9: ...s Faculty Standards and Guidelines or a similar resource and reference publication and refer to those quide lines for the proper and safe operation of a spa facility including steamrooms Steam room construction infor mation is available from the Tile Council of America Inc at 864 646 8453 or www tileusa com The F1 Plus Temperature Control System is required operating equipment for each steam room ...

Page 10: ... Jumper for Optional Timer BLK WHT YEL YEL ON OFF Switch BLK BR BLK YEL WHT WHT WHT GRN YEL Contactor Contactor GRN YEL WHT Remove BR BLK Jumper for AutoFlush Timer Pilot Light RED BLK PUR RED BLU Motorized Blowdown Valve CU81600 WHT BLU Automatic RED Blowdownc GRN YEL optional S WHT BLU Blowdown GRN YEL Valve CU81500 BLK BLK FILL HTR YEL H L L1 BLK C L2 GRN YEL WHT Low High Com NO NC COM Input WH...

Page 11: ...LU Motorized Blowdown Valve CU81600 WHT BLU Automatic RED Blowdownc GRN YEL optional S WHT BLU Blowdown GRN YEL Valve CU81500 5 4 3 2 1 High Probe 6 PUR Rod Low 9 Probe RED Rod High No Rod PINK Water Probe GRN YEL Top of Pressure Vessel WHT BLK Steam Solenoid Valve S WHT BLK BRN WHT Remove Jumper for Optional Timer BLK WHT Sensor F1 Plus Temperature Controller F1 Plus Kit 2nd Steam Solenoid Valve ...

Page 12: ...805 24 hr Timer Optional Timer Location 99353 Delay Timer ON OFF Switch with Pilort Light 103661 Blowdown Valve 2nd CU HL CU HL 120V F1 Plus Electronic Temperature Controller PN 103730 S 1 2 R 5 3 4 8 1 T 5 7 6 4 2 2 1 3 LEGEND Factory Wiring Field Wiring IMPORTANT 1 F1 Plus sensors are intended to be field installed within the steam room at the location selected by the designer architect 2 Autofl...

Page 13: ...Temperature Limit Control One or more Steam SolenoidValves Acrylic Shield one for each steamhead MrSteam CU Series Installation Operating Maintenance Manual F1 Plus Kit Contents 13 100F 102 104 106 108 110 112 114 116 118 120 F1 Plus Control Front F1 Plus Sensor CU HL Hi Limit Control Acrylic Shield F1 Plus Control Back Steam Solenoid Valve F1 Plus Sensor Cover Steam Head CU HL Sensor Cover ...

Page 14: ...ic Shock Disconnect all power supplies before making wiring connections NOTE Reference applicable wiring diagram 1 Remove 4 diameter blank cover located steam generator Mount the F1 Plus faceplate on the back of the generator cabinet with provided screws and nuts For one room installation use the upper blank 2 Connect the control wires to the bottom of the terminal above the control The terminals ...

Page 15: ...y to F1 Plus Control Do not splice the sensor cable Do not route sensor cable inside conduit Do not route sensor cable with power wiring next to electric motors or any other location subject to electrical noise Seal cable entrance to steam room with silicone Protect sensor with bulb guard provided F1 Plus High Limit Operating Temperature Sensor Installation Sensor Cable 3 8 hole Silicone Sealant 4...

Page 16: ...ve 5 feet above the floor on a wall Avoid sharp bends or kinks in capillary tubing This could affect the controller s performance and may result in unsafe operation Excess capillary should be very carefully coiled and placed beneath the control unit 6 Secure sensing bulb to the wall with the sensor bulb guard provided Hazard of Electric Shock Disconnect all power supplies before making wiring conn...

Page 17: ...U 81500 CU 81600 Kit for Hard Water Installations F1 Plus Control Panel Motorized DrainValve Assembly CU 81600 Front Back CU 81600 Motorized Drain Valve Front Back CU 81500 Motorized Drain Valve MrSteam CU Series Installation Operating Maintenance Manual 17 Automatic Blowdown System Kit Contents ...

Page 18: ... the wire insulation color Brown Black White Green 4 Plumb the motorized valve assembly to the generator drain valve 5 Install the valve cable in the knockout below the Automatic Blowdown Control Panel 6 Connect the wires to the terminal block at the bottom of the panel The terminals are coded with the wire insulation color CU81500 White Blue none Green CU81600 White Blue Red Green 7 Program the t...

Page 19: ...ellow from terminal block 3 Connect the pc board wires to the terminal block The terminals are coded with the wire insulation color Green Yellow Yellow Black White none 4 Install manual reset button and connect wires to RESET terminals on pc board 5 Locate and punch out knockout on middle and back of generator 6 Remove 3 8 npt plug and install side probe 7 Install electrical junction box over the ...

Page 20: ...e energize the steam valve closing the valve and stopping the flow of steam into the steam room The F1 Plus Kit is provided with CU HL High Limit Room Temperature Controller CU HL monitors the room tempera ture inside the commercial steambath If the room temperature exceeds the set point Model CU HL shuts off the power to the CU Steambath Generator shutting steam off CU HL can also send a signal t...

Page 21: ...Turn ON the CU steam generator 2 CU generator will heat up and produce steam in a few minutes then stop when steamroom temperature reaches 100 F 3 Slowly turn the F1 Plus thermostat knob higher The steam solenoid valve should open and allow steam to fill the steamroom again 4 Turn the thermostat knob lower Steam should stop 5 Set the F1 Plus thermostat to 100 F or desired setting 1 Set the thermos...

Page 22: ...sired operational and hi limit pressures 2 It is recommended that the hi limit control be set at 8 10 psig maximum and the operating pressure control s shall not be set above 5 psig Note Models CU360 CU3000 are provided with one 1 automatic reset operating pressure control and one 1 manual reset high limit pressure control Models CU 4500 is provided with two 2 automatic reset operating pressure co...

Page 23: ...conducted manually at the end of each working day while unit is still operating turn ON OFF switch to the OFF position and close water supply valve De energize wall mounted safety switch Open blowdown valve s SLOWLY IMPORTANT Pressure may still be in the generator 2 Discharge is complete when gauge glass shows no water Unit has been effectively drained Follow this procedure a Fully close the blowd...

Page 24: ...olts for tightness Specific torque in 22 Ft lbs cold 3 In hard water areas generators equipped with the McDonnell Miller control Models CU 2000 and larger should be checked for proper operation every four months or sooner At the same time a bottom heating element should be removed and inspected If scale has begun to form all elements should be cleaned and re installed using only new gaskets and bo...

Page 25: ... is pushed to the inside the switch is in the OFF position SETTING TIME To set the current time and day of week turn the minute hand clockwise Do not set the time by rotating Outer Dial Turn the minute hand clockwise until the day of the week and the time of day on the outer dial is aligned with the triangle marker on the inner dial two o clock Example for 7 day program dial Monday 10 30 AM Turn t...

Page 26: ...insert one end of the glass into the top gauge fitting Keeping the glass inside the top fitting gently rotate the top gauge fitting clockwise until vertically aligned with the bottom gauge then insert glass into bottom fitting until glass bottoms out on the shoulder inside the bottom fitting 5 Carefully raise glass about 1 1611 and slide lower glass packing down until the glass packing contacts th...

Page 27: ...e replacements DO protect glass from sudden changes in temperatures such as drafts water spray etc MAINTENANCE Examine the gauge regularly for any signs of clouding scratching erosion or corrosion The glass should be inspected daily until the need for replacement becomes apparent This will help establish the routine inspection and routine replacement schedules CLEANING Use commercial non abrasive ...

Page 28: ..._____________________________________________ No water in generator See above _______________________________________________________ Defective contactor Check replace contactor _______________________________________________________ Defective pressure control Check replace control switch _______________________________________________________ Defective PC Board Check replace PC Board ____________...

Page 29: ...s and reinstall 6 After installation make sure probe is not touching ground With generator drained and probe wires disconnected there should be no resistance X between probe and ground Check for leaks _____________________________________________ Steam Solenoid Valve 1 Check voltage rating of solenoid valve 120VAC for United States Canada Mexico may be 220 240VAC for other countries 2 Check voltag...

Page 30: ...bly see wiring schematic Remove 6 5 16 18 bolts from flange 5 Thoroughly clean unit flange of all foreign materials Be certain no part of the old gasket remains on flange 6 Apply Slick Tite gasket compound or equal to both surfaces of new gasket supplied with replacement element Install heating element with gasket between flanges Be careful to align flange holes so wire connection terminals on ele...

Page 31: ... Typical Component Arrangement 31 Terminal Block Contactors Steam Outlet Data Plate Pressure Gauge Gauge Glass ON OFF Switch Blank for Blow Down Timer Heating Elements Motorized Drain Valve High Limit Operating Pressure Control Pressure Control For Illustrative Purposes Only ...

Page 32: ...Control Steam Outlet Access Door Contactor Terminal Block Fuses Operating Pressure Control Pressure Relief Valve Data Plate Liquid Level Control Pressure Gauge Drain Valve F1 Temperature Control 24hr 7day Blowdown Clock Heating Elements Drain Valve Motorized Drain Valve On Off Switch Gauge Glass For Illustrative Purposes Only ...

Page 33: ... AUX LWCO RESET BUTTON ______________________________________________ 99315 FUSE BLOCK 208 240V ______________________________________________ 99314 POWER FUSES 208 240V 60A 250V ______________________________________________ 99317 FUSE BLOCK 480V ______________________________________________ 99316 POWER FUSES 480V 60A 600V ______________________________________________ CU99331C CONTROL VOLTAGE T...

Page 34: ...________________________________ 99113R OPERATING PRESSURE CONTROL 0 15 PSIG _____________________________________________ 99290 PRESSURE GAUGE 0 30 PS _____________________________________________ 99969R HI LIMIT CONTROL W MANUAL RESET 15PSIG _____________________________________________ FB023 PIGTAIL 1 4 NPT 180 _____________________________________________ VALVES _______________________________...

Reviews: