background image

SWF EMBROIDERY MACHINE

How to Change Version

board

Configure machine 

1. Version Change

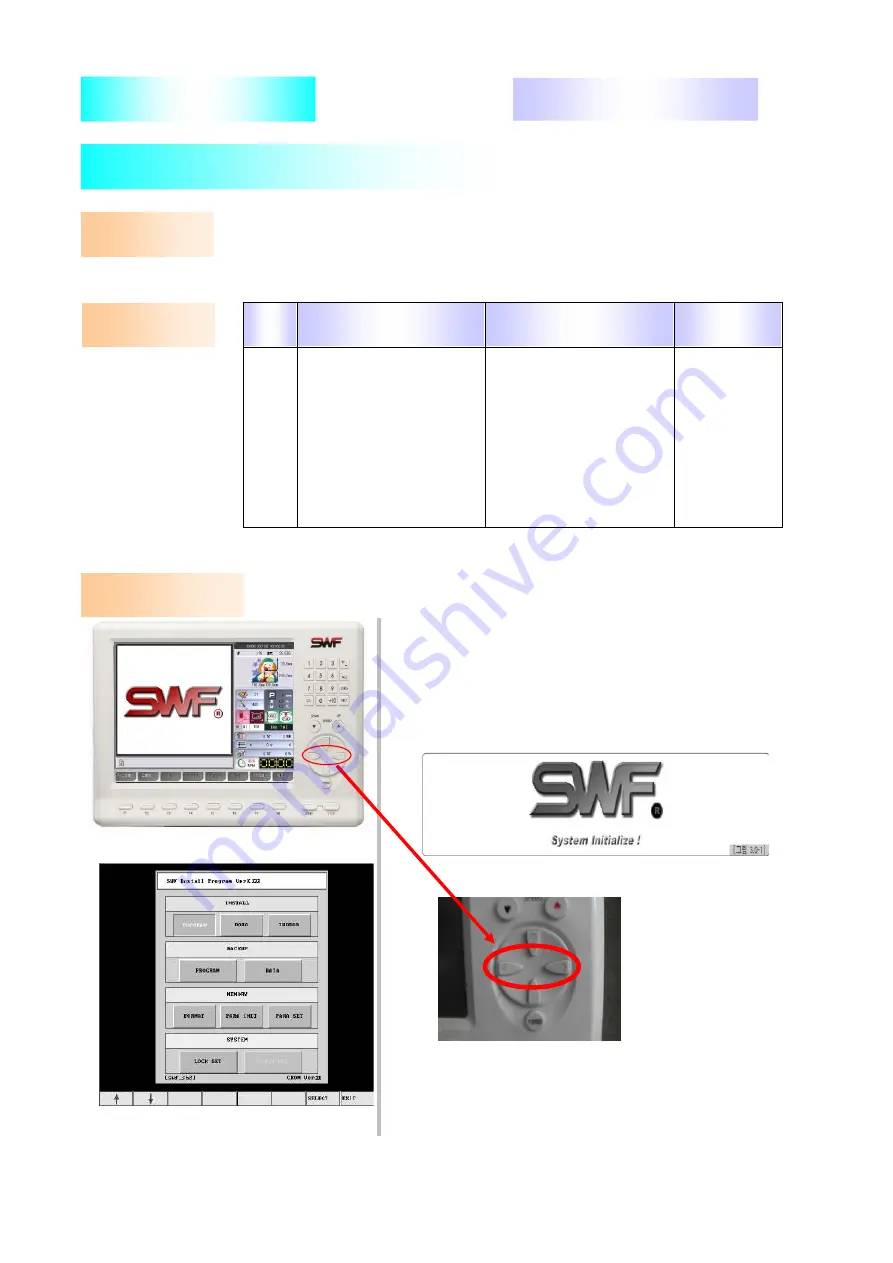
    keys to move the cursor to 'PROGRAM' under INSTALL and 

    press F7 SELECT to enter the screen in [Picture 5].

Install program and data

-

    [Picture 3] when SWF logo image as in [Picture 2] appears.

Turn ON the machine

-

Insert FDD or USB

-

1

2

3

Select START key

-

4

5

Update thread sensing

-

6

-

-

-

settings

1) Turn ON the machine and press left and right frame move key 

2) At the screen shown in [Picture 4], use F1 

 and F2 

 arrow

[T] OPERATION BOX

A. Content

SWB-E-08

Order

Tools Required

B. Order

C. Details

JIG /

Instruments

No.

CD CODE No:

Picture 1

Picture 2

Picture 3

Picture 4

─ Ver.2009 1st

────────────────────── SunStar Co., Ltd ─

Summary of Contents for SWF SWB-E-08

Page 1: ...n SWF logo image as in Picture 2 appears Turn ON the machine Insert FDD or USB 1 2 3 Select START key 4 5 Update thread sensing 6 settings 1 Turn ON the machine and press left and right frame move key 2 At the screen shown in Picture 4 use F1 and F2 arrow T OPERATION BOX A Content SWB E 08 Order Tools Required B Order C Details JIG Instruments No CD CODE No Picture 1 Picture 2 Picture 3 Picture 4 ...

Page 2: ...ick connect it press F1 GO key To cancel press F3 CANCEL to USB PORT and press F2 USB To cancel press F3 CANCEL 7 If you want to upgrade the program of thread sensing board When you use a diskette insert the diskette to FDD and press F1 FDD key When you use a USB memory stick connect it 3 Program Installation 6 Picture 7 is a screen that is automatically created when to USB PORT and press F2 USB T...

Page 3: ...e 8 shows machine settings Selecting MEMORY PARA SET in Picture 4 generates the same screen Picture 8 1 11 After configuring all items press F7 NEXT to enter the screen Use F1 F2 keys to move to each item Press F7 SELECT to generate function screens such as Picture 8 Picture 9 Picture 8 1 Head No Set Picture 8 2 Color No Set Picture 8 3 Setting Trim Type Picture 8 4 Setting Y Frame Ver 2009 1st Su...

Page 4: ...rame Size Picture 8 6 Setting alternative function Picture 8 7 Setting Wheel Picture 8 9 Setting Basic Value in X Satin Picture 8 10 Setting Basic Value in Y Satin Picture 8 10 Setting Cording Picture 8 8 Setting Sequin Ver 2009 1st SunStar Co Ltd ...

Reviews: