Sunell SN-TPC4201AT II, User Manual
The Sunell SN-TPC4201AT II camera comes with a comprehensive User Manual that provides step-by-step instructions to ensure hassle-free setup and operation. You can easily download this manual for free from our website manualshive.com, helping you get the most out of your product effortlessly.
Share
Download


Reviews:
No comments
Related manuals for SN-TPC4201AT II

X90
Brand: Kaiser Baas Pages: 8

DashCam C2 Pro
Brand: Roav Pages: 11

OSMO+
Brand: dji Pages: 67

A9D
Brand: COXPAL Pages: 27
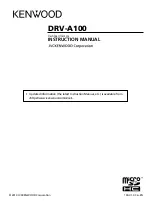
DRV-A100
Brand: JVC KENWOOD Pages: 48

BlackVue DR650S-1CH
Brand: Pittasoft Pages: 96

KRIOS
Brand: GRDIAN Pages: 28

DR750X-1CH
Brand: BlackVue Pages: 60

NDR-EB2104
Brand: Novus Pages: 216

ZH-IZV15-WAC
Brand: ZMODO Pages: 6

OnDash X3
Brand: Vantrue Pages: 44

Moment 5M
Brand: VanTop Pages: 71

TLF-AC4K
Brand: Telefunken Pages: 28

DIMIKA
Brand: Tronie Pages: 21

9673
Brand: Coopers Pages: 4

Onyx
Brand: Fire Cam Pages: 12

V3 MAGNETIC
Brand: Xblitz Pages: 36

P6210
Brand: Zavio Pages: 60


