SteelMax BM-7, Operator'S Manual
The SteelMax BM-7 Operator's Manual is an essential resource for utilizing this powerful tool effectively and safely. It provides detailed instructions, diagrams, and maintenance guidelines. Download this comprehensive manual for free from our website, ensuring you have all the information you need to maximize the potential of your BM-7.
Share
Download


Reviews:
No comments
Related manuals for BM-7

WP
Brand: Wacker Neuson Pages: 54

51808
Brand: XPOtool Pages: 10
2063574-1
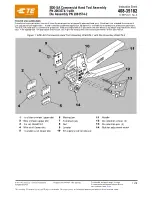
Brand: TE Connectivity Pages: 8

585 E1
Brand: Alemite Pages: 66

TS-DOUBLE
Brand: Siser Pages: 76

31753
Brand: Eastwood Pages: 8

PLD7060
Brand: Clas Ohlson Pages: 52

Minifant M99
Brand: X-FLOC Pages: 51

AR-HE-WKWLS
Brand: AREBOS Pages: 7

456988
Brand: Silverline Pages: 2

H19MM
Brand: Hydralok Pages: 15

69124
Brand: Outils Wolf Pages: 32

TN-600
Brand: Baileigh Industrial Pages: 36

H-9152
Brand: U-Line Pages: 6

010-320
Brand: Jula Pages: 20

MJOIN8012-0130
Brand: laguna Pages: 34

HPH14
Brand: Enerpac Pages: 2

BR-5
Brand: Jarvis Pages: 12


