

Quick-start guide
FR:
Guide de l’utilisateur - fr.startech.com
DE:
Bedienungsanleitung - de.startech.com
ES:
Guía del usuario - es.startech.com
NL:
Gebruiksaanwijzing - nl.startech.com
PT:
Guia do usuário - pt.startech.com
IT:
Guida per l’uso - it.startech.com
Manual Revision: 02/26/2016
For the latest information, technical specifications, and support for
this product, please visit www.startech.com/USB312SAT3.
Packaging contents
• 1 x USB 3.1 Gen 2 to SATA adapter for 2.5 in. and 3.5 in. solid-state
drives (SSD) and hard disk drives (HDD)
• 1 x universal power adapter (NA/UK/EU/AU)
• 1 x quick-start guide
System requirements
• USB-enabled computer system with an available USB port
The USB312SAT3 is OS independent and doesn’t require any
additional drivers or software.
Note:
To obtain the maximum USB throughout, you must use a
system with a USB 3.1 Gen 2 (10Gbps) port.
System requirements are subject to change. For the latest
requirements, please visit
.
USB312SAT3
USB 3.1 to SATA (6Gbps) Adapter for 2.5in/3.5in SSD/HDD
*actual product may vary from photos
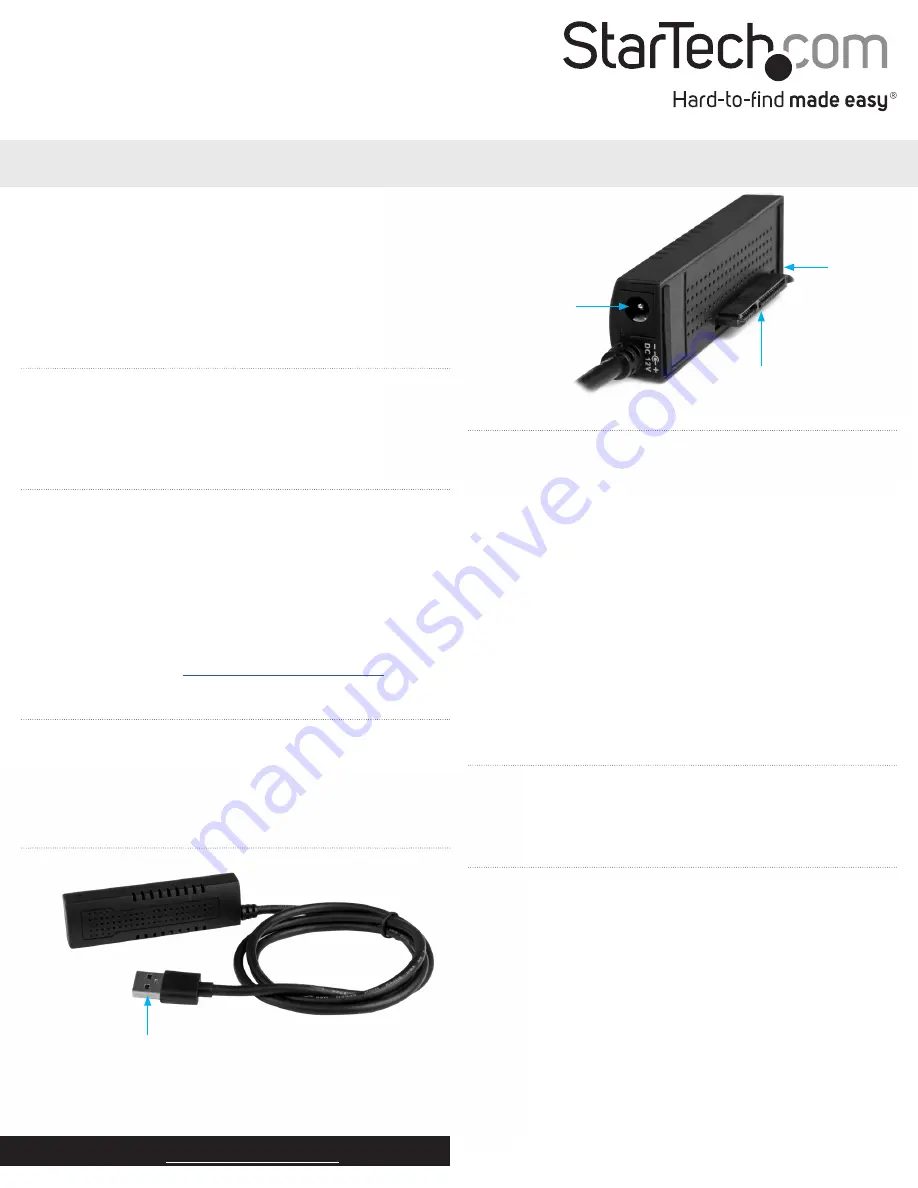
Product diagram
USB 3.1 connector
Introduction
The USB312SAT3 provides an easy way to access, transfer, and
back up data from a 2.5 in. or 3.5 in. SATA drive to your desktop or
laptop computer. The adapter also includes an integrated cable that
leverages the faster speeds of USB 3.1 Gen 2 technology.
Power
adapter port
SATA data and power
connector
Connect the adapter
Warning!
Drives should be handled carefully, especially when they’re
transported. If you’re not careful with your drive, you may lose data
as a result. Make sure that you’re properly grounded by wearing an
anti-static strap when you install any computer component. If an
anti-static strap isn’t available, touch a large, grounded metal surface
for several seconds to discharge any built-up static electricity.
1. Connect a 2.5 in. or 3.5 in. SATA SSD or HDD to the
SATA
connector
on the adapter.
2. Connect the universal power adapter to the
Power adapter
port
on the adapter and an electrical outlet.
Note:
You can use most 2.5 in. drives without connecting the
universal power adapter, as enough power is provided through the
USB connection.
3. Connect the integrated USB 3.1 connector to an available USB
port on your computer.
About driver installation
After you connect the adapter to your computer, the computer
detects the adapter and automatically installs the driver. You don’t
need to take any further action to install the driver.
Prepare a drive for use
Windows OS
If you connect a drive that already has data on it, after you connect
the adapter, it appears under
My Computer
or
Computer
with a
drive letter assigned to it.
If you install a brand-new drive that doesn’t contain any data, you
must prepare the drive for use.
Warning!
When you complete the following steps, all of the data
on your drive will be deleted. If your drive has data on it that you
require, you should create a backup file or use a different drive.
1. Depending on the version of OS that you’re running, do one of
the following:
• On your desktop, right-click
My Computer
and click
Manage
.
• On your desktop, right-click
Computer
and click
Manage
.
• Click the
Start
button or
Windows
icon. Type
compmgmt.msc
LED
indicator


